= "q/count" | "q/min" | "q/max" | ...
```
Available entity collection Field aggregates
* `q/count`
* `q/sum`
* `q/avg`
* `q/min`
* `q/max`
> [//]: # (callout;icon-type=icon;icon=exclamation-circle;color=#fba32f)
> It doesn't matter if a Field is populated manually or via a Formula/Lookup — the query stays exactly the same.
### Select rich text Field
Take a look how rich text Fields work in Fibery, if you haven't yet.
To select a rich text Field we should:
1. Get `fibery/secret` of the corresponding collaborative document.
2. Get the document via `api/documents` endpoint using this `fibery/secret`.
Supported document formats:
* Markdown (`md`) — default
* HTML (`html`)
* JSON of a particular structure (`json`)
* Plain-text (`plain-text`)
`Cricket/Player` Type used as an example
| Field name | Field type |
| --- | --- |
| `Cricket/Bio` | rich text (`Collaboration~Documents/Document`) |
Get the related collaborative document's `fibery/secret`:
cURL
```
curl -X POST https://YOUR_ACCOUNT.fibery.io/api/commands \
-H 'Authorization: Token YOUR_TOKEN' \
-H 'Content-Type: application/json' \
-d \
'[
{
"command": "fibery.entity/query",
"args": {
"query": {
"q/from": "Cricket/Player",
"q/select": [
"Cricket/name",
{ "Cricket/Bio": [ "Collaboration~Documents/secret" ] }
],
"q/limit": 2
}
}
}
]'
```
Grab the secrets (cURL):
```
[
{
"success": true,
"result": [
{
"Cricket/name": "Virat Kohli",
"Cricket/Bio": {
"Collaboration~Documents/secret": "b33a25d1-99ba-11e9-8c59-09d0cb6f3aeb"
}
},
{
"Cricket/name": "Kane Williamson",
"Cricket/Bio": {
"Collaboration~Documents/secret": "b33a25d3-99ba-11e9-8c59-09d0cb6f3aeb"
}
}
]
}
]
```
Get the documents one-by-one:
```
curl -X GET https://YOUR_ACCOUNT.fibery.io/api/documents/b33a25d1-99ba-11e9-8c59-09d0cb6f3aeb?format=html \
-H 'Authorization: Token YOUR_TOKEN' \
curl -X GET https://YOUR_ACCOUNT.fibery.io/api/documents/b33a25d3-99ba-11e9-8c59-09d0cb6f3aeb?format=html \
-H 'Authorization: Token YOUR_TOKEN' \
```
Result:
```
{
"secret": "b33a25d1-99ba-11e9-8c59-09d0cb6f3aeb",
"content": "Virat Kohli (born 5 November 1988) is an Indian cricketer who currently captains the India national team.\nHe plays for Royal Challengers Bangalore in the Indian Premier League.
"
}
{
"secret": "b33a25d3-99ba-11e9-8c59-09d0cb6f3aeb",
"content": "Kane Stuart Williamson (born 8 August 1990) is a New Zealand international cricketer who is currently the captain of the New Zealand national team.
He is a right-handed batsman and an occasional off spin bowler and is considered to be one of the best batsmen in the world.
"
}
```
Get multiple documents in a single batch request:
```
curl --location --request POST 'https://YOUR_ACCOUNT.fibery.io/api/documents/commands' \
--header 'Authorization: Bearer ' \
--header 'Content-Type: application/json' \
--data-raw '{
"command": "get-documents",
"args": [
{
"secret": "b33a25d1-99ba-11e9-8c59-09d0cb6f3aeb"
},
{
"secret": "b33a25d3-99ba-11e9-8c59-09d0cb6f3aeb"
}
]
}'
```
Result:
```
[
{
"secret": "b33a25d1-99ba-11e9-8c59-09d0cb6f3aeb",
"content": "..."
},
{
"secret": "b33a25d3-99ba-11e9-8c59-09d0cb6f3aeb",
"content": "..."
}
]
```
### Filter Entities
Filters (where) go into the q/where clause of the query.
The general form is inspired by Lisp: it's a list where the first element is an operator and the remaining elements are the values to check using the operator:
```
= [ ...]
= ">", ">=", "<", "<=", ...
= |
```
In these examples we filter by:
* a primitive Field (height)
* two primitive Fields (birth date and retirement status)
* a single-select (batting hand)
* an entity Field (current team)
* an entity collection Field (former teams)
We don't compare Entity's Field to a value directly, but use a `$param` instead.
`Cricket/Player` Type used as an example
| Field name | Field type |
| --- | --- |
| `Cricket/Height` | `fibery/decimal` |
| `Cricket/Youth Career` | `fibery/date-range` |
| `Cricket/Retired?` | `fibery/bool` |
| `Cricket/Batting Hand` | single-select |
| `Cricket/Current Team` | entity Field |
| `user/Former Teams` | entity collection Field |
Operators
* `=`
* `!=`
* `<`
* `<=`
* `>`
* `>=`
* `q/contains`
* `q/not-contains`
* `q/in`
* `q/not-in`
* `q/and`
* `q/or`
Get players taller than 1.75 meters — primitive Field:
JavaScript
```
const Fibery = require('fibery-unofficial');
const fibery = new Fibery({host: "YOUR_ACCOUNT.fibery.io", token: YOUR_TOKEN});
const players = await fibery.entity.query({
'q/from': 'Cricket/Player',
'q/select': ['Cricket/name', 'Cricket/Height'],
'q/where': ['>', ['Cricket/Height'], '$height' ],
'q/limit': 2
}, { '$height': '1.75' });
```
cURL
```
curl -X POST https://YOUR_ACCOUNT.fibery.io/api/commands \
-H 'Authorization: Token YOUR_TOKEN' \
-H 'Content-Type: application/json' \
-d \
'[
{
"command": "fibery.entity/query",
"args": {
"query": {
"q/from": "Cricket/Player",
"q/select": ["Cricket/name", "Cricket/Height"],
"q/where": [">", ["Cricket/Height"], "$height" ],
"q/limit": 2
},
"params": {
"$height": "1.75"
}
}
}
]'
```
Result (cURL):
```
[
{
"success": true,
"result": [
{
"Cricket/name": "Cheteshwar Pujara",
"Cricket/Height": "1.79"
}
]
}
]
```
Filters can be nested and combined using q/and and q/or. Here we are querying players who started their youth career before 2004 and haven't retired yet:
JavaScript
```
const Fibery = require('fibery-unofficial');
const fibery = new Fibery({host: "YOUR_ACCOUNT.fibery.io", token: YOUR_TOKEN});
const players = await fibery.entity.query({
'q/from': 'Cricket/Player',
'q/select': ['Cricket/name', 'Cricket/Youth Career', 'Cricket/Retired?'],
'q/where': [
'q/and',
['<', ['q/start', ['Cricket/Youth Career']], '$date'],
['=', ['Cricket/Retired?'], '$retired?']
],
'q/limit': 2
}, {
'$date': '2004-01-01',
'$retired?': false
});
```
cURL
```
curl -X POST https://YOUR_ACCOUNT.fibery.io/api/commands \
-H 'Authorization: Token YOUR_TOKEN' \
-H 'Content-Type: application/json' \
-d \
'[
{
"command": "fibery.entity/query",
"args": {
"query": {
"q/from": "Cricket/Player",
"q/select": ["Cricket/name", "Cricket/Youth Career", "Cricket/Retired?"],
"q/where": [
"q/and",
["<", ["q/start", ["Cricket/Youth Career"]], "$date"],
["=", ["Cricket/Retired?"], "$retired?"]
],
"q/limit": 2
},
"params": {
"$date": "2004-01-01",
"$retired?": false
}
}
}
]'
```
Result (cURL):
```
[
{
"success": true,
"result": [
{
"Cricket/name": "Virat Kohli",
"Cricket/Youth Career": {
"start": "2002-10-01",
"end": "2008-07-01"
},
"Cricket/Retired?": false
}
]
}
]
```
Get right-handed players — single-select:
JavaScript
```
const Fibery = require('fibery-unofficial');
const fibery = new Fibery({host: "YOUR_ACCOUNT.fibery.io", token: YOUR_TOKEN});
const players = await fibery.entity.query({
'q/from': 'Cricket/Player',
'q/select': ['Cricket/name', { 'Cricket/Batting Hand': ['enum/name'] }],
'q/where': ['=', ['Cricket/Batting Hand', 'enum/name'], '$hand' ],
'q/limit': 2
}, { '$hand': 'Right' });
```
cURL
```
curl -X POST https://YOUR_ACCOUNT.fibery.io/api/commands \
-H 'Authorization: Token YOUR_TOKEN' \
-H 'Content-Type: application/json' \
-d \
'[
{
"command": "fibery.entity/query",
"args": {
"query": {
"q/from": "Cricket/Player",
"q/select": ["Cricket/name", { "Cricket/Batting Hand": ["enum/name"] } ],
"q/where": ["=", ["Cricket/Batting Hand", "enum/name"], "$hand" ],
"q/limit": 2
},
"params": {
"$hand": "Right"
}
}
}
]'
```
Result (cURL):
```
[
{
"success": true,
"result": [
{
"Cricket/name": "Virat Kohli",
"Cricket/Batting Hand": {
"enum/name": "Right"
}
},
{
"Cricket/name": "Kane Williamson",
"Cricket/Batting Hand": {
"enum/name": "Right"
}
}
]
}
]
```
Get players whose current team was founded before 2000 — entity Field:
JavaScript
```
const Fibery = require('fibery-unofficial');
const fibery = new Fibery({host: "YOUR_ACCOUNT.fibery.io", token: YOUR_TOKEN});
const players = await fibery.entity.query({
'q/from': 'Cricket/Player',
'q/select': ['Cricket/name', { 'Cricket/Current Team': ['Cricket/name'] }],
'q/where': ['<', ['Cricket/Current Team', 'Cricket/Year Founded'], '$year' ],
'q/limit': 2
}, { '$year': 2000 });
```
cURL
```
curl -X POST https://YOUR_ACCOUNT.fibery.io/api/commands \
-H 'Authorization: Token YOUR_TOKEN' \
-H 'Content-Type: application/json' \
-d \
'[
{
"command": "fibery.entity/query",
"args": {
"query": {
"q/from": "Cricket/Player",
"q/select": ["Cricket/name", { "Cricket/Current Team": ["Cricket/name"] } ],
"q/where": ["<", ["Cricket/Current Team", "Cricket/Year Founded"], "$year" ],
"q/limit": 2
},
"params": {
"$year": 2000
}
}
}
]'
```
Result (cURL):
```
[
{
"success": true,
"result": [
{
"Cricket/name": "Virat Kohli",
"Cricket/Current Team": {
"Cricket/name": "Delhi"
}
},
{
"Cricket/name": "Cheteshwar Pujara",
"Cricket/Current Team": {
"Cricket/name": "Saurashtra"
}
}
]
}
]
```
Get players who previously played for Yorkshire or Derbyshire — entity collection Field:
JavaScript
```
const Fibery = require('fibery-unofficial');
const fibery = new Fibery({host: "YOUR_ACCOUNT.fibery.io", token: YOUR_TOKEN});
const players = await fibery.entity.query({
'q/from': 'Cricket/Player',
'q/select': ['Cricket/name', { 'user/Former Teams': { 'q/select': ['Cricket/name'], 'q/limit': 'q/no-limit' } } ],
'q/where': ['q/in', ['user/Former Teams', 'Cricket/name'], '$teams' ],
'q/limit': 2
}, { '$teams': ['Yorkshire', 'Derbyshire'] });
```
cURL
```
curl -X POST https://YOUR_ACCOUNT.fibery.io/api/commands \
-H 'Authorization: Token YOUR_TOKEN' \
-H 'Content-Type: application/json' \
-d \
'[
{
"command": "fibery.entity/query",
"args": {
"query": {
"q/from": "Cricket/Player",
"q/select": ["Cricket/name", { "user/Former Teams": { "q/select": ["Cricket/name"], "q/limit": "q/no-limit" } } ],
"q/where": ["q/in", ["user/Former Teams", "Cricket/name"], "$teams" ],
"q/limit": 2
},
"params": {
"$teams": ["Yorkshire", "Derbyshire"]
}
}
}
]'
```
Result (cURL):
```
[
{
"success": true,
"result": [
{
"Cricket/name": "Kane Williamson",
"user/Former Teams": [
{ "Cricket/name": "Northern Districts" },
{ "Cricket/name": "Gloucestershire" },
{ "Cricket/name": "Yorkshire" },
{ "Cricket/name": "Barbados Tridents" }
]
},
{
"Cricket/name": "Cheteshwar Pujara",
"user/Former Teams": [
{ "Cricket/name": "Royal Challengers Bangalore" },
{ "Cricket/name": "Yorkshire" },
{ "Cricket/name": "Kolkata Knight Riders" },
{ "Cricket/name": "Kings XI Punjab" },
{ "Cricket/name": "Derbyshire" },
{ "Cricket/name": "Nottinghamshire" }
]
}
]
}
]
```
### Order Entities
```
= [[, "q/asc" | "q/desc"], ...];
```
Sort Entities by multiple primitive and entity Fields.
The default sorting is by creation date and UUID:
`[ [["fibery/creation-date"], "q/asc"], [["fibery/id"], "q/asc"] ]`
Sorting by `fibery/id` guarantees that Entities order won't change on different executions of the same query.
`Cricket/Player` Type used as an example
| Field name | Field type |
| --- | --- |
| `Cricket/Height` | `fibery/decimal` |
| `Cricket/Current Team` | entity Field |
JavaScript
```
const Fibery = require('fibery-unofficial');
const fibery = new Fibery({host: "YOUR_ACCOUNT.fibery.io", token: YOUR_TOKEN});
const players = await fibery.entity.query({
'q/from': 'Cricket/Player',
'q/select': [
'Cricket/name',
'Cricket/Height',
{ 'Cricket/Current Team': ['Cricket/name'] }
],
'q/order-by': [
[['Cricket/Height'], 'q/desc'],
[['Cricket/Current Team', 'Cricket/name'], 'q/asc']
],
'q/limit': 3
});
```
cURL
```
curl -X POST https://YOUR_ACCOUNT.fibery.io/api/commands \
-H 'Authorization: Token YOUR_TOKEN' \
-H 'Content-Type: application/json' \
-d \
'[
{
"command": "fibery.entity/query",
"args": {
"query": {
"q/from": "Cricket/Player",
"q/select": [
"Cricket/name",
"Cricket/Height",
{ "Cricket/Current Team": ["Cricket/name"] }
],
"q/order-by": [
[["Cricket/Height"], "q/desc"],
[["Cricket/Current Team", "Cricket/name"], "q/asc"]
],
"q/limit": 3
}
}
}
]'
```
Result (cURL):
```
[
{
"success": true,
"result": [
{
"Cricket/Current Team": {
"Cricket/name": "Saurashtra"
},
"Cricket/Height": "1.79",
"Cricket/name": "Cheteshwar Pujara"
},
{
"Cricket/Current Team": {
"Cricket/name": "Royal Challengers Bangalore"
},
"Cricket/Height": "1.75",
"Cricket/name": "Virat Kohli"
},
{
"Cricket/Current Team": {
"Cricket/name": "Sunrisers Hyderabad"
},
"Cricket/Height": "1.75",
"Cricket/name": "Kane Williamson"
}
]
}
]
```
## Create Entity
Create Entities with primitive, single-select and entity Fields.
Setting `fibery/id` is optional and might be useful for working with Entity right after creation.
To set a single-select or an entity Field we'll need the target Entity's `fibery/id`. We can get `fibery/id` either via API (check [Getting Entities](https://the.fibery.io/@public/User_Guide/Guide/Entity-API-264/anchor=Get-Entities--0a5b17e3-bb53-4ee2-b14a-4e2757e1af9d "https://the.fibery.io/@public/User_Guide/Guide/Entity-API-264/anchor=Get-Entities--0a5b17e3-bb53-4ee2-b14a-4e2757e1af9d"))or by opening the relevant Entity on UI and exploring the command response in browser's Network tab.
> [//]: # (callout;icon-type=icon;icon=exclamation-circle;color=#9c2baf)
> Note that the target Entity should already exist.
Setting entity collection Fields on Entity creation is not supported. Instead we suggest updating entity collection Fields after the Entity is created.
Setting a rich text Field on creation is not possible either. Update rich text Field once the Entity is created instead.
`Cricket/Player` Type used as an example
| Field name | Field type |
| --- | --- |
| `fibery/id` | `fibery/uuid` |
| `fibery/public-id` | `fibery/text` |
| `Cricket/name` | `fibery/text` |
| `Cricket/Full Name` | `fibery/text` |
| `Cricket/Born` | `fibery/date` |
| `Cricket/Youth Career` | `fibery/date-range` |
| `Cricket/Shirt Number` | `fibery/int` |
| `Cricket/Height` | `fibery/decimal` |
| `Cricket/Retired?` | `fibery/bool` |
| `Cricket/Batting Hand` | single-select |
| `Cricket/Current Team` | entity Field |
| `user/Former Teams` | entity collection Field |
JavaScript
```
const Fibery = require('fibery-unofficial');
const fibery = new Fibery({host: "YOUR_ACCOUNT.fibery.io", token: YOUR_TOKEN});
await fibery.entity.createBatch([
{
'type': 'Cricket/Player',
'entity': {
'fibery/id': 'd17390c4-98c8-11e9-a2a3-2a2ae2dbcce4',
'Cricket/name': 'Curtly Ambrose',
'Cricket/Full Name': 'Curtly Elconn Lynwall Ambrose',
'Cricket/Born': '1963-09-21',
'Cricket/Youth Career': {
'start': '1985-01-01',
'end': '1986-01-01'
},
'Cricket/Shirt Number': 1,
'Cricket/Height': '2.01',
'Cricket/Retired?': true,
'Cricket/Batting Hand': { 'fibery/id': 'b0ed3a80-9747-11e9-9f03-fd937c4ecf3b' }
}
}
]);
```
cURL
```
curl -X POST https://YOUR_ACCOUNT.fibery.io/api/commands \
-H 'Authorization: Token YOUR_TOKEN' \
-H 'Content-Type: application/json' \
-d \
'[
{
"command": "fibery.entity/create",
"args": {
"type": "Cricket/Player",
"entity": {
"fibery/id": "d17390c4-98c8-11e9-a2a3-2a2ae2dbcce4",
"Cricket/name": "Curtly Ambrose",
"Cricket/Full Name": "Curtly Elconn Lynwall Ambrose",
"Cricket/Born": "1963-09-21",
"Cricket/Youth Career": {
"start": "1985-01-01",
"end": "1986-01-01"
},
"Cricket/Shirt Number": 1,
"Cricket/Height": "2.01",
"Cricket/Retired?": true,
"Cricket/Batting Hand": { "fibery/id": "b0ed3a80-9747-11e9-9f03-fd937c4ecf3b" }
}
}
}
]'
```
Result with all primitive Fields, single-selects and entity Fields:
```
[
{
"success": true,
"result": {
"Cricket/Height": "2.01",
"fibery/modification-date": "2019-06-27T10:44:53.860Z",
"Cricket/Born": "1963-09-21",
"fibery/id": "98fd77a0-98c8-11e9-8af8-976831879f29",
"fibery/creation-date": "2019-06-27T10:44:53.860Z",
"Cricket/Shirt Number": 1,
"Cricket/Full Name": "Curtly Elconn Lynwall Ambrose",
"fibery/public-id": "6",
"Cricket/Retired?": true,
"Cricket/Current Team": null,
"Cricket/Batting Hand": {
"fibery/id": "b0ed3a80-9747-11e9-9f03-fd937c4ecf3b"
},
"Cricket/Youth Career": {
"start": "1985-01-01",
"end": "1986-01-01"
},
"Cricket/name": "Curtly Ambrose"
}
}
]
```
## Update Entity
Update primitive, single-select and entity Fields this way. For updating entity collection Fields check out the section below.
To update a single-select or an entity Field, we'll need the target Entity's `fibery/id`. We can get `fibery/id` either via API or by opening the relevant Entity on UI and exploring the command response in browser's Network tab. Note that the target Entity should already exist.
`Cricket/Player` Type used as an example
| Field name | Field type |
| --- | --- |
| `fibery/id` | `fibery/uuid` |
| `fibery/public-id` | `fibery/text` |
| `Cricket/name` | `fibery/text` |
| `Cricket/Full Name` | `fibery/text` |
| `Cricket/Born` | `fibery/date` |
| `Cricket/Youth Career` | `fibery/date-range` |
| `Cricket/Shirt Number` | `fibery/int` |
| `Cricket/Height` | `fibery/decimal` |
| `Cricket/Retired?` | `fibery/bool` |
| `Cricket/Batting Hand` | single-select |
| `Cricket/Current Team` | entity Field |
| `user/Former Teams` | entity collection Field |
JavaScript
```
const Fibery = require('fibery-unofficial');
const fibery = new Fibery({host: "YOUR_ACCOUNT.fibery.io", token: YOUR_TOKEN});
await fibery.entity.updateBatch([
{
'type': 'Cricket/Player',
'entity': {
'fibery/id': '20f9b920-9752-11e9-81b9-4363f716f666',
'Cricket/Full Name': 'Virat \"Chikoo\" Kohli',
'Cricket/Current Team': { 'fibery/id': 'd328b7b0-97fa-11e9-81b9-4363f716f666' }
}
}
]);
```
cURL
```
curl -X POST https://YOUR_ACCOUNT.fibery.io/api/commands \
-H 'Authorization: Token YOUR_TOKEN' \
-H 'Content-Type: application/json' \
-d \
'[
{
"command": "fibery.entity/update",
"args": {
"type": "Cricket/Player",
"entity": {
"fibery/id": "20f9b920-9752-11e9-81b9-4363f716f666",
"Cricket/Full Name": "Virat \"Chikoo\" Kohli",
"Cricket/Current Team": { "fibery/id": "d328b7b0-97fa-11e9-81b9-4363f716f666" }
}
}
}
]'
```
Result with all primitive Fields, single-select and entity Fields:
```
[
{
"success": true,
"result": {
"Cricket/Height": "1.75",
"fibery/modification-date": "2019-06-27T12:17:02.842Z",
"Cricket/Born": "1988-11-05",
"fibery/id": "20f9b920-9752-11e9-81b9-4363f716f666",
"fibery/creation-date": "2019-06-25T14:04:20.988Z",
"Cricket/Shirt Number": 18,
"Cricket/Full Name": "Virat \"Chikoo\" Kohli",
"fibery/public-id": "1",
"Cricket/Retired?": false,
"Cricket/Current Team": {
"fibery/id": "d328b7b0-97fa-11e9-81b9-4363f716f666"
},
"Cricket/Batting Hand": {
"fibery/id": "b0ed1370-9747-11e9-9f03-fd937c4ecf3b"
},
"Cricket/Youth Career": {
"start": "2002-10-01",
"end": "2008-07-01"
},
"Cricket/name": "Virat Kohli"
}
}
]
```
### Update entity collection Field
Add already existing Entities to an entity collection Field by providing their `fibery/id`. Remove Entities from the collection in a similar way.
Get `fibery/id` either via API or by opening the relevant Entity on UI and exploring the command response in browser's Network tab.
`Cricket/Player` Type used as an example
| Field name | Field type |
| --- | --- |
| `fibery/id` | `fibery/uuid` |
| `user/Former Teams` | entity collection Field |
Add two existing Teams to Player's "Former Teams" entity collection Field:
JavaScript
```
const Fibery = require('fibery-unofficial');
const fibery = new Fibery({host: "YOUR_ACCOUNT.fibery.io", token: YOUR_TOKEN});
await fibery.entity.addToEntityCollectionFieldBatch([
{
'type': 'Cricket/Player',
'field': 'user/Former Teams',
'entity': { 'fibery/id': '216c2a00-9752-11e9-81b9-4363f716f666' },
'items': [
{ 'fibery/id': '0a3ae1c0-97fa-11e9-81b9-4363f716f666' },
{ 'fibery/id': '17af8db0-97fa-11e9-81b9-4363f716f666' }
]
}
]);
```
cURL
```
curl -X POST https://YOUR_ACCOUNT.fibery.io/api/commands \
-H 'Authorization: Token YOUR_TOKEN' \
-H 'Content-Type: application/json' \
-d \
'[
{
"command": "fibery.entity/add-collection-items",
"args": {
"type": "Cricket/Player",
"field": "user/Former Teams",
"entity": { "fibery/id": "216c2a00-9752-11e9-81b9-4363f716f666" },
"items": [
{ "fibery/id": "0a3ae1c0-97fa-11e9-81b9-4363f716f666" },
{ "fibery/id": "17af8db0-97fa-11e9-81b9-4363f716f666" }
]
}
}
]'
```
Result (cURL):
```
[
{
"success": true,
"result": "ok"
}
]
```
Remove two Teams from Player's "Former Teams" entity collection Field:
JavaScript
```
const Fibery = require('fibery-unofficial');
const fibery = new Fibery({host: "YOUR_ACCOUNT.fibery.io", token: YOUR_TOKEN});
await fibery.entity.removeFromEntityCollectionFieldBatch([
{
'type': 'Cricket/Player',
'field': 'user/Former Teams',
'entity': { 'fibery/id': '216c2a00-9752-11e9-81b9-4363f716f666' },
'items': [
{ 'fibery/id': '0a3ae1c0-97fa-11e9-81b9-4363f716f666' },
{ 'fibery/id': '17af8db0-97fa-11e9-81b9-4363f716f666' }
]
}
]);
```
cURL
```
curl -X POST https://YOUR_ACCOUNT.fibery.io/api/commands \
-H 'Authorization: Token YOUR_TOKEN' \
-H 'Content-Type: application/json' \
-d \
'[
{
"command": "fibery.entity/remove-collection-items",
"args": {
"type": "Cricket/Player",
"field": "user/Former Teams",
"entity": { "fibery/id": "216c2a00-9752-11e9-81b9-4363f716f666" },
"items": [
{ "fibery/id": "0a3ae1c0-97fa-11e9-81b9-4363f716f666" },
{ "fibery/id": "17af8db0-97fa-11e9-81b9-4363f716f666" }
]
}
}
]'
```
Result (cURL):
```
[
{
"success": true,
"result": "ok"
}
]
```
### Update rich text Field
To update a rich text Field we should:
1. Get `fibery/secret` of the corresponding collaborative document.
2. Update the document via `api/documents` endpoint using this `fibery/secret`.
Supported document formats:
* Markdown (md) — default
* HTML (html)
* JSON of a particular structure (json)
`Cricket/Player` Type used as an example
| Field name | Field type |
| --- | --- |
| `Cricket/Bio` | rich text (`Collaboration~Documents/Document`) |
Get collaborative document's `fibery/secret`:
```
curl -X POST https://YOUR_ACCOUNT.fibery.io/api/commands \
-H 'Authorization: Token YOUR_TOKEN' \
-H 'Content-Type: application/json' \
-d \
'[
{
"command": "fibery.entity/query",
"args": {
"query": {
"q/from": "Cricket/Player",
"q/select": [
"fibery/id",
{ "Cricket/Bio": [ "Collaboration~Documents/secret" ] }
],
"q/where": ["=", ["fibery/id"], "$id"],
"q/limit": 1
},
"params": { "$id": "20f9b920-9752-11e9-81b9-4363f716f666" }
}
}
]'
```
Grab the secret:
```
[
{
"success": true,
"result": [
{
"fibery/id": "20f9b920-9752-11e9-81b9-4363f716f666",
"Cricket/Bio": {
"Collaboration~Documents/secret": "b33a25d1-99ba-11e9-8c59-09d0cb6f3aeb"
}
}
]
}
]
```
Update the document:
```
curl -X PUT https://YOUR_ACCOUNT.fibery.io/api/documents/b33a25d1-99ba-11e9-8c59-09d0cb6f3aeb?format=md \
-H 'Authorization: Token YOUR_TOKEN' \
-H 'Content-Type: application/json' \
-d \
'{
"content": "Virat Kohli (born 5 November 1988) is an Indian [cricketer](https://en.wikipedia.org/wiki/Cricket) who currently captains the India national team.\nHe plays for Royal Challengers Bangalore in the Indian Premier League."
}'
```
Update multiple documents in a single batch request:
```
curl -X POST 'https://YOUR_ACCOUNT.fibery.io/api/documents/commands?format=md' \
-H 'Authorization: Bearer ' \
-H 'Content-Type: application/json' \
-d \
'{
"command": "create-or-update-documents",
"args": [
{
"secret": "b33a25d1-99ba-11e9-8c59-09d0cb6f3aeb",
"content": "my md content 1"
},
{
"secret": "b33a25d3-99ba-11e9-8c59-09d0cb6f3aeb",
"content": "my md content 2"
}
]
}'
```
Status code 200 means that the update has been successful.
### Add comment
Once you install the Comments extension on a Type, you are free to add comments to the Type's Entities – both via UI and API.
Here at Fibery, we don't throw abstractions around so comments are assembled from the pre-existing basic building blocks:
* Comment (`comments/comment`) is a Type with Fields like Author (`fibery/created-by`) and Creation Date (`fibery/creation-date`).
* The `Comments` extension connects a parent Type with Comment Type via a one-to-many relation.
* Each individual comment is an Entity of Comment Type.
* The content of a comment is stored in a collaborative document just like [rich-text Fields](https://the.fibery.io/@public/User_Guide/Guide/Field-API-263/anchor=Rich-text-Field--a2a8947a-579b-4e7b-b9d1-a8ab7c2a9b4a "https://the.fibery.io/@public/User_Guide/Guide/Field-API-263/anchor=Rich-text-Field--a2a8947a-579b-4e7b-b9d1-a8ab7c2a9b4a").
So here is how you add comment:
1. Create an Entity of the Comment Type.
2. Connect this comment to a proper parent Entity.
3. Set the comment's content.
Generate two UUIDs – for the comment ID and the document secret ID:
```
a88626cb-2f08-4821-9d5f-3edb9b624c26
9f18d395-05da-44dc-9f21-602b2e744b14
```
Create an Entity of the auxiliary Comment Type and link it to the parent Entity:
JavaScript
```
const Fibery = require('fibery-unofficial');
const fibery = new Fibery({host: "YOUR_ACCOUNT.fibery.io", token: YOUR_TOKEN});
const PARENT_ENTITY_ID = '216c2a00-9752-11e9-81b9-4363f716f666';
const COMMENT_AUTHOR_ID = 'fe1db100-3779-11e9-9162-04d77e8d50cb';
const COMMENT_ID = 'a88626cb-2f08-4821-9d5f-3edb9b624c26'; // newly generated
const DOCUMENT_SECRET_ID = '9f18d395-05da-44dc-9f21-602b2e744b14'; // newly generated
const comment = await fibery.entity.create({
'type': 'comments/comment',
'entity': {
'fibery/id': COMMENT_ID,
'comment/document-secret': DOCUMENT_SECRET_ID,
'fibery/created-by': { 'fibery/id': COMMENT_AUTHOR_ID }
}
});
await fibery.entity.addToEntityCollectionField({
'type': 'Cricket/Player',
'field': 'comments/comments',
'entity': { 'fibery/id': PARENT_ENTITY_ID },
'items': [
{ 'fibery/id': COMMENT_ID }
]
});
```
cURL
```
curl -X POST https://YO UR_ACCOUNT.fibery.io/api/commands \
-H 'Authorization: Token YOUR_TOKEN' \
-H 'Content-Type: application/json' \
-d \
'[
{
"command":"fibery.command/batch",
"args":{
"commands":[
{
"command":"fibery.entity/create",
"args":{
"type":"comments/comment",
"entity":{
"fibery/id":"a88626cb-2f08-4821-9d5f-3edb9b624c26",
"comment/document-secret":"9f18d395-05da-44dc-9f21-602b2e744b14",
"fibery/created-by": { "fibery/id": "fe1db100-3779-11e9-9162-04d77e8d50cb" }
}
}
},
{
"command":"fibery.entity/add-collection-items",
"args":{
"type":"Cricket/Player",
"entity":{
"fibery/id":"20f9b920-9752-11e9-81b9-4363f716f666"
},
"field":"comments/comments",
"items":[
{
"fibery/id": "a88626cb-2f08-4821-9d5f-3edb9b624c26"
}
]
}
}
]
}
}
]'
```
Make sure the result looks good:
```
[
{
"success": true,
"result": [
{
"success": true,
"result": {
"comment/document-secret": "9f18d395-05da-44dc-9f21-602b2e744b14",
"fibery/id": "a88626cb-2f08-4821-9d5f-3edb9b624c26",
"fibery/public-id": "139",
"fibery/creation-date": "2021-05-05T17:37:21.933Z",
"comment/content": null,
"fibery/created-by": {
"fibery/id": "fe1db100-3779-11e9-9162-04d77e8d50cb"
}
}
},
{
"success": true,
"result": null
}
]
}
]
```
Set the comment's content:
JavaScript
```
const content = 'He is the [G.O.A.T.](https://en.wikipedia.org/wiki/Greatest_of_All_Time) batsman!';
await fibery.document.update('9f18d395-05da-44dc-9f21-602b2e744b14', content, 'md');
```
cURL
```
curl -X POST https://YOUR_ACCOUNT.fibery.io/api/documents/commands?format=md \
-H 'Authorization: Token YOUR_TOKEN' \
-H 'Content-Type: application/json' \
-d \
'{
"command": "create-or-update-documents",
"args": [
{
"secret": "9f18d395-05da-44dc-9f21-602b2e744b14",
"content": "He is the [G.O.A.T.](https://en.wikipedia.org/wiki/Greatest_of_All_Time) batsman!"
}
]
}'
```
## Delete Entity
Delete Entity by providing its Type and `fibery/id`.
JavaScript
```
const Fibery = require('fibery-unofficial');
const fibery = new Fibery({host: "YOUR_ACCOUNT.fibery.io", token: YOUR_TOKEN});
await fibery.entity.deleteBatch([
{
'type': 'Cricket/Player',
'entity': { 'fibery/id': 'b4f2e9b0-9907-11e9-acf1-fd0d502cdd20' }
}
]);
```
cURL
```
curl -X POST https://YOUR_ACCOUNT.fibery.io/api/commands \
-H 'Authorization: Token YOUR_TOKEN' \
-H 'Content-Type: application/json' \
-d \
'[
{
"command": "fibery.entity/delete",
"args": {
"type": "Cricket/Player",
"entity": { "fibery/id": "93648510-9907-11e9-acf1-fd0d502cdd20" }
}
}
]'
```
Result (cURL):
```
[
{
"success": true,
"result": "ok"
}
]
```
# DATE FIELD
____________
## Date with time
A Date field can optionally include time.

## Date range
A Date field can cover a period of time, by including a start and end. This is often referred to as a 'Date range'.

A Date range must have both a Start and End value.
## Date format
Every person sees dates and times in a format set in their [Personal preferences](https://the.fibery.io/@public/User_Guide/Guide/Personal-preferences-288). This means the same Date Field value might look like `Feb 13, 2024 16:36` for you and `2/13/2024 4:36 pm` for your colleague — see our [internationalization principles](https://community.fibery.io/t/twitter-post-about-potentially-new-fibery-settings/5728/4?u=antoniokov).
## Dates in Formulas
Using Dates and Date ranges in [Formulas](https://the.fibery.io/@public/User_Guide/Guide/Formulas-39) can lead to some un-intuitive behaviour, specifically when it comes to [Timezones](https://the.fibery.io/@public/User_Guide/Guide/Timezones-41) and [Date Ranges in Formulas](https://the.fibery.io/@public/User_Guide/Guide/Date-Ranges-in-Formulas-42) :this-is-fine-fire:.
# HUBSPOT MIGRATION TO V4 ENGAGEMENTS (API GUIDE)
_________________________________________________
## Breaking changes:
Few fields changed their inner id and type so we have to re-create them on next sync. We tried to make this as less painful as we could so we won't delete old fields to not flood you with "Broken formula" notifications but they won't be in sync anymore.
So we'd like to ask you to re-setup your formulas, view filters and automations to use new fields.
Below you can find the list of changed fields.
#### All engagement databases (Meeting, Note, Email, Task, Call):
`Owner` and `Hubspot Creation Date` changed their inner id
#### Meeting:
`startTime` renamed to `Start Time`
`endTime` → `End Time`
*new field:*
`Outcome` changed type from Text to Single-Select
#### Email:
*new field:*
`Status` changed type from Text to Single-Select
#### Call:
`Status` changed type from Text to Single-Select
`Disposition` changed type from Text to Single-Select
*new field:*
`Direction` single-select field with values (INBOUND, OUTBOUND)
#### Task:
`Status` changed type from Text to Single-Select
`Priority` changed type from Text to Single-Select
`Type` changed type from Text to Single-Select
### How to fix deprecated field
Here is how you can switch to the new field in your formulas:
1. Open integration settings
2. Click on "…" and choose "Edit Fields To Sync"
3. Disable deprecated field
4. Open broken formula
5. Replace \[Deleted Field\] with the name of new field
# CUSTOM HOLIDAYS APP TUTORIAL
______________________________
In this tutorial we will show how to create simple integration app which does not require any authentication. We intend to create a public holidays app which will sync data about holidays for selected countries. The holidays service [Nager.Date](https://date.nager.at/) will be used to retrieve holidays.
The source code can be found here:
[https://gitlab.com/fibery-community/holidays-integration-app](https://gitlab.com/fibery-community/holidays-integration-app)
## **App Information**
Every integration should have the configuration which describes what the app is doing and the authentication methods. The app configuration should be accessible at `GET /` endpoint and should be publicly available.
> [//]: # (callout;icon-type=icon;icon=exclamation-circle;color=#fba32f)
> All mentioned properties are required.
Since I don't want my app be authenticated I didn't provide any fields for "Public Access" node in authentication. It means that any user will be able to connect their account to the public holidays app. Find an example with token authentication [here](https://gitlab.com/fibery-community/integration-sample-apps/-/blob/master/samples/simple/src/app.js) .
```
const appConfig = require(`./config.app.json`);
app.get(`/`, (req, res) => res.json(appConfig));
```
Response (config.app.json):
```
{
"id": "holidays-app",
"name": "Public Holidays",
"version": "1.0.1",
"description": "Integrate data about public holidays into Fibery",
"authentication": [
{
"id": "public",
"name": "Public Access",
"description": "There is no any authentication required",
"fields": [
]
}
],
"sources": [
],
"responsibleFor": {
"dataSynchronization": true
}
}
```
## Validate Account
This endpoint is responsible for app account validation. It is required to be implemented. Let's just send back the name of account without any authentication since we are creating an app with public access.
```
app.post(`/validate`, (req, res) => res.json({name: `Public`}));
```
## **Sync configuration**
The way data is synchronised should be described.
The endpoint is `POST /api/v1/synchronizer/config` and you can read about it in [Custom App: REST Endpoints](https://the.fibery.io/@public/User_Guide/Guide/Custom-App:-REST-Endpoints-272).
**types** - responsible for describing types which will be synced. For the holidays app it is just one type with id " holidays" and name "Public Holidays". It means that only one integration Fibery database will be created in the space, with the name "Public Holidays".
**filters** - contains information on how the type can be filtered. In our case there is a multi dropdown ('countries') which is required and marked as datalist. It means that options for this dropdown should be retrieved from app and special end-point should be implemented for that. We have two numeric filters from and to which are optional and can be used to filter holidays by years.
Find information about filters here: [Custom App: Fields](https://the.fibery.io/@public/User_Guide/Guide/Custom-App:-Fields-270).
```
const syncConfig = require(`./config.sync.json`);
app.post(`/api/v1/synchronizer/config`, (req, res) => res.json(syncConfig));
```
Response(config.sync.json):
```
{
"types": [
{
"id": "holiday",
"name": "Public Holiday"
}
],
"filters": [
{
"id": "countries",
"title": "Countries",
"datalist": true,
"optional": false,
"type": "multidropdown"
},
{
"id": "from",
"type": "number",
"title": "Start Year (by default previous year used)",
"optional": true
},
{
"id": "to",
"type": "number",
"title": "End Year (by default current year used)",
"optional": true
}
]
}
```
## **Countries datalist**
Endpoint `POST /api/v1/synchronizer/datalist` should be implemented if synchronizer filters has dropdown marked as `"datalist": true`. Since we have countries multi dropdown filter which should contain countries it is required to implement the mentioned endpoint as well.
```
app.post(`/api/v1/synchronizer/datalist`, wrap(async (req, res) => {
const countries = await (got(`https://date.nager.at/api/v3/AvailableCountries`).json());
const items = countries.map((row) => ({title: row.name, value: row.countryCode}));
res.json({items});
}));
```
For example part of countries response will look like this:
```
{
"items": [
...
{
"title": "Poland",
"value": "PL"
},
{
"title": "Belarus",
"value": "BY"
},
{
"title": "Cyprus",
"value": "CY"
},
{
"title": "Denmark",
"value": "DK"
},
{
"title": "Russia",
"value": "RU"
}
]
}
```
> [//]: # (callout;icon-type=icon;icon=exclamation-circle;color=#199ee3)
> For this app, only the list of countries is returned since our config has only one data list. In the case where there are several data lists then we will need to retrieve "field" from request body which will contain an id of the requested list. The response should be formed as an array of `items` where every element contains `title` and `value` properties.
## Schema
`POST /api/v1/synchronizer/schema` endpoint should return the data schema of the app. In our case it should contain only one root element "holiday" named after the id of holiday type in sync configuration above.
```
const schema = require(`./schema.json`);
app.post(`/api/v1/synchronizer/schema`, (req, res) => res.json(schema));
```
schema.json
```
{
"holiday": {
"id": {
"name": "Id",
"type": "id"
},
"name": {
"name": "Name",
"type": "text"
},
"date": {
"name": "Date",
"type": "date"
},
"countryCode": {
"name": "Country Code",
"type": "text"
}
}
}
```
> [//]: # (callout;icon-type=icon;icon=exclamation-circle;color=#fba32f)
> Every schema node should have `id` and `name` elements defined.
## Data
The data endpoint `POST /api/v1/synchronizer/data` is responsible for retrieving data. There is no paging needed in case of our app, so the data is returned according to selected countries and years interval. The `requestedType` and `filter` can be retrieved from the request body. The response should be returned as array in `items` element.
```
const getYearRange = filter => {
let fromYear = parseInt(filter.from);
let toYear = parseInt(filter.to);
if (_.isNaN(fromYear)) {
fromYear = new Date().getFullYear() - 1;
}
if (_.isNaN(toYear)) {
toYear = new Date().getFullYear();
}
const yearRange = [];
while (fromYear <= toYear) {
yearRange.push(fromYear);
fromYear++;
}
return yearRange;
};
app.post(`/api/v1/synchronizer/data`, wrap(async (req, res) => {
const {requestedType, filter} = req.body;
if (requestedType !== `holiday`) {
throw new Error(`Only holidays database can be synchronized`);
}
if (_.isEmpty(filter.countries)) {
throw new Error(`Countries filter should be specified`);
}
const {countries} = filter;
const yearRange = getYearRange(filter);
const items = [];
for (const country of countries) {
for (const year of yearRange) {
const url = `https://date.nager.at/api/v3/PublicHolidays/${year}/${country}`;
console.log(url);
(await (got(url).json())).forEach((item) => {
item.id = uuid(JSON.stringify(item));
items.push(item);
});
}
}
return res.json({items});
}));
```
# EMAIL THREADS
_______________
Fibery Email Sync supports threads. We use first element of **References** header in IMAP response which contain **Message-IDs** (we take first since it is the id of the first email sent) and set a relation to another Message as Thread field. You can create List View or Table View and group Emails by Threads.

It is useful to sort Emails by Date to have fresh emails on top.
> [//]: # (callout;icon-type=icon;icon=exclamation-circle;color=#d40915)
> **Limitation:** Some email clients or servers might not properly set these headers, and forwarded messages can break the thread structure.
## Reply via Fibery and maintain email threads
You can [Send emails and reply to emails](https://the.fibery.io/@public/User_Guide/Guide/Send-emails-and-reply-to-emails-105) in Fibery.
You should set `In-Reply-To:` and `References:` headers in Send Email action to support threads, so you can [create a button to reply to emails in Fibery](https://www.loom.com/share/1bf61de02ece45bca8f7c6847ff271af?sid=193b541e-b5a4-48f8-a693-18250e36488f). Check the guide how to do it: [Send emails and reply to emails](https://the.fibery.io/@public/User_Guide/Guide/Send-emails-and-reply-to-emails-105)
# GET /
_______
## Overview
GET "/" endpoint is the main one which returns information about the app. You can find response structure [here](https://the.fibery.io/@public/User_Guide/Guide/Domain-365). Response example:
```
{
"version": "1.0", // string representing the version of your app
"name": "My Super Application", // title of the app
"description": "All your base are belong to us!", // long description
"site": "fibery.io", // OPTIONAL: website, if you've got one
"authentication": [...], // list of account schema information
"sources": [...], // list of source info, see below
"responsibleFor": { // app responsibility
"dataProviding": true // app is responsibile for data providing
}
}
```
## Authentication Information
The `authentication` object includes all account schema information. It informs the Fibery front-end how to build forms for the end-user to provide required account information. This property is required, even if your application does not require authentication. At least one account object must be provided within array.
```
"authentication": [
{
"id": "basic", // identifier
"name": "Basic Authentication", // user-friendly title
"description": "Just using a username and password", // description
"fields": [ //list of fields to be filled
{
"id": "username", //field identifier
"title": "Username", //friendly name
"description": "Your username, duh!", //description
"type": "text", //field type (text, password, number, etc.)
"optional": true, // is this a optional field?
},
/* ... */
]
}
]
```
In case when application doesn't require authentication, the `fields` array must be omitted. Read more about fields [here](https://the.fibery.io/@public/User_Guide/Guide/Field-types-366).
*Important note:* if your app provides OAuth capabilities for authentication, the authentication identifiers *must* be `oauth` and `oauth2` for OAuth v1 and OAuth v2, respectively. Only one authentication type per OAuth version is currently supported.
## Source Schema Information
Source information is included into `GET /` response using `sources` property:
```
"sources": [
{
"id": "supersource", // identifier
"name": "Super Data Source", // friendly name
"description": "Use data here to take over the world.", // description
"filter": [ // list of fields used for filter
{
"id": "ssn", //f ield identifier
"title": "Social Security Number", // friendly name
"description": "Filter by victim's socialized surf number", // description
"type": "number", // field type (text, password, number, etc.)
"optional": false, // is this a optional field?
},
/*...*/
]
}
]
```
## Source Filter Information
The `filter` object is used to help the user to exclude non-required data. Just like other field-like objects, the `filter` object is not required. If nothing is provided, users will not be able to filter out data received from the app.
For more information about authentications, sources and filters, please refer to [Domain](https://the.fibery.io/@public/User_Guide/Guide/Domain-365). For more information about fields and for a list of field types, please refer to [Field types](https://the.fibery.io/@public/User_Guide/Guide/Field-types-366).
# FIELDS WITH UNIQUE VALUES
___________________________
*See also: [Required fields](https://the.fibery.io/@public/User_Guide/Guide/Required-fields-393)*
Prevent duplicates by requiring all values in a given Field to be unique:

> [//]: # (callout;icon-type=emoji;icon=:unicorn_face:;color=#9c2baf)
> This feature is available on Pro and Enterprise [plans](https://fibery.io/pricing).
## Why enforcing unique values
Inevitably, from time to time, users and scripts create duplicate data. If you don't know that you are looking at a duplicate entity, you might rely on outdated or incomplete information.

For example, there can be two Contacts in CRM representing the same person: an older entity shows the outdated job title but contains a LinkedIn link while the newer entity has the up-to-date title but no LinkedIn info. Obviously, this is no good.
To prevent duplicates, require the values in a certain Field to be unique.
## How to prevent duplicates and guarantee unique values
Go to Field settings and enable the corresponding toggle:
1. Show Databases in the sidebar for the relevant Space
2. Expand your Database and navigate to `Fields`
3. Select the Field that should be used to detect duplicates
4. Expand `Advanced` section
5. Enable `Require values to be unique` toggle

## What to do with existing duplicates
When you try to require values of a Field to be unique, we look for existing duplicates:

If the duplicates are found, we suggest either merging them automatically (if there are no conflicts in data) or creating a temporary Table View to merge them manually.
> [//]: # (callout;icon-type=emoji;icon=:sparkles:;color=#9c2baf)
> You can also try asking [AI Agent (new)](https://the.fibery.io/@public/User_Guide/Guide/AI-Agent-(new)-333) to do the deduplication for you (at your own peril 😅).
## How automatic duplicates merging works
Whenever there are no conflicts in the data, we suggest merging the existing duplicates automatically. The automatic merge doesn't allow for the same level of control (e.g. can't pick the primary record) but it resolves the duplicates with a single tempting click:

We can always merge these Fields without a conflict:
* **rich-text** by appending content;
* **multi-selects** and **to-many relations** by combining values.
Other Field values should either be identical or empty for all the duplicates in a cluster—otherwise, we'll ask you to resort to manual merge. In this example, `Salary` is the only Field that prevents the automatic merge:
| | | | | | |
| --- | --- | --- | --- | --- | --- |
| **Email** (email, unique) | **Name** ✅ (text) | **Job Title** ✅ (text) | **Salary** ⌠(money) | **Tags** ✅ (multi-select) | **Notes** ✅ (rich-text) |
| mara@fibery.io | Mara | CDO | $100,000 | `smart`, `loyal` | "Surround with **extra** love and car" |
| mara@fibery.io | Mara | | $125,000 | `resourceful` | "A *pleasure* to work with" |
## How to merge duplicates manually
If the automatic merge is not possible or you'd like to have more control over the process, you can merge the existing duplicates manually. We generate a temporary Table View in your private space so you can compare duplicate entities and ensure the surviving one has all the right values:

The duplicate values in the View are sorted and color coded to help you navigate. Display the Fields that help you to decide which record to preserve and use [Merge entities](https://the.fibery.io/@public/User_Guide/Guide/Merge-entities-330) action (or copy-paste + delete) to eliminate the rest.
Once you are finished, delete the View and go back to the unique values toggle to repeat the check. If things have gone well, you'll see that there are no duplicate left and you can finally ensure the future values will be unique:

> [//]: # (callout;icon-type=icon;icon=exclamation-circle;color=#199EE3)
> One auxiliary Table View can handle up to 20 duplicate values. If you have more, you'll have to repeat the procedure a few times.
## What happens if someone tries to enter a duplicate value?
Once you require the values to be unique, Fibery will prevent any duplicates by displaying an error toast:

The user will have an option to navigate to the original entity and update it instead of creating a duplicate.
## What kinds of Fields can be unique?
Here are the supported Field types:
1. Text
2. Email
3. URL
4. Phone
5. Number (0 decimal places aka `Integer`)
6. Date (without time or range)
You can require unique values for up to 5 Fields per Database.
> [//]: # (callout;icon-type=emoji;icon=:ear:;color=#FBA32F)
> So far, we don't prevent duplicates based on the *combination* of Fields (e.g. `First Name` + `Last Name`). If that's what you need, please let us know in the [community](https://community.fibery.io/c/ideas-features/7) or via support chat.
# WHITEBOARD KEYBOARD SHORTCUTS
_______________________________
All whiteboard keyboard shortcuts:
| | | |
| --- | --- | --- |
| **General** | **Mac** | **Win** |
| Undo | `⌘ Z` | `CTRL Z` |
| Redo | `⌘ ⇧ Z` | `CRTL ⇧ Z` |
| Copy | `⌘ C` | `CTRL C` |
| Paste | `⌘ V` | `CTRL V` |
| Cut | `⌘ X` | `CTRL X` |
| Duplicate | `⌘ D` | `CTRL D` |
| Duplicate | `⌥ DRAG` | `ALT DRAG` |
| Delete | `⌫` | `DELETE` |
| Select multiple items | `⇧ CLICK` | `⇧ CLICK` |
| Group all | `⌘ G` | `CTRL G` |
| Ungroup all | `⌘ ⇧ G` | `CTRL ⇧ G` |
| Lock/Unlock | `⇧ L` | `⇧ L` |
| Bring forward | `]` | `]` |
| Send backward | `[` | `[` |
| Edit mode | `↵` | `↵` |
| Quit edit mode, Deselect | `ESC` | `ESC` |
| Copy link to object | `⌘ ⌥ ⇧ G` | `CTRL ALT ⇧ G` |
\+ Holding a modifier key `Shift` while moving an item on the board keep the item sticky to the X or Y axis.
| | | |
| --- | --- | --- |
| **Navigation** | **Mac** | **Win** |
| Zoom in | `⌘ +` | `WIN +` |
| Zoom out | `⌘ -` | `WIN -` |
| Mini map | `M` | `M` |
| Move canvas | `SPACE` | `SPACE` |
| Zoom to 100% | `⌘ 0` | `CTRL 0` |
| Zoom to fit | `⌘ 1` | `CTRL 1` |
| Toggle grid | `G` | `G` |
You can also
ðŸ–±ï¸ **Scroll wheel zoom**
Zoom in and out using your mouse wheel, no Cmd/Ctrl key required 👌
ðŸ–±ï¸ **Right-click to pan**
Hold the right mouse button to drag and pan across the Whiteboard.
âš™ï¸ You'll find both options in your Whiteboard action menu. These preferences are set per user and apply to all whiteboards in your workspace.
| | | |
| --- | --- | --- |
| **Tools** | **Mac** | **Win** |
| Select | `V` | `V` |
| Hand | `H` | `H` |
| Text | `T` | `T` |
| Shape | `S` | `S` |
| Connection line | `L` | `L` |
| Relations link | `R` | `R` |
| Pen | `P` | `P` |
| Sticky note | `N` | `N` |
| Insert card | `I` | `I` |
| Section | `F` | `F` |
# PUBLISH SPACE TO WEB
______________________
You can share a whole Space to the web. This is handy for cases like a [product changelog](https://the.fibery.io/@public/Changelog/Releases-6061?show-only-current-space-in-menu "https://the.fibery.io/@public/Changelog/Releases-6061?show-only-current-space-in-menu"), user guide, [process documentation](https://the.fibery.io/@public/Fibery_Process/Start-5885?show-only-current-space-in-menu "https://the.fibery.io/@public/Fibery_Process/Start-5885?show-only-current-space-in-menu"), [product roadmap](https://the.fibery.io/@public/Public_Roadmap/Roadmap-Board-5974?show-only-current-space-in-menu "https://the.fibery.io/@public/Public_Roadmap/Roadmap-Board-5974?show-only-current-space-in-menu"), etc.
## Publish space to web
1. Click … near Space name and select `Manage access`
2. Click `Publish to web` button in the top right corner
3. Click `Copy public link` to get he link and share it with people

## What is shared?
Everything inside shared space is shared (viewable) including documents, [Views](https://the.fibery.io/@public/User_Guide/Guide/Views-8), [Databases](https://the.fibery.io/@public/User_Guide/Guide/Databases-7), entities, whiteboards. All you see in the sidebar will be visible to any user on the internet.
Data from other closed spaces are not shared.
* For example, you may have a view in shared space that shows database from a closed space. In this case the view will be visible, but it will be empty.
* Or you may have a reference to an entity in a closed space, in this case it will be not visible.
> [//]: # (callout;icon-type=icon;icon=heart;color=#e72065)
> Semantic Search works in public Spaces — it shows results from all databases that are both part of the public Space and added to Semantic Search.
## Is shared space SEO-friendly?
It is, but it is not heavily optimized. It is visible for search engines, but shared documents and entities in Fibery are not static pages and Google might not like them very much.
## Examples
This User Guide is a shared space. Here are some other shared spaces for you to explore and get some inspiration:
* [Public Roadmap](https://the.fibery.io/@public/Public_Roadmap/Roadmap-Board-5974 "https://the.fibery.io/@public/Public_Roadmap/Roadmap-Board-5974")
* [Fibery Process](https://the.fibery.io/@public/Fibery_Process/Start-5885 "https://the.fibery.io/@public/Fibery_Process/Start-5885")
* [Changelog](https://the.fibery.io/@public/Changelog/Releases-6061 "https://the.fibery.io/@public/Changelog/Releases-6061")
## FAQ
### Does Fibery support custom domains?
Not yet.
You can change your logo and company name in [Workspace settings](https://the.fibery.io/@public/User_Guide/Guide/Workspace-settings-62) but the URL ([xxx.fibery.io](http://xxx.fibery.io)) is unaffected.
### Is there a way to see a list of all shared spaces?
Yes, just navigate to `https://[your-workspace].fibery.io/@public`
### Can I embed shared Space to my website?
Yes, you can, just create an iFrame and add `?no-menu` parameter if you want to hide the left menu. For example, you can try to embed this View:
# CUSTOM NOTION SYNC APP TUTORIAL
_________________________________
This tutorial is created in order to provide help on creating complex integration app with dynamic data schema, non-primitive data synchronization (for example, files) and oauth2 authentication. The source code (node.js) can be found in [official Fibery repository](https://gitlab.com/fibery-community/notion-app) which contains the implementation of integrating [Notion](https://notion.so/) databases into Fibery databases. Demo databases can be found [here](https://fibery-dev.notion.site/fibery-dev/Demo-cc147e7b2af04d259ccd98444c67b9b4).
## **App Configuration**
Returns the description of the app and possible ways to be authenticated in Notion.
Route in app.js
```
app.get(`/`, (req, res) => res.json(connector()));
```
connector.config.js:
```
const config = require(`./config`);
const ApiKeyAuthentication = {
description: `Please provide notion authentication`,
name: `Token`,
id: `key`,
fields: [
{
type: `password`,
name: `Integration Token`,
description: `Provide Notion API Integration Token`,
id: `key`,
},
{
type: `link`,
value: `https://www.notion.so/help/create-integrations-with-the-notion-api`,
description: `We need to have your Notion Integration Token to synchronize the data.`,
id: `key-link`,
name: `Read how to create integration, grant access and create token here...`,
},
],
};
const OAuth2 = {
id: 'oauth2',
name: 'OAuth v2 Authentication',
description: 'OAuth v2-based authentication and authorization for access to Notion',
fields: [
{
title: 'callback_uri',
description: 'OAuth post-auth redirect URI',
type: 'oauth',
id: 'callback_uri',
},
],
};
const getAuthenticationStrategies = () => {
return [OAuth2, ApiKeyAuthentication];
};
module.exports.connector = () => ({
id: `notion-app`,
name: `Notion`,
version: config.version,
website: `https://notion.com`,
description: `More than a doc. Or a table. Customize Notion to work the way you do.`,
authentication: getAuthenticationStrategies(),
responsibleFor: {
dataSynchronization: true,
},
sources: [],
});
```
As you see there are two authentication ways are defined:
### **OAuth2**
Hardcoded `"oauth2"` should be used as `id` in case you would like to implement OAuth2 support in integration app.

### **Token Authentication**
You may use special field `type: "link"` in order to provide url for external resource where the user can get more info. Use `type:"password"` for tokens or other text fields which need to be secured.

## **Token Authorization**
The implementation of token authentication is the simplest way to implement. We always used it for testing and development since it is not required UI interaction. The request contains `id` of auth and user provided values. In our case it is `key`. Other fields are appended by system and can be ignored.
Route (app.js):
```
app.post(`/validate`, (req, res) => promiseToResponse(res, notion.validate(_.get(req, `body.fields`) || req.body)));
```
Request Body:
```
{
"id": "key",
"fields": {
"app": "620a3c9baec5dd25794fed7a",
"auth": "key",
"owner": "620a3c46cf7154924cf442cb",
"key": "MY TOKEN",
"enabled": true
}
}
```
Notion call (the name of account is returned):
```
module.exports.validate = async (account) => {
const client = getNotionClient(account);
const me = await client.users.me();
return {name: me.name}; //reponse should include the name of user account
};
```
## **OAuth 2**
OAuth 2 is a bit more complex and requires several routes to be implemented. The `POST /oauth2/v1/authorize` endpoint performs the initial setup for OAuth version 2 accounts using `Authorization Code` grant type by generating `redirect_uri` based on received parameters.
> [//]: # (callout;icon-type=icon;icon=exclamation-circle;color=#8ec351)
> Read more in [Custom App: OAuth](https://the.fibery.io/@public/User_Guide/Guide/Custom-App:-OAuth-273)
The `POST /oauth2/v1/access_token` endpoint performs the final setup and validation of OAuth version 2 accounts. Information as received from the third party upon redirection to the previously posted `callback_uri` are sent to this endpoint, with other applicable account information, for final setup.
app.js
```
app.post('/oauth2/v1/authorize', (req, res) => {
try {
const {callback_uri: callbackUri, state} = req.body;
const redirectUri = oauth.getAuthorizeUrl(callbackUri, state);
res.json({redirect_uri: redirectUri});
} catch (err) {
res.status(401).json({message: `Unauthorized`});
}
});
app.post('/oauth2/v1/access_token', async (req, res) => {
try {
const tokens = await oauth.getAccessToken(req.body.code, req.body.fields.callback_uri);
res.json(tokens);
} catch (err) {
res.status(401).json({message: 'Unauthorized'});
}
});
```
oauth.js
```
const got = require(`got`);
const CLIENT_ID = process.env.ENV_CLIENT_ID;
const CLIENT_SECRET = process.env.ENV_CLIENT_SECRET;
module.exports = {
getAuthorizeUrl: (callbackUri, state) => {
const queryParams = {
state,
redirect_uri: callbackUri,
response_type: 'code',
client_id: CLIENT_ID,
owner: `user`,
};
const queryParamsStr = Object.keys(queryParams)
.map((key) => `${encodeURIComponent(key)}=${encodeURIComponent(queryParams[key])}`)
.join(`&`);
return `https://api.notion.com/v1/oauth/authorize?${queryParamsStr}`;
},
getAccessToken: async (code, callbackUri) => {
const tokens = await got.post(`https://api.notion.com/v1/oauth/token`, {
resolveBodyOnly: true,
headers: {
"Authorization": `Basic ${Buffer.from(`${CLIENT_ID}:${CLIENT_SECRET}`).toString('base64')}`,
},
json: {
code,
redirect_uri: callbackUri,
grant_type: `authorization_code`,
},
}).json();
return {access_token: tokens.access_token};
},
};
```
The implementation of oauth is pretty similar for many services and Notion is not exclusion here. Find the code of oauth.js in the right code panel. `access_token` will be passed into `/validate` for validating token in future calls.
## **Synchronizer configuration**
This endpoint returns types which should be synced to Fibery databases. In Notion case it is the list of databases. Static `user` type is added. Check how the configuration response looks like for [Notion Demo](https://fibery-dev.notion.site/fibery-dev/Demo-cc147e7b2af04d259ccd98444c67b9b4).

app.js (route)
```
app.post(`/api/v1/synchronizer/config`, (req, res) => {
if (_.isEmpty(req.body.account)) {
throw new Error(`account should be provided`);
}
promiseToResponse(res, notion.config(req.body));
});
```
notion.api.js
```
const getDatabases = async ({account, pageSize = 1000}) => {
const client = getNotionClient(account);
let hasNext = true;
let start_cursor = null;
const databases = [];
while (hasNext) {
const args = {
page_size: pageSize, filter: {
value: `database`, property: `object`,
}
};
if (start_cursor) {
args.start_cursor = start_cursor;
}
const {results, has_more, next_cursor} = await client.search(args);
results.forEach((db) => databases.push(db));
hasNext = has_more;
start_cursor = next_cursor;
}
return databases;
};
const getDatabaseItem = (db) => {
const name = _.get(db, `title[0].plain_text`, `Noname`).replace(/[^\w ]+/g, ``).trim();
return {id: db.id, name};
};
module.exports.config = async ({account, pageSize}) => {
const databases = await getDatabases({account, pageSize});
const dbItems = databases.map((db) => getDatabaseItem(db)).concat({id: `user`, name: `User`});
return {types: dbItems, filters: []};
};
```
Response example
```
{
"types": [
{
"id": "f4642444-220c-439d-85d6-378ddff3d510",
"name": "Features"
},
{
"id": "3bd058e6-a71c-4e9a-8480-a76810ae38d3",
"name": "Tasks"
},
{
"id": "user",
"name": "User"
}
],
"filters": []
}
```
## **Schema of synchronization**
The schema which describes fields and relations should be provided for each sync type. Find [full implementation here](https://gitlab.com/fibery-community/notion-app/-/blob/main/app/notion.api.js#L156). It is not easy thing to implement since we are talking about dynamic data in Notion databases.
app.js (schema route)
```
app.post(`/api/v1/synchronizer/schema`, (req, res) => promiseToResponse(res, notion.schema(req.body)));
```
notion.api.js
```
module.exports.schema = async ({account, types}) => {
const databases = await getDatabases({account});
const mapDatabasesById = _.keyBy(databases, `id`);
const schema = {};
types.forEach((id) => {
if (id === `user`) {
schema.user = userSchema;
return;
}
const db = mapDatabasesById[id];
if (_.isEmpty(db)) {
throw new Error(`Database with id "${id}" is not found`);
}
schema[id] = createSchemaFromDatabase(db);
});
cleanRelationsDuplication(schema);
return schema;
};
```
Request example:
```
{
"account": {
"_id": "620a4396aec5dd672c4fed83",
"access_token": "USER-TOKEN",
"app": "620a3c9baec5dd25794fed7a",
"auth": "oauth2",
"owner": "620a3c46cf7154924cf442cb",
"enabled": true,
"name": "Fibery Developer",
"masterAccountId": null,
"lastUpdatedOn": "2022-02-21T09:45:37.802Z"
},
"filter": {},
"types": [
"f4642444-220c-439d-85d6-378ddff3d510",
"3bd058e6-a71c-4e9a-8480-a76810ae38d3",
"user"
]
}
```
Response example:
```
{
"f4642444-220c-439d-85d6-378ddff3d510": {
"id": {
"type": "id",
"name": "Id"
},
"archived": {
"type": "text",
"name": "Archived",
"subType": "boolean"
},
"created_time": {
"type": "date",
"name": "Created On"
},
"last_edited_time": {
"type": "date",
"name": "Last Edited On"
},
"__notion_link": {
"type": "text",
"name": "Notion Link",
"subType": "url"
},
"related to tasks (column)": {
"name": "Related to Tasks (Column) Ref",
"type": "text",
"relation": {
"cardinality": "many-to-many",
"targetFieldId": "id",
"name": "Related to Tasks (Column)",
"targetName": "Feature",
"targetType": "3bd058e6-a71c-4e9a-8480-a76810ae38d3"
}
},
"tags": {
"name": "Tags",
"type": "array[text]"
},
"due date": {
"name": "Due Date",
"type": "date"
},
"name": {
"name": "Name",
"type": "text"
}
},
"3bd058e6-a71c-4e9a-8480-a76810ae38d3": {
"id": {
"type": "id",
"name": "Id"
},
"archived": {
"type": "text",
"name": "Archived",
"subType": "boolean"
},
"created_time": {
"type": "date",
"name": "Created On"
},
"last_edited_time": {
"type": "date",
"name": "Last Edited On"
},
"__notion_link": {
"type": "text",
"name": "Notion Link",
"subType": "url"
},
"status": {
"name": "Status",
"type": "text"
},
"assignees": {
"name": "Assignees Ref",
"type": "array[text]",
"relation": {
"cardinality": "many-to-many",
"targetType": "user",
"targetFieldId": "id",
"name": "Assignees",
"targetName": "Tasks (Assignees Ref)"
}
},
"specs": {
"name": "Specs",
"type": "array[text]",
"subType": "file"
},
"link to site": {
"name": "Link to site",
"type": "text",
"subType": "url"
},
"name": {
"name": "Name",
"type": "text"
}
},
"user": {
"id": {
"type": "id",
"name": "Id",
"path": "id"
},
"name": {
"type": "text",
"name": "Name",
"path": "name"
},
"type": {
"type": "text",
"name": "Type",
"path": "type"
},
"email": {
"type": "text",
"name": "Email",
"subType": "email"
}
}
}
```
It can be noticed that almost any field from Notion database can be mapped into Fibery field using `subType` attribute. Relations can be mapped as well. Rich text can be sent as `html` or `md` by defining corresponding `type="text"` and `subType="md" or "html"`.
Note: Relation between databases(types) should be declared only once. Double declarations for relations will lead to duplication of relations in Fibery databases. We implemented the function `cleanRelationsDuplication` in order to remove redundant relation declarations from schema fields.
Files field mapping:
```
"specs": {
"name": "Specs",
"type": "array[text]",
"subType": "file"
}
```
## **Data route**
Notion supports paged output, so it is handy to fetch data page by page. The response should include `pagination` node with `hasNext` equals to `true` or `false` and `nextPageConfig` (next page configuration) which will be included with the future request as `pagination`.
You may notice that we have included `schema` into `nextPageConfig` (pagination config). It is not required and it is done as an optimization in order to save some between pages fetching on schema resolving. In other words the pagination can be used as a context cache between page calls.
app.js
```
app.post(`/api/v1/synchronizer/data`, (req, res) => promiseToResponse(res, notion.data(req.body)));
```
notion.api.js (paging support)
```
const getValue = (row, {path, arrayPath, subPath = ``}) => {
let v = null;
const paths = _.isArray(path) ? path : [path];
paths.forEach((p) => {
if (!_.isUndefined(v) && !_.isNull(v)) {
return;
}
v = _.get(row, p);
});
if (!_.isEmpty(subPath) && _.isObject(v)) {
return getValue(v, {path: subPath});
}
if (!_.isEmpty(arrayPath) && _.isArray(v)) {
return v.map((element) => getValue(element, {path: arrayPath}));
}
if (_.isObject(v)) {
if (v.start) {
return v.start;
}
if (v.end) {
return v.end;
}
if (v.type) {
return v[v.type];
}
return JSON.stringify(v);
}
return v;
};
const processItem = ({schema, item}) => {
const r = {};
_.keys(schema).forEach((id) => {
const schemaValue = schema[id];
r[id] = getValue(item, schemaValue);
});
return r;
};
const resolveSchema = async ({pagination, client, requestedType}) => {
if (pagination && pagination.schema) {
return pagination.schema;
}
if (requestedType === `user`) {
return userSchema;
}
return createSchemaFromDatabase(await client.databases.retrieve({database_id: requestedType}));
};
const createArgs = ({pageSize, pagination, requestedType}) => {
const args = {
page_size: pageSize,
};
if (!_.isEmpty(pagination) && !_.isEmpty(pagination.start_cursor)) {
args.start_cursor = pagination.start_cursor;
}
if (requestedType !== `user`) {
args.database_id = requestedType;
}
return args;
};
module.exports.data = async ({account, requestedType, pageSize = 1000, pagination}) => {
const client = getNotionClient(account);
const schema = await resolveSchema({pagination, client, requestedType});
const args = createArgs({pageSize, pagination, requestedType});
const data = requestedType !== `user`
? await client.databases.query(args)
: await client.users.list(args);
const {results, next_cursor, has_more} = data;
return {
items: results.map((item) => processItem({account, schema, item})),
"pagination": {
"hasNext": has_more,
"nextPageConfig": {
start_cursor: next_cursor,
schema: has_more ? schema : null,
},
},
};
};
```
Request example:
```
{
"filter": {},
"types": [
"f4642444-220c-439d-85d6-378ddff3d510",
"3bd058e6-a71c-4e9a-8480-a76810ae38d3",
"user"
],
"requestedType": "3bd058e6-a71c-4e9a-8480-a76810ae38d3",
"account": {
"_id": "620a4396aec5dd672c4fed83",
"access_token": "USER-TOKEN",
"app": "620a3c9baec5dd25794fed7a",
"auth": "oauth2",
"owner": "620a3c46cf7154924cf442cb",
"enabled": true,
"name": "Fibery Developer",
"masterAccountId": null,
"lastUpdatedOn": "2022-02-21T13:30:51.350Z"
},
"lastSynchronizedAt": null,
"pagination": null
}
```
Response example:
```
{
"items": [
{
"id": "4455580b-000b-4313-8128-f1ca2d2dec34",
"archived": false,
"created_time": "2022-02-14T11:28:00.000Z",
"last_edited_time": "2022-02-14T11:30:00.000Z",
"__notion_link": "https://www.notion.so/Login-Page-4455580b000b43138128f1ca2d2dec34",
"related to tasks (column)": [
"b829daf3-bae5-40a0-a090-56a30f240a28"
],
"tags": [
"Urgent"
],
"due date": "2022-02-24",
"name": [
"Login Page"
]
},
{
"id": "9b3dff11-582b-498a-ba9b-571827ab3ca7",
"archived": false,
"created_time": "2022-02-14T11:28:00.000Z",
"last_edited_time": "2022-02-14T11:29:00.000Z",
"__notion_link": "https://www.notion.so/Home-Page-9b3dff11582b498aba9b571827ab3ca7",
"related to tasks (column)": [
"987a714b-0b7e-4b03-bdaf-c0efc5d522fb",
"539a4d0e-6871-434b-a5cb-619f5bd5a911"
],
"tags": [
"Important",
"Urgent"
],
"due date": "2022-02-14",
"name": [
"Home Page"
]
}
],
"pagination": {
"hasNext": false,
"nextPageConfig": {
"start_cursor": null,
"schema": null
}
}
}
```
## Source Code
The source code of Notion integration can be found in [our public repository](https://gitlab.com/fibery-community/notion-app) as well as other examples. Notion app is used in production and can be tried by following integrate link in your database editor.
# TIMELINE VIEW
_______________
On a Timeline, each Entity is represented as a row with start and end dates. Timeline View is handy to visualize roadmaps and plans.

## Add timeline view to a space
1. Put the mouse cursor on a Space and click `+` icon
2. Select Timeline from the menu
## Configure timeline view
1. Select one or more databases to be visualized as rows on Timeline View.
2. Select date fields. It can be a single Date Range field or two different fields that you will use as start/finish fields. In most cases Date Range is preferable.
> [//]: # (callout;icon-type=icon;icon=star;color=#fba32f)
> You can also resize lanes on the Timeline, to show all necessary information

If there is no Date field in a Database, you have to create it. \
Just click on the Dates selector and click \
`+ Create new Date Field`
You can also display one entity per lane. \
As a result, you can see full names and units of entities in this mode. This setting is handy for dense timelines.


## Configure visible fields for rows and items
You may select what [Fields](https://the.fibery.io/@public/User_Guide/Guide/Fields-15) will be visible on rows and lanes:
1. Click `Fields` in the top menu
2. Select the required fields. You can show unique fields for every database, just click on a database on the left and select the required fields.

## Add new entities
There are several ways to add new entities.
1. Click `+ New` button in the top menu and a new row will be added on top.
2. Hold Cmd (or Ctrl on Windows) key to create new cards.
[https://d1f4u7smwbtn85.cloudfront.net/the.fibery.io/c7f205d3-2afc-4410-bc0a-203ce32e0235?response-content-disposition=inline%3B+filename%3D%22add-timeline.gif%22&response-content-type=image%2Fgif&Expires=1742385234&Key-Pair-Id=KGJPFJ6T4AGSL&Signature=itHMoGcYoNfKf5TqtdTbXd1I2jsd3CVFTsjJSuDPzSt7qo-Pz%7EnHauYuvFfmbhQGhC0Q0EIJFSpU-eSwsdi4LFRUsRh5YEEuK8SxT1Go3cdq27R0Ij2JXwdWW%7EnBJDDReWvr%7E5zrc4aUf6IccX6kEnhW9ELaz-1lBcyTlDgOGXM9n73bZcoZxHaJWeNoTCWwNg4m%7EqmJHEOEb-NCh%7EtG7HSQ76OcuVQLm1nLrz7h7BbaPrmqKB7GXZLYQ5XATeCi6K8mNmZUmxV6jYJYngYlSWo40pYSjBtN4EZgOHxa2ujDahqJO7g8xiYBTOu-evakIsgF2D6PLots-ShxDGiYJg__#align=%3Aalignment%2Fblock-left&width=619.296875&height=299](https://d1f4u7smwbtn85.cloudfront.net/the.fibery.io/c7f205d3-2afc-4410-bc0a-203ce32e0235?response-content-disposition=inline%3B+filename%3D%22add-timeline.gif%22&response-content-type=image%2Fgif&Expires=1742385234&Key-Pair-Id=KGJPFJ6T4AGSL&Signature=itHMoGcYoNfKf5TqtdTbXd1I2jsd3CVFTsjJSuDPzSt7qo-Pz%7EnHauYuvFfmbhQGhC0Q0EIJFSpU-eSwsdi4LFRUsRh5YEEuK8SxT1Go3cdq27R0Ij2JXwdWW%7EnBJDDReWvr%7E5zrc4aUf6IccX6kEnhW9ELaz-1lBcyTlDgOGXM9n73bZcoZxHaJWeNoTCWwNg4m%7EqmJHEOEb-NCh%7EtG7HSQ76OcuVQLm1nLrz7h7BbaPrmqKB7GXZLYQ5XATeCi6K8mNmZUmxV6jYJYngYlSWo40pYSjBtN4EZgOHxa2ujDahqJO7g8xiYBTOu-evakIsgF2D6PLots-ShxDGiYJg__#align=%3Aalignment%2Fblock-left&width=619.296875&height=299)
## Open entities
Just click on a row and an entity will be opened on the right. Note that you can explore the entities easily by clicking them.
## Change entities dates
You may drag and drop rows to change entities' dates.
1. Drag the left or right side of the row if you want to change start/end date respectively.
2. Drag the whole row if you want to change both dates at the same time.

## Configure secondary dates
You can display secondary pair of dates on a Timeline View. The most popular use case is Planned vs. Actual dates. Click `Items` and then click `Add secondary dates` button. Select dates fields.
> [//]: # (callout;icon-type=icon;icon=exclamation-circle;color=#fba32f)
> Secondary dates only visible in "Display one Entity per lane" mode.

## Filter cards
You may filter rows.
1. Click `Filter` in the top menu
2. Select required fields and build filter conditions

You can choose whether an entity should be shown only if it matches all filters or if it matches any of the filters. It's not currently possible to use more complex logic in filters (e.g. if A and B or C).
> [//]: # (callout;icon-type=icon;icon=exclamation-circle;color=#6a849b)
> Each View has Global Filters and My Filters. Global Filters will be applied for **all** users, while My Filter is visible to you only.
You can also quickly find something on Timeline View, just use `Cmd + F` shortcut and type some keyword. This quick search works for Name, ID, numbers and other visible basic text fields.
You can also pin filters for easier accessibility.
## Sort rows and lanes
You may sort rows and lanes by fields.
1. Click `Sort` on the top menu.
2. Add one or more sorting rules.
## Group entities by lanes
You can group rows by [Fields](https://the.fibery.io/@public/User_Guide/Guide/Fields-15) (including [Relations](https://the.fibery.io/@public/User_Guide/Guide/Relations-17) ).
1. Click `Items` in the top menu.
2. Find `Lanes` option and select a required field.
3. Add one more group level in `Grouped By` option if you need it.
## Hide Lanes
You may hide some lanes.
1. Click `•••` near the Lane name
2. Click `Hide` action.

All hidden fields are added to the Filter section. If you need to make them visible again, click `Filter` and exclude hidden fields.
You can hide empty lanes with a single switcher. Click Filters, click on Lane databases and enable `Hide Empty Lanes` option.
## Color cards
You may color code rows to highlight some important things. For example, mark features that are in progress green.
1. Click on `Colors` in the top menu.
2. Set one or many color rules.

## Work with Backlog
Many entities may have empty dates, you can find them in the Backlog panel on the right.
1. Click on `Backlog` in top right menu.
2. Drag and drop an entity from backlog to the timeline.

> [//]: # (callout;icon-type=icon;icon=exclamation-circle;color=#d40915)
> Note: entities in Final states (for example, the ones that are Done) won't be shown in the Backlog
## 🆕 Manage Dependencies
You can manage [Dependencies](https://the.fibery.io/@public/User_Guide/Guide/Dependencies-392) on a Timeline View. Dependency is a self-relation. Click Enable Dependencies for some database and you will be able to see, create and delete dependencies on a Timeline.

> [//]: # (callout;icon-type=icon;icon=exclamation-circle;color=#fba32f)
> Limitations:
>
> * Dependencies work in **One Entity per lane** mode only.
> * When entities are far apart and you have to scroll the timeline, dependencies will not be visible between these entities. Use zoom to fit them into a screen.
> * It is not possible to drag and drop cards to change vertical position (yet).
### Creating and deleting dependencies
Put cursor over a card, find small circle and drag a arrow from this circle to another card to create a dependency.
Put cursor over an arrow and click â“ circle to delete a dependency.

When dates of cards overlap, relation is red to indicate overlapping.
### Card shifting strategies
On a timeline dependent cards can change dates automatically. There are three strategies to select from:
* Do not automatically shift dates
* Shit dates only when they are overlap
* Shift dates and keep time between entities
Try them and see how they work.

## Visualize Milestones
You can see milestones on a Timeline View as vertical lines.
1. Click `Milestones` option in the top menu:
2. Select a Database as Milestone
3. Select any Date field in this Database.

## Adjust the first day of the week
Every person sees a timeline according to their [Personal preferences](https://the.fibery.io/@public/User_Guide/Guide/Personal-preferences-288): the same timeline view might start on Monday for you and on Sunday for your colleague.
The personal preferences, in turn, are set based on your browser locale and can be adjusted if needed.
## Duplicate timeline view
You may duplicate the current timeline view into the same Space.
1. Click `•••` on the top right.
2. Click `Duplicate Timeline` option.
## Link to your timeline
You can copy an anchor link to this specific view so you can share it elsewhere. There are two ways to do it:
1. Click `•••` on the top right and click Copy Link
2. Click on timeline `Id` in top left corner and the link will be copied to your clipboard
# BATCH ACTIONS AND BATCH UPDATES
_________________________________
You can select cards on almost all views and do batch actions:
* Update fields
* Delete
* Convert
* Merge
* Invoke custom Action Buttons

> [//]: # (callout;icon-type=icon;icon=exclamation-circle;color=#d40915)
> Limitations:
>
> * Batch drag and drop is not implemented so far
> * We are not going to support multiple databases editing
Cards selection works on Table, Board, List, Calendar, Timeline and Feed views. Here are main patterns:
* Just start dragging from a non-card area and select many cards.
* Hold `Cmd` to add/remove cards in the selection.
* Hold `Shift` to add/remove cards in the selection.
* You may select/unselect all cards from the panel on the bottom
Here is an example of cards selection on board view:
On a List view selection also works, but it is not easy to aim into empty area.
On a timeline view you can select many cards as well.
# SHARE SPACE AS A TEMPLATE
___________________________
You may create a template from any Space and help other people quickly clone this template to create a new space in their own accounts. If you need to share the whole workspace, check [Share Workspace as a Template](https://the.fibery.io/@public/User_Guide/Guide/Share-Workspace-as-a-Template-57).
> [//]: # (callout;icon-type=emoji;icon=:unlock:;color=#9c2baf)
> Please note that Assignment, Comments and Files are not included into the template
## When do you need to share space as a template?
* 😈 selfish: when you want to move Space from one of your workspaces to another
* 🤠friendly: give your friends ready-to-go templates, don't make them struggle with Fibery alone
* 🧠consultancy: create Spaces for your customers and partners and show them some real magic
## How to share a space?
1. Click … near Space name and select `Share as a Template` option.
2. Decide whether you want to include all the data and click `Generate a shareable link` button.

It's up to you whether you want to share the data that is in the Space (= entities):
3. Copy a link and send it to anyone who needs to install this template or put this link anywhere you need to help people quickly install this template in Fibery.
> [//]: # (callout;icon-type=emoji;icon=:cry:;color=#FC551F)
> Comments, Files, and Images are not included in the shared template.
## How to install a new space from the template?
1. Click the generated link.
2. Login into Fibery.
3. Select Fibery workspace (or create a new one).
New Space will be created from a template in a selected workspace.
## How to stop sharing a space?
1. Click … near Space name and select `Shared as a Template` option.
2. Click `Stop sharing` button.
The template will be disabled and the old link will return the "The creator has stopped sharing this template, sorry." message.
## Updating the shared space template
If you improve your Space structure, add new cool Views, or somehow change it and want everyone to notice that — just Update your Template.
1. Click … near Space name and select `Shared as a Template` option.
2. Click `Update template` button.
## How to make a space template explorable by any user?
You can make templates browsable by any user via [Publish Space to Web](https://the.fibery.io/@public/User_Guide/Guide/Publish-Space-to-Web-36) feature and include them on any webpage via iFrame. [Here is an example of a shared template](https://apps.fibery.io/@public/Software_Development/Read.me-792?show-only-current-space-in-menu "https://apps.fibery.io/@public/Software_Development/Read.me-792?show-only-current-space-in-menu") that you can explore without installation.
1. Click … near Space name and click `Share`.
2. Enable `Share to web` option.
3. Click `Copy` icon. The URL is copied to your clipboard for pasting or sharing wherever you want.
> [//]: # (callout;icon-type=icon;icon=lightbulb-alt;color=#199ee3)
> You may have several shared templates in a workspace. How to focus the user's attention on a single one? Add `?show-only-current-space-in-menu` key to the template URL and a visitor will see only this template. Compare these two links:
>
> 1.
> 2.
## How to create human-friendly templates?
### Include Read.me document
A Read.me document inside a Space with an explanation of how to use it and how it can work would definitely help others get the value.

### Include some dummy data
No need to show others sensitive and private information, but empty Views can look depressing…\
Add some dummy data, if possible, and make everyone a bit happier 🌞
### Views and sidebar
Make sure that you have all important [Views](https://the.fibery.io/@public/User_Guide/Guide/Views-8) setup and organize the sidebar in a good way.

## FAQ
#### What if I need Assignments?
Assignments cannot be automatically migrated, because user IDs are different across workspaces. But you can also write a customer script using API:
* The script would connect to both workspaces via API tokens.
* It would match users manually (e.g., by email) and re‑assign tasks in the new workspace accordingly.
* This requires external execution — we can share guidance on the API, but the script itself would need to be implemented on your side.
# TEXT FUNCTIONS
________________
#### BINS
Returns the categorical ordered intervals
`BINS([Users Count], 10)`
#### DATENAME
Returns provided date part of date as a text
`DATENAME([Created On], 'year')`
#### FIRST
Returns first met value in a set
`FIRST([Name])`
#### LAST
Returns last met value in a set
`LAST([Name])`
#### LEFT
Returns first N symbols of text
`LEFT('Hulk', 2)`
#### LOWER
Converts text to lower case.
`LOWER('Hulk')`
#### REPLACE
Replaces text to be replaced in an income text expression with its replacement
`REPLACE([Name], 'Suit', 'Helmet')`
#### RIGHT
Returns last N symbols of text
`RIGHT('Hulk', 2)`
#### SPLIT
Splits values of text field using defined delimiter.
`SPLIT([Tags], ',')`
#### TEXT
Returns provided numerical or date as a text
`TEXT([Created On])`
#### TEXT_AGG
Combines all text values into one
`TEXT_AGG([Feature])`
#### UPPER
Converts text to upper case.
`UPPER('Hulk')`
# REST API
__________
The Fibery API provides a way to integrate Fibery with your external systems and automate routine tasks.
Here is the list of things you can do:
* Understand you workspace schema via [Schema API](https://the.fibery.io/@public/User_Guide/Guide/Schema-API-261) (use to understand what databases and fields you have).
* Customize Apps (Spaces) by creating, renaming and deleting Types (Databases) and Fields: [Type API](https://the.fibery.io/@public/User_Guide/Guide/Type-API-262) and [Field API](https://the.fibery.io/@public/User_Guide/Guide/Field-API-263).
* Read, create, update and delete Entities: [Entity API](https://the.fibery.io/@public/User_Guide/Guide/Entity-API-264).
* Work with [rich text Fields](https://the.fibery.io/@public/User_Guide/Guide/Entity-API-264/anchor=Select-rich-text-Field--f9838a54-3d74-4f49-9f5d-9195731c7e89).
* Upload, attach and download files: [File API](https://the.fibery.io/@public/User_Guide/Guide/File-API-265).
* Update other tools when something changes in Fibery using [Webhooks](https://the.fibery.io/@public/User_Guide/Guide/Webhooks-258).
* Automate routine actions with programmable action buttons and rules: [Scripts in Automations](https://the.fibery.io/@public/User_Guide/Guide/Scripts-in-Automations-54).
* Integrate your custom data into Fibery database using custom apps.
If something is missing, please describe your use case in [the community](https://community.fibery.io/ "https://community.fibery.io/") — we'll try our best to help.
> [//]: # (callout;icon-type=emoji;icon=:bulb:;color=#fba32f)
> Fibery also has [GraphQL API](https://the.fibery.io/@public/User_Guide/Guide/GraphQL-API-254), so you may check it.
> [//]: # (callout;icon-type=emoji;icon=:point_up:;color=#1fbed3)
> In the interface, Type = Database, App = Space. To find out why, check [Terminology](https://the.fibery.io/@public/User_Guide/Guide/Fibery-API-Overview-279/anchor=Terminology--15f750ec-571c-48f6-9b0b-6861222c1a27).
## Getting Started
Fibery API is based on commands. Both reading and editing data means sending a POST request with JSON payload to `https://YOUR_ACCOUNT.fibery.io/api/commands` endpoint.
The endpoint works with batches of commands. The request should contain an array of commands with their names and arguments. You'll get an array back too. Take a look at the example below in which we retrieve the basic info about a user.
While there are no official clients for any platform, there is an [unofficial API client for Node.js](https://gitlab.com/fibery-community/unofficial-js-client).
[https://gitlab.com/fibery-community/unofficial-js-client](https://gitlab.com/fibery-community/unofficial-js-client)
It mostly follows the API functionality, but makes it easier to create a domain Type, a relation or a single-select Field.
```
const Fibery = require('fibery-unofficial');
const fibery = new Fibery({host: "YOUR_ACCOUNT.fibery.io", token: YOUR_TOKEN});
const users = await fibery.entity.query({
"q/from": "fibery/user",
"q/select": ["fibery/id","user/name"],
"q/limit": 1
});
```
Here's the result:
```
[
{
"fibery/id": "7dcf4730-82d2-11e9-8a28-82a9c787ee9d",
"user/name": "Arthur Dent"
}
]
```
And here are cURL examples:
```
curl -X POST https://YOUR_ACCOUNT.fibery.io/api/commands \
-H 'Authorization: Token YOUR_TOKEN' \
-H 'Content-Type: application/json' \
-d '[
{
"command": "fibery.entity/query",
"args": {
"query": {
"q/from": "fibery/user",
"q/select": ["fibery/id", "user/name"],
"q/limit": 1
}
}
}
]'
```
Here's the result:
```
[
{
"success": true,
"result": [
{
"fibery/id": "7dcf4730-82d2-11e9-8a28-82a9c787ee9d",
"user/name": "Arthur Dent"
}
]
}
]
```
# 5 REPORTS FOR PRODUCT MANAGEMENT
__________________________________
This is a compilation of various examples from our own Fibery Workspace that you can use to manage the product management process in your team and share with the stakeholders.
What we will cover:
1. [Feature time in progress](https://the.fibery.io/@public/User_Guide/Guide/5-Reports-for-Product-Management-218/anchor=1.-Feature-Time-in-Progress-\(not-includi--c8063a1e-5dbf-44cd-8d42-67f6de243ea6 "https://the.fibery.io/@public/User_Guide/Guide/5-Reports-for-Product-Management-218/anchor=1.-Feature-Time-in-Progress-(not-includi--c8063a1e-5dbf-44cd-8d42-67f6de243ea6")
2. [Done features by product areas](https://the.fibery.io/@public/User_Guide/Guide/5-Reports-for-Product-Management-218/anchor=2.-Done-features-by-Product-Areas*--b5feb3b5-8d6d-4b19-b15a-95581991e9ab "https://the.fibery.io/@public/User_Guide/Guide/5-Reports-for-Product-Management-218/anchor=2.-Done-features-by-Product-Areas*--b5feb3b5-8d6d-4b19-b15a-95581991e9ab")
3. [Most requested features by product areas](Most requested Features by Areas "Most requested Features by Areas")
4. [The buggiest product area](https://the.fibery.io/@public/User_Guide/Guide/5-Reports-for-Product-Management-218/anchor=4.-The-buggiest-Product-Area--ae0c4720-aad3-4576-a024-3f1856c80200 "https://the.fibery.io/@public/User_Guide/Guide/5-Reports-for-Product-Management-218/anchor=4.-The-buggiest-Product-Area--ae0c4720-aad3-4576-a024-3f1856c80200")
5. [Total effort spent on bugs last 90 days](https://the.fibery.io/@public/User_Guide/Guide/5-Reports-for-Product-Management-218/anchor=5.-Total-effort-spent-on-Bugs-last-90-da--108cc9e6-2d04-4876-9e42-9a064df3ecd7 "https://the.fibery.io/@public/User_Guide/Guide/5-Reports-for-Product-Management-218/anchor=5.-Total-effort-spent-on-Bugs-last-90-da--108cc9e6-2d04-4876-9e42-9a064df3ecd7")
If you want to dive deeper, please go to complete [Reports User Guide](https://reports-help.fibery.io).
## 1. Feature time in progress (not including currently in progress)
[https://vizydrop-svc.fibery.io/svc/vizydrop/shared/drop/652d49222b625fd71a2177d4?authkey=a23dcb080de4b84c3b1d](https://vizydrop-svc.fibery.io/svc/vizydrop/shared/drop/652d49222b625fd71a2177d4?authkey=a23dcb080de4b84c3b1d)
Let's start with one of the Reports we use to identify the Features from Features Database that were in progress the longest. It can be helpful to quickly identify these Features and observe the overall duration trend. By doing so, we can reflect on what caused delays and aim for more efficiency in the future.
This Report doesn't include Features that are currently in progress, because it's not a finite state and it's tricky to compare it to the completed Features.
> [//]: # (callout;icon-type=emoji;icon=:sleuth_or_spy:;color=#8ec351)
> You can click on all embeds and explore the Reports in detail.
### Step-by-step setup
#### Step 1. Select the report source
This Report is based on historical data (you can check [how it's different](https://the.fibery.io/@public/User_Guide/Guide/Current-vs-historical-data-168) from Reports based on current data), so when creating a new Report, you need to select this `Data Source`. Specify the desired `Date Range` if you want to narrow down the period for analysis.

#### Step 2. Set values on the axes
* X-axis — drag & drop `Creation Date` from the list — as simple as that!
* Y-axis will require two more sophisticated values that you can add by clicking on the `+` icon on the axis:
1) 'State Duration'

```
SUM(DATEDIFF([Modification Date], IF([Modification Valid To] > NOW(), NOW(), [Modification Valid To]), 'day'))
```
2) 'Currently in Progress?' (to later exclude it with an additional filter)
```
IF([Modification Valid To] > NOW() and [State] == 'In Progress', 'Currently in progress', 'Not in progress')
```
#### Step 3. Final touches: set filters and labels
Let's exclude Features that currently are 'In Progress' and add the `Label` to see the names of these blue dots scattered all over the chart.

## 2. Done features by product areas\*
[https://vizydrop-svc.fibery.io/svc/vizydrop/shared/drop/652956a1c7c811545bcf5dec?authkey=d136312875ccad979713](https://vizydrop-svc.fibery.io/svc/vizydrop/shared/drop/652956a1c7c811545bcf5dec?authkey=d136312875ccad979713)
This is also one of the reports that we use in Fibery. It helps us understand if we were focused on some particular product areas, or if we were busy with Features from many product areas simultaneously.
It also gives an overview of completed Features over a year, quarter, or even month — depending on the grouping that you can change any time.
> [//]: # (callout;icon-type=icon;icon=asterisk;color=#6A849B)
> We have product areas as a general hub for collecting all relevant Features, Insights, Bugs, etc. However, not every development process in the world relies on the same structure. To get to know our process better, you can study the [Product Development Structure](https://the.fibery.io/@public/Fibery_Process/Product-development-structure-5916) guide.
### Step-by-step setup
#### Step 1. Select the report source and drop the values on the axes
This one is much easier, so let's choose `Current Data` as a `Data Source` and select the values to be viewed on the chart.
From the list of all values take `Count of Records` and `Planned Dates End` (select the desired `Grouping`).

#### Step 2. Change the chart type and add color-coding
To see all product areas, we'll need a `Stacked Bar Chart` and a color coding that would create all this product area variety.
#### Step 3. Set the filters and choose the grouping
We need to see only done Features, so we can filter out this state to be shown on the chart. Also, you can select a time range that you're most interested in (for example, it can be only 2023).

## 3. Most requested features by product areas
[https://vizydrop-svc.fibery.io/svc/vizydrop/shared/drop/65295bcd2b625fd2c32145ac?authkey=67ddd3e4e0d3ed135fb1](https://vizydrop-svc.fibery.io/svc/vizydrop/shared/drop/65295bcd2b625fd2c32145ac?authkey=67ddd3e4e0d3ed135fb1)
Although we use the 'Most Requested Product Areas,' it might be interesting to see such a report by Features as well if you're interested in a more detailed overview of what your users are asking for. This is where the importance of feedback collection truly shines.
By aggregating feedback from various sources, you can gain real insights, allowing you to identify whether users are interested in areas that your team probably hasn't focused on.
This information can lead to valuable revelations, such as the marketing team attracting a different user segment or the need to adjust your assumptions. In the long run, this can be really precious.
### Step-by-step setup
#### Step 1. Select the report source and drop the values on the axes
Let's choose `Current Data` as a `Data Source` and create a Table this time. The values are in the list, so just pick the `Features`, `Recent Requests`, and `Product Area` fields.
> [//]: # (callout;icon-type=emoji;icon=:raising_hand:;color=#199ee3)
> Note that `Recent Requests` is not an automatically created field, but a formula that looks like this:
>
> References.Filter(FromEntityType.Name = "Discourse/Topic" and ToDays(Today() - \[Creation Date\]) <= 180).Count() + References.Filter(FromEntityType.Name != "Discourse/Topic" and ToDays(Today() - \[Creation Date\]) <= 180).CountUnique(FromEntityId)

#### Step 2. Set the sorting
To have the numbers go from biggest to lowest, set the sorting to the `Recent References` value.

To have prettier bars, select `Cell Bar` in `Visual encoding` and set their color.
## 4. The buggiest product area
[https://vizydrop-svc.fibery.io/svc/vizydrop/shared/drop/652971f6c7c81124cfcf60b8?authkey=e50823f7550205b47898](https://vizydrop-svc.fibery.io/svc/vizydrop/shared/drop/652971f6c7c81124cfcf60b8?authkey=e50823f7550205b47898)
It's not only about Features. Bugs need to be taken care of as well.
Since all of them (mostly) are distributed between the Features and Features belong to Product Areas, we can make a Report to see the buggiest of them all (Bugs by Area), as well as analyze the tendency of bugs: when there were many of them and when their number reduced thanks to the team's efforts (Bugs by Area Over Time).
### Step-by-step setup
#### Step 1. Select the source and set up 'bugs by area' table
Choose Current Data Source, find Bugs Database, and create a new Table View.
Drag & drop `Product Area` and `Count of Records` to Table columns from the list of values, set the Sorting for `Count of Records` column.

#### Step 2. Add new chart view
Click on `Add View` → `Add Chart`
Select the `Chart Type` → `Stacked Area Chart`
Drag & drop `Creation Date` on X-axis and `Count of Records` on Y-axis. Add Color coding by dropping `Product Area` inside the `Color`.

#### Step 3. Set filters to the whole
All Filters are View-specific, but you can set the same ones to all Views to keep the Report consistent.

As a result, you have an overview of all bugs by Product Areas reported over this year.
## 5. Total effort spent on bugs last 90 days
[https://vizydrop-svc.fibery.io/svc/vizydrop/shared/drop/65297ccec7c811df58cf61a1?authkey=f27754c6b8fd2926edd6](https://vizydrop-svc.fibery.io/svc/vizydrop/shared/drop/65297ccec7c811df58cf61a1?authkey=f27754c6b8fd2926edd6)
The setup for this report is similar to setup for counting the number of days in a particular State. We recommend to check the guide on that before proceeding — [Cumulative Report: count number of days in specific State](https://the.fibery.io/@public/User_Guide/Guide/Cumulative-Report:-count-number-of-days-in-specific-State-106).
Let's take Bugs and see how much time was spent on them in total (to do that, we don't count `Icebox` and `Done` States). The same can be applied to Features or whatever part of the process you'd like to analyze — you'll be able to compare the time spent on implementing new functionality vs. troubleshooting.
### Step-by-step setup
#### Step 1. Select the report source and drop the values on the axes
And we're back to the Historical Data and you should already know what to do if you're still here.
Use `Name`, `Duration`, and `State` as columns. Drop `Name` to the `Grouping` field to collect Bugs in different states together.
#### Step 2. Add filters
This is the part where we'll filter out unnecessary states and leave only the ones we're interested in: `Ready for Dev`, `In Progress`, `In Testing`

#### Step 3. Remove redundant fields
Click on the `Finish` button, navigate to the `…` button and select `Remove Redundant Fields` in the drop-down menu to make sure the changes are calculated only within the `State` fields and that report takes less time to update.
> [//]: # (callout;icon-type=emoji;icon=:09e7f6e9-798b-4905-99b1-a13d73f46c69:;color=#8ec351)
> If anything from this guide is unclear or you have ideas of a report and need help with — please contact us in support chat!
# TRELLO INTEGRATION
____________________
## How to setup Trello sync
1. Navigate to `Templates` and find `Trello` template
2. Click `Sync`.
3. Authorize the Trello app.
4. Choose what boards you want to sync from Trello. Specify starting date for the sync, by default, it is a month ago, but you may want to fetch all the data.
5. Click `Sync now` and wait. Trello Space will appear in the sidebar and all the data should be synced eventually.
## How the setup looks
Fibery creates a new Database for every Board you're importing.
For example, if you select 3 boards in Trello, 3 boards will be created in Fibery Trello Space and 3 Databases will be created under the hood as well. You can rename Databases as you wish after the import and augment cards with additional fields.
After everything you want was imported, simply turn off the sync, to make all the cards editable again.
> [//]: # (callout;icon-type=icon;icon=exclamation-circle;color=#d40915)
> 🚨 Trello integration is a read-only integration.
As it's a one-way sync, keeping it read-only is the only way to keep consistency.
> [//]: # (callout;icon-type=icon;icon=exclamation-circle;color=#fba32f)
> 💪 To make everything active, please disable the integration. All the data migrated will stay, but no new data will be synced.

## What are the limitations?
The following can't be synced at the momemnt:
* Labels
* Visual cover
* User-related fields
* Owners
* Comments
* Randomized colors for types
# GENERATE ENTITY NAME WITH FORMULA
___________________________________
Sometimes you don't want to set the entity Name manually but would rather assemble it from the values in several other fields. For example, for an Interview, you want to have a Name that consists of the Contact Name and Interview Date.
There is a special action for an entity `Generate Name using Formula`.
1. Click `•••` in entity view and find `Generate Name using Formula` action.
2. Create a formula you need and Save it.
> [//]: # (callout;icon-type=emoji;icon=:rotating_light:;color=#FC551F)
> When you create a formula for Name, it will update all entities of this Database, so be careful. You can convert the auto-generated Name field back to a usual Text field if you want - but it will not bring back previous values.
Please, check [Formulas Reference](https://the.fibery.io/@public/User_Guide/Guide/Formulas-Reference-44) for more details
## Examples
### Sales invoice
```
[Account Name] +
" " +
ToText(Date) +
" (" +
Currency.Name +
" " +
ToText(Total) +
")"
```
Result: Apple 2024-08-17 (USD 22.0)
### Make active Sprints more visible with emojis in the name
We'd like to add a flag/emoji of sorts for current sprints so everyone in the product team is aware of which sprint we're currently in.
```
If(([Sprint #] < 10) and (Status = "Current"),"🟢" + "ðŸƒâ€â™€ï¸" + "Sprint" + " - " + "S","ðŸƒâ€â™€ï¸" + "Sprint" + " - " + "S") + ToText([Sprint #])
```
### Create Entity when Name is a formula
When creating a new entity, you will see all the fields that are involved in the formula calculation. This allows you to set them immediately and have a proper entity name from the start. This functionality works in all views and in search.
# CONVERT ENTITY FROM ONE DATABASE TO ANOTHER
_____________________________________________
You can convert entities from one database to another. For example, you can convert a Feature entity into a Bug. This feature is useful when a Feature needs to be reclassified as a Bug without losing any data.
> [//]: # (callout;icon-type=icon;icon=exclamation-circle;color=#d40915)
> Note: When you convert entity to another database, the original entity is deleted right away.
## How to convert?
1. To access the Convert action, navigate to the Entity View of the Feature you want to convert, click on the … and select `Convert To...` action.
2. In the popover that appears, you will see a list of Databases. Use the filter to quickly search and select the desired Database for conversion.

## Availability of the Convert Action:
The Convert action is available in the following locations:
* Entity View: Clicking the "Convert To..." action button redirects to the new Entity View of the converted entity.
* Table View (Batch action): A "Convert" action is be available in Actions button when you select at least one entity.
* Context menu (right click) on any entity card (any view or left menu).
## How convert works?
* The original entity will be deleted.
* You will be redirected to the Entity View of the newly created entity.
# SHARE SPACE
_____________
> [//]: # (callout;icon-type=icon;icon=exclamation-circle;color=#1fbed3)
> Check out [Sharing & Permissions](https://the.fibery.io/@public/User_Guide/Guide/Sharing-&-Permissions-46) for the access management overview
By default, new Spaces are visible to Admins only. `Admins` are always Creators in all Spaces: otherwise, it's hard to create a truly connected Workspace.

## Share a Space to make it visible to others
1. Click on Space name.
2. Click the Share button in the top left corner.
3. Add users (or groups) and set the permission level.

## Space access levels
> [//]: # (callout;icon-type=icon;icon=exclamation-circle;color=#FC551F)
> **Everyone** who has access to a Space can see all the Views and Entities. \
> Access levels only limit users' abilities to edit and configure things.
Depending on the level, the user's powers vary:
* **Creators** can
* configure Databases and Views.
* manage Space permissions.
* share Space as a template.
* create and edit any Entities.
* **Editors** can
* view, create, and edit any Entity, but not configure the Space
* Space configuration includes creating new Views, changing them, adding new fields, relations, etc. That part is not accessible with Editor permissions
* create and edit Documents and Whiteboards,
* create per-Entity context views.
* **Contributors** can
* view, comment on, and create any Entity,
* edit only Entities assigned to them (or created by them).
* **Viewers** can
* view and comment on but not edit any Entity.
## FAQ
### Why is user 'X' not showing up in the list?
If a user has the `Admin` role, they automatically are creators in every space, so there is no point in trying to grant them a specific access level.
# SELF-RELATIONS
________________
A self-relation is simply a relation that has been configured to link a Database to itself.
It behaves just like other [Relations](https://the.fibery.io/@public/User_Guide/Guide/Relations-17), in that
* it is [created](https://the.fibery.io/@public/User_Guide/Guide/Relations-17/anchor=How-to-add-a-Relation--ecf98902-d046-4409-8d9c-b182f6902164) using `+ New field` or via the `Relations` menu on the database configuration page
* the relation will show up as two fields (one for each end)
* you can choose the [cardinality](https://the.fibery.io/@public/User_Guide/Guide/Relations-17/anchor=Relation-cardinality--bf3b8c12-2c9d-433b-ba06-995b6efb4547) (one-to-one, one-to-many, many-to-many)
* you can use [filters](https://the.fibery.io/@public/User_Guide/Guide/Relation-Filters-and-Sorts-177) (for the to-one field)
* you can use [auto-linking](https://the.fibery.io/@public/User_Guide/Guide/Set-Relations-Automatically-\(Auto-Linking\)-50)
## Typical use cases
### Tasks with subtasks, which have subtasks, …
There can be a temptation to create a database of Tasks, and then another database for Subtasks, and link the two databases.
However, if you want to create a hierarchy of Tasks, so that a Task can have sub-tasks (which themselves can have sub-sub-tasks, and so on) then self-relations are the way to go.
After you create a one-to-many self-relation in the Task database, each Task will get a collection of linked Tasks (representing the sub-tasks), and will also get a simple Task field (representing the 'parent' Task).
> [//]: # (callout;icon-type=icon;icon=exclamation-circle;color=#6A849B)
> By default, these fields will be named Tasks and Task respectively, but you may want to rename them as SubTasks and Parent Task.
A self-relation like this allows for multi-level nesting, which can be enabled on Table view and Board view by choosing the `Group by … Parent Task (recursive)` option.

### Blockers
If you have a Deliverables database, and each Deliverable may be dependent on the completion of certain other Deliverables, you might want to make a many-to-many self-relation where the two collection fields represent the other Deliverables that are 'blockers' and 'being blocked' for any given Deliverable.

### Daisy-chaining
If your Sprints run one after each other, you might want to use a one-to-one self-relation to achieve 'daisy chaining'. Each Sprint will then have two fields: one links to the previous Sprint, the other to the next Sprint.

You might even consider using [auto-linking](https://the.fibery.io/@public/User_Guide/Guide/Set-Relations-Automatically-\(Auto-Linking\)-50) so that you don't need to manually connect them, but instead let Fibery do the work. For example, if you have a date range field, you can do matching of the end date to the start date.
> [//]: # (callout;icon-type=icon;icon=exclamation-circle;color=#6A849B)
> Check out [how date range formulas work](https://the.fibery.io/@public/User_Guide/Guide/Date-Ranges-in-Formulas-42) for why this works, when the end date of one sprint is actually a day before the start of the next one.
### Wikis
Guess what? The user guide that you are reading now is made using entities that are self-related (one-to-many). This makes it possible to create a nesting hierarchy of topics - you'll notice a list of Sub-guides at the bottom of each Guide.
Also, within the the User Guide space, there are a number of [Smart Folders](https://the.fibery.io/@public/User_Guide/Guide/Smart-Folders-26) in the left menu.

Each smart folder is set up with 'self-relations' enabled …

… and has a filter for the Section and Published status.

## Using self-relations in formulas
Having self-relations means that it is possible to have recursive formulas, i.e. formulas that refer to themselves (via self-related entity/entities).
For example, you could create a 'breadcrumb' formula on a Task that shows the names of all the Tasks that are higher up in the hierarchy.
The `Breadcrumb` formula would look like this:
`If(IsEmpty([Parent Task]), Name, [Parent Task].Breadcrumb + " > " + Name)`

However, it is not possible to create a recursive formula in one go. That's because in order for the formula to refer to itself, it needs to already exist 🤪
To create a recursive formula, first create a formula field with the correct name, containing a 'dummy' formula that gives the correct data type. Then after it has been saved once, you can edit the formula field to make use of recursion.
In the above example, you would create a formula field called `Breadcrumb`, where the formula is something simple like `"xxx"` which ensures that Fibery recognises it as a text field. After saving it, you can go back and update this field to the correct formula (above).
Another use of self-recursive formulas might be to count the total number of subtasks, sub-subtasks, etc.
`SubTasks.Count() + SubTasks.Sum([Count of subtasks])`

# FIBERY FOR STARTUPS: GETTING STARTED
______________________________________
## How to start:
> [//]: # (callout;icon-type=icon;icon=exclamation-circle;color=#199EE3)
> Starting simple is the key. Don't try to build your entire company OS in one day - pick just one process to begin with. You can grow from there.
#### 1. Choose one process to start from
Trying to set up everything at once (Product, CRM, Fundraising, Team Ops, etc.) usually leads to chaos. Instead, pick the most important and well-understood area right now - for example:
* Product Management
* Software Development
* CRM & Sales
* Fundraising
* …smth else?
Focus on setting up just one or two processes to start. You'll always be able to add more later - and everything will eventually live in one place.
#### 2. Explore templates
We provide ready-to-use templates for common startup workflows like Product Management, Roadmap, and CRM.
* Use them as a starting point, and don't stress about choosing the “perfect†one - everything is customizable later.
* If a template feels off, just delete it. A clean workspace is easier to build on than a cluttered one.
> [//]: # (callout;icon-type=icon;icon=exclamation-circle;color=#d40915)
> Tip: Keep it simple at the start.
>
> If your team previously worked with just Tasks, don't try to migrate into a complex structure with Epics, Features, Deliverables, Tasks, and Subtasks all at once. That can be overwhelming.
>
> Start with a basic setup your team is already familiar with. Let everyone adapt to the new tool first, then gradually introduce more structure and processes as needed.
#### 3. Invite your team
Collaboration is where Fibery really shines.
* Head to `Users` database → `Invite` to add your co-founders and team.
* Set permissions as needed, and start working together in real-time.
## Leverage the AI Builder
> [//]: # (callout;icon-type=icon;icon=rocket;color=#199EE3)
> Once you've picked a process to start with - like Product Management or CRM - the AI Builder can help you build faster. You don't need to know formulas, database modelling, or scripting - just describe what you want, and the AI will guide you step by step.
>
> [Here you can find detailed explanation](https://the.fibery.io/@public/User_Guide/Guide/Smart-Agent-\(new\)-333/anchor=Build-Mode-What-it-can-do--67d98cb4-150b-48b4-b1b9-3976973943ea) what the Smart agent AI builder is capable of.
#### 👷 Start in Build Mode
Open the AI Builder in `Build Mode`, and ask questions like:
* *What can you do?*
* *What use cases do you support?*
* *Based on my current setup, what should I improve or automate next?*
* *How can I connect this process with another one (e.g., CRM with Product)?*
This is especially useful when you're not sure what's possible or how to scale your workspace as your team grows.
Here is quick overview of what is can do:
* Build or adjust your workspace structure (databases, fields, relations).
* ex: *create me structure for Fundraising process. I want to track VC's and our interactions with them.* \
As a result, it will create you a proper structure, with all required databases and relations
* ex. *I don't like our current Fundraising Space. It's missing the option to see Offers pipeline.*\
As a result, it will extend the structure of the existing Space
* the more precise and concrete you are, the better the result is
* Import, update, or transform data - even in bulk.
* Create views (tables, boards) to make sense of your data.
> [//]: # (callout;icon-type=icon;icon=brain;color=#199EE3)
> #### Pro Tip: Let AI suggest the next step
>
> After setting up your first process, ask the AI:
>
> * *What related processes should I add next?*
> * *How can I automate parts of this workflow?*
> * *What do other startups usually do after setting up X?*
>
> This helps you grow your workspace intentionally, without overwhelming yourself or your team.
#### What the AI can't do (yet)
* Create automations
* Manage permissions and user roles.
* Generate Views except Tables or Boards.
* Interpret files (e.g., PDFs, CSV uploads) directly - for now, data must be in the workspace.
* Set up native integrations without APIs (e.g. direct Slack setup still needs manual config).
## Import your data
If you're migrating from another tool, you can bring your existing data into Fibery in a few ways:
* [Use one of our connectors](https://fibery.io/features/integrations) (e.g., Trello, Notion, ClickUp) to sync data directly.
* Or go with a simple [CSV import](https://the.fibery.io/@public/User_Guide/Guide/Import-from-CSV-67) if your tool supports export.
> [//]: # (callout;icon-type=icon;icon=lightbulb;color=#fba32f)
> Tip: Don't just copy-paste your old structure. Fibery works best when your data is 'normalized'. For example, if you had one spreadsheet mixing companies, features, and stories - break it down into separate databases (e.g., Companies → Products → Features → Stories). This makes your workspace cleaner and more powerful in the long run.
## Get help & support
* In-App help: Use the `Help & Support` button in Fibery to access guides and FAQs. There you are welcome to use AI - ask the question you are interested in, and get some help fast (but be aware, it may [confabulate](https://en.wikipedia.org/wiki/Hallucination_\(artificial_intelligence\))!)
* Chat support: Reach out to the support team via in-app chat for quick responses. No AI. Only humans 🤘
* Fibery Community: Join the [Fibery Community](https://community.fibery.io) to ask questions, share ideas, and learn from other startups
## Useful resources
* [Fibery User Guide](https://the.fibery.io/@public/User_Guide/Fibery-User-Guide-Start-6568)
* [Video Tutorials](https://www.youtube.com/c/Fibery)
* [API & Integrations](https://the.fibery.io/@public/User_Guide/Guide/GraphQL-API-254)
* [Product Updates Blog](https://fibery.io/blog)
> [//]: # (callout;icon-type=icon;icon=heart;color=#e72065)
> Fibery is built for creators and changemakers. As your startup grows, Fibery grows with you. If you get stuck or want to brainstorm ideas, don't hesitate to reach out!
>
> Happy building 🚀
# 🣠ONBOARDING
_______________
In the third part of the guide for HR Workspace Template, we'll explain how to set the onboarding process.
If you prefer video, check this 14-min detailed step-by-step explanation:
[https://youtu.be/XvAhmBS0gh8?si=6UHiT99YT46b9omS](https://youtu.be/XvAhmBS0gh8?si=6UHiT99YT46b9omS)
If you prefer text, explore the **Boarding Space** with this guide. While doing it, you'll also be able to test whether the template works for you, and make necessary changes if needed.
We'll see how to make onboarding a repetitive and easy-to-handle process with a 30-60-90 framework.
## What is the 30-60-90 framework?
A 30-60-90 day plan acts as a roadmap, guiding new employees through their first three months on the job. This plan outlines and tracks key steps, including familiarizing with the employee handbook, undergoing necessary training, and gaining a strong grasp of roles, responsibilities, performance goals, and KPIs. Additionally, it initiates conversations about personal goals and career advancement.
By providing new hires with a clear framework, you swiftly grasp the organization's bigger picture and its role within it. The ultimate aim is to create a welcoming environment, enabling new team members to prioritize tasks and quickly become productive contributors.
## Step 1. Make a plan aka template
You hire different people for different positions, and your expectations and goals are different. However, most likely there are some common tasks that every new employee has to do. For example, read policies, meet (or e-meet) teammates, get access to ~~Fibery~~ company tools, etc.
We suggest planning repetitive tasks over a specific time period, such as tasks to be completed in 30 days, 60 days, and 90 days. Each new employee will have a set of pre-defined tasks as well as new unique tasks, which are likely added by their manager over time.
In the Board called Boarding Tasks Templates you can define needed templated tasks:

## Step 2. Track progress across all new employees
Every New Employees is an Employee that hasn't finished the onboarding process yet. And they all can be found in the "Employees in the Onboarding Process" View.

When a new Employee appears, you will see him in this Table automatically. You just have to click the Button `Generate onboarding tasks.`
This Button will apply the template from step one, and under Employee you will see a list of Tasks to accomplish. Haven't used Buttons before? Check this guide — [Buttons](https://the.fibery.io/@public/User_Guide/Guide/Buttons-52)
On this Grid, you will see only Tasks that haven't been done yet. This helps to understand which Tasks your Employees are on.

Board also works great for that purpose. There it's even easier to add new unique Tasks. Here is a Board "Tasks by State and Employee":

> [//]: # (callout;icon-type=emoji;icon=:straight_ruler:;color=#e72065)
> Formulas and calculations.
>
> We added two Formulas that are shown as read-only Fields (like any other Formula).
>
> * The first one is called "Onboarding progress", and you can find it on the Employee Card. This Formula calculates how many Tasks (percentage) are finished already. It's calculated across all three months.
> * The second one is called "Phase end date", and you can find in the Boarding Task Database. This Formulas calculates the planned deadline for the Task based on the Task creation date and phase duration.
>
> For example, my first working day was on October 1st. My task for "30 days" is "Get access to all the tools". The deadline for this Task, or "Phase end date", is November 1st.
## Step 3. Help new employee focus on onboarding tasks
You can create different Views for managers and for employees.
We created Board "My Tasks" and applied `is Me` Filter option. This means that every teammate who accesses this board will only see their own tasks.
For quick access, we recommend adding such Views to the [Personal (with Favorites)](https://the.fibery.io/@public/User_Guide/Guide/Personal-(with-Favorites)-390) section in the [Sidebar](https://the.fibery.io/@public/User_Guide/Guide/Sidebar-21) by clicking on a star.

And of course, you can see everything on the Employee Card, new Tasks including.

Once all Tasks are completed, the Formula will set Onboarding progress to 100%, and this Employee will automatically be removed from all Onboarding Views ✨
# SALARIES ACCESS
_________________
In this guide, we'll walk through how to set up a simple but powerful access model - one that reflects real-world organizational needs.
Let's say you have two databases: `Employee` and `Salary`. Each employee has a salary, and employees can also *`report to`* other employees - creating a clear reporting structure.
### ✅ Use Cases this covers:
* An employee can view their own salary, but not others'.
* A manager can view their own salary *and* the salaries of their direct (or indirect) reports.
* HR or admin roles can still have full access as needed.
By combining relations with Fibery's granular permissions, you can mirror your team's structure while keeping sensitive data like salaries properly scoped.
Let's dive into how to set this up!

### Databases setup:
If not yet, set self-relation on the Employee database level, and let's call two fields that appeared: `Reports to `and `Subordinates`


Employee may also have multiple Salaries.
> [//]: # (callout;icon-type=icon;icon=moneybag;color=#4faf54)
> An Employee has a one-to-many relation with Salaries to account for changes over time. This allows you to track salary history - for example, when someone gets a raise or promotion. Instead of overwriting the old value, each new salary is stored as a separate record, linked to the same employee. This way, you can maintain a full audit trail and analyze compensation changes over time.
>
> 
### Creating Access template
Here you can read what are access templates - [Custom Access Templates](https://the.fibery.io/@public/User_Guide/Guide/Custom-Access-Templates-240)
> [//]: # (callout;icon-type=icon;icon=exclamation-circle;color=#d40915)
> Please, note, that this functionality works on Pro and Enterprise plans only.
Here is how our template looks like:

### How it works – level by level
1. Root: `Employee` (Self)
* The user has access to their own Employee record.
2. Level 1: `Subordinates`
* The user can see all employees that report directly to them.
3. Level 2: `Salaries` of Subordinates
* For each subordinate, the user can access their salary records.
4. Level 3: `Subordinates of Subordinates`
* The tree continues: managers can see not only direct reports, but their subordinates' subordinates as well.
5. Level 4: `Salaries` of Subordinates of Subordinates
* Managers can also see salaries down the entire reporting chain — not just immediate employees.
6. Bottom Level: `Salaries` (Self)
* The user has access to their own salary records.

### Permissions indicators
Each level shows different types of access:
* ðŸ‘ï¸ View: Enabled
* 💬 Comment: Enabled
* âœï¸ Edit / ðŸ—‘ï¸ Delete / 🌠Public access: Disabled

This means users:
* Can view and comment on salary and employee records they're permitted to access
* Cannot edit or delete them
* Cannot share them publicly
> [//]: # (callout;icon-type=icon;icon=heart;color=#e72065)
> You are very welcome to configure access for every database on your own
### Apply the template
Now we can use the template. Template can be applied not to the Employee, but to Fibery User.
> [//]: # (callout;icon-type=icon;icon=key-skeleton;color=#1fbed3)
> While the access model is built around the Employee database, permissions are granted to actual Fibery Users - the people using the tool. This is important because not every Employee record needs to represent an active user (e.g., past employees, placeholders, or external roles). By applying the template to Fibery Users, you ensure that each person only sees data related to *themselves and their reporting tree*. Behind the scenes, this works by linking each Fibery User to the corresponding Employee record - and from there, permissions flow naturally through the hierarchy.
We will use People field for this purpose. You will need to create a People field on the Employee database (don't allow multiple people), turn on `Automatically share Employees switcher` and choose the Template from the dropdown.

> [//]: # (callout;icon-type=icon;icon=exclamation-circle;color=#199EE3)
> To connect Employees with Fibery users automatically, you can use [Auto-linking (Set Relations Automatically)](https://the.fibery.io/@public/User_Guide/Guide/Auto-linking-(Set-Relations-Automatically)-50) and connect entities based on Email address.
### What this configuration enables
* Employees: See and comment on their own profile and salary.
* Managers: See their subordinates' profiles and salary history — even for multi-level team structures.
* Hierarchy-aware access: Visibility scales automatically as the org chart grows deeper.
## What's next: ideas & extensions
This kind of hierarchical permission setup isn't just for salaries - it opens the door to all kinds of smart access control in your workspace. Here are a few ways you can build on this model:
* Performance Reviews
Managers can access their team's reviews, provide feedback, and track growth - while keeping reviews private from peers or other departments.
* Goals & KPIs
Let employees track their own objectives, and enable managers to see aggregated progress for their teams - across nested reporting chains.
* Expense reports
Give employees visibility into their own submissions, while allowing team leads to review and comment on their team's expense activity.
###
# SHARE ENTITY
______________
> [//]: # (callout;icon-type=emoji;icon=:jigsaw:;color=#1fbed3)
> Check out [Sharing & Permissions](https://the.fibery.io/@public/User_Guide/Guide/Sharing-&-Permissions-46) for the access management overview
## Sharing an Entity

To share an Entity (e.g. a Task or a Feature) with someone:
1. Open the Entity
2. Click `Share` in the top right corner
3. Type the names of Users and Groups
4. Select the appropriate access level
5. Click `Invite`
Here is how it works for the person on the receiving end:
| | | |
| --- | --- | --- |
| **Perk** | **Shared directly** | **Shared via Group** |
| Gets a notification that an Entity has been shared with them | ✅ | ➖ |
| Can see the Entity in the `Shared with Me` section of the sidebar | ✅ | ➖ |
| Automatically sees the Entity's parent Space in the sidebar | âž– | âž– |
## Sharing with everyone
Some Entities bear no secrets, so everyone should be able to see them. To share an Entity with everyone in your workspace, select the corresponding option in the dropdown:

> [//]: # (callout;icon-type=emoji;icon=:point_up:;color=#1fbed3)
> Everyone doesn't include [Guests](https://the.fibery.io/@public/User_Guide/Guide/User-Management-45/anchor=User-roles--6a87ff6a-9d36-4c93-bf2c-697a77ae1da6).
## Sharing with a Group
If you find yourself repeatedly sharing Entities with the same bunch of Users, consider using Groups to save time and simplify maintenance:
1. If you haven't created your first [User Groups](https://the.fibery.io/@public/User_Guide/Guide/User-Groups-47) yet, do it first by following the [guide](https://the.fibery.io/@public/User_Guide/Guide/User-Groups-47).
2. Navigate to an Entity you'd like to share
3. Click `Share` in the top right corner
4. Pick your Groups
5. Select the appropriate access level
6. Click `Invite`

> [//]: # (callout;icon-type=emoji;icon=:magic_wand:;color=#1fbed3)
> You can also [Automatically Share Entities with linked Groups](https://the.fibery.io/@public/User_Guide/Guide/Automatically-Share-Entities-with-linked-Groups-395)
> [//]: # (callout;icon-type=emoji;icon=:unicorn_face:;color=#673db6)
> User Groups are available on Pro and Enterprise [plans](https://fibery.io/pricing).
## Sharing with an external collaborator (guest)
If you'd like to share an Entity with someone who's not supposed to be a member of your workspace (e.g. a client or a contractor), type their email to invite them as a Guest:

They will receive an email that takes them to the shared Entity:

You can assign and @mention Guests, but their access to the workspace is limited. Learn more in [User Management](https://the.fibery.io/@public/User_Guide/Guide/User-Management-45).
> [//]: # (callout;icon-type=emoji;icon=:unicorn_face:;color=#9c2baf)
> Workspaces on Pro and Enterprise plans can [extend access](https://the.fibery.io/@public/User_Guide/Guide/Share-Entity-233/anchor=Extending-access--3479ab1d-1d4f-44e0-94fd-2b3694537af9) and apply [custom access templates](https://the.fibery.io/@public/User_Guide/Guide/Share-Entity-233/anchor=Custom-access-templates--722a4df2-5298-476e-9d8d-aee0340368da) to share entire hierarchies with Guests.
## Default access levels
Here is what users are able to do depending on their access level:
| | | | | | | |
| --- | --- | --- | --- | --- | --- | --- |
| | **View** | **Comment** | **Update** | **Delete** | **Share externally** | **Remove others' access** |
| **Viewer** | ✅ | | | | | |
| **Commenter** | ✅ | ✅ | | | | |
| **Editor** | ✅ | ✅ | ✅ | ✅ | | |
| **Owner** | ✅ | ✅ | ✅ | ✅ | ✅ | ✅ |
**Anyone** can share an Entity with another user using their or lower access level. For example, a Commenter might grant `Commenter` or `Viewer` but not `Editor` access to someone else.
A few notes:
* Observers can only receive `Viewer` or `Commenter` access.
* One cannot share an Entity with oneself.
* Someone who's given access to an Entity can revoke this access even without being an `Owner` as long as they still have permissions to grant the same access.
## Extending access

Share Entities linked together with the main one by extending access:
* Project → its Tasks and Allocations
* Feature → its Stories, Bugs, and Dev Tasks
* Client → its Contacts and Opportunities.
The default access is extended via all one-to-many [Relations](https://the.fibery.io/@public/User_Guide/Guide/Relations-17) one level deep. If you'd like to specify how exactly the access should be extended, create [Custom Access Templates](https://the.fibery.io/@public/User_Guide/Guide/Custom-Access-Templates-240).
Access extension doesn't affect the user's ability to create new Entities (e.g. Tasks, Stories, Contacts).
## Custom access templates

If when extending access you'd like to
* include relations outside one-to-many (e.g. many-to-many),
* exclude certain one-to-many relations (e.g. extend Feature access to Stories but not Bugs),
* extend access multiple levels down (e.g. Product → Features → Stories),
* specify a different access level for child Entities (e.g. view Features but edit Stories),
create [Custom Access Templates](https://the.fibery.io/@public/User_Guide/Guide/Custom-Access-Templates-240).
## Automatic sharing with assigned People and Groups

If you find yourself repeatedly providing access to someone who is already assigned to an Entity, check out
* [Automatically Share Entities via People Field](https://the.fibery.io/@public/User_Guide/Guide/Automatically-Share-Entities-via-People-Field-327)
* [Automatically Share Entities with linked Groups](https://the.fibery.io/@public/User_Guide/Guide/Automatically-Share-Entities-with-linked-Groups-395)
## Sharing via public link
If you'd like to share something with a person outside your Fibery workspace, we recommend to [Public sharing of Documents and Entities](https://the.fibery.io/@public/User_Guide/Guide/Public-sharing-of-Documents-and-Entities-37). The access via a public link is read-only.
## Access audit

There are numerous ways how someone might receive access to a Feature, Task, or Client: via a Space, this particular Entity, or a related Entity using a custom access template. Also, via a Group or using the automatic access for assignees.
All of these sources combine and merge, making it hard to tell the final access for a given person. Does everyone who should have access has it? Is there someone who shouldn't have permissions but does?
Open the sharing popup and click on `Shared with … users` to drill down to individual users and capabilities:

Expand a particular user to see where a certain capability has come from.
## Space → Entity access levels
Users who receive access via [Share Space](https://the.fibery.io/@public/User_Guide/Guide/Share-Space-232) automatically get access to all the Space's Entities. Here is how Space-level access corresponds to Entity-level's:
| | | | | | | |
| --- | --- | --- | --- | --- | --- | --- |
| | **View** | **Comment** | **Update** | **Delete** | **Remove others' access** | **Share externally** |
| **Viewer** | ✅ | ✅ | | | | |
| **Contributor** | ✅ | ✅ | when author or assignee |
| **Editor** | ✅ | ✅ | ✅ | ✅ | ✅ | ✅ |
| **Creator** | ✅ | ✅ | ✅ | ✅ | ✅ | ✅ |
Check out [Sharing & Permissions](https://the.fibery.io/@public/User_Guide/Guide/Sharing-&-Permissions-46) for an overview of how Space and Entity permissions work together.
# INTEGRATION FILTERS
_____________________
In Fibery, you can configure a set of Filters for integration with other applications. This is useful when you want to reduce the amount of data for synchronization, for example:
* Data created or modified after the certain date.
* Data from certain repositories, channels, groups.
* Deleted or archived data.
* Etc.

Filter configuration includes following common Fields across different Filter types:
| | | | |
| --- | --- | --- | --- |
| **Name** | **Type** | **Description** | **Required** |
| `id` | `text` | Unique identifier | |
| `title` | `text` | Display name | |
| `optional` | `boolean` | Indicates that user may leave Filter unset | |
| `type` | `text` | Filter type (a list of supported Filter types and their customizations can be found below) | |
| `secured` | `boolean` | Secured Filter values are not available for change by non-owner | |
| `defaultValue` | `unknown` | Filter default value | |
### Filter configuration sample
```
[
{
"id": "channels",
"title": "Channels",
"datalist": true,
"optional": false,
"secured": true,
"type": "multidropdown"
},
{
"id": "oldest",
"title": "Oldest Message",
"optional": false,
"type": "datebox",
"datalist": false
},
{
"id": "excludeAppMessages",
"title": "Filter out APP messages",
"optional": true,
"type": "bool",
"defaultValue": false
}
]
```
## Text Filter
Simple text Filter available with `type="text"` :

### Configuration sample
```
{
"id": "text",
"title": "Text",
"type": "text"
}
```
## Number Filter
Simple number Filter available with `type="number"` :

### Configuration sample
```
{
"id": "number",
"title": "Number",
"type": "number"
}
```
## Single Date Filter
Simple single date Filter available with `type="datebox"`:

### Configuration sample
```
{
"id": "oldest",
"title": "Oldest Message",
"optional": false,
"type": "datebox"
}
```
## Checkbox Filter
Simple `true`/`false` Filter available with `type="bool"`:

### Configuration sample
```
{
"id": "excludeAppMessages",
"title": "Filter out APP messages",
"optional": true,
"type": "bool"
}
```
## Single Select Filter
Filter based on predefined values which is rendered as Single Select. Connector should provide available values via [datalist endpoint](https://the.fibery.io/@public/User_Guide/Guide/Custom-App-REST-Endpoints-272/anchor=POST-api-v1-synchronizer-datalist--afbdfc9b-4304-4e4c-84cf-e6eb0d37e4cd).
Following attributes should be specified:
* `type="list"`
* `datalist=true`

### Configuration sample 1
```
{
"id": "group",
"title": "Group",
"datalist": true,
"type": "list"
}
```
Also, it's possible to configure this Filter as a datalist dependent from another datalist (e.g., user should first select organization and only afterwards repository). It can be achieved by specifying `datalist_requires` attribute where value is an array of ID of another `datalists` .
### Configuration sample 2
```
[
{
"id": "group",
"title": "Group",
"datalist": true,
"type": "list"
},
{
"id": "project",
"title": "Project",
"datalist": true,
"type": "list",
"datalist_requires": ["group"]
}
]
```
## Multi Select Filter
This Filter is based on predefined values which are rendered as Multi Select Field. The connector should provide available values via [datalist endpoint](https://the.fibery.io/@public/User_Guide/Guide/Custom-App-REST-Endpoints-272/anchor=POST-api-v1-synchronizer-datalist--afbdfc9b-4304-4e4c-84cf-e6eb0d37e4cd).
Following attributes should be specified:
* `type="multidropdown"`
* `datalist=true`

### Configuration sample 1
```
{
"id": "groups",
"title": "Groups",
"datalist": true,
"type": "multidropdown"
}
```
Also, it's possible to configure this Filter as a datalist dependent from another datalist (e.g., user should first select organization and only afterwards repository). It can be achieved by specifying `datalist_requires` attribute where value is an array of ID of another `datalists`
### Configuration sample 2
```
[
{
"id": "group",
"title": "Group",
"datalist": true,
"type": "list"
},
{
"id": "projects",
"title": "Projects",
"datalist": true,
"type": "multidropdown",
"datalist_requires": ["group"]
}
]
```
> [//]: # (callout;icon-type=emoji;icon=:eyes:;color=#9c2baf)
> If you haven't found applicable Filter, please contact us in the support chat or in [the community](https://community.fibery.io/ "https://community.fibery.io/").
# FEATURE TRACKING
__________________
## How to add or remove tasks from Features?
In the Product Team Template, Tasks are dedicated Fields you can add to all Features to track their progress. When a new Feature is created, it will have the same set of Tasks as all other Features (Product Spec, Design Assets, Development).

1. Create a new Field (use either way to do that)
a) go to the Feature DB, click on the `+ New Field` button in the top right corner;
b) navigate to the last Field of the Database and add a new Single Select Field by clicking `+` in the column header.

2. Choose a Single-Select Field and configure it similarly to the existing Tasks. Set the numeric Values to the created options by enabling the toggle `Specify numeric value for each option` in Advanced section

## How to calculate weighted progress from the statuses?
You have successfully added the Task Fields, but the overall Feature progress is missing. [Automations](https://the.fibery.io/@public/User_Guide/Guide/Automations-27) can help you automatically populate the Values of Single-Selects to set the exact State the Feature is in. Let's build the Automations that would change the State between 'Planned', 'In Progress', and 'Completed'.
1. Create a Single-Select Field for Feature Progress, and set up Options (they can match with the 'Tasks' Options or be different depending on what states you wish to see).

2. Go to `Automations` tab and add a new Automation. We'll need a separate one for every state, so here are the three Rules:
* Update Feature progress to 'Planned'

These filters are basic logic rules that make sure the Feature state changes correctly according to the current state of the Tasks.

As simple as that!
* Update Feature progress to 'In Progress'

* Update Feature progress to 'Completed'

3. Enable the Feature Progress Field in a View and enjoy the progress overview at one glance.

# AUTO-LINKING (SET RELATIONS AUTOMATICALLY)
____________________________________________
You can setup automatic [Relations](https://the.fibery.io/@public/User_Guide/Guide/Relations-17) based on some basic matching rules. It is mostly needed for integrations, but there are other cases as well.
## How to set an automatic relation
1. Create a new `Relation field` and setup a new relation.
2. Click `Automatically link` switcher.
3. Specify matching fields. For example, you have City and Country databases. In a City database you have a text field `CAbbr` with Country abbreviation, and in Country database you have a field `Abbr` with Country abbreviation. In this case select `CAbbr` and `Abbr` fields for correspondent database to create a matching rule.
> [//]: # (callout;icon-type=emoji;icon=:nerd_face:;color=#199ee3)
> You might want to create a new formula fields to extract the required information to be matched, and then use this formula field in the matching rule.
## Example
Below we automatically link Pull Requests from GitHub to User Stories in Fibery.
[https://www.loom.com/share/f9921158275a4375be76937b41476208](https://www.loom.com/share/f9921158275a4375be76937b41476208)
Here is the formula that extracts user story id from `fibery/us#123 some name`
```
If(StartsWith(Name,"fibery/us#"),Trim(ReplaceRegex(Name,"fibery\/us#(\d+).+"," \1 ")),"")
```
And here is the rule:

# NOTIFY PEOPLE USING BUTTONS OR RULES
______________________________________
Notify actions can send in-app notifications via buttons or rules. Notify actions automatically appear for People fields (for example `Notify Owner` or `Notify Assignees`). `Notify User` action with users selector is available as well.
Here are some cases and a short guide on how to notify your teammates using in-app notifications (or email and slack if configured in the user's notifications settings).
## **Notify the owner about the entity was moved to another state**
Sometimes it is handy to be notified about workflow changes that occurred with entities created by you. Here is how it can be configured:

## **Poke the assignees of a bug**
Here is a button that sends a ping notification to bug assignees:

Send a message about troubles with fixing a bug to VIP persons
You may notify some specific users, like this:

> [//]: # (callout;icon-type=emoji;icon=:nerd_face:;color=#199ee3)
> There are almost no differences between markdown and text templates except markdown syntax is not supported in the text templates. So please check [Markdown Templates](https://the.fibery.io/@public/User_Guide/Guide/Markdown-Templates-53) to be familiar with how to build dynamic messages.
## Notify when the rich text (description) field was changed
It is also possible to perform actions when the description or any other rich text field of an entity is changed.

With [Text history](https://the.fibery.io/@public/User_Guide/Guide/Text-history-32) you'll be able to see what exactly was changed
## FAQ
#### I configured the rule, but notifications don't arrive, however, the Action is executed.
There can be two problems.
1. During the test, please make sure that this checkbox is checked

By default, Fibery assumes, that author is aware of changes and doesn't send the email to avoid cluttering.
2. Make sure that User have access to the Entities/Database he has to be notified about
If the User doesn't have access to the data, he can't see notifications either.
If any of these points help, please, ping us in chat 🤗
# HOW TO SET UP SPRINTS FOR MULTIPLE DEVELOPMENT TEAMS
______________________________________________________
In this guide, we will explain how to set up Fibery so that it is convenient to work with several software development teams. As always, we need to set up structure, meaning we need to create relevant Databases, set Relations between them and add Views.
## Adding Databases
Let's add a Team database, and create Relations between Team and Sprint.
We believe that having separate Sprints for different Teams is a way to go.

What else do we need to know about Teams?
Participants. We'll need one more Relation here.

Cool!
We are done with structure!

Now, let's create Views in a way that would allow us to avoid manually duplicating every sprint.
## Adding Views
Now we would use [Smart Folders](https://the.fibery.io/@public/User_Guide/Guide/Smart-Folders-26).
First, create a new Smart Folder in a Software Development space.

We will need to choose Team and Sprint under the Team level. This will help us to group Stories and Bugs automatically.

And we also need to add a filter for Sprints to see the current one only.

Now it's time to create Views that the team will use regularly.
The structure will be similar to the one from [How to Use Fibery for Software Development ](https://the.fibery.io/@public/User_Guide/Guide/How-to-Use-Fibery-for-Software-Development---245).
The difference here is that we will create the Current Sprint work board under the Sprint level. Once you create it, such a Board will appear for every current Sprint for any other Team.

Feel free to create other Views under the sprint, such as "My work with sprint" or "Work by Assignee". Built-in filters will show automatically only Bugs and Stories assigned to this Sprint.
And that's it!
# CALENDAR VIEW
_______________
On a Calendar each Entity is represented as a row with start and end dates. Calendar View is handy to visualize tasks, events, meetings and other short entities. For longer entities, like Projects, it is better to use a [Timeline](https://the.fibery.io/@public/Intercom/Tag/Timeline-68) view.

## Add calendar view to a space
1. Put mouse cursor on a Space and click `+` icon
2. Select Calendar from the menu
## Configure calendar view
1. Select one or more databases to be visualized as cards on Calendar View.
2. Select date fields. It can be a single Date Range field or two different fields that you will use as start/finish fields. In most cases Date Range is preferable.

If there are is no Date field in a Database, you have to create it. Just click on Dates selector and click `+ Create new Date Field`

## Configure visible fields for cards
You may select what [Fields](https://the.fibery.io/@public/User_Guide/Guide/Fields-15) will be visible on cards:
1. Click `Fields` in the top menu
2. Select required fields. You can show unique fields for every database, just click on a database on the left and select required fields.
## Add new entities
There are several ways to add a new entities.
1. Click `+ New` button in the top menu and new row will be added in the first date of the current month.
2. Put a mouse cursor in the cell and click `+` button.

## Open entities
Just click on a card and an entity will be opened on the right. Note that you can explore the entities easily by clicking them.
## Change entities dates
You may drag and drop entities to change entities' dates.
1. Drag left or right side of the card if you want to change start/end date respectively.
2. Drag the whole card if you want to change both dates at the same time.

## Filter cards
You may filter rows.
1. Click `Filter` in the top menu
2. Select required fields and build filter conditions

You can choose whether an entity should be shown only if it matches all filters or if it matches any of the filters. It's not currently possible to use more complex logic in filters (e.g. if A and B or C).
> [//]: # (callout;icon-type=icon;icon=exclamation-circle;color=#6a849b)
> Each List has Global Filters and My Filters. Global Filters will be applied for **all** users, while My Filter is visible to you only.
You can also quickly find something on Calenar View, just use `Cmd + F` shortcut and type some keyword. This quick search works for Name, ID, numbers and other visible basic text fields.
## Sort cards
You may sort cards by fields.
1. Click `Sort` on the top menu.
2. Add one or more sorting rules.
## Color cards
You may color code cards to highlight some important things. For example, mark features with bugs red.
1. Click on `Colors` in the top menu.
2. Set one or many color rules.
## Work with Backlog
Many entities may have empty dates, you can find them in the Backlog menu on top.
1. Click in `Backlog` in the top menu.
2. Click on `•••` for some entity.
3. Click `Plan for Today` action.
## Switch to Month/Week/Day view
If you have Time information in your Date Field, you can switch between views in a Calendar View. Click `Months` selector and switch.

## Adjust the first day of the week
Every person sees a calendar according to their [Personal preferences](https://the.fibery.io/@public/User_Guide/Guide/Personal-preferences-288): the same calendar view might start on Monday for you and on Sunday for your colleague.
The personal preferences, in turn, are set based on your browser locale and can be adjusted if needed.
## Duplicate calendar view
You may duplicate current calendar view into the same Space.
1. Click `•••` on the top right.
2. Click `Duplicate Calendar` option.
## Link to your calendar
You can copy an anchor link to this specific view so you can share it elsewhere. There are two ways to do it:
1. Click `•••` on the top right and click Copy Link
2. Click on calendar `Id` in top left corner and the link will be copied to your clipboard
# HOME
_______
Home Page contains several widgets that you can enable and disable. Click `Customize` in the top right corner and enable/disable widgets:
* Greeting
* Search
* My Work
* Learn the basics
* Import my data
* Suggested templates
* Integrations

### My Work Widget
The My Work Widget is an intelligent dashboard that automatically discovers and displays all entities across your workspace where you're involved – whether you're assigned, own, or are mentioned in any People field. No more hunting through multiple databases to find your tasks, features, bugs, or other work items.
It dynamically includes new databases as they're created or when People fields are added.

My Work has three tabs: Started, Not Started and Finished. You can customize visible databases and fields, add filters, color coding and find entities fast.
#### Organized by Status
Navigate your work with three intuitive tabs:
* Started: Items you're actively working on (excludes Done and Open states)
* Not Started: Work that's ready for you to begin (excludes Done states)
* Finished: Your recently completed work (last 20 items by modification date)
#### Customizable Experience
* Database Filtering: Choose which databases to display using quick filters
* Field Selection: Customize visible fields per database type
* Personal Filters: Add your own filters on top of the built-in smart filters
* You can also sort and color code items in My Work
### Personalization
You can fully personalize your Home Page by adding custom Views and adjusting the layout to suit your preferences. Enable or disable widgets like My Work/Search, or embed your own Views, including documents directly into the Home Page. Your Home Page will become your personalized dashboard, configurable and unique to you.
## Current limitations
* It's not possible to reorder widgets
* It's not possible to add own widgets
* It's not possible to change size of the widgets
# ASK USER FOR A VALUE IN AUTOMATION BUTTON
___________________________________________
Sometimes you want to execute a button and let user set some values manually. Typical examle is when you want to create an entity.
Click `…` near an action and select `Ask user`.
The following fields are supported:
* Basic text, URL, Email, Phone
* Number
* Relation
* Single/multi-select
* Checkbox
# FIBERY API OVERVIEW
_____________________
The Fibery API provides a way to integrate Fibery with your external systems and automate routine tasks.
There are many extension points in Fibery. Here are the guides you can start with:
* [REST API](https://the.fibery.io/@public/User_Guide/Guide/REST-API-259) - fetch data from Fibery and add data into Fibery.
* [GraphQL API](https://the.fibery.io/@public/User_Guide/Guide/GraphQL-API-254) - fetch data from Fibery and add data into Fibery using a modern GraphQL.
* [Webhooks](https://the.fibery.io/@public/User_Guide/Guide/Webhooks-258) - use webhooks to update other tools based on changes in Fibery.
* [Integrations API](https://the.fibery.io/@public/User_Guide/Guide/Integrations-API-267) - sync data from external tools into Fibery.
## Terminology
To avoid confusion, please note that the terms used in the API guide may differ from what you've seen in other parts of the User Guide and in the interface.
> [//]: # (callout;icon-type=icon;icon=check;color=#fc551f)
> This applies to two terms:
>
> * Type → Database
> * App → Space
Initially, we used Type and App across all assets and interface. Based on user feedback, we decided to rename them as Database and Space.
However, the old terms still exist in the API code and are likely to remain unchanged. So in the API guide you still encounter Type and App to align with the API code.
# PUBLIC SHARING OF DOCUMENTS AND ENTITIES
__________________________________________
You can share any document or any entity (Task, Feature, Project, etc) using a unique URL. Sharing is public and the link never expires (but it can be turned off → see below).
## Enabling & disabling sharing with public link
Find the relevant button in the top right corner, enable the link, and share it with anyone outside your workspace:
**For a Document**

To disable, click `Stop sharing`
**For an Entity**

To disable, switch the toggle off.
## What is being shared
* Entities mentioned in rich text via [Entity mentions and bi-directional links](https://the.fibery.io/@public/User_Guide/Guide/Entity-mentions-and-bi-directional-links-31)
* Nested Documents, but not embedded Views and their data
Additionally, for Entities:
* [Relations](https://the.fibery.io/@public/User_Guide/Guide/Relations-17) one level deep: for example, when sharing an Objective in Objectives → Features → Tasks hierarchy, Features will be shared while Tasks will not.
> [//]: # (callout;icon-type=emoji;icon=:point_up:;color=#1fbed3)
> Sharing via link is sharer-dependent: if the user enabling the public link doesn't have access to a mentioned Entity or a one-to-many relation, it won't be shared.
## FAQ
### Can I specify what I want to share inside an Entity?
No, it is not possible.
### Can external users add comments in a shared Document or Entity?
Not yet, but we are going to add this in the future.
### How do I know what other people have shared?
[Reviewing Shared Items](https://the.fibery.io/@public/User_Guide/Guide/Reviewing-Shared-Items-229)
### Is shared information indexed?
We put "X-Robots-Tag": `"noindex"` header for shared documents and entities, which should prevent content from being indexed.
However, we don't recommend publishing sensitive info on the internet on a page that doesn't require authentication.
# IMPORT FROM MARKDOWN
______________________
# Overview
The Markdown Import feature helps to import documents from different sources. Whether you need to import a single markdown file or a collection of files organized in a folder structure, this feature allows you to bring in your markdown content effortlessly.
# Supported File Formats
Before importing markdown files, ensure the file extension is `.md` or `.zip` in case of multiple markdown file imports.
The zip file supports the following structure (folder structure on the left side, imported result on the right side):

If the markdown file includes external links to images or files, Fibery will automatically download and import them.
# Supported Export Formats
The Markdown import feature supports different export formats.
* **Notion export format:** The `Notion id` will be removed from the file and folder name during import.
* **Fibery export format:** The `Fibery uuid` will be removed from the file and folder name during the import.
# Import a Single Markdown File or Multiple Markdown Files
To import a single markdown file, follow these steps (you can use the **Back** option at any step to return to the previous screen if needed):
1. To access the **Import page**, navigate to the **Settings** menu in the top left corner. From there, select the **Import** menu item in the Workspace section and choose the **Markdown** icon.
> [//]: # (callout;icon-type=icon;icon=exclamation-circle;color=#fba32f)
> Admin rights are needed to perform this operation.

Alternatively, you can import from the **Space settings** screen by clicking on the menu at the top right and selecting the **Import** option. By starting the operation from here, you skip Step 2 as you have already specified the Space where you want to import the data.
> [//]: # (callout;icon-type=icon;icon=exclamation-octagon;color=#fba32f)
> Creator rights are needed in the specific space to perform this operation.

2. Select an existing Space or create a new one where you would like to import the markdown file.
> [//]: # (callout;icon-type=icon;icon=exclamation-octagon;color=#6A849B)
> Importing Markdown files into an existing Workspace won't overwrite any existing data.

3. You can import the file by dragging and dropping it into the designated landing area or selecting it from your computer.

4. The selected filename will be displayed on the Import screen, and the **Import Now** button will be enabled.

5. To initiate the import process, click the **Import Now** button. \
Please note that the duration of the import process will depend on the number and size of the files being imported.
6. After the import, you will be directed to the imported document. In the case of multiple files, the first document will appear at the top of the document structure.
# CAPTURE FEEDBACK VIA SURVEYS AND FORMS
________________________________________
[https://youtu.be/btYxlZQ5X1s](https://youtu.be/btYxlZQ5X1s)
# FORMULAS REFERENCE
____________________
This is a reference guide for all [Formulas](https://the.fibery.io/@public/User_Guide/Guide/Formulas-39) in Fibery.
## Access Fields
Use dot notation to refer to fields in linked entities and collections.
If you have a space symbol in Field or Collection name, put the name in square brackets `[ ]` , like this:
```
Epic.Estimate
Epic.Product.Value * [Own Value]
[User Stories].[Total Effort]
```
## Math operations
Nothing fancy here, usual operators are supported (`*, -, +, /`)
```
(Effort * Risk) / Complexity.Value
Velocity - [Assigned Effort]
```
### **Power(number, power)**
There is also `Power(number, power)` function. Note that decimal power is also possible. For example:
```
Power(10, 2) → 100
Power(4, 0.5) → 2
```
### **Round(number)**
Round() function rounds a number to the specified number of decimal places.
```
Round(1.154, 1) → 1.2
```
#### **RoundDown(number\[, places\])**
Rounds a number down to the specified number of decimal places
```
RoundDown(9.999, 2) → 9.99
```
#### **RoundUp(number\[, places\])**
Rounds a number up to the specified number of decimal places
```
RoundUp(12.001, 1) → 12.1
```
#### AbsoluteValue(number)
Calculates the absolute value of a number
```
AbsoluteValue(-14) → 14
AbsoluteValue(123) → 123
```
#### Log(number, base)
Calculates the logarithm of a number for a given base.
```
Log(128, 2) → 7
```
## Collections
For example, you have Product and several Features linked to every Product. On a Product level you may want to calculate various metrics for its Features. Here is where collection aggregates will help:
* Sum(Number Field Name)
* Avg(Number Field Name)
* Count()
* Max(Number or Date Field Name)
* Min(Number or Date Field Name)
For Product Database you may use these examples:
```
Features.Count()
Features.Sum(Estimate)
Features.Max(Estimate)
Features.Avg(Estimate)
```
### **Sort(\[field, isAscending\]) + First() and Last()**
Sort a collection of Entities by a particular Field (rank by default) prior to getting the first/last Entity.
For example, here is how you get the latest Sprint for a Team and extract its progress:
```
Sprints.Sort([Start Date]).Last()
Sprints.Sort([Start Date]).Last().Progress
```
### **Join(text field, delimiter)**
Combines text values from a collection of Entities into a single text. For example, returns a string of assignees:
```
Assignees.Join(Name, ', ') → "Michael, Teddy, Jerry"
```
### **CountUnique(expression)**
Counts the number of unique values in a collection of entities
How many teams work on Feature across all User Stories?
```
Stories.CountUnique(Team.PublicId)
```
### **Min/Max**
These functions can be used inside collections. Here is the case:
* A Feature is decomposed into Stories
* The Stories are planned using Sprints
* Each Sprint has a start date and an end date
Could I automatically calculate the start and the end date of the Feature to show on a Timeline? Yes, you could:
```
Feature.[Start Date] = Stories.Min(Sprint.[Start Date])
Feature.[End Date] = Stories.Max(Sprint.[End Date])
```
###
## Filter inside collections
Use `Filter` function (with `AND` and `OR` operators) to extract subsets from collections.
Sum of Effort of all not completed Features:
```
Features.Filter(State.Final != true).Sum(Effort)
```
Count of all high complexity non-estimated Features:Â
```
Features.Filter(Effort = 0 AND Complexity.Name = "High").Count()
```
## Dates
In general, you can do operations with Dates like with Numbers. For example, here is how you define the duration of a project in days:
```
ToDays(Planned.End(false) - Planned.Start())
```
(check [Date Ranges in Formulas](https://the.fibery.io/@public/User_Guide/Guide/Date-Ranges-in-Formulas-42) for why it is appropriate to use the `false` parameter)

Note that you can just subtract dates. The result of these operations is a Duration object that has format Duration(days, hours, minutes, seconds). For example, it can be Duration(10, 0, 0, 0) and this is exactly 10 days. Then you have to apply functions like `ToDays` or `ToHours` to convert the duration object into a number of days or hours.
Here we subtract two dates and add dates difference (in days) to the third date:
```
Date(2022,1,13) + Days(ToDays(Today() - Date(2022,6,24)))
```
⌠(coming Q1 2025) You can also add months, using `Months` function.
```
Date(2022,1,13) + Months(6)
```
### **Today()**
Returns current date.
```
ToDays(Today() - Planned.Start())
```
If you want to get "yesterday"
```
Today() - Days(1)
```
### **Now()**
Returns current date time.
> [//]: # (callout;icon-type=icon;icon=exclamation-circle;color=#FC551F)
> `Now()` is only available in Automation Formulas (not in Formula Fields).
### **Year(date)**
Returns the year of a date (as a number).
```
Year(Today())
```
### **Month(date)**
Returns the month of a date (as a number).
### **Day(date)**
Returns the day of a date (as a number).
### IsoWeekday**(date)**
Extracts the day of the week of the date as a number between 1 (Monday) and 7 (Sunday)
```
Weekday(Today()) → 4
```
### **IsoWeekNum(date)**
Returns number of the ISO week number of the year for a given date.
```
IsoWeekNum([Creation Date]) → 23
```
### **Date(year, month, day)**
Returns a date based on the year, month and day numbers.
```
Date(1999, 12, 31)
```
### **DateTime(year, month, day, hours, minutes, seconds)**
Returns a datetime value.
```
DateTime(1999, 12, 31, 23, 59, 50)
```
You may want to check out how [Timezones](https://the.fibery.io/@public/User_Guide/Guide/Timezones-41) work.
### **MonthName(date, \[format\])**
Extracts the full or short month name from a date.
Supported formats: `MONTH`, `Month`, `month`, `MON`, `Mon`, `mon`.
```
MonthName([Creation Date], "Mon")
```
### **WeekDayName(date, \[format\])**
Extracts the day-of-the-week name from a date.
Supported formats: `DAY`, `Day`, `day`, `DY`, `Dy`, `dy`.
```
WeekdayName([Creation Date])
```
## Duration
### **ToDays(Duration)**
Convert a time duration into a number of days.
```
ToDays(Planned.End(false) - Planned.Start())
```
### **ToHours(Duration)**
Convert a time duration into a number of hours.
```
ToHours(Planned.End(false) - Planned.Start())
```
### **ToMinutes(Duration)**
Convert a time duration into a number of minutes.
```
ToMinutes(Planned.End(false) - Planned.Start())
```
### **ToSeconds(Duration)**
Convert a time duration into a number of seconds.
```
ToSeconds(Planned.End(false) - Planned.Start())
```
### **Duration(days, hours, minutes, seconds)**
Create a time duration.
```
Duration(10, 0, 0, 0)
```
### **Months(number)**Â
Returns a Duration for the number of months.
For example, you want to create a field that will show the date 1 month before the deadline.
```
[Due Date] - Months(1)
```
### **Days(number)**Â
Returns a Duration for the number of days.
For example, you want to create a field that will show the date 2 days before the deadline. Later you can use this field to highlight cards on boards. Here is how you do it:
```
[Due Date] - Days(2)
```
### **Hours(number)**
Returns a Duration for the number of hours.
### **Minutes(number)**
Returns a Duration for the number of minutes.
### **Seconds(number)**
Returns a Duration for the number of seconds.
### **DateRange(start date, end date)**
Returns a date range, from the start date to the end date.
```
DateRange(Today(), Today() + Days(2))
DateRange(Date(1999, 12, 31), Today())
```
Check out [Date Ranges in Formulas](https://the.fibery.io/@public/User_Guide/Guide/Date-Ranges-in-Formulas-42).
### **DateTimeRange(start datetime, end datetime)**
Returns a datetime range, from the start datetime to the end datetime.
```
DateRange(DateTime(1999, 12, 31, 23, 59, 50), DateTime(2000, 1, 1, 00, 00, 00))
```
###
## Logical (If, and, or)
You can use `If` Â to create various interesting formulas.Â
### **If(condition, true result, false result)**
Returns some results based on condition. Here are some examples:
Cycle Time calculation:
```
If([Planned Dates].End > Today(), ToDays(Today() - [Planned Dates].Start), ToDays([Planned Dates].End - [Planned Dates].Start))
```
Generate some text field based on conditions:
```
If((Confidence > 10) and (Reach > 10),"Important","So-so")
```
Nest `if` functions:
```
If([RICE Score] >= 15,"Cool", If([RICE Score] >= 10,"OK","Bad"))
```
Generate checkbox (for example, you may create "Fix ASAP" field with this formula):
```
If((Risk = "High") and (Severity = "High"), true, false)
```
### **IsEmpty(value)**
Checks whether the value is empty.
```
IsEmpty("") → true
```
### **IfEmpty(value)**
Returns the first non-empty value from a list
```
IfEmpty(Interview.Weight, Chat.Weight, Topic.Weight, Conversation.Weight, 1.0)
```
### **Greatest(value1\[, value2, value3,…\])**
Calculates the largest number or the latest date across several values.
```
Greatest(Appointments.Max([Creation Date], Drugs.Max([Creation Date])), Comments.Max([Creation Date]))
```
### **Least(value1\[, value2, value3,…\])**
Calculates the smallest number or the earliest date across several values
```
Least(Appointments.Max([Creation Date], Drugs.Max([Creation Date])), Comments.Max([Creation Date]))
```
## Text
Use `+` to combine or join strings. Some examples:
```
Name + " " + [Public Id]
Project.Abbreviation + "-" + [Public Id]
"https://www.google.com/maps/search/?api=1&query=" + Address
```
> [//]: # (callout;icon-type=emoji;icon=:nerd_face:;color=#199ee3)
> You can select Text or URL as a formula type.
### **Length(text)**
Calculates the number of characters in the text.
```
Length("This phrase has 29 characters")
```
### **Lower/Upper(text)**
Converts the text to lower/upper case.
```
Upper(Name) + " " + Upper(Abbreviation)
```
### **Left(text, numberOfCharacters)**
Extracts the desired number of starting characters from the text.
```
Left("Fibery rules", 6)
```
### **Right(text, numberOfCharacters)**
Extracts the desired number of ending characters from the text.
```
Right("Fibery rules", 5)
```
### **Trim(text)**
Removes starting and ending spaces from the text.
```
Trim(LastName)
```
### **EndsWith(text, suffix)**
Checks if text ends with a suffix.
```
EndsWith("Fibery rules", "rules")
```
### **StartsWith(text, prefix)**
Checks if text starts with a prefix.
```
StartsWith("Fibery rules", "Fibery")
```
### **MatchRegex(text, regularExpression)**
Checks if text matches a regular expression.
```
MatchRegex("Fibery", "F.b")
```
### **Replace(text, searchFor, replacementText)**
Substitutes a matching part of the text.
```
Replace("Fibery is slow", "slow", "fast")
```
### **ReplaceRegex(text, regularExpression, replacementText)**
Substitutes regular expression matches in the text.
```
ReplaceRegex("It costs $2000", "(\d+)", "1000")
```
### **Middle(text, startAt, numberOfCharacters)**
Extracts the desired number of characters from the middle of the text.
```
Middle("Umbrella", 5, 4)
```
### **Find(text, searchFor)**
Finds the first occurrence of the string in the text.
```
Find("Where's Waldo?", "Waldo") → 9
```
### **ToText(\[number\] or \[date\])**
Converts numbers or dates into text.
```
ToText(1067)
ToText([Creation Date])
```
There is no pattern formatting, so you might use this trick:
```
ToText(Day([Creation Date])) + " " + MonthName([Creation Date]) + " " + ToText(Year([Creation Date])) → 21 July 2020
```
## Rich Text (snippets)
Snippets are a plain text version of the rich text field.
You can use the snippet field in the formula as a proxy for the rich text field. For example, you can generate the entity Name field from the snippet.

> [//]: # (callout;icon-type=icon;icon=exclamation-circle;color=#fba32f)
> Note: snippets are generated asynchronously (which means there is a slight delay between changes to the rich text field and updates to the snippet, and the snippet fields only store the first 3000 characters of the Rich text field.
## Location
### **FullAddress**
Extracts full address from location.
```
[Client Address].FullAddress()
```
### **Latitude**
Extracts latitude coordinate portion of location.
```
[Client Address].Latitude()
```
### **Longitude**
Extracts longitude coordinate portion of location.
```
[Client Address].Longitude()
```
### **AddressPart**
Extracts specific part of address component.
```
[Client Address].AddressPart("country")
```
Available options: country, region, post code, district, place, locality, neighborhood, address, points of interest.
## FAQ
### Can I use a single select field in a formula?
Yes, you can. Please find details here [Single and Multi-Select fields](https://the.fibery.io/@public/User_Guide/Guide/Single-and-Multi-Select-fields-87)
### Is there a way to get the initials of a Creator in a formula?
i.e. Polina John = PJ?
A very rudimentary way is to strip out anything that is not a capital letter, so `Polina John` becomes `PJ`
Might not work as you'd like for 'weird' names, like `Prof. John McNichol Snr` !
Here's a formula to do it
`ReplaceRegex([Created By].Name, "[^A-Z]", "")`
### Why does rounding work differently for negative numbers?
> I have a calculation that sometimes produces negative numbers (e.g. expenses). When I apply Round Up or Round Down, the behavior seems reversed:
>
> * *Round Up* on `-10.5` results in `-10`
> * *Round Down* on `-10.5` results in `-11`
>
> Is this a bug?
This is expected behavior. Fibery uses mathematical rounding:
* Round Up always rounds toward positive infinity. For negative numbers, this means moving closer to 0 (e.g., `-10.5` → `-10`).
* Round Down always rounds toward negative infinity. For negative numbers, this means moving farther from 0 (e.g., `-10.5` → `-11`).
If you want rounding based on absolute value (e.g., always rounding away from zero), you'll need to adjust your calculation formula accordingly.
# WORKFLOW FIELD
________________
Workflow is a special kind of single-select Field that is used to track the status of an Entity: for example, a Task or a Feature:

In most cases, Workflow behaves like a usual single-select Field: it has a few options, each with an optional emoji and a background color. [Formulas](https://the.fibery.io/@public/User_Guide/Guide/Single-and-Multi-Select-Fields-87/anchor=Select-Workflow-Fields-in-Formulas--8e1edc34-2712-4e66-ab17-67754fa4c27f) and [Automations](https://the.fibery.io/@public/User_Guide/Guide/Single-and-Multi-Select-Fields-87/anchor=Select-Fields-in-Automations--20ec5226-94c5-43cf-b0b3-5616ed59e10f) work in the same way. Essentially, you can follow the [Single and Multi-Select fields](https://the.fibery.io/@public/User_Guide/Guide/Single-and-Multi-Select-fields-87) guide except for the cases listed below.
> [//]: # (callout;icon-type=icon;icon=arrow-right;color=#bec5cc)
> Once you create a Workflow Field, it appears as `State`.
## Workflow vs. single-select
There are a few differences between the Workflow Field and a usual single-select:
* Workflow options (aka states) are categorized into three types: `Not started`, `Started`, `Finished`. Entities in `Finished` state are treated in a special manner throughout the workspace — see the [section below](https://the.fibery.io/@public/User_Guide/Guide/Workflow-Field-292/anchor=State-types--13758a9b-af59-4ade-9908-49018d98c0ba) for more details.
* There can only be a single Workflow Field in a Database and it's always named `State`. If you need more, please create single-select Fields.
* A state cannot be empty.
* Unless you pick a custom emoji, each state's icon is a progress indicator.
## State types
Each state belongs to one of three groups:
* Not started
* Started
* Finished
Entities in the `Finished` states are usually less relevant so we grey them out throughout the workspace. For example, in Views:

And in search:

The progress indicator icon starts empty for `Not started` states and gradually fills in for `Started` states, culminating in a checkmark for `Finished` states:

## Workflow in Formulas
Most basic usage is identical to [Single and Multi-Select fields](https://the.fibery.io/@public/User_Guide/Guide/Single-and-Multi-Select-fields-87):
```
State.Name = "Done"
```
Additionally, there is `Type` Field in each state:
```
State.Type = "Not started"
Tasks.Filter(State.Type = "Finished").Count()
```
## Final checkbox (deprecated)
Before there were state types, there used to be a `Final` checkbox:

For backward compatibility, we have preserved the checkbox and now automatically sync its value with the state type.
This means both of these Formulas will work just fine:
```
State.Final = true
State.Type = "Finished"
```
# VIASOCKET INTEGRATION
_______________________
### How can viaSocket be helpful?
Integrating viaSocket with Fibery empowers users to connect their workspace with a wide range of external tools and services without writing code. It's especially helpful for automating workflows, syncing data, and reacting to events across systems - whether it's sending updates, triggering actions, or pulling in information from third-party apps. While Fibery doesn't yet offer native integrations for everything, viaSocket fills that gap, making it a valuable option for teams who need flexibility right now.
#### Some ideas, when it can be helpful:
1. Automated status updates from external services
Use case: When a payment is processed (e.g., via Stripe or Razorpay), viaSocket sends the status to Fibery and updates a corresponding "Invoice" or "Customer" entity with "Paid", "Failed", etc.
2. Two-Way sync with CRM Tools
Use case: viaSocket syncs contact or deal updates between Fibery and CRMs like Zoho or Pipedrive. When a lead is marked “Closed†in CRM, the matching record in Fibery is updated as well.
3\. Auto-create Entities based on Events
Use case: When a new user signs up via an app or authentication service (Firebase, Auth0, etc.), viaSocket pushes that data into Fibery to create a new “User†or “Customer†entity, optionally tagging their plan, signup source, etc.

### How to connect Fibery & viaSocket?
#### Step 1: Create a viaSocket Account

* Go to[ ViaSocket page](https://viasocket.com)
* Click **Sign Up** and log in using Google or password
* You'll land in your **Workspace** to start building workflows
#### Step 2: Set Up Your Workflow
* Click **“Newâ€** in your Workspace
* Select **Fibery** as the Trigger app
* Choose an event (e.g., “New Task Createdâ€)
* Authenticate your Fibery account using an API token
* Test the trigger to confirm the data is fetched

#### Step 3: Add Action(s)
* Search for an app like Pipedrive or Stripe
* Choose an action event
* Authenticate and configure the action
* Use dynamic fields from Fibery trigger
* Test and **Publish** your workflow

> [//]: # (callout;icon-type=icon;icon=heart;color=#e72065)
> viaSocket runs the automation automatically whenever the trigger event occurs.
# AUTOMATICALLY SHARE ENTITIES WITH LINKED GROUPS
_________________________________________________
In addition to manually sharing an Entity (see [Share Entity](https://the.fibery.io/@public/User_Guide/Guide/Share-Entity-233)), you can configure automatic access for assigned teams, squads, or departments.
> [//]: # (callout;icon-type=emoji;icon=:mirror:;color=#1fbed3)
> This works almost identical to [Automatically share Entities via People field](https://the.fibery.io/@public/User_Guide/Guide/Automatically-share-Entities-via-People-field-327).
## When to use automatic sharing
These are the typical use cases:
* An external Team should only see Features assigned to them.
* Everyone can see Projects but only members of the assigned Squad should be able to edit.
* Department members should see wiki Pages relevant to them.
If you find yourself repeatedly providing access to a Group that is already linked to an Entity, consider automatic sharing. Once configured, it will save you and your teammates clicks and will prevent awkward situations when an assigned Group can't access their task.
## How to configure automatic sharing
> [//]: # (callout;icon-type=emoji;icon=:busts_in_silhouette:;color=#1fbed3)
> Make sure you have [User Groups](https://the.fibery.io/@public/User_Guide/Guide/User-Groups-47) in your workspace before proceeding.
Instead of manually sharing every Entity, provide access to all Groups that are linked to an Entity via some relation.
For example, if there is a [relation](https://the.fibery.io/@public/User_Guide/Guide/Relations-17) between Team DB and Story DB, you can enable automatic sharing via this relation so that Team members get `Editor` access whenever their Team is assigned to a Story:

1. Navigate to the Database you are looking to share automatically.
2. Open settings for the relation Field connecting this DB to a User Group DB.
3. Enable the `Automatically share … with …` toggle in the `Sharing` section.
4. Select an access template (use can use [Custom Access Templates](https://the.fibery.io/@public/User_Guide/Guide/Custom-Access-Templates-240) here).
5. Click `Update Field`.
> [//]: # (callout;icon-type=emoji;icon=:unicorn_face:;color=#673db6)
> User Groups are exclusive to Pro and Enterprise plans. See our [pricing page](https://fibery.io/pricing) for the most up-to-date info.
## How to extend automatic access

You can share not only an Entity itself (e.g. Project) but also all the Entities linked to it (e.g. Tasks and Time Logs). If you are not familiar with the access templates yet, check out [Share Entity](https://the.fibery.io/@public/User_Guide/Guide/Share-Entity-233) and [Custom Access Templates](https://the.fibery.io/@public/User_Guide/Guide/Custom-Access-Templates-240).
## How to configure different access for Group manager
Consider this use case: a Team assigned to a Task should automatically receive access to this Task. However, the access should be different for regular team members (read-only) and the team leader (edit). How do we configure that?
Here's one way to do it:
1. **For regular team members:** enable automatic access via `Team` relation on Tasks DB using `Viewer` access template as described in the guide above.
2. **For team leader:** create a Lookup `Team → Leader` People Field on Tasks DB and enable automatic sharing using `Editor` access template following the [Automatically share Entities via People field](https://the.fibery.io/@public/User_Guide/Guide/Automatically-share-Entities-via-People-field-327) guide.
## Who can configure automatic sharing
To configure automatic access via a Group relation, one has to have `Creator` access for both Databases. In addition, they should have all the capabilities of the selected access template.
For example, to enable `Editor` automatic access for Features DB via Team relation Field, one has to have the following capabilities:
* **Template-independent**
* configure Features DB;
* revoke access to all Features;
* configure Teams DB;
* read access to all Teams.
* **Template-specific**
* see all Features;
* comment all Features;
* update all Features;
* delete all Features.
If you are having trouble configuring automatic access due to the lack of permissions, consider asking an Admin for help.
## FAQ
* **If we change automatic access from `Owner` to `Viewer`, will it affect Groups that are already assigned or only the future ones?**\
Both the existing and the future ones.
* **Are the items shared via automatic access visible in the `Shared with Me` section of the sidebar?**\
They are not since there can be too many of them.
* **What if we disable or delete a custom access template used in automatic access?**\
Disabling won't affect automatic access that's already been configured while deleting will stop it from working.
* **Can we use automatic access via Formula or Lookup user relation?**\
You can!
* **What happens if I delete a relation used for automatic access and later restore it?**\
Automatic access will be turned off because of the potential security vulnerabilities.
# FILES IN RICH TEXT & DOCUMENTS
________________________________
You can upload a file into Fibery and use it in [Rich Text](https://the.fibery.io/@public/User_Guide/Guide/Rich-Text-28) fields, Documents and Comments.
There are several ways how to upload a file
1. Type `/f` and click on the `File` command. Upload your file, and it will be inserted into the current location.
2. Drag and drop a file from your OS into the Rich Text field, and it will be uploaded into Fibery.
3. Copy a file from your OS and paste it into the Rich Text field.
> [//]: # (callout;icon-type=icon;icon=gift;color=#6a849b)
> You can upload files in all rich text fields, comments and documents.
### Open File
Just click on a file and it will opened in a new tab.
Here is an example of a file, click it →[Fibery product company.pdf](/api/files/13d5a82a-c69e-4750-8a61-77a14ae5439d?is-public=1)
### File size limitation
Note that there is a file size limitation, and you can upload files up to 500Mb.
# BRAINTREE INTEGRATION
_______________________
Braintree integration exports plans, subscriptions, and transactions. You can use it to link payments to Fibery accounts (CRM use case), thus you can quickly calculate MRR, see canceled subscriptions and missing transactions right in Fibery.
Main use cases:
* Track unpaid accounts and contact them automatically via email.
* Calculate financial metrics per account, including MRR, refunds, churn, etc.
* Spot changes in payment patterns for account (growth or downsize) and react to it automatically.

## Setup Braintree sync
1. Navigate to `Templates` and find `Braintree` template
2. Click `Sync`.
3. Fill in the auth form, you have to provide Braintree Merchant Id, Public and Private Keys.
4. Click `Sync now` and sync process will be started. Note that it may take time to complete.

### **How to connect Subscriptions and Transactions to Accounts?**
Every Subscription in Braintree has an ID (usually you encode it somehow when using Braintree). We have a format like `workspacename_fibery_io_lb00q0p`. So we need to extract the workspace name. We should create a formula for `Subscription` Database.
Navigate to `Subscriptions` database, Click `+ New Field` and create a `Formula` field named `Workspace Name`:
```
Trim(ReplaceRegex([Subscription Id],"([^_]*).+"," \1 "))
```
Then in our Workspace in Fibery we have a Workspace Name as well.
Now we need to set up an Automatic Relation between Subscription and Workspace (we use [Auto-linking (Set Relations Automatically)](https://the.fibery.io/@public/User_Guide/Guide/Auto-linking-(Set-Relations-Automatically)-50) here):

That is it. Now you can open any Workspace and see all `Subscriptions`. You can connect `Transactions` as well.

# AI AGENT (NEW)
________________
Fibery AI Agent can answer quite complex questions around your Fibery data, modify Fibery workspace and modify data as well. Click Fibery AI in the top left menu and try to ask some questions, including "what can you do?".
There are two modes: `Ask` and `Build`. In `Ask` mode you can ask questions around Fibery data, in `Build` mode you can change Fibery workspace and data.
> [//]: # (callout;icon-type=icon;icon=key-skeleton;color=#fba32f)
> Build mode is available to **Admins** only, since it is quite novel and risky
## 🧑â€ðŸ« Ask mode: What it can do
1. **Access your Fibery data**: The Agent can query any database in your workspace to find information, generate reports, and answer questions about your data.
2. **Work with Rich Text in databases**: It can read and summarize content from rich text fields.
3. **Generate text reports**: It can create PDF reports based on your data.
4. **Analyze trends**: It can identify patterns and insights across multiple records.
5. **Classify data**: It can categorize your data using AI-powered semantic analysis.

Here are questions examples:
* "How many Product Features are currently in progress?"
* "Show me all Conversations from the last month related to UI improvements."
* "Which team members have vacation scheduled next month?"
* "Summarize the key feedback themes from our customer conversations this quarter."
* "What are the common patterns in our overdue tasks?"
* "Give me an overview of our Feature development timeline."
* "Create a PDF report of all high-priority Features with their current status.
* "Generate a summary of this month's customer feedback."
Here is the video with quick overview:
[https://www.loom.com/share/7fc8dc4c46834fc3a7b269431aae514f?sid=b45aadd1-f976-4113-aba1-d3476ceaff46](https://www.loom.com/share/7fc8dc4c46834fc3a7b269431aae514f?sid=b45aadd1-f976-4113-aba1-d3476ceaff46)
### Options and features
* Use Anthropic or OpenAI for your questions via `Model` option
* Copy reply using `Copy` action, it will be copied as markdown
* Use `Search` switcher to allow agent explore the Internet
* Chat history is available via `History` icon in the top right corner
## 👷 Build Mode: What it can do
Good way to know that is to ask questions to an agent in Build mode. Try these
* `What you can do?`
* `What tools do you have?`
* `What use cases you support based on all the tools?`
* `What use cases you can suggest based on my workspace schema?`
Workspace Schema Management
* Create or delete Spaces to organize your workspace.
* Create, update, or delete databases and fields (text, number, relations, enums, etc.).
* Move or refactor fields and relations between databases.
* Set up relations (one-to-one, one-to-many, many-to-many) between entities.
* Manage single-select fields (add options, reorder, etc.).
Data Operations
* Query, filter, and analyze entities across any database, including advanced filtering, sorting, and relations.
* Create, update, or delete entities (single or batch).
* Migrate or transform data (move data between fields, databases, or formats).
* Bulk operations (assign, update, or link many entities at once).
* Read and update rich text (document) fields in markdown, HTML, or plain text.
* Transfer and transform document content between entities or fields.
Views & Visualization
* Supported Views: Table, Board, Calendar, Timeline, Gantt, Feed, Map, Form. AI can apply filters and sorting (but not color coding yet) as well as View-specific settings (e.g., Milestones on Timeline).
* Delete or update existing views.
Automation & Scripting
* Do complex tasks (bulk assignment, data cleanup, field migration, etc.).
* Chain actions (e.g., create a database, add fields, migrate data, update views—all in one flow).
Integrations & HTTP
* Make HTTP GET/POST requests to external APIs for integrations or data enrichment.
AI Agent can also generate nice links to Space, Database, View, Field, Rule, Button or Entity.

### Some use cases ideas
Fibery AI Build opens up powerful scenarios. We ourselves just started to comprehend the enormous power of this tool… Some trivial things it can do:
* Add sample data to databases fast for demonstration or testing
* Merge two databases ([video](https://youtu.be/DFOp1W8vtWk))
* Duplicate database with or without data ([video](https://youtu.be/GwZLmsF3PG0))
* Split a database ([video](https://youtu.be/eKnxG953pzw))
* Move or copy a field from one database to another (and keep the content) ([video](https://youtu.be/29Tu7PSbwDI))
* Convert text field to single select and keep all values
* Convert single select field to a database ([video](https://youtu.be/p1fhONzoX_A))
* Add new Tags database, add many-to-many relation between Tags and Content databases, create and set relevant Tags for all Content entities ([video](https://youtu.be/KIIg9F7O9mc))
* Batch update entities based on some fuzzy or exact conditions, like "find all features without Product Area relation and set a relation to some product area that fits best" or "move not-completed tasks from Release 1 to Release 2" ([video](https://youtu.be/y7jhKNu6wiU))
* Remove old, unused tags from all articles
* Normalize inconsistent field values
* Ensure all tasks are assigned and have due dates
> [//]: # (callout;icon-type=icon;icon=exclamation-circle;color=#199EE3)
> Build mode always uses GPT-4.1 model. So far it works better than all other models in our tests.
## How Smart Agent works
Fibery Smart Agent first interprets what you're asking and create plans how execute your request. It almost always asks for confirmation and then writes code to execute the necessary queries and commands. For complex requests, it breaks tasks into smaller steps and may ask clarifying questions along the way.
Smart Agent has quite many specific tools. If you want to get deep, ask it "what tools do you have?" and check for yourself what you can use. Note that you can always guide the agent to use specific tools, so do it for fine tuning your prompts.
You can see what Smart Agent is doing in `Thinking` section.

There are two models we support: Anthropic Claude Sonnet 4 (Thinking) and OpenAI GPT-4.1.
### Limitations
* AI Agent **knows nothing about Documents and Images**, it only knows full databases content
* It is not possible to share chat sessions
* Build mode limitations
* It can't create Automations
* It can't create Reports
* There is no easy undo. In general all schema changes and data deletions are reversible from Audit History, but data modification will be hard to restore.
* There are limited number of queries you can run every month, for Free it is 20 queries per month, for Standard it is 50 queries + 10 for every paid user, for Pro it is 100 + 25 and for Enterprise it is 200 + 50.
> [//]: # (callout;icon-type=icon;icon=exclamation-circle;color=#fba32f)
> #### **Note on visibility of Select Field values and AI Agent inference**
>
> If information is stored in Single-select or Multi-select fields, the values of these selects are visible to *all* users, because they are part of the Schema, not the individual records.This means that even if a user doesn't have direct access to the database or specific records, they may still be able to discover some of these values via the Smart Agent - because, well, it's *smart*. Be mindful of what kind of data you store in select options, especially if it's sensitive or internal-only.
# REPORT EDITOR
_______________
The report editor is where you configure the visualisation view(s) within your report, and includes three distinct areas: source settings, available fields and the visualisation pane.

## Source settings
This section allows you to see to the settings that were chosen during the initial report configuration. Clicking on `Edit source` will bring up the data source options panel, allowing you to make changes. Click `Apply changes` to confirm any changes.
> [//]: # (callout;icon-type=icon;icon=exclamation-circle;color=#6A849B)
> If you change the Fibery databases being used for your report, it is likely to break any visualisations you have previously configured
Clicking on the right-pointing arrow in the bottom of the source settings section will bring up a data review pane, where you can see the raw source data on which the report is based.
## Available fields
This section shows a list of fields available for the data set(s) you are visualising.
Each field has a specific data type (`number`, `date`, `text` or `id`) which will affect the configuration options available if the field is used as a visualisation parameter.
In the case of using Fibery database(s) as a source, the available fields will be the [Fields](https://the.fibery.io/@public/User_Guide/Guide/Fields-15) for the chosen database(s). The database fields will be coerced into one of the data types.
| | |
| --- | --- |
| **Database field type** | **Report field type** |
| Text | `text` |
| Number | `number` |
| Date or datetime | `date` |
| Date or datetime range | `date` x2 (range start and range end) |
| Single-select or workflow | `text` (name of option) |
| Multi-select | `text` (comma-separated list of options) |
| Relation (to-one) | `text` (name of entity) |
| Relation (to-many) | `text` (comma-separated list of names of entities) |
| Rich text, files, documents | not available |
It is possible in some cases to change the data type of a field, e.g. from `date` to `text` or from `number` to `text`, by clicking on the gear symbol next to the field name.
> [//]: # (callout;icon-type=icon;icon=exclamation-circle;color=#6A849B)
> If a field is set with`id` type, the value will be converted to text (if not already) and will be displayed as a clickable link if used in table view. Clicking the link will take the user directly to the relevant source data entity.
>
> Also, `id` type fields are considered to represent unique properties, so items with the same value for an `id` field are not treated as being the same when it comes to grouping/aggregation.
### Remove redundant fields
> [//]: # (callout;icon-type=icon;icon=exclamation-circle;color=#6A849B)
> Once a report has been configured, you can choose to remove redundant (unused) fields, which will speed up rendering time for the report. This can be helpful if a data set is particularly large.
>
> To remove redundant fields, finish configuring your report, and then choose the Remove redundant fields from the options menu
>
> 
>
> You can always choose `+ Add field` in the available fields section of the report editor to add a missing field back into the list.
## Visualisation pane
This section contains one or more visualisation views, and each view allows you to make choices about how the data set should be visualised.
The pane will look different depending upon which visualisation type has been chosen:
[Chart](https://the.fibery.io/@public/User_Guide/Guide/Chart-353), [Table](https://the.fibery.io/@public/User_Guide/Guide/Table-354), [Metric (KPI)](https://the.fibery.io/@public/User_Guide/Guide/Metric-(KPI)-355) or [Pie chart](https://the.fibery.io/@public/User_Guide/Guide/Pie-chart-356).
Within the visualisation pane there are dotted-line boxes into which you can drag and drop fields from the available fields list. These are the visualisation parameters.
Refer to the individual visualisation types for more details about how your choices for each of these parameters will affect the appearance of the resultant report.
The visualisation pane also allows you to apply filters to the data. See [Report filters](https://the.fibery.io/@public/User_Guide/Guide/Report-filters-359). These filters are applied in addition to any [filters on the source](https://the.fibery.io/@public/User_Guide/Guide/Reports-346/anchor=Filtering--5ab22756-b03b-483b-aaec-5caff317367e).
For any view in a report, you can optionally describe the report in the description box of the visualisation pane.

### Parameter configuration
Each parameter in a visualisation can be configured in specific ways.

The configuration options available are dependent on the data type being visualised, but will typically include:
#### Title
The title indicates how the visualisation will be annotated. By default, the title is taken directly from the calculation.
#### Calculation
The calculation box shows how the parameter is defined. In many cases, this will simply be the name of a field in the data set.\
However, it is also possible to use [Calculations in Reports](https://the.fibery.io/@public/User_Guide/Guide/Calculations-in-Reports-347) such that a parameter's value is derived using functions.
#### Group
For `date` type parameters, parameter values can be grouped, in order to visualise the data at a higher or lower granularity level. Date values can be grouped by Day, Week, Month, Quarter or Auto. If Auto is chosen, the report engine will pick the most suitable date period grouping automatically.
#### Aggregation
This option allows parameter values to be aggregated, e.g. for `number` type parameters, the options are Count, Sum Avg, Min and Max.
#### Sort
Values can be sorted to determine the order in which they appear. In some cases, the sorting order for a parameter can be chosen to be something other than the parameter itself. For example, you may want to show the Name field, but sort by Creation Date.
#### Format
It is possible to choose how dates and number values are formatted.
> [//]: # (callout;icon-type=icon;icon=book-open;color=#6A849B)
> Other configuration options specific to the visualisation-type are described in their respective guides ([Chart](https://the.fibery.io/@public/User_Guide/Guide/Chart-353), [Table](https://the.fibery.io/@public/User_Guide/Guide/Table-354), [Metric (KPI)](https://the.fibery.io/@public/User_Guide/Guide/Metric-(KPI)-355), [Pie chart](https://the.fibery.io/@public/User_Guide/Guide/Pie-chart-356))
### Multiple visualisations
Sometimes there is a need to explore the same data set using different data slices or using different visualization techniques. It is possible to have several visualisation views within one report.

Click `+ Add View` at the top of the visualisation pane to add another view to your report, or click the gear icon next to an existing view and choose `Duplicate view` if that is more appropriate.
You can find also find options to rename, move and delete views under the gear icon. If it's more convenient, you can reorder views with drag and drop.
Once you have finished configuring your report, click on `Finish`.
# CLICKUP MIGRATION
___________________
You can already move your data from ClickUp to Fibery with a couple of clicks - check our [ClickUp integration](https://the.fibery.io/@public/User_Guide/Guide/ClickUp-integration-132) guide for details. We also recommend checking the [Fibery vs ClickUp article](https://fibery.io/blog/fibery-vs-clickup/ "https://fibery.io/blog/fibery-vs-clickup/") (we didn't hesitate to be harsh to ourselves, no worries) to better understand the differences.
But what will be the next steps? How to make it work if you think that staying in ClickUp is not an option anymore?
Here you will find a quick high-level overview.
### 1. Data overview 🙈
Here is how my super basic setup looks in ClickUp

As you see, it's super simple. I have only one Space, and just one Folder. And a couple of Tasks.
And here is how it looks in Fibery
1. List View

2. Space Configuration

The only question I have is - "Where are my Projects???"
The more complicated your structure in ClickUp is, the more questions you'll probably have… ("Where are my Features??", "Where are my Epics?", "Where are my Sprints, Bugs, Stories, and Releases???")

> [//]: # (callout;icon-type=icon;icon=frown;color=#1fbed3)
> In ClickUp, data is stored and organized as a single Task database. This means that everything within ClickUp is treated as a Task or a Task property. While this approach is straightforward to get started with, it can become more complex and limiting as your data and workflows grow over time.
On the other hand, Fibery takes a different approach to data storage. In Fibery, the structure is built around a set of connected databases. This means that instead of having everything as a Task, you have the flexibility to create multiple databases that are interconnected and can represent different types of data and relationships.

This also affects [Views](https://the.fibery.io/@public/User_Guide/Guide/Views-8) . Keeping the ClickUp structure with no changes in Fibery won't work (good).
You'll struggle with setting multiple filters manually (instead of using [Smart Folders](https://the.fibery.io/@public/User_Guide/Guide/Smart-Folders-26) for ex.) all the time. And will also face tons of limitations.

### 2. Set the structure ï¸ðŸ”¨
Unfortunately (or luckily, not sure) you will have to set a correct structure in Fibery.
Create necessary databases, set relations, and later - views.
> [//]: # (callout;icon-type=icon;icon=times;color=#d40915)
> There is no magic wand that will create a correct structure in Fibery with a couple of clicks. Some time has to be spent to create. But as a result - Project will be a Project. Task will be a Task. Insight will be an Insight. Sprint will be a Sprint. Everything will be connected.
>
> If you don't feel comfortable with that - we have a free concierge service to help you with that. Just contact us via chat or email.
For our case, we create two databases - Task and Project. And connect them with one-to-many relations.
No need to set fields, or anything else. Just Databases and relations.

### 3. Import data ðŸƒâ€â™€ï¸
Unfortunately, Integration here won't help (that's a separate topic to discuss, but our convert is not that powerful at the moment)
So, we will use the power of [Import from CSV](https://the.fibery.io/@public/User_Guide/Guide/Import-from-CSV-67)
ClickUp lets you export your [Workspace's data in a comma separated value (CSV) format](https://help.clickup.com/hc/en-us/articles/6310551109527-Workspace-Task-Data-Export-CSV- "https://help.clickup.com/hc/en-us/articles/6310551109527-Workspace-Task-Data-Export-CSV-").
> [//]: # (callout;icon-type=icon;icon=exclamation-circle;color=#4faf54)
> We recommend importing all the data process by process - Space by Space, using ClickUp terms.
>
> For example, first, migrate Project Management. Then - Software development, etc.
>
> Because ClickUp's list can be a Project, or it can be Sprint, or something else. So distinguishing that on the CSV level will be the most effective way.
Let's test it.

And here is the reason why we needed to set a structure before the import. Our connect allows you to set ClickUp Task Properties (for example Project, Sprint, etc.) as a real connection.

And here is the result:

As you see, this import:
* 🔨 Automatically created necessary fields with the format (text, relation, date, etc.) that you've chosen
* ðŸƒâ€â™€ï¸ Uploaded data
* 💅 Used Fibery relations power and structured the data in a correct way
### 4. Visualize it 🎨
Set as many fancy views, as you need. Discover power gained by relations, and appeared limitations.
No screenshots here. Just link to the [Views](https://the.fibery.io/@public/User_Guide/Guide/Views-8) guide.
> [//]: # (callout;icon-type=icon;icon=exclamation-circle;color=#e72065)
> At the moment migration process is pretty painful. We would try to deliver a better solution. If you want to share any feedback on that, or if you simply have some questions - we will be waiting for you in our chat.
# SHARE WORKSPACE AS A TEMPLATE
_______________________________
You may create a template from any Workspace and help other people quickly clone this template to create a new workspace in their own accounts. Here is an example of a shared workspace: [Fibery for Startups](https://ws-startup.fibery.io/@public/Getting_Started/Read.me-5 "https://ws-startup.fibery.io/@public/Getting_Started/Read.me-5").
> [//]: # (callout;icon-type=icon;icon=exclamation-circle;color=#199EE3)
> Please note that Comments and Files are not included into the template
## When do you need to share workspace as a template?
😈 **Selfish**\
Use this when you want to move all connected structures from one of your workspaces to another.
> *Tip: This also works as a workaround for renaming a workspace!*
🤹â€â™‚ï¸ **Experimental**\
Perfect for testing ideas or playing with your current setup — without the risk of breaking anything important.
👯â€â™€ï¸ **Friendly**\
Easily share ready-to-use, connected templates with your friends. Help them skip the struggle and dive right into Fibery.
🧠**Consultancy**\
Build polished, pre-configured workspaces for your clients or partners. It's a great way to demo your magic and deliver value fast.
⌠**Backup**\
Please avoid using this as a backup method.
> *Why?* If your workspace has 200+ entities and you share everything, creating a new workspace from the template might never finish—or could take hours. Please, use our [Export your data](https://the.fibery.io/@public/User_Guide/Guide/Export-your-data-63) instead
## How to share a workspace?
1. Navigate to Workspace Map as admin from the sidebar.
2. Click `Share as Template` option.
3. Specify template's name.
4. Describe the purpose of the template briefly.
5. Include or exclude some [Spaces](https://the.fibery.io/@public/User_Guide/Guide/Spaces-18) from the template.
6. Decide whether you want to include all the data and click `Generate a shareable link` button.
7. Copy the generated link and send it to anyone or include it into any web page.

## How to install shared workspace template?
1. Click the generated link.
2. Login into Fibery.
3. Select Fibery workspace (or create a new one).
New Spaces will be created from a template in a selected workspace.
## How to stop sharing a workspace?
1. Navigate to Workspace Map as admin.
2. Click `Shared as a Template` button on top.
3. Click `Stop sharing` button.
Template will be disabled and the old link will return "The creator has stopped sharing this template, sorry." message.
## Updating the shared space template
If you improve your workspace structure, add new cool Views, or somehow change it and want everyone to notice that — just Update your Template.
1. Navigate to Workspace Map as admin.
2. Click `Shared as a Template` button on top.
3. Click `Update template` button.
## Spaces order in the template
* The default order comes from the sidebar order for the person who (re-)creates the template.
* Once the order is set, it's the same for all Admins looking at the template sharing screen.
* Any Admin can reorder Spaces in a template.
* The new order is set on `Update template`, there is no immediate effect after a reorder.
* For existing templates, the Spaces order on the screen will start to correspond with the order in the sidebar.
## How to make a workspace template explorable by any user?
You can make templates browsable by any user via [Share Space to web](https://the.fibery.io/@public/User_Guide/Guide/Share-Space-to-web-36) feature and include them to any webpage via iFrame. [Here is an example of a shared template](https://ws-startup.fibery.io/@public/Getting_Started/Read.me-5) that you can explore without installation.
To achieve this, you have to share **every** space in a template one by one.
1. Navigate to space settings.
2. Click `Share` button in the top right.
3. Enable `Share to web` option.
4. Click `Copy` icon. The URL is copied to your clipboard for pasting or sharing wherever you want.
When you share all spaces, you will have something like this as a result
## How to create a human-friendly templates?
### Include Read.me document pr whiteboard
A [Read.me document inside a Space](https://apps.fibery.io/@public/Software_Development/Read.me-792 "https://apps.fibery.io/@public/Software_Development/Read.me-792") with an explanation of how to use it and how it can work would definitely help others get the value.

### Include some dummy data
No need to show others sensitive and private information, but empty Views can look depressing… Add some dummy data, if possible, and make everyone a bit happier 🌞
### Views and sidebar
Make sure that you have all important [Views](https://the.fibery.io/@public/User_Guide/Guide/Views-8) setup and organize the sidebar in a good way.
# POST /
________
Data endpoint performs actual data retrieving for the specified source. Incoming payload includes both account and filter information provided by the end-user and retrieved in accordance with the scheme information provided in the initial [GET /](https://the.fibery.io/@public/User_Guide/Guide/GET-%2F-367) request:
```
//Request Body:
{
"source": "supersource", // identifier
"account": { //account information, formatted according to app info authentications
"identifier": "basic", // identifier of this account type
"username": "test_user",
"password": "test$user!",
/*...*/
},
"filter": { //filter field values according to app info source filters
"ssn": "696969696",
/*...*/
}
}
```
In case when the account information is incorrect, the app should return an HTTP status 401 (Unauthorized) and should include a human-friendly error message. In case when the information is incomplete, the app should return HTTP status 400 (Bad Request) and include a human friendly error message:
```
// there's been an error!
{"error": "This is a friendly error message for you."}
```
Internal errors should return HTTP status 500 (Internal Server Error) and include an error message similar to the one above.
Good responses should return an appropriate HTTP 2xx status code and be in any text-like format, serialized or not. Because source schema information is not concrete and isn't necessarily provided to the Fibery, the return representation of the datapoints can be structured according to the underlying data model or arbitrarily defined by the implementer of the app.
# ACTIVITY LOG & UNDELETE: HOW TO REVERSE CONVERTED RELATION
____________________________________________________________
### Problem: you converted a relation between databases (from one-to-many to many-to-many)
Most likely that was a miscluck or misunderstanding. You wanted to test smth, and there is no `unconvert` button, and you are not happy with the result. Sorry for that 😥

What are the next steps?
Here are the video & text guide
[https://www.loom.com/share/48dfd4ead41447f7be5c7b3d066d84d5](https://www.loom.com/share/48dfd4ead41447f7be5c7b3d066d84d5)
#### 1. Navigate to the Audit log
There will be a tricky part.
Convert relation in the Audit log is presented as two separate actions.
1. Deleted relation (one-to-many, original one) - two records, one per database
2. New relation created (new many-to-many appeared) - two records, one per database, marked as "changed"
(somewhere between p.1 and p.2 there was a data migration, but you can't see it in the Audit log)

You can see it?
Great, everything goes according to the plan
#### 2. Delete the new relation and check the Audit log

This looks like a risky point, but it has to be done. You have to delete a newly created many-to-many relation.
Here is how the Audit log looks like now

#### 3. Restore the very first relation
The one, that was marked as "deleted" after the conversion
Choose any of them and click on the `Restore` button

Tadaah

We have our relation back again!
> [//]: # (callout;icon-type=emoji;icon=:nerd_face:;color=#FC551F)
> 1. if you have tons of data, each action may take from several seconds to several minutes, please, be patient and wait a bit
> 2. if that seems suspicious - please, create a testing Space and run the process to test it
> 3. we store daily backups and if there will be an emergency - we will help you.
# ANNUAL BILLING
________________
### When does my billing cycle start?
Your billing cycle starts from the date of the first payment. It will bill per each active user, that is now invited to the account. You can check it in `Manage Users` section (can be accessed by Admins only).

### What if I add more people later?
They will be paid annually as well, but the amount will be reduced in proportion to the remaining days until the end of the billing cycle.
### What if I deactivate the user?
If you paid for the user, and after deactivated him or deleted him from the workspace, that sum will be deducted from the next billing cycle (next year in your case).
So, there will be no immediate refund.
# FEED VIEW
___________
On a Feed View each Entity is represented as a large cart with a rich edit field (for example, Description field). Feed View is handy when you need to review text of many entities, like scroll through notes or feedback items.

## Add feed view to a space
1. Put mouse cursor on a Space and click `+` icon.
2. Select `Feed` from the menu.
## Configure feed view
1. Select one or more databases to be visualized as Cards on Feed View.
2. Select Rich Edit field.

## Configure cards
You may select what [Fields](https://the.fibery.io/@public/User_Guide/Guide/Fields-15) will be visible on Cards.
1. Click `Fields` in the top menu
2. Select required fields

## Add new cards
Click `+ New` button in the top menu and a new card will be added on top of the list.
## Open cards
Just click on a card name and it will be opened on the right.

## Filter cards, columns and rows
You may filter Cards.
1. Click `Filter` in the top menu
2. Select required properties and build filter conditions
You can choose whether an entity should be shown only if it matches all filters or if it matches any of the filters. It's not currently possible to use more complex logic in filters (e.g. if A and B or C).
> [//]: # (callout;icon-type=icon;icon=exclamation-circle;color=#6a849b)
> Each Feed has Global Filters and My Filters. Global Filters will be applied for **all** users, while My Filter is visible to you only.
## Sort cards
You may sort Cards.
1. Click `Sort` on the top menu
2. Add one or more sorting rules
## Color cards
You may color code cards to highlight some important things. For example, mark fresh notes green.
1. Click on `Colors` in the top menu
2. Set one or many color rules.
## Duplicate feed view
You may duplicate current feed view into the same Space.
1. Click `•••` on the top right
2. Click `Duplicate Feed` option
## Link to your board
You can copy an anchor link to this specific view so you can share it elsewhere. There are two ways to do it:
1. Click `•••` on the top right and click Copy Link
2. Click on feed `Id` in top left corner and the link will be copied to your clipboard
# ADD FORMULA TO AUTOMATION BUTTON
__________________________________
A Button is a type of [Automations](https://the.fibery.io/@public/User_Guide/Guide/Automations-27) that is triggered manually. It allows you to define a set of Actions that should always happen when a trigger condition is met.
To make Buttons even more powerful, you can add Formulas to Actions.
Check out [this video](https://www.youtube.com/watch?v=O8mAKN64F6M) for an explanation of how automation formulas differ from formula fields, as well as a couple of examples of what's possible.
## How to add a formula into Action
1. Select an Action.
2. Select a field you would like to change.
3. Switch input into the formula mode by clicking *`f` *icon at the right of the control
4. Enter a formula. To reference clicked entity, write `[Step 1 Entity]`.
For example, Feature can be referenced as `[Step 1 Feature]`
### Example: Automate Fields syncing for related Entities
Sometimes there is a need to set the same value for Fields of related Databases.
Let's imagine you have a Feature with User Stories and there is a Product Area Field defined for Feature and User Story. You would like to synchronize the value of the Product Area for all Stories assigned to a Feature.
Here is how it can be accomplished:

### Example: Change existing number, date, or text
You can also change existing primitive values. For example, you can create a Button automatically renames the story to reflect its implementation phase and asks for an assignee before saving the changes.

### Example: Assign the User who clicked a Button
In addition to the changed Entity (ex. `[Step 1 Story]`), Automation Formulas come with `[User who clicked Button]`. Use it to assign people and teams, restrict certain workflows, and track who was the last to update a certain Field.

### How to propagate select value in Automation Formulas
You can set single- and multi-select Field values in Automations. Check [Set Single- and Multi-Select Fields in Automations](https://the.fibery.io/@public/User_Guide/Guide/Set-Single--and-Multi-Select-Fields-in-Automations-196).

### How to ask user to provide value
Sometimes there is a need to provide dynamic values for Button Actions. You can configure almost any control to ask users values after a Button click.
1. Open `Button` configuration.
2. Select the option `Ask User`. You can select this option for several controls. The popup will be shown to provide values for all controls configured in this manner.

### Usage
Select Entities and click a Button. A popup will appear. Enter values and click Run. The user provided values will be applied to your entities.

### Example: Batch changing of several Fields
You can configure a Button to update multiple Fields if you want to make the same changes in multiple Entities.
Only provided values will be changed.
In other words, if you want to change only Assignees and State, then select values for these Fields. The Projects Field will not be changed if the value is not selected.

> [//]: # (callout;icon-type=icon;icon=exclamation-circle;color=#199EE3)
> You can set a field with a formula that returns a collection in IF branch, for example, set People field.
# FIBERY GLOSSARY
_________________
When talking about Fibery (with colleagues, with other Fibery users, or with customer support) it's helpful to have a shared language. The following is a dictionary of terms that you might find useful.
# A
---
#### access template
A set of [capabilities](https://the.fibery.io/@public/User_Guide/Guide/Fibery-Glossary-403/anchor=capability--fe4e88f0-ae23-4144-8a6b-2c7c69e4b554) which can be granted to a [user](https://the.fibery.io/@public/User_Guide/Guide/Fibery-Glossary-403/anchor=user--2aeda929-2406-41c4-98f6-d5ef99b8c93c). See [Custom Access Templates](https://the.fibery.io/@public/User_Guide/Guide/Custom-Access-Templates-240).
---
#### action
Something that an [automation](https://the.fibery.io/@public/User_Guide/Guide/Fibery-Dictionary-403/anchor=automation--dd53041b-0c27-4834-b815-1c6a60b52a84) ([rule](https://the.fibery.io/@public/User_Guide/Guide/Fibery-Glossary-403/anchor=rule--01e1a980-2023-4d1b-b211-0e1f6bfa1760) or [button](https://the.fibery.io/@public/User_Guide/Guide/Fibery-Dictionary-403/anchor=button--4bdb3fb7-0a9f-4ef8-a9ab-eadfedf6cefd)) will do when it executes. See [Rules](https://the.fibery.io/@public/User_Guide/Guide/Rules-51) and [Buttons](https://the.fibery.io/@public/User_Guide/Guide/Buttons-52).
---
#### activated/active
A [user](https://the.fibery.io/@public/User_Guide/Guide/Fibery-Glossary-403/anchor=user--2aeda929-2406-41c4-98f6-d5ef99b8c93c) who is able to log in to a [workspace](https://the.fibery.io/@public/User_Guide/Guide/Fibery-Glossary-403/anchor=workspace--7677f49d-ddbe-42ba-a508-fee9045f6c57). See [User Management](https://the.fibery.io/@public/User_Guide/Guide/User-Management-45).
---
#### activity log
Can mean
* the record of all activity in a [workspace](https://the.fibery.io/@public/User_Guide/Guide/Fibery-Glossary-403/anchor=workspace--7677f49d-ddbe-42ba-a508-fee9045f6c57) (see [Activity Log](https://the.fibery.io/@public/User_Guide/Guide/Activity-Log-92))
* the record of activity specific to an [entity](https://the.fibery.io/@public/User_Guide/Guide/Fibery-Glossary-403/anchor=entity--3c9a4aba-db25-4238-b795-3311f32a4552) (see [Single Entity Activity Log](https://the.fibery.io/@public/User_Guide/Guide/Single-Entity-Activity-Log-91))
* the [history](https://the.fibery.io/@public/User_Guide/Guide/Fibery-Glossary-403/anchor=history--9629b0c5-5975-45a6-a6c3-bb0780021705) of a [document](https://the.fibery.io/@public/User_Guide/Guide/Fibery-Glossary-403/anchor=document--dffa804b-aa14-434d-8bb2-17c266246d72) or [rich text](https://the.fibery.io/@public/User_Guide/Guide/Fibery-Glossary-403/anchor=rich-text--86084fed-1297-473f-99ab-8e5cf60f3f04) (see [Text history](https://the.fibery.io/@public/User_Guide/Guide/Text-history-32))
---
#### annotation
Lines or areas on a [chart](https://the.fibery.io/@public/User_Guide/Guide/Fibery-Glossary-403/anchor=chart--7e571e96-ed85-4562-8af1-d7b0b6c12ae6) to provide context for the data. See [Chart](https://the.fibery.io/@public/User_Guide/Guide/Chart-353).
---
#### API
Application programming interface - a mechanism for interacting with the data in the [workspace](https://the.fibery.io/@public/User_Guide/Guide/Fibery-Glossary-403/anchor=workspace--7677f49d-ddbe-42ba-a508-fee9045f6c57) via software. See [Fibery API overview](https://the.fibery.io/@public/User_Guide/Guide/Fibery-API-overview-279).
---
#### app
A deprecated term for a [space](https://the.fibery.io/@public/User_Guide/Guide/Fibery-Glossary-403/anchor=space--be1ddf64-68e6-41fd-ab4d-7363678301f9).
---
#### auto-linking
A [relationship](https://the.fibery.io/@public/User_Guide/Guide/Fibery-Glossary-403/anchor=relation--7c419e82-2278-43b6-8afc-5631c52dc782) where [entities](https://the.fibery.io/@public/User_Guide/Guide/Fibery-Glossary-403/anchor=entity--3c9a4aba-db25-4238-b795-3311f32a4552) are linked together based on them having the same values for specific [fields](https://the.fibery.io/@public/User_Guide/Guide/Fibery-Glossary-403/anchor=field--8bcbd7cb-9b9b-4237-a227-5ae787de1e06). See [Auto-linking (Set Relations Automatically)](https://the.fibery.io/@public/User_Guide/Guide/Auto-linking-(Set-Relations-Automatically)-50).
---
#### automation
A set of [actions](https://the.fibery.io/@public/User_Guide/Guide/Fibery-Dictionary-403/anchor=action--f8b8ea78-1fe9-4cce-a59f-f6cf98c4a1fa) that will be executed when a [trigger](https://the.fibery.io/@public/User_Guide/Guide/Fibery-Glossary-403/anchor=trigger--65b08ea3-532b-47f1-83d5-a38514bfb285) occurs or when a [button](https://the.fibery.io/@public/User_Guide/Guide/Fibery-Glossary-403/anchor=button--4bdb3fb7-0a9f-4ef8-a9ab-eadfedf6cefd) is pressed. See [Automations](https://the.fibery.io/@public/User_Guide/Guide/Automations-27).
---
# B
---
#### back-links (aka back-references)
Visualisation (and links to) the places where an [entity](https://the.fibery.io/@public/User_Guide/Guide/Fibery-Glossary-403/anchor=entity--3c9a4aba-db25-4238-b795-3311f32a4552) has been [mentioned](https://the.fibery.io/@public/User_Guide/Guide/Fibery-Glossary-403/anchor=mention--898a8b70-8fc7-42a6-b0f3-ffa440a1c1a6). See [Entity mentions and bi-directional links](https://the.fibery.io/@public/User_Guide/Guide/Entity-mentions-and-bi-directional-links-31).
---
#### board
A type of [view](https://the.fibery.io/@public/User_Guide/Guide/Fibery-Glossary-403/anchor=view--d94cabe1-317d-4f1a-9e4e-de4d3e378f89). See [Board View](https://the.fibery.io/@public/User_Guide/Guide/Board-View-9).
---
#### button
A user-interface element (which can be shown in [entity view](https://the.fibery.io/@public/User_Guide/Guide/Fibery-Glossary-403/anchor=entity-view--82a02810-e4e0-4c01-962b-2646dfadcb94) and/or in other [views](https://the.fibery.io/@public/User_Guide/Guide/Fibery-Glossary-403/anchor=view--d94cabe1-317d-4f1a-9e4e-de4d3e378f89)) which can be pressed. Alternatively, the name of the [automation](https://the.fibery.io/@public/User_Guide/Guide/Fibery-Dictionary-403/anchor=automation--dd53041b-0c27-4834-b815-1c6a60b52a84) that will execute when a button is pressed. See [Buttons](https://the.fibery.io/@public/User_Guide/Guide/Buttons-52).
---
# C
---
#### calendar
A type of [view](https://the.fibery.io/@public/User_Guide/Guide/Fibery-Glossary-403/anchor=view--d94cabe1-317d-4f1a-9e4e-de4d3e378f89). See [Calendar View](https://the.fibery.io/@public/User_Guide/Guide/Calendar-View-13).
---
#### capability
An ability to see or do something in the [workspace](https://the.fibery.io/@public/User_Guide/Guide/Fibery-Glossary-403/anchor=workspace--7677f49d-ddbe-42ba-a508-fee9045f6c57), e.g. view, comment, update, delete, share, etc.
[Users](https://the.fibery.io/@public/User_Guide/Guide/Fibery-Glossary-403/anchor=user--2aeda929-2406-41c4-98f6-d5ef99b8c93c) will have capabilities depending on how things have been shared with them. See [Sharing & Permissions](https://the.fibery.io/@public/User_Guide/Guide/Sharing-&-Permissions-46).
---
#### cardinality
The nature of a structured [relation](https://the.fibery.io/@public/User_Guide/Guide/Fibery-Glossary-403/anchor=relation--7c419e82-2278-43b6-8afc-5631c52dc782), determining the number of [entities](https://the.fibery.io/@public/User_Guide/Guide/Fibery-Glossary-403/anchor=entity--3c9a4aba-db25-4238-b795-3311f32a4552) that may be linked. Can be one-to-one, one-to-many, many-to-one or many-to-many. See [Relations](https://the.fibery.io/@public/User_Guide/Guide/Relations-17).
---
#### chart
A type of [report](https://the.fibery.io/@public/User_Guide/Guide/Fibery-Glossary-403/anchor=report--61266e77-08b2-4aee-be01-4d8c5e301d67). See [Chart](https://the.fibery.io/@public/User_Guide/Guide/Chart-353).
---
#### collection
The set of [entities](https://the.fibery.io/@public/User_Guide/Guide/Fibery-Glossary-403/anchor=entity--3c9a4aba-db25-4238-b795-3311f32a4552) linked via a one-to-many or many-to-many [relation](https://the.fibery.io/@public/User_Guide/Guide/Fibery-Glossary-403/anchor=relation--7c419e82-2278-43b6-8afc-5631c52dc782). See [Relations](https://the.fibery.io/@public/User_Guide/Guide/Relations-17).
---
#### column
Can mean
* a part of [entity view](https://the.fibery.io/@public/User_Guide/Guide/Fibery-Glossary-403/anchor=entity-view--82a02810-e4e0-4c01-962b-2646dfadcb94) [layout](https://the.fibery.io/@public/User_Guide/Guide/Fibery-Glossary-403/anchor=layout--f8c49c81-cd06-4461-90d9-9687be24b8f9) (see [Entity View](https://the.fibery.io/@public/User_Guide/Guide/Entity-View-339))
* a layout option within [documents](https://the.fibery.io/@public/User_Guide/Guide/Fibery-Glossary-403/anchor=document--dffa804b-aa14-434d-8bb2-17c266246d72) or [rich text](https://the.fibery.io/@public/User_Guide/Guide/Fibery-Glossary-403/anchor=rich-text--86084fed-1297-473f-99ab-8e5cf60f3f04) (see [Multi-columns layout](https://the.fibery.io/@public/User_Guide/Guide/Multi-columns-layout-198))
* a [field](https://the.fibery.io/@public/User_Guide/Guide/Fibery-Glossary-403/anchor=field--8bcbd7cb-9b9b-4237-a227-5ae787de1e06) being visualised in a [table](https://the.fibery.io/@public/User_Guide/Guide/Fibery-Glossary-403/anchor=table--4bff8156-b063-467f-bc89-b82f120e9cf5) [view](https://the.fibery.io/@public/User_Guide/Guide/Fibery-Glossary-403/anchor=view--d94cabe1-317d-4f1a-9e4e-de4d3e378f89)
---
#### comment
Can mean
* a contextual remark associated with a piece of [rich text](https://the.fibery.io/@public/User_Guide/Guide/Fibery-Glossary-403/anchor=rich-text--86084fed-1297-473f-99ab-8e5cf60f3f04) a.k.a. inline comment (see [Comments and mentions](https://the.fibery.io/@public/User_Guide/Guide/Comments-and-mentions-34))
* a remark associated with an [entity](https://the.fibery.io/@public/User_Guide/Guide/Fibery-Glossary-403/anchor=entity--3c9a4aba-db25-4238-b795-3311f32a4552), logged in the comments [field](https://the.fibery.io/@public/User_Guide/Guide/Fibery-Glossary-403/anchor=field--8bcbd7cb-9b9b-4237-a227-5ae787de1e06) (see [Comments and mentions](https://the.fibery.io/@public/User_Guide/Guide/Comments-and-mentions-34))
* a remark added to a [whiteboard](https://the.fibery.io/@public/User_Guide/Guide/Fibery-Glossary-403/anchor=whiteboard--25fb4d84-fcf4-4fff-a5f6-846c4a37c4b6) (see [Comments on Whiteboard](https://the.fibery.io/@public/User_Guide/Guide/Comments-on-Whiteboard-397))
---
#### context
Limitation ([filtering](https://the.fibery.io/@public/User_Guide/Guide/Fibery-Glossary-403/anchor=filters--b710ff44-4ccc-442d-9712-4065fa72c464)) of data based on the (direct or indirect) [relation](https://the.fibery.io/@public/User_Guide/Guide/Fibery-Glossary-403/anchor=relation--7c419e82-2278-43b6-8afc-5631c52dc782) to another [entity](https://the.fibery.io/@public/User_Guide/Guide/Fibery-Glossary-403/anchor=entity--3c9a4aba-db25-4238-b795-3311f32a4552). See [Context Views](https://the.fibery.io/@public/User_Guide/Guide/Context-Views-20).
---
#### custom access template
A [user](https://the.fibery.io/@public/User_Guide/Guide/Fibery-Glossary-403/anchor=user--2aeda929-2406-41c4-98f6-d5ef99b8c93c)-defined [access template](https://the.fibery.io/@public/User_Guide/Guide/Fibery-Glossary-403/anchor=access-template--cf535854-ecd3-4125-a250-f652faa544e3) defining [capabilities](https://the.fibery.io/@public/User_Guide/Guide/Fibery-Glossary-403/anchor=capability--fe4e88f0-ae23-4144-8a6b-2c7c69e4b554) across a hierarchy of related [databases](https://the.fibery.io/@public/User_Guide/Guide/Fibery-Glossary-403/anchor=database--ff1cbe3b-e4e4-431d-ba9b-5c1675b55bc1). See [Custom Access Templates](https://the.fibery.io/@public/User_Guide/Guide/Custom-Access-Templates-240).
---
# D
---
#### dashboard
A [sidebar](https://the.fibery.io/@public/User_Guide/Guide/Fibery-Glossary-403/anchor=sidebar--77a7b407-69cd-4093-a006-7398bd29d452) item used for the presentation of multiple embedded [views](https://the.fibery.io/@public/User_Guide/Guide/Fibery-Glossary-403/anchor=view--d94cabe1-317d-4f1a-9e4e-de4d3e378f89). It can be a [context](https://the.fibery.io/@public/User_Guide/Guide/Fibery-Glossary-403/anchor=context--26b9edb4-1d7d-4fd0-a7dc-468e9c9a1d60) [view](https://the.fibery.io/@public/User_Guide/Guide/Fibery-Glossary-403/anchor=view--d94cabe1-317d-4f1a-9e4e-de4d3e378f89) (meaning that the embedded views are default-filtered to the context of a specific [entity](https://the.fibery.io/@public/User_Guide/Guide/Fibery-Glossary-403/anchor=entity--3c9a4aba-db25-4238-b795-3311f32a4552)). See [Dashboard View](https://the.fibery.io/@public/User_Guide/Guide/Dashboard-View-421).
---
#### database
A collection of [entities](https://the.fibery.io/@public/User_Guide/Guide/Fibery-Glossary-403/anchor=entity--3c9a4aba-db25-4238-b795-3311f32a4552) which share the same characteristics (a.k.a. [fields](https://the.fibery.io/@public/User_Guide/Guide/Fibery-Glossary-403/anchor=field--8bcbd7cb-9b9b-4237-a227-5ae787de1e06)). See [Databases](https://the.fibery.io/@public/User_Guide/Guide/Databases-7).
---
#### default space
The top-level of the [sidebar](https://the.fibery.io/@public/User_Guide/Guide/Fibery-Glossary-403/anchor=sidebar--77a7b407-69cd-4093-a006-7398bd29d452) - a (non-visible) container for [views](https://the.fibery.io/@public/User_Guide/Guide/Fibery-Glossary-403/anchor=view--d94cabe1-317d-4f1a-9e4e-de4d3e378f89), [folders](https://the.fibery.io/@public/User_Guide/Guide/Fibery-Glossary-403/anchor=folder--06030e61-5491-48eb-b74e-743602fb0c01), [smart folders](https://the.fibery.io/@public/User_Guide/Guide/Fibery-Glossary-403/anchor=smart-folder--e0ec8ce5-4489-4528-9dfb-e4c7876ca692), [documents](https://the.fibery.io/@public/User_Guide/Guide/Fibery-Glossary-403/anchor=document--dffa804b-aa14-434d-8bb2-17c266246d72), [whiteboards](https://the.fibery.io/@public/User_Guide/Guide/Fibery-Glossary-403/anchor=whiteboard--25fb4d84-fcf4-4fff-a5f6-846c4a37c4b6) and other [spaces](https://the.fibery.io/@public/User_Guide/Guide/Fibery-Glossary-403/anchor=space--be1ddf64-68e6-41fd-ab4d-7363678301f9).
---
#### document
A [rich text](https://the.fibery.io/@public/User_Guide/Guide/Fibery-Glossary-403/anchor=rich-text--86084fed-1297-473f-99ab-8e5cf60f3f04) object. See [Documents](https://the.fibery.io/@public/User_Guide/Guide/Documents-85).
---
# E
---
#### embedded view
A [view](https://the.fibery.io/@public/User_Guide/Guide/Fibery-Glossary-403/anchor=view--d94cabe1-317d-4f1a-9e4e-de4d3e378f89) within [rich text](https://the.fibery.io/@public/User_Guide/Guide/Fibery-Glossary-403/anchor=rich-text--86084fed-1297-473f-99ab-8e5cf60f3f04). It can be an existing [space](https://the.fibery.io/@public/User_Guide/Guide/Fibery-Glossary-403/anchor=space--be1ddf64-68e6-41fd-ab4d-7363678301f9)-level view (from the [sidebar](https://the.fibery.io/@public/User_Guide/Guide/Fibery-Glossary-403/anchor=sidebar--77a7b407-69cd-4093-a006-7398bd29d452)) or a new view, that thus 'belongs' to the [document](https://the.fibery.io/@public/User_Guide/Guide/Fibery-Glossary-403/anchor=document--dffa804b-aa14-434d-8bb2-17c266246d72)/[entity](https://the.fibery.io/@public/User_Guide/Guide/Fibery-Glossary-403/anchor=entity--3c9a4aba-db25-4238-b795-3311f32a4552).
---
#### entity
A single object, sharing the same characteristics as other objects in a [database](https://the.fibery.io/@public/User_Guide/Guide/Fibery-Glossary-403/anchor=database--ff1cbe3b-e4e4-431d-ba9b-5c1675b55bc1). See [Entity](https://the.fibery.io/@public/User_Guide/Guide/Entity-329).
---
#### entity view
A way to see some or all of the characteristic values ([fields](https://the.fibery.io/@public/User_Guide/Guide/Fibery-Glossary-403/anchor=field--8bcbd7cb-9b9b-4237-a227-5ae787de1e06)) of an [entity](https://the.fibery.io/@public/User_Guide/Guide/Fibery-Glossary-403/anchor=entity--3c9a4aba-db25-4238-b795-3311f32a4552). See [Entity View](https://the.fibery.io/@public/User_Guide/Guide/Entity-View-339).
---
# F
---
#### feed
A type of [view](https://the.fibery.io/@public/User_Guide/Guide/Fibery-Glossary-403/anchor=view--d94cabe1-317d-4f1a-9e4e-de4d3e378f89). See [Feed View](https://the.fibery.io/@public/User_Guide/Guide/Feed-View-14).
---
#### field
A (basic or complex) characteristic of all [entities](https://the.fibery.io/@public/User_Guide/Guide/Fibery-Glossary-403/anchor=entity--3c9a4aba-db25-4238-b795-3311f32a4552) in a given [database](https://the.fibery.io/@public/User_Guide/Guide/Fibery-Glossary-403/anchor=database--ff1cbe3b-e4e4-431d-ba9b-5c1675b55bc1). See [Fields](https://the.fibery.io/@public/User_Guide/Guide/Fields-15).
---
#### filters
Can mean
* criteria by which the [entities](https://the.fibery.io/@public/User_Guide/Guide/Fibery-Glossary-403/anchor=entity--3c9a4aba-db25-4238-b795-3311f32a4552) to be shown in a [view](https://the.fibery.io/@public/User_Guide/Guide/Fibery-Glossary-403/anchor=view--d94cabe1-317d-4f1a-9e4e-de4d3e378f89) can be limited (see [Filters](https://the.fibery.io/@public/User_Guide/Guide/Filters-141))
* criteria which determine whether an [automation](https://the.fibery.io/@public/User_Guide/Guide/Fibery-Dictionary-403/anchor=automation--dd53041b-0c27-4834-b815-1c6a60b52a84) [rule](https://the.fibery.io/@public/User_Guide/Guide/Fibery-Glossary-403/anchor=rule--01e1a980-2023-4d1b-b211-0e1f6bfa1760) should execute (see [Rules](https://the.fibery.io/@public/User_Guide/Guide/Rules-51))
* criteria which determine what source data to include in a [report](https://the.fibery.io/@public/User_Guide/Guide/Fibery-Glossary-403/anchor=report--61266e77-08b2-4aee-be01-4d8c5e301d67) (see [Reports](https://the.fibery.io/@public/User_Guide/Guide/Reports-346)) as well as which data points should be visualised (see [Report filters](https://the.fibery.io/@public/User_Guide/Guide/Report-filters-359))
* criteria by which the items to be shown in the [trash](https://the.fibery.io/@public/User_Guide/Guide/Fibery-Glossary-403/anchor=trash--3c5f76a5-8f0d-47bd-abf6-32663a2c9649) or [workspace](https://the.fibery.io/@public/User_Guide/Guide/Fibery-Glossary-403/anchor=workspace--7677f49d-ddbe-42ba-a508-fee9045f6c57) activity log can be limited.
---
#### folder
A [sidebar](https://the.fibery.io/@public/User_Guide/Guide/Fibery-Glossary-403/anchor=sidebar--77a7b407-69cd-4093-a006-7398bd29d452) element for grouping of [spaces](https://the.fibery.io/@public/User_Guide/Guide/Fibery-Glossary-403/anchor=space--be1ddf64-68e6-41fd-ab4d-7363678301f9), [views](https://the.fibery.io/@public/User_Guide/Guide/Fibery-Glossary-403/anchor=view--d94cabe1-317d-4f1a-9e4e-de4d3e378f89), [documents](https://the.fibery.io/@public/User_Guide/Guide/Fibery-Glossary-403/anchor=document--dffa804b-aa14-434d-8bb2-17c266246d72), [whiteboards](https://the.fibery.io/@public/User_Guide/Guide/Fibery-Glossary-403/anchor=whiteboard--25fb4d84-fcf4-4fff-a5f6-846c4a37c4b6), folders and [smart folders](https://the.fibery.io/@public/User_Guide/Guide/Fibery-Glossary-403/anchor=smart-folder--e0ec8ce5-4489-4528-9dfb-e4c7876ca692). See [Sidebar](https://the.fibery.io/@public/User_Guide/Guide/Sidebar-21).
---
#### form
A type of [view](https://the.fibery.io/@public/User_Guide/Guide/Fibery-Glossary-403/anchor=view--d94cabe1-317d-4f1a-9e4e-de4d3e378f89) used for creating new [entities](https://the.fibery.io/@public/User_Guide/Guide/Fibery-Glossary-403/anchor=entity--3c9a4aba-db25-4238-b795-3311f32a4552). See [Forms](https://the.fibery.io/@public/User_Guide/Guide/Forms-134).
---
#### formula
Can mean
* a characteristic of an [entity](https://the.fibery.io/@public/User_Guide/Guide/Fibery-Glossary-403/anchor=entity--3c9a4aba-db25-4238-b795-3311f32a4552) (i.e. a [field](https://the.fibery.io/@public/User_Guide/Guide/Fibery-Glossary-403/anchor=field--8bcbd7cb-9b9b-4237-a227-5ae787de1e06)) which is calculated from other field values (see [Formulas](https://the.fibery.io/@public/User_Guide/Guide/Formulas-39))
* a calculation used in an [automation](https://the.fibery.io/@public/User_Guide/Guide/Fibery-Dictionary-403/anchor=automation--dd53041b-0c27-4834-b815-1c6a60b52a84) [action](https://the.fibery.io/@public/User_Guide/Guide/Fibery-Dictionary-403/anchor=action--f8b8ea78-1fe9-4cce-a59f-f6cf98c4a1fa) (see [Rules](https://the.fibery.io/@public/User_Guide/Guide/Rules-51) and [Add Formula to Automation Button](https://the.fibery.io/@public/User_Guide/Guide/Add-Formula-to-Automation-Button-211))
* a calculation used in a [report](https://the.fibery.io/@public/User_Guide/Guide/Fibery-Glossary-403/anchor=report--61266e77-08b2-4aee-be01-4d8c5e301d67) (see [Calculations in Reports](https://the.fibery.io/@public/User_Guide/Guide/Calculations-in-Reports-347))
---
# H
---
#### highlight
A connection between a fragment of [rich text](https://the.fibery.io/@public/User_Guide/Guide/Fibery-Glossary-403/anchor=rich-text--86084fed-1297-473f-99ab-8e5cf60f3f04) and an [entity](https://the.fibery.io/@public/User_Guide/Guide/Fibery-Glossary-403/anchor=entity--3c9a4aba-db25-4238-b795-3311f32a4552), where the connection itself has characteristics ([fields](https://the.fibery.io/@public/User_Guide/Guide/Fibery-Glossary-403/anchor=field--8bcbd7cb-9b9b-4237-a227-5ae787de1e06)). See [Highlights](https://the.fibery.io/@public/User_Guide/Guide/Highlights-310).
---
#### historical report
A [report](https://the.fibery.io/@public/User_Guide/Guide/Fibery-Glossary-403/anchor=report--61266e77-08b2-4aee-be01-4d8c5e301d67) which visualises information related to the history of [entities](https://the.fibery.io/@public/User_Guide/Guide/Fibery-Glossary-403/anchor=entity--3c9a4aba-db25-4238-b795-3311f32a4552). See [Current vs Historical data in Reports](https://the.fibery.io/@public/User_Guide/Guide/Current-vs-Historical-data-in-Reports-168).
---
#### history
Can mean
* the changes that an [entity](https://the.fibery.io/@public/User_Guide/Guide/Fibery-Glossary-403/anchor=entity--3c9a4aba-db25-4238-b795-3311f32a4552) undergoes (see [Single Entity Activity Log](https://the.fibery.io/@public/User_Guide/Guide/Single-Entity-Activity-Log-91))
* the changes that a [document](https://the.fibery.io/@public/User_Guide/Guide/Fibery-Glossary-403/anchor=document--dffa804b-aa14-434d-8bb2-17c266246d72) or [rich text](https://the.fibery.io/@public/User_Guide/Guide/Fibery-Glossary-403/anchor=rich-text--86084fed-1297-473f-99ab-8e5cf60f3f04) [field](https://the.fibery.io/@public/User_Guide/Guide/Fibery-Glossary-403/anchor=field--8bcbd7cb-9b9b-4237-a227-5ae787de1e06) undergoes (see [Text history](https://the.fibery.io/@public/User_Guide/Guide/Text-history-32))
---
# I
---
#### inbox
A section of the [workspace](https://the.fibery.io/@public/User_Guide/Guide/Fibery-Glossary-403/anchor=workspace--7677f49d-ddbe-42ba-a508-fee9045f6c57) where [notifications](https://the.fibery.io/@public/User_Guide/Guide/Fibery-Glossary-403/anchor=notification--ff35313d-0d02-47db-9456-31e2d9545f36) are presented and stored. See [Inbox and notifications](https://the.fibery.io/@public/User_Guide/Guide/Inbox-and-notifications-35).
---
#### integration
A way of providing (read-only) access to data from an external source. See [Import and integration overview](https://the.fibery.io/@public/User_Guide/Guide/Import-and-integration-overview-182).
---
# L
---
#### layout
A way of presenting information in an [entity view](https://the.fibery.io/@public/User_Guide/Guide/Fibery-Glossary-403/anchor=entity-view--82a02810-e4e0-4c01-962b-2646dfadcb94), with either 1 or 2 [columns](https://the.fibery.io/@public/User_Guide/Guide/Fibery-Glossary-403/anchor=column--525437d0-25f6-48fc-b455-d1591dd854e4). See [Multiple Entity Views](https://the.fibery.io/@public/User_Guide/Guide/Multiple-Entity-Views-335).
---
#### list
A type of [view](https://the.fibery.io/@public/User_Guide/Guide/Fibery-Glossary-403/anchor=view--d94cabe1-317d-4f1a-9e4e-de4d3e378f89). See [List View](https://the.fibery.io/@public/User_Guide/Guide/List-View-10).
---
#### lookup
A [field](https://the.fibery.io/@public/User_Guide/Guide/Fibery-Glossary-403/anchor=field--8bcbd7cb-9b9b-4237-a227-5ae787de1e06) which surfaces field values of a related [entity](https://the.fibery.io/@public/User_Guide/Guide/Fibery-Glossary-403/anchor=entity--3c9a4aba-db25-4238-b795-3311f32a4552). See [Lookups](https://the.fibery.io/@public/User_Guide/Guide/Lookups-16).
---
# M
---
#### map
A type of [view](https://the.fibery.io/@public/User_Guide/Guide/Fibery-Glossary-403/anchor=view--d94cabe1-317d-4f1a-9e4e-de4d3e378f89). See [Map View](https://the.fibery.io/@public/User_Guide/Guide/Map-View-167).
---
#### mention
A clickable link in [rich text](https://the.fibery.io/@public/User_Guide/Guide/Fibery-Glossary-403/anchor=rich-text--86084fed-1297-473f-99ab-8e5cf60f3f04) (pointing to an [entity](https://the.fibery.io/@public/User_Guide/Guide/Fibery-Glossary-403/anchor=entity--3c9a4aba-db25-4238-b795-3311f32a4552), [view](https://the.fibery.io/@public/User_Guide/Guide/Fibery-Glossary-403/anchor=view--d94cabe1-317d-4f1a-9e4e-de4d3e378f89), [document](https://the.fibery.io/@public/User_Guide/Guide/Fibery-Glossary-403/anchor=document--dffa804b-aa14-434d-8bb2-17c266246d72) or [whiteboard](https://the.fibery.io/@public/User_Guide/Guide/Fibery-Glossary-403/anchor=whiteboard--25fb4d84-fcf4-4fff-a5f6-846c4a37c4b6)) which is dynamic, displaying the [name](https://the.fibery.io/@public/User_Guide/Guide/Fibery-Glossary-403/anchor=name--c8776236-8503-420e-8fbb-705771fad88a) (and potentially other [field](https://the.fibery.io/@public/User_Guide/Guide/Fibery-Glossary-403/anchor=field--8bcbd7cb-9b9b-4237-a227-5ae787de1e06) values) of the linked-to item. See [Comments and mentions](https://the.fibery.io/@public/User_Guide/Guide/Comments-and-mentions-34).
---
#### metric
A type of [report](https://the.fibery.io/@public/User_Guide/Guide/Fibery-Glossary-403/anchor=report--61266e77-08b2-4aee-be01-4d8c5e301d67). See [Metric (KPI)](https://the.fibery.io/@public/User_Guide/Guide/Metric-(KPI)-355).
---
#### mirroring
The act of replicating a [context](https://the.fibery.io/@public/User_Guide/Guide/Fibery-Glossary-403/anchor=context--26b9edb4-1d7d-4fd0-a7dc-468e9c9a1d60) [view](https://the.fibery.io/@public/User_Guide/Guide/Fibery-Glossary-403/anchor=view--d94cabe1-317d-4f1a-9e4e-de4d3e378f89) to all [entities](https://the.fibery.io/@public/User_Guide/Guide/Fibery-Glossary-403/anchor=entity--3c9a4aba-db25-4238-b795-3311f32a4552) of the same type within a [smart folder](https://the.fibery.io/@public/User_Guide/Guide/Fibery-Glossary-403/anchor=smart-folder--e0ec8ce5-4489-4528-9dfb-e4c7876ca692). See [Context Views](https://the.fibery.io/@public/User_Guide/Guide/Context-Views-20).
---
# N
---
#### name
A required characteristic ([field](https://the.fibery.io/@public/User_Guide/Guide/Fibery-Glossary-403/anchor=field--8bcbd7cb-9b9b-4237-a227-5ae787de1e06)) of every [entity](https://the.fibery.io/@public/User_Guide/Guide/Fibery-Glossary-403/anchor=entity--3c9a4aba-db25-4238-b795-3311f32a4552).
---
#### notification
An alert sent to a particular [user](https://the.fibery.io/@public/User_Guide/Guide/Fibery-Glossary-403/anchor=user--2aeda929-2406-41c4-98f6-d5ef99b8c93c) regarding some event in the [workspace](https://the.fibery.io/@public/User_Guide/Guide/Fibery-Glossary-403/anchor=workspace--7677f49d-ddbe-42ba-a508-fee9045f6c57). See [Inbox and notifications](https://the.fibery.io/@public/User_Guide/Guide/Inbox-and-notifications-35).
---
# P
---
#### panel
A part of the user interface, for displaying information. See [Panels](https://the.fibery.io/@public/User_Guide/Guide/Panels-23).
---
#### pie chart
A type of [report](https://the.fibery.io/@public/User_Guide/Guide/Fibery-Glossary-403/anchor=report--61266e77-08b2-4aee-be01-4d8c5e301d67). See [Pie chart](https://the.fibery.io/@public/User_Guide/Guide/Pie-chart-356).
---
#### pinned fields
A set of [fields](https://the.fibery.io/@public/User_Guide/Guide/Fibery-Glossary-403/anchor=field--8bcbd7cb-9b9b-4237-a227-5ae787de1e06) at the top of the left [column](https://the.fibery.io/@public/User_Guide/Guide/Fibery-Glossary-403/anchor=column--525437d0-25f6-48fc-b455-d1591dd854e4) in a 2-column [layout](https://the.fibery.io/@public/User_Guide/Guide/Fibery-Glossary-403/anchor=layout--f8c49c81-cd06-4461-90d9-9687be24b8f9) of [entity view](https://the.fibery.io/@public/User_Guide/Guide/Fibery-Glossary-403/anchor=entity-view--82a02810-e4e0-4c01-962b-2646dfadcb94). See [Entity View](https://the.fibery.io/@public/User_Guide/Guide/Entity-View-339).
---
# R
---
### reference
Alternative name for a [mention](https://the.fibery.io/@public/User_Guide/Guide/Fibery-Glossary-403/anchor=mention--898a8b70-8fc7-42a6-b0f3-ffa440a1c1a6).
---
#### relation
Can mean
* a connection, defined (with a specific [cardinality](https://the.fibery.io/@public/User_Guide/Guide/Fibery-Glossary-403/anchor=cardinality--d5f07378-611e-47cd-b597-0fd1068a7b08)) between one [database](https://the.fibery.io/@public/User_Guide/Guide/Fibery-Glossary-403/anchor=database--ff1cbe3b-e4e4-431d-ba9b-5c1675b55bc1) and another (or itself). It will present as a pair of [fields](https://the.fibery.io/@public/User_Guide/Guide/Fibery-Glossary-403/anchor=field--8bcbd7cb-9b9b-4237-a227-5ae787de1e06), representing either end of the connection.
* an instantiation of the above, i.e. a link between one [entity](https://the.fibery.io/@public/User_Guide/Guide/Fibery-Glossary-403/anchor=entity--3c9a4aba-db25-4238-b795-3311f32a4552) and another
See [Relations](https://the.fibery.io/@public/User_Guide/Guide/Relations-17).
---
#### relation view
An [context](https://the.fibery.io/@public/User_Guide/Guide/Fibery-Glossary-403/anchor=context--26b9edb4-1d7d-4fd0-a7dc-468e9c9a1d60) [view](https://the.fibery.io/@public/User_Guide/Guide/Fibery-Glossary-403/anchor=view--d94cabe1-317d-4f1a-9e4e-de4d3e378f89) that is part of an [entity view](https://the.fibery.io/@public/User_Guide/Guide/Fibery-Glossary-403/anchor=entity-view--82a02810-e4e0-4c01-962b-2646dfadcb94), and which displays, for each [collection](https://the.fibery.io/@public/User_Guide/Guide/Fibery-Glossary-403/anchor=collection--60704079-8191-4b46-8394-f34a552b9f6f), the related [entities](https://the.fibery.io/@public/User_Guide/Guide/Fibery-Glossary-403/anchor=entity--3c9a4aba-db25-4238-b795-3311f32a4552). See [Relation Views](https://the.fibery.io/@public/User_Guide/Guide/Relation-Views-309).
---
#### report
A type of [view](https://the.fibery.io/@public/User_Guide/Guide/Fibery-Glossary-403/anchor=view--d94cabe1-317d-4f1a-9e4e-de4d3e378f89) which allows visualisation of aggregated [entity](https://the.fibery.io/@public/User_Guide/Guide/Fibery-Glossary-403/anchor=entity--3c9a4aba-db25-4238-b795-3311f32a4552) data. See [Reports](https://the.fibery.io/@public/User_Guide/Guide/Reports-346).
---
#### rich text
An area for collaborative text editing. See [Rich Text](https://the.fibery.io/@public/User_Guide/Guide/Rich-Text-28).
---
#### role
An overarching level of access for each [user](https://the.fibery.io/@public/User_Guide/Guide/Fibery-Glossary-403/anchor=user--2aeda929-2406-41c4-98f6-d5ef99b8c93c) in the [workspace](https://the.fibery.io/@public/User_Guide/Guide/Fibery-Glossary-403/anchor=workspace--7677f49d-ddbe-42ba-a508-fee9045f6c57). See [User Management](https://the.fibery.io/@public/User_Guide/Guide/User-Management-45).
---
#### rule
A type of [automation](https://the.fibery.io/@public/User_Guide/Guide/Fibery-Dictionary-403/anchor=automation--dd53041b-0c27-4834-b815-1c6a60b52a84) that will execute when an event [trigger](https://the.fibery.io/@public/User_Guide/Guide/Fibery-Glossary-403/anchor=trigger--65b08ea3-532b-47f1-83d5-a38514bfb285) occurs, provided the [filter](https://the.fibery.io/@public/User_Guide/Guide/Fibery-Glossary-403/anchor=filters--b710ff44-4ccc-442d-9712-4065fa72c464) criteria are met. See [Rules](https://the.fibery.io/@public/User_Guide/Guide/Rules-51).
---
# S
---
#### schema
The complete description of the [relations](https://the.fibery.io/@public/User_Guide/Guide/Fibery-Glossary-403/anchor=relation--7c419e82-2278-43b6-8afc-5631c52dc782) and [fields](https://the.fibery.io/@public/User_Guide/Guide/Fibery-Glossary-403/anchor=field--8bcbd7cb-9b9b-4237-a227-5ae787de1e06) of the [databases](https://the.fibery.io/@public/User_Guide/Guide/Fibery-Glossary-403/anchor=database--ff1cbe3b-e4e4-431d-ba9b-5c1675b55bc1) in the [workspace](https://the.fibery.io/@public/User_Guide/Guide/Fibery-Glossary-403/anchor=workspace--7677f49d-ddbe-42ba-a508-fee9045f6c57).
---
#### script
A piece of code that executes as an [automation](https://the.fibery.io/@public/User_Guide/Guide/Fibery-Dictionary-403/anchor=automation--dd53041b-0c27-4834-b815-1c6a60b52a84) [action](https://the.fibery.io/@public/User_Guide/Guide/Fibery-Dictionary-403/anchor=action--f8b8ea78-1fe9-4cce-a59f-f6cf98c4a1fa). See [Scripts in Automations](https://the.fibery.io/@public/User_Guide/Guide/Scripts-in-Automations-54).
---
#### select
A type of [field](https://the.fibery.io/@public/User_Guide/Guide/Fibery-Glossary-403/anchor=field--8bcbd7cb-9b9b-4237-a227-5ae787de1e06) representing single or multiple options. Select fields are effectively 'mini' [databases](https://the.fibery.io/@public/User_Guide/Guide/Fibery-Glossary-403/anchor=database--ff1cbe3b-e4e4-431d-ba9b-5c1675b55bc1). See [Single and Multi-Select fields](https://the.fibery.io/@public/User_Guide/Guide/Single-and-Multi-Select-fields-87).
---
#### settings
The configuration options for a [workspace](https://the.fibery.io/@public/User_Guide/Guide/Fibery-Glossary-403/anchor=workspace--7677f49d-ddbe-42ba-a508-fee9045f6c57). See [Workspace settings](https://the.fibery.io/@public/User_Guide/Guide/Workspace-settings-62).
---
#### sharing
The configuration of access for [users](https://the.fibery.io/@public/User_Guide/Guide/Fibery-Glossary-403/anchor=user--2aeda929-2406-41c4-98f6-d5ef99b8c93c). See [Sharing & Permissions](https://the.fibery.io/@public/User_Guide/Guide/Sharing-&-Permissions-46).
---
#### sidebar
The left part of the user interface (if not hidden) allowing navigation within the [workspace](https://the.fibery.io/@public/User_Guide/Guide/Fibery-Glossary-403/anchor=workspace--7677f49d-ddbe-42ba-a508-fee9045f6c57). See [Sidebar](https://the.fibery.io/@public/User_Guide/Guide/Sidebar-21).
---
#### smart folder
A [sidebar](https://the.fibery.io/@public/User_Guide/Guide/Fibery-Glossary-403/anchor=sidebar--77a7b407-69cd-4093-a006-7398bd29d452) element showing a nested list of [entities](https://the.fibery.io/@public/User_Guide/Guide/Fibery-Glossary-403/anchor=entity--3c9a4aba-db25-4238-b795-3311f32a4552), under each of which can be created [context](https://the.fibery.io/@public/User_Guide/Guide/Fibery-Glossary-403/anchor=context--26b9edb4-1d7d-4fd0-a7dc-468e9c9a1d60) [views](https://the.fibery.io/@public/User_Guide/Guide/Fibery-Glossary-403/anchor=view--d94cabe1-317d-4f1a-9e4e-de4d3e378f89). See [Smart Folders](https://the.fibery.io/@public/User_Guide/Guide/Smart-Folders-26).
---
#### space
A container for [databases](https://the.fibery.io/@public/User_Guide/Guide/Fibery-Glossary-403/anchor=database--ff1cbe3b-e4e4-431d-ba9b-5c1675b55bc1), [integrations](https://the.fibery.io/@public/User_Guide/Guide/Fibery-Glossary-403/anchor=integration--2f7cf4dc-f6dd-405c-b03b-e4c16f399a34), [views](https://the.fibery.io/@public/User_Guide/Guide/Fibery-Glossary-403/anchor=view--d94cabe1-317d-4f1a-9e4e-de4d3e378f89), [documents](https://the.fibery.io/@public/User_Guide/Guide/Fibery-Glossary-403/anchor=document--dffa804b-aa14-434d-8bb2-17c266246d72), [whiteboards](https://the.fibery.io/@public/User_Guide/Guide/Fibery-Glossary-403/anchor=whiteboard--25fb4d84-fcf4-4fff-a5f6-846c4a37c4b6), [folders](https://the.fibery.io/@public/User_Guide/Guide/Fibery-Glossary-403/anchor=folder--06030e61-5491-48eb-b74e-743602fb0c01) and [smart folders](https://the.fibery.io/@public/User_Guide/Guide/Fibery-Glossary-403/anchor=smart-folder--e0ec8ce5-4489-4528-9dfb-e4c7876ca692), found in the [sidebar](https://the.fibery.io/@public/User_Guide/Guide/Fibery-Glossary-403/anchor=sidebar--77a7b407-69cd-4093-a006-7398bd29d452). See [Spaces](https://the.fibery.io/@public/User_Guide/Guide/Spaces-18).
---
# T
---
#### table
Can mean
* a type of [view](https://the.fibery.io/@public/User_Guide/Guide/Fibery-Glossary-403/anchor=view--d94cabe1-317d-4f1a-9e4e-de4d3e378f89) (see [Table View](https://the.fibery.io/@public/User_Guide/Guide/Table-View-11))
* a type of [report](https://the.fibery.io/@public/User_Guide/Guide/Fibery-Glossary-403/anchor=report--61266e77-08b2-4aee-be01-4d8c5e301d67) (see [Table](https://the.fibery.io/@public/User_Guide/Guide/Table-354))
* a grid within a [document](https://the.fibery.io/@public/User_Guide/Guide/Fibery-Glossary-403/anchor=document--dffa804b-aa14-434d-8bb2-17c266246d72) / [rich text](https://the.fibery.io/@public/User_Guide/Guide/Fibery-Glossary-403/anchor=rich-text--86084fed-1297-473f-99ab-8e5cf60f3f04) (see [Rich Text](https://the.fibery.io/@public/User_Guide/Guide/Rich-Text-28))
---
#### table of contents
A hierarchical list of the headings within a [document](https://the.fibery.io/@public/User_Guide/Guide/Fibery-Glossary-403/anchor=document--dffa804b-aa14-434d-8bb2-17c266246d72) / [rich text](https://the.fibery.io/@public/User_Guide/Guide/Fibery-Glossary-403/anchor=rich-text--86084fed-1297-473f-99ab-8e5cf60f3f04). See [Table of contents](https://the.fibery.io/@public/User_Guide/Guide/Table-of-contents-160).
---
#### template
Can mean
* a pre-defined [space](https://the.fibery.io/@public/User_Guide/Guide/Fibery-Glossary-403/anchor=space--be1ddf64-68e6-41fd-ab4d-7363678301f9) which can be imported and thus reproduced in another [workspace](https://the.fibery.io/@public/User_Guide/Guide/Fibery-Glossary-403/anchor=workspace--7677f49d-ddbe-42ba-a508-fee9045f6c57) (see [Templates](https://the.fibery.io/@public/User_Guide/Guide/Templates-19))
* a pre-defined set of connected [spaces](https://the.fibery.io/@public/User_Guide/Guide/Fibery-Glossary-403/anchor=space--be1ddf64-68e6-41fd-ab4d-7363678301f9) which can be reproduced (see [Share Workspace as a Template](https://the.fibery.io/@public/User_Guide/Guide/Share-Workspace-as-a-Template-57))
---
#### thread
Can mean
* a type of [view](https://the.fibery.io/@public/User_Guide/Guide/Fibery-Glossary-403/anchor=view--d94cabe1-317d-4f1a-9e4e-de4d3e378f89) (see [Thread View (experimental, emulates Slack channels)](https://the.fibery.io/@public/User_Guide/Guide/Thread-View-(experimental,-emulates-Slack-channels)-221))
* a [comment](https://the.fibery.io/@public/User_Guide/Guide/Fibery-Glossary-403/anchor=comment--0910f9e6-084f-420d-9573-50271dbdebb0) with one or more replies
---
#### timeline
A type of [view](https://the.fibery.io/@public/User_Guide/Guide/Fibery-Glossary-403/anchor=view--d94cabe1-317d-4f1a-9e4e-de4d3e378f89). See [Timeline View](https://the.fibery.io/@public/User_Guide/Guide/Timeline-View-12).
---
#### trash
A list of deleted items ([entities](https://the.fibery.io/@public/User_Guide/Guide/Fibery-Glossary-403/anchor=entity--3c9a4aba-db25-4238-b795-3311f32a4552), [views](https://the.fibery.io/@public/User_Guide/Guide/Fibery-Glossary-403/anchor=view--d94cabe1-317d-4f1a-9e4e-de4d3e378f89), [fields](https://the.fibery.io/@public/User_Guide/Guide/Fibery-Glossary-403/anchor=field--8bcbd7cb-9b9b-4237-a227-5ae787de1e06), [databases](https://the.fibery.io/@public/User_Guide/Guide/Fibery-Glossary-403/anchor=database--ff1cbe3b-e4e4-431d-ba9b-5c1675b55bc1), [spaces](https://the.fibery.io/@public/User_Guide/Guide/Fibery-Glossary-403/anchor=space--be1ddf64-68e6-41fd-ab4d-7363678301f9)) which may be restored. See [Trash](https://the.fibery.io/@public/User_Guide/Guide/Trash-90).
---
#### trigger
An event which can cause an [automation](https://the.fibery.io/@public/User_Guide/Guide/Fibery-Dictionary-403/anchor=automation--dd53041b-0c27-4834-b815-1c6a60b52a84) [rule](https://the.fibery.io/@public/User_Guide/Guide/Fibery-Glossary-403/anchor=rule--01e1a980-2023-4d1b-b211-0e1f6bfa1760) to be executed (subject to [filters](https://the.fibery.io/@public/User_Guide/Guide/Fibery-Glossary-403/anchor=filters--b710ff44-4ccc-442d-9712-4065fa72c464)). See [Rules](https://the.fibery.io/@public/User_Guide/Guide/Rules-51).
---
#### type
A category of [entities](https://the.fibery.io/@public/User_Guide/Guide/Fibery-Glossary-403/anchor=entity--3c9a4aba-db25-4238-b795-3311f32a4552) having common characteristics, i.e. the set of [fields](https://the.fibery.io/@public/User_Guide/Guide/Fibery-Glossary-403/anchor=field--8bcbd7cb-9b9b-4237-a227-5ae787de1e06) of [database](https://the.fibery.io/@public/User_Guide/Guide/Fibery-Glossary-403/anchor=database--ff1cbe3b-e4e4-431d-ba9b-5c1675b55bc1). Also, a deprecated name for a database.
---
# U
---
#### user
A person who has been granted access to a [workspace](https://the.fibery.io/@public/User_Guide/Guide/Fibery-Glossary-403/anchor=workspace--7677f49d-ddbe-42ba-a508-fee9045f6c57) or parts of it. See [User Management](https://the.fibery.io/@public/User_Guide/Guide/User-Management-45).
---
# V
---
#### view
Can mean
* [entity view](https://the.fibery.io/@public/User_Guide/Guide/Fibery-Glossary-403/anchor=entity-view--82a02810-e4e0-4c01-962b-2646dfadcb94)
* a visualisation of [entities](https://the.fibery.io/@public/User_Guide/Guide/Fibery-Glossary-403/anchor=entity--3c9a4aba-db25-4238-b795-3311f32a4552) in aggregate, e.g. [board](https://the.fibery.io/@public/User_Guide/Guide/Fibery-Glossary-403/anchor=board--8efc5243-b418-4ff9-92ca-c072ebeb8dc2), [list](https://the.fibery.io/@public/User_Guide/Guide/Fibery-Glossary-403/anchor=list--4f28ece4-bd09-4153-b513-c8bf8ddc0630), [table](https://the.fibery.io/@public/User_Guide/Guide/Fibery-Glossary-403/anchor=table--4bff8156-b063-467f-bc89-b82f120e9cf5) a.k.a. 'data view'
* a [sidebar](https://the.fibery.io/@public/User_Guide/Guide/Fibery-Glossary-403/anchor=sidebar--77a7b407-69cd-4093-a006-7398bd29d452) item such as a [document](https://the.fibery.io/@public/User_Guide/Guide/Fibery-Glossary-403/anchor=document--dffa804b-aa14-434d-8bb2-17c266246d72), [whiteboard](https://the.fibery.io/@public/User_Guide/Guide/Fibery-Glossary-403/anchor=whiteboard--25fb4d84-fcf4-4fff-a5f6-846c4a37c4b6) or [dashboard](https://the.fibery.io/@public/User_Guide/Guide/Fibery-Glossary-405/anchor=dashboard--5ffdef97-c96c-4b57-809a-8b92bb97852c), a.k.a. 'content view'
* a [form](https://the.fibery.io/@public/User_Guide/Guide/Fibery-Glossary-403/anchor=form--c78a0bf3-4cc1-448b-9f5d-d2f06087fb39)
See [Views](https://the.fibery.io/@public/User_Guide/Guide/Views-8).
---
# W
---
#### whiteboard
A canvas for drawing / diagramming. See [Whiteboards](https://the.fibery.io/@public/User_Guide/Guide/Whiteboards-38).
---
#### workspace
A collection of [spaces](https://the.fibery.io/@public/User_Guide/Guide/Fibery-Glossary-403/anchor=space--be1ddf64-68e6-41fd-ab4d-7363678301f9), [users](https://the.fibery.io/@public/User_Guide/Guide/Fibery-Glossary-403/anchor=user--2aeda929-2406-41c4-98f6-d5ef99b8c93c) and the [settings](https://the.fibery.io/@public/User_Guide/Guide/Fibery-Glossary-403/anchor=settings--e83c9b8d-bedd-43c8-96d8-5e6e71e39f3a) related to them.
---
#### workspace map
A visualisation of [spaces](https://the.fibery.io/@public/User_Guide/Guide/Fibery-Glossary-403/anchor=space--be1ddf64-68e6-41fd-ab4d-7363678301f9), [databases](https://the.fibery.io/@public/User_Guide/Guide/Fibery-Glossary-403/anchor=database--ff1cbe3b-e4e4-431d-ba9b-5c1675b55bc1) and the [relations](https://the.fibery.io/@public/User_Guide/Guide/Fibery-Glossary-403/anchor=relation--7c419e82-2278-43b6-8afc-5631c52dc782) between them. See [Sidebar](https://the.fibery.io/@public/User_Guide/Guide/Sidebar-21).
# IMPORT AND INTEGRATION OVERVIEW
_________________________________
## Introduction
Fibery is an all-in-one work management tool, but there are instances where you may need to connect it to other systems for data import or integration.
Understanding the distinctions between **import**, **integration**, and **two-way sync** is crucial in deciding the best approach for connecting Fibery with external systems.
## Import
Importing data allows users to bring data from external sources into Fibery, saving time and effort. It can be a one-time process, and the imported data remains static until another import is performed.
Two types of import exist: file-based and API-based.
### File-based import
File-based import allows importing data from external sources as files. This method is straightforward and can be useful for importing data from legacy systems or from other tools that don't have direct integration with Fibery. However, it is important to note that the quality of the imported data depends on the quality of the original data and how well it is organized.
* [Import from CSV](https://the.fibery.io/@public/User_Guide/Guide/Import-from-CSV-67)
* [Import from Markdown](https://the.fibery.io/@public/User_Guide/Guide/Import-from-Markdown-187)
### API-based import
API-based import allows importing data from external sources using the third-party tool's public API. This method is more powerful and flexible than file-based import, as it allows for more control over the import process and can handle more complex data structures.
However, the quality, accessibility, and reliability of the third-party API will define the import quality. We add many extra logic and configuration options to help maximize the data transfer when importing data. These options can help ensure that the imported data is accurate, complete, and organized in a way that makes sense for your use case.
## Integration
Integrating Fibery with external tools or services allows you to collaborate with data created outside of Fibery. Integrations enable a connection of other tools and services like Slack, GitLab, or Hubspot and sync their data into Fibery. Integrations use the same third-party public API described in the Import section above.

Integration is unidirectional. Integrations are set up once and run automatically or manually in the background to get fresh information.
Integration is typically used for the following use cases:
* **Streamlining workflows:** Integrating Fibery with other tools can help to streamline workflows by automating repetitive tasks or eliminating the need for manual data entry. \
For example, you could integrate Fibery with a project management tool to automatically create tasks in Fibery when a new project is created in the other tool.
* **Data aggregation:** Integrating Fibery with other data sources can help to consolidate information in one place, making it easier to analyze and work with. \
For example, you could integrate Fibery with a customer relationship management (CRM) tool to pull in customer data and use it to inform product development decisions.
* **Custom integrations:** Integrating Fibery with custom-built tools or systems can help to create tailored solutions for specific use cases or industries or enhance functionalities. \
For example, custom integrations can pull data from IoT devices and sensors into Fibery for analysis and action.
For more details, please check [Integration templates](https://the.fibery.io/@public/User_Guide/Guide/Integration-templates-68) and [Create Custom Integrations](https://the.fibery.io/@public/User_Guide/Guide/Create-Custom-Integrations-83).
When creating a Database, you can also import or sync data from an external source:

## Two-way sync
Two-way sync allows for bi-directional data exchange between Fibery and an external tool or service. With two-way sync, any updates made to data in Fibery are automatically reflected in the external system and vice versa. This ensures that all data across the two systems is always up to date.
Two-way sync is typically used for the following use cases:
* **High-value data sync:** This can be data such as customer records or financial data, where discrepancies or inconsistencies can have serious consequences.
* **Collaboration between different teams:** When two different teams in an organization use different tools, two-way sync can ensure that both teams are working with the same data. This can help avoid errors and miscommunications arising when working with different tools.
* **Transition to Fibery:** When one team starts using Fibery while the rest of the organization uses a third-party tool or service, two-way sync can ensure that data is shared seamlessly between the two systems. This can help to ease the transition to Fibery and minimize disruptions to existing workflows.
Currently, the only two-way import sync is [Jira two-way sync](https://the.fibery.io/@public/User_Guide/Guide/Jira-two-way-sync-159)
## Integration platforms
Integration platforms are like matchmakers for apps and tools. They help them connect and work together seamlessly. You can use them to create custom workflows that automate tasks and synchronize data between different tools.
We support the two most popular platforms:
* [Make (Integromat) integration](https://the.fibery.io/@public/User_Guide/Guide/Make-(Integromat)-integration-82)
* [Zapier Integration](https://the.fibery.io/@public/User_Guide/Guide/Zapier-Integration-81)
## Custom integration
In addition to the supported integration platforms, Fibery also allows to [Create Custom Integrations](https://the.fibery.io/@public/User_Guide/Guide/Create-Custom-Integrations-83), enabling tailored solutions for specific needs or industries.
> [//]: # (callout;icon-type=emoji;icon=:tophat:;color=#bec5cc)
> To use the Import and Integration features, you must have at least Creator rights on the Space level and Admin rights on the Workspace level.
### Request Import and/or Integration
> [//]: # (callout;icon-type=icon;icon=exclamation-circle;color=#199EE3)
> If you cannot find an import or integration you need, please provide us with feedback through [this form](https://the.fibery.io/@public/forms/ylxUN4kP "https://the.fibery.io/@public/forms/ylxUN4kP").
### Prevent integration entity deletion if it has any custom schema
Integration sync can cleanup entities like Source for Highlights, and it is quite dangerous, since restoration is not super easy. From now on, integration entities with ANY schema modifications will not be deleted during sync. This applies if:
* At least one custom field has been added by an admin.
* The entity has any rich text field.
To manage source-deleted entities, we're introducing a Simple Text field `deleted in source` with values `yes` and `no`. If an entity with a modified schema is deleted in the source, the value will be set to `yes`. Admins can then manually delete these entities if needed. This feature ensures a safer environment for your custom data.
## FAQ
### Integrations preserving references, backlinks and links
We recommend checking this [community thread](https://community.fibery.io/t/mapping-links-in-imported-content-into-fibery-links-references/3213) for more details, since there is no direct import supported.
#### Can I preserve internal links when importing content into Fibery (e.g. from Obsidian, Roam research, or Quip)?
Yes - with some preparation and scripting, it's possible to map internal links from your imported files into actual Fibery references, so they function like native entity mentions and power features like backlinks and References.
#### What kinds of links can be mapped to Fibery references?
This process can work for content exported from tools like:
* Obsidian – uses `[[Page Title]]` format (wiki-style links)
* Quip – similar markdown links, also usually `[Link Text](URL)`
#### The key requirement is:
The link text should match the title (name) of the page or entity that will exist in Fibery.\
How to convert the links into Fibery references?\
You can import your content (e.g. as `.md` or via `.csv`) into a Docs database in Fibery. Then, using an automation script, you can:
1. Parse the text in each entity for specific link patterns (e.g. `[[Page Title]]`).
2. Look up the matching entity by name in Fibery.
3. Replace the raw link with an internal mention like `[[#^DatabaseID/EntityID]]` so Fibery treats it as a reference.
A full working script example:
```
const fibery = context.getService('fibery');
//get the whole schema
const schema = await fibery.getSchema();
//get the entity type
const typeName = args.currentEntities[0].type;
// filter the schema for the specific type and get the spacename and database id
const namespace = schema['typeObjects'].filter((obj) => obj.name == typeName)[0]['nameParts']['namespace'];
const databaseID = schema['typeObjects'].filter((obj) => obj.name == typeName)[0]['id']
//get all documents in the database (assumes DB is called Doc)
const allDocs = await fibery.graphql(namespace, "{ findDocs{ id, name }}");
//create a lookup table that matches entity names to 'mentions'
//the mentions are constructed from the database id and the entity id
const lookupTable = allDocs['data']['findDocs'].reduce((obj, item) => (obj[item.name] = "[[#^" + databaseID + "/" + item.id + "]]", obj), {});
//for each entity
for (const entity of args.currentEntities) {
//get the contents of the Description field (change to suit)
const textToUpdate = await fibery.getDocumentContent(entity['Description']['Secret']);
//check for not null doc
if (textToUpdate !== null) {
//look for substrings that match the Obsidian formatting (as exported from Fibery)
//Note: Fibery escapes the [ and ] characters with backspaces, so we are looking for
// \[\[Title of obsidian document\]\]
//and the regex needs to escape these characters!
const replacementText = textToUpdate.replace(/\\\[\\\[[^\\\]]+\\\]\\\]/g, (match, key) => {
//trim to get the title to be looked up (remove the \[\[ and \]\] bits )
const title = match.replace(/\\\[\\\[|\\\]\\\]/g, '');
//if a match exists in the lookupTable, then replace
return lookupTable[title] !== undefined
? lookupTable[title]
: match;
});
//write the resultant text back to the Description field
await fibery.setDocumentContent(entity['Description']['Secret'], replacementText)
}
};
```
###
# HOW FIBERY HANDLES HIRING
___________________________
The Hiring Space in Fibery is built to manage the entire recruitment lifecycle, from job postings to final hiring decisions. Let's see how it works.
We don't have a dedicated HR department, so the hiring manager is always the person who will actually work with the new teammate. Vacancies are posted across several platforms, and every application is reviewed manually without delegating this responsibility to AI ~~(although it looks like it makes sense, looking at the quality of some applications…)~~. Our goal is to respond to every candidate, whether they're a match or not, and to keep a complete, transparent record of all interactions. For fun reports and ~~topic for whining.~~ To make this smoother and less error-prone, we decided to polish our workflow in Fibery so that all stages of the process — from collecting applications to scheduling interviews and tracking communications — are neatly structured, easy to follow, and leave no candidate overlooked.
> [//]: # (callout;icon-type=icon;icon=heart;color=#e72065)
> You are welcome to install[ the template right away here.](https://shared.fibery.io/t/761ce560-86fb-4ab2-84db-e72b6148eb3e-hiring-in-fibery) Please, note, that you will have to connect email integration on your own, and also replicated integration-related formulas manually as well.
### Typical workflow: from Job Opening to Hire
1. Create Position\
→ You add a new position, assigning a hiring manager.
2. Candidates Apply\
→ Manually added (rare) or submitted with a Form (most of cases)
3. Initial Screening\
→ Responsible team member reviews and moves to "Followed up" or "Not Hired".
4. Interview Process
* Move promising candidates to "To interview"
* Schedule and document interviews
* Record outcomes in the Interview database
* Continue progress through stages like "Interview passed" and "Offer made"
5. Decision Phase\
→ Final state is set: Hired, Not hired, or Declined.
6. Close Position
### What have we done to make it easier to process?
#### Collecting candidates — How we made it sane
In the early days, we asked candidates to apply via email to a shared inbox (`new@fibery.io`). That turned out to be a mess. The inbox was flooded with all kinds of messages — newsletters, product feedback, spam — making it nearly impossible to spot and track actual job applicants. Candidates were easily overlooked, and the hiring process became chaotic and unreliable.
To fix this, we started using Fibery form as the single source of truth for all incoming applications. This form includes all the relevant fields we need — name, CV, LinkedIn, role, background, and more — and every submission goes directly into the Hiring/Candidate database.
By doing this:
* ✅ No candidates are lost or forgotten
* ✅ All data arrives structured and complete
* ✅ Everyone involved in hiring sees the same up-to-date list


#### Integrated with Email
To streamline candidate communication and make the process more transparent, [we've integrated email syncing directly into Fibery. ](https://the.fibery.io/@public/User_Guide/Guide/Email-integration-\(Gmail,-Outlook-IMAP\)-66)Once configured, all email exchanges with candidates are automatically pulled in and linked to the correct Candidate record — based on their email address.


This integration brings a few powerful benefits:
* Automatic Linking: Emails are matched to candidates without manual effort
* Conversation History: When you open a Candidate, you instantly see all email exchanges — perfect for curious teammates who want to stay in the loop
* Smart Metrics via Formulas: We also use email data to drive meaningful insights:
* Days to First Reply:\
`ToDays(Emails.Filter(Right(Email, 10) = "@fibery.io").Min(Date) - [Creation Date]) `→ Measures how quickly we respond to applications
* Total Email Count:\
`Emails.Count()`→ Tracks all communication volume
* Emails Till Decision:\
`Emails.Filter(Right(Email, 10) = "@fibery.io" and (IsEmpty([Decision Date]) or [Decision Date] > Date)).Count()`→ Shows how many emails were exchanged *before* the hiring decision
* Latest Communication Date:\
`Emails.Max(Date) `→ Lets us see when the last contact was


#### Rejecting Candidates 😢
Like most teams, we received a large volume of applications, and while every candidate was reviewed by a real human (the hiring manager!), it became clear that rejecting non-fit applicants manually was time-consuming.
To streamline this part of the process without sacrificing empathy or professionalism, we introduced simple automation with clear intent — a set of rejection buttons that cover the most common scenarios:
1. **Reject**\
→ Sends a polite, default rejection email automatically.\
Ideal for cases where the candidate is clearly not a fit, but you still want to acknowledge the effort and bring closure.

2. **Reject with Custom Message**\
→ Opens an email draft where you can explain why it's not a match and offer a more personal note — for candidates who showed potential or made a thoughtful application.\
Great for keeping the door open for future opportunities.

3. **Reject Silently**\
→ No email is sent. Used for clear misses (e.g., applicants who didn't read the role description or totally mismatch the requirements).\
Helps avoid unnecessary back-and-forth while still logging the decision internally.
It's also easy to see, why candidate was rejected.

#### Follow-up
For candidates who look promising but need more info or scheduling, we wanted to make follow-ups smooth, personalized, and fast — without the hassle of switching tools.
So we built a “Follow-Up†button directly into Fibery.
When clicked, it:
* Prepares a draft with the candidate's email and your sender info
* Auto-generates a subject line using a formula
* Lets you write a custom message right inside Fibery
* And finally — sends the email in one click

### Reporting
Because everything lives inside Fibery — from candidate details to emails and decisions — we get powerful reporting almost for free.
With just a few views, charts, and formulas, we can:
* See how many candidates applied and how they're distributed across hiring stages
* Discover where the best candidates come from (geographically or by channel)
* Track conversion rates between stages (e.g., New → Interview → Hired)
* Measure time-to-hire, email response times, and drop-off patterns

 Anton in August 2025 about Customer Education Manager position")
#### Smart agent help
One of the coolest parts of our setup is the Smart Agent in Fibery. You can ask it questions like:\
“How many emails have I sent to candidates since last Monday?â€\
… and it will figure out the filters, interpret time frames, and query your database accurately.
It understands not only date ranges and logic, but also context across related fields like Candidate, Sender, or Email Date. Even when it needs clarification — like in the screenshot — it will ask the right follow-up to avoid errors.
Once clarified, it can:
* ðŸ•µï¸ Filter out just your emails
* 🧩 Count only those linked to candidates
* 📅 Use smart date handling (e.g. “last Monday†→ exact date)
* 🧠Summarize patterns and detect content uniqueness (like in the 51 unique email content types case)
It's a massive time-saver. Especially if you are simply curious and have volumes of data. You don't need to create filtered views or build reports manually. Just ask in natural language and get precise answers in seconds.

### Data structure
If you are curious about how it was built, [you can install the template here](https://shared.fibery.io/t/761ce560-86fb-4ab2-84db-e72b6148eb3e-hiring-in-fibery), or build the structure on your own.
The hiring setup in Fibery is built around three tightly connected databases — **Positions**, **Candidates**, and **Interviews** — to mirror the real-life flow of recruitment.
* The `Position` database tracks job openings, which can be marked as “Open†or “Closed,†assigns a hiring manager from the Fibery team, and automatically aggregates candidate metrics such as total, active, and unprocessed applications. It also links job postings to related blog articles and, when someone is hired, connects directly to the employee's record in the company database.
* The `Candidate` database holds all applicant details and moves them through an eight-stage workflow — from “New†to “Hired,†“Not hired,†or “Declined†— while recording communication metrics like email count, days to first reply, and last contact date, all powered by email integration. Candidate records store essential details (CV, LinkedIn, location, phone) from the application form and allow quick replies via rejection buttons.
* The `Interview` database manages interview scheduling, notes, results, and recordings, with the ability to assign multiple team members. Relationships between the databases ensure that each position lists all its candidates and each candidate's interview history, keeping the hiring process both structured and traceable.


> [//]: # (callout;icon-type=icon;icon=heart;color=#e72065)
> Have any ideas on how to make it better? You are welcome share that (as always!)
# ZAPIER INTEGRATION
____________________
Connect Fibery to hundreds of other tools to automate routine tasks using [Zapier](https://zapier.com/) integration.
To enable Zapier in Fibery, navigate to `Templates` *→* `Integration` section. Click `Connect` Zapier and follow the flow. This video shows the whole connection flow and first Zap creation.
[https://youtu.be/QjSFpex9Um4](https://youtu.be/QjSFpex9Um4)
> [//]: # (callout;icon-type=icon;icon=heart;color=#e72065)
> Fibery also supports [dehydration](https://docs.zapier.com/platform/reference/cli-docs#dehydration) for files in Zapier, so you can create Zaps that extracts files from Fibery entity and sends them as attachments via email, for example.
Please, note, that:
* Some file fields may not accept text.
* Files larger than 100 MB may result in a [time out error](https://help.zapier.com/hc/en-us/articles/8496100326285).
* You can only add 1 file per field. If you need to add additional files, you'll need to add separate action steps.
### FAQ
#### Is it possible to set single-select value by name during Update Entity?
We don't support setting single-select value by name during Update Entity Zapier Action. You must retrieve id of corresponding single-select value and paste it to the Zapier form.
# AUTOMATED DAILY LEAD QUALIFICATION WITH AI
____________________________________________
#### How may this work and why you need that?
Sales teams often need to quickly understand which new sign-ups are worth engaging with. Manually reviewing every registration is time-consuming, especially when information is incomplete (e.g. no business email, unclear role, or ambiguous company data).
With Fibery + AI, you can:
* Automatically collect all contacts who registered the previous day.
* Run an AI-driven analysis for each new contact, predicting details such as role, company, category, and potential relevance.
* Generate a concise daily report that helps the sales team prioritize communication and outreach.
This ensures your team starts each day with an actionable, AI-powered summary of new leads, saving time and improving focus on the most promising prospects. [Here is an example of the report](https://d1f4u7smwbtn85.cloudfront.net/polina-sandbox-new.fibery.io/c0f00658-583e-491e-8bc6-3de186829c8a?response-content-disposition=inline%3B+filename%3D%22Sales_Contact_Analysis_Report.pdf%22&response-content-type=application%2Fpdf&Expires=1756133153&Key-Pair-Id=KGJPFJ6T4AGSL&Signature=DBWXZ3wK805vPrup129VBwZTuuzCwfhaxfTsB4LFkEP3wfXBaBwKy8T%7EdaSegSR1DkOuEAJQWd37lfVzPhBm3t5j-D%7E2V%7E2AfAzM86cyi1HbUesX2xyRmC-e9mYNLfPV3eR1JNx5nJclxJkBVidR-zTOYyu3K6020JoFLjUNbwEPVPxcC725sIlYqW5HE79F7tGS4FF%7EnSF4zH6bo8yEXtB-L4UyjtCEVL1qz5GI1ki2BUckyI%7ELLC4Ey4DPwU4zRPRFwpehDxVEl86sqkZywe6oeWWm5xZX5kyvea9E4fwaxoRKc2Nzo-muWEXIwTBtcgY7-67oI9TeTOQSuSCWlQ__)
#### Structure you will need
* You'll have a `Contacts` database where every new signup is stored. This is where you keep basic information like their name, email, company, category, country, and the date they registered. It also holds some “enriched†data like whether the email looks like a business email, and AI predictions about their role or company.
* Then there's an `AI Prompts` — think of it as a library of questions or instructions you might want to ask AI about your contacts. Each prompt describes what kind of analysis or summary you want the AI to produce.
* Finally, you'll have an `AI Reports` database, which is essentially the results vault. Each report is created for a specific Contact using a specific Prompt. So, for every contact analyzed, you'll store the AI's response here, linked both back to the original contact and to the prompt that was used.
👉 In short: Contacts hold the people, Prompts hold the instructions, and Reports hold the AI's answers — all neatly connected.

#### Automations and prompts
1. Prepare your AI prompt
First, create an `AI Prompt` entity that describes what you want the AI to analyze. For example here is what we used:
> You are an AI assistant for the sales team. For each new contact registered yesterday, analyze the following:
>
> * Is the email a business email or not?
> * What is the predicted role and company? Are they plausible for our construction bank target?
> * Is the contact's company relevant to our industry?
> * Any notable patterns or anomalies in registration (e.g., high number from a country, many non-business emails)?\
> Provide a concise summary with recommendations for sales outreach prioritization.\
> Please create a smart report based on that.

This prompt will serve as the instruction the AI follows when generating reports.
2. Configure the rule
You can use Fibery's **Smart Agent** to process your prompt. In the AI Prompt database, add a **button** that triggers the Smart Agent. The setup looks like this:
```
[ai-agent]
{{Prompt Text}}
[/ai-agent]
```
* `{{Prompt Text}}` is the rich text field containing your AI instructions.
* The Smart Agent reads this prompt, analyzes the relevant contacts, and generates a report.

When you click the button:
1. Trigger: The button activates the automation.
2. Send to AI: Fibery sends the prompt to the Smart Agent, along with the data to analyze (e.g., contacts registered yesterday).
3. Processing: The Smart Agent evaluates each contact based on your prompt and produces a structured, concise summary.
4. Create Report: Fibery automatically creates a new entry in the AI Reports database, linking it to both the original prompt and the contacts analyzed. The AI-generated summary is stored in the report's rich text field.
3. Result
After execution, you will have:
* A new report in AI Reports, summarizing recent sign-ups, highlighting business emails, predicted roles, company relevance, and notable patterns.
* A clear recommendation for sales outreach prioritization.
This flow ensures that every day, your sales team can quickly review new contacts with AI-generated insights without manual analysis.


# RULES
_______
## What is an automation rule?
Automatic Rules in Fibery react to changes (update, create or delete, link, unlink) that happened with entities. For example, you closed a Task and want to set a Completion Date to Today. Or they can run according to a pre-defined schedule (every weekday at 9am, once a month, etc.)
Rules are linked to [Databases](https://the.fibery.io/@public/User_Guide/Guide/Databases-7), so you add them via the Database editor. If you need to react to Task change, then the Rule should be defined in Task Database.
Rule consists of a **Trigger** and one or more **Actions**.

## How to add a Rule
To add an Automation:
1. Go to a Space Configuration
2. Choose a Database and expand it.
3. Find `Rules` section and click `+` near it.
> [//]: # (callout;icon-type=icon;icon=laughing;color=#199EE3)
> You can set Icon field in Automations to make it more fun (or not fun)
## Triggers
Triggers are events. Consider the Feature database. It will have the following triggers:
* Feature Created.
* Feature Updated.
* Entity linked to a Feature (for example, Task or Product).
* Entity unlinked from a Feature.
* On Schedule (periodic rules based on intervals).

To react only in certain conditions, use [Filters](https://the.fibery.io/@public/User_Guide/Guide/Filters-141). For example, proceed only if the created Feature is in Failed State:

> [//]: # (callout;icon-type=icon;icon=exclamation-circle;color=#fba32f)
> * When an entity is created, the setting of field values on creation is treated as a part of the "Create" event - there are not additional update events for each field.i.e. if an entity is created in a specific column of a board view, or from within a filtered view, the field values will be automatically set **on creation** to match that column or the filter criteria (where possible).
> * If an Automation relies on a calculated Field (Formula or Lookup), it should be triggered by an **update** to the Formula or Lookup field rather than on creation of the Entity.
### The user who triggered the automation
You can configure your Automations based on who triggers them:
* track who was the last to change a certain Field
* automatically assign the developer who moves a Story to "In progress"
* link an Epic to the right team based on who clicked the `Plan for next Quarter` Button

## Actions
The Actions define what will be done when an event is triggered. There are many possible types of actions. Let's take the Feature database as an example. You can use the following actions:
* Create (create a new Feature)
* Update (update the Feature)
* Delete (delete the Feature)
* Script (execute some script to do complex things)
* Append content to a [Rich Text](https://the.fibery.io/@public/User_Guide/Guide/Rich-Text-28) field (e.g. add content into Description)
* Set of actions for every collection, like Add Task, Update Tasks, Delete Tasks, Link Task, Unlink Task
* Notifications (send [Inbox and notifications](https://the.fibery.io/@public/User_Guide/Guide/Inbox-and-notifications-35))
> [//]: # (callout;icon-type=icon;icon=exclamation-circle;color=#FC551F)
> For a given automation, action steps are always executed sequentially. See [Automation execution logic](https://the.fibery.io/@public/User_Guide/Guide/Automation-execution-logic-332)
### "Add Item" Automation Action. Allow to override default Relation Field setter
If you create a item in an automation action via a relation from the triggering entity, the new item will be linked to the triggering entity automatically. So in this example, a Task called 'New Task' will be created as a child of the triggering Story.

And yet, the action allows you to define any field values of the newly-created item, including it's relation to the 'parent' database:

So, if there is a field value defined in the automation action, it will override 'default inheritance'.
If nothing is defined (which is what 99% of automations do) the 'default inheritance' will continue to be applied.
## Recurring rules
Sometimes, an entity needs to be created or a repeating set of actions performed. Below is a quick guide on how to add recurring rules and several use cases describing when scheduled tasks can be useful.
### **How to add recurring rules in Fibery**
To start configuring scheduled rules proceed with the following steps
1. Open Database editor.
2. Click `Automations`.
3. Click `Add Rule`.
4. Select `On Schedule` trigger type in the `When` section.
5. Configure the schedule of the rule execution.
6. Provide filters of how you will apply actions for existing entities.
7. Configure actions.

### Recurring rules example: Notify team about daily meeting
Scheduled rules can be used for notifying team members about important events. This example shows how to notify your teammates about the daily meetings every workday at 13:00 using the "Notify Users" action

## Errors
When something is wrong with the Automation rule you configured, you will be given a notification (see [Inbox and notifications](https://the.fibery.io/@public/User_Guide/Guide/Inbox-and-notifications-35)).
You can also check `Activity` Tab to see what did (or didn't happen).
## FAQ
### Why in some cases do I see the "Run now" option, and in other cases, I don't?
`Run now` is available only for scheduled rules. In that case, the entity selection is known that's why it is available.
### My rule is not triggered on creation
If you have a filter that relies on a LookUp or Formula, that can be the cause.
Formulas and LookUps are updated asynchronously, so if the automation gets triggered when the item gets created, it is not deterministic whether the filter criteria are met at the time they are checked.
Check out [Automation execution logic](https://the.fibery.io/@public/User_Guide/Guide/Automation-execution-logic-332).
### When do filters on trigger get evaluated?
Filters in Automation Rules do not get evaluated at the exact moment of a change, that caused Rule's trigger. Instead, they run when the 'automation engine' receives the trigger event notification.
Check out [Automation execution logic](https://the.fibery.io/@public/User_Guide/Guide/Automation-execution-logic-332) for more details.
### Is there a way in an automation to copy a rich text field's content to another entity without using a script?
Yes, it's possible - no scripting is required.
Fibery's automation actions include:
* Append Description
* Rewrite Description
These actions allow you to copy, append, or replace the contents of a Rich Text field from one entity to another — as long as both databases have Rich Text fields.

To control *what* is copied and how it appears, you can use Markdown formatting. This gives you flexibility to structure the copied content (e.g. with headings, links, bold text, etc.).
👉 Check out the [Markdown Templates](https://the.fibery.io/@public/User_Guide/Guide/Markdown-Templates-53) for formatting tips and examples.
# REFERENCES TO HIGHLIGHTS
__________________________
# Why we decided to improve Link-to-Entity and turn it into Highlight?
Fibery has [Entity mentions and bi-directional links](https://the.fibery.io/@public/User_Guide/Guide/Entity-mentions-and-bi-directional-links-31) which are ad-hoc connections that work for all database entities in Fibery.
There are two ways of creating a bi-directional link
* Create a Mention, or
* Select text and use the Link-to-Entity feature
Both result in a backlink, which can be found in the Reference section of the Entity that was linked to.

These bi-directional links work well in many scenarios, but some limitations exist.
**References are not easily accessible**
* The Reference database is not accessible like other Fibery databases are.\
This means you cannot easily analyse/query data within references. For example, you cannot easily create a formula to extract properties from entities connected via Link-to-Entity or Mention.
**References do not support attributes**
* Attributes cannot be added to bidirectional links. This means you cannot determine whether a link between a Conversation and a Feature expresses a positive or negative sentiment.
Seeing these limitations, we upgraded the Link-to-Entity functionality while keeping the Mentions the same as today.
[https://demo.arcade.software/TZleai2cyafFsTcL9wre?embed&show_copy_link=true](https://demo.arcade.software/TZleai2cyafFsTcL9wre?embed&show_copy_link=true)
> [//]: # (callout;icon-type=icon;icon=book-open;color=#199ee3)
> You can find more information in the [Highlights](https://the.fibery.io/@public/User_Guide/Guide/Highlights-310) user guide.
# Options for Existing Workspaces
It is not possible to utilise both Link-to-entity and Highlights functionality in the same workspace, so you need to decide if you want to upgrade.
Upgrading to Highlights is not mandatory for existing workspaces. All the new workspaces have only the Highlights option.\
If you choose to upgrade, it is important to understand the consequences since the upgrade from Link-to-entity functionality to Highlights is NOT reversible.
**Advantages**
* Highlights are stored in an accessible database and can be used in normal Fibery [Views](https://the.fibery.io/@public/User_Guide/Guide/Views-8) .
* Highlights can have attributes, formulas, and rules similar to any other database in Fibery.
**Limitations**
* Highlights can only be created from selected types of entities (a.k.a. source databases) as determined by the Highlight settings.
* Highlights can only point to selected types of entities (a.k.a target databases) as determined by the Highlight settings.
Note: You are limited to choosing up to 6 databases as Highlight sources and 6 databases as Highlight targets
* Highlights can, therefore, not be used to link to/from Documents or Views
Considering the advantages and limitations, you can decide whether to move to Highlights based on your Reference usage.
> [//]: # (callout;icon-type=icon;icon=lightbulb-alt;color=#8ec351)
> Remember, you can continue to use Mentions even if you upgrade to Highlights.
> [//]: # (callout;icon-type=icon;icon=map-marker-question;color=#99a2ab)
> If you are unsure, don't hesitate to contact Support through Intercom — we can help you to figure it out together.
# Upgrading
> [//]: # (callout;icon-type=icon;icon=exclamation-triangle;color=#d40915)
> Once the Highlight database is created, the Link-to-entity feature is changed to Highlight creation, and there is no way back.
The Highlights configuration is found under Settings. Here, you can define the possible sources and targets.
Once the Highlight database is created, the following things change in the workspace:
* **Link-to-Entity Feature:** the Link-to-Entity feature will no longer be available and will be replaced by the Highlights feature.
* **Highlights Feature**: the Create Highlight option will only be enabled if the entity is in a database set as a source in the Highlights settings. It will only be possible to link to entities in one of the target databases.
* **Documents**: Only the Mention feature can be used in Documents; the Link-to-Entity will be disabled and cannot be re-enabled. The existing References in the Document are still available and can be deleted, but new ones cannot be created.
* **References**: non-migrated Link-to-Entitty references will remain visible. They can be found in the Reference section of the Entity view, but new Link-to-Entity references cannot be created.
* **Mentions:** Mentions can still be used in databases, entities, and documents. There are no restrictions, and they can be found in the reference section of the referenced entity's view.
# Migration
After the Highlights database is created and the source and targets are set, the system begins to find references that can be migrated. Only those references that match the source and target settings in the Highlights database can be migrated.
In the following example, the Reference Migration Tool found 279 references between Feedback and Feature or Product Line or between Slack and Feature or Product Line.

Once you start the migration, you cannot convert back the Highlights to References. Please consider this carefully before starting, or seek help from support if needed.
Clicking the "Migrate" button initiates the migration, and you can track its progress through a counter. The entire process runs asynchronously, so you can leave the settings page if you don't want to wait for it to finish. It could take a long time when you have a huge amount of References.
Once the migration is complete, you will see a notification message that you need to close in order to access the Highlight settings again.

You do not have to migrate existing References; you can start using Highlights without any migration. In that case, existing References will continue to be available in the Reference section of the Entity view.
# CALCULATIONS IN REPORTS
_________________________
Quite often, creating the required visualisation requires transforming or combining the source data. This can be done using calculations, which enable you to leverage powerful techniques for data manipulation.
Every visualisation parameter (dotted box) in the [visualisation pane](https://the.fibery.io/@public/User_Guide/Guide/Reports-346/anchor=Visualisation-pane--a5d9226f-671e-49d4-a61e-7bcf7ea9bb3d) allows you to do some calculations (like aggregation or grouping) via the basic parameter configuration settings.
For other, more complex cases, you will need to use the calculation box.
## Using calculations
New calculations can be added using the "+" sign, or by clicking the parameter box. The "New Calculation" popup will appear.
An existing parameter's calculation can be modified via the [parameter configuration](https://the.fibery.io/@public/User_Guide/Guide/Report-editor-352/anchor=Parameter-configuration--a5d64e85-ec92-413d-9fba-f13c6b2c11a1).
It utilizes autocomplete and while being used, the [source settings](https://the.fibery.io/@public/User_Guide/Guide/Reports-346/anchor=Source-settings--73eef0e7-362d-41de-8d57-8b0fcbbbf874) and [available fields](https://the.fibery.io/@public/User_Guide/Guide/Reports-346/anchor=Available-fields--52af9fa6-9bf6-439c-a9c6-3328be1c36b5) sections are replaced with a guide to the available functions, as well as samples of how they can be used.
The available functions are as follows:
[Logic functions](https://the.fibery.io/@public/User_Guide/Guide/Logic-functions-349)
[Numeric functions](https://the.fibery.io/@public/User_Guide/Guide/Numeric-functions-348)
[Text functions](https://the.fibery.io/@public/User_Guide/Guide/Text-functions-350)
[Date functions](https://the.fibery.io/@public/User_Guide/Guide/Date-functions-351)
> [//]: # (callout;icon-type=icon;icon=exclamation-circle;color=#6A849B)
> The syntax used for report calculations is different from the syntax used for database [Formulas](https://the.fibery.io/@public/User_Guide/Guide/Formulas-39)
# SEARCH
________
Fibery has a full-text search and [Semantic Search (AI Search)](https://the.fibery.io/@public/User_Guide/Guide/Semantic-Search-(AI-Search)-203) (semantic search).
Find Search in the left sidebar (or use `Cmd + K` shortcut ) to access full-text search. Just type some keywords and most likely Fibery will present some decent results. Fibery will look in [Rich Text](https://the.fibery.io/@public/User_Guide/Guide/Rich-Text-28) fields, [Documents](https://the.fibery.io/@public/User_Guide/Guide/Documents-85), [Comments and mentions](https://the.fibery.io/@public/User_Guide/Guide/Comments-and-mentions-34), the Name Field of Entities, basic text/email/url/phone Fields.
> [//]: # (callout;icon-type=icon;icon=exclamation-circle;color=#fba32f)
> Some limitations:
>
> * Search doesn't work for inline text comments.
> * Phone search has some limitations, for example, if you type `12345678`, then all numbers which contain spaces `123 45 768`, brackets `1(23)45678` or hyphens `123-45-678` will be missed in search.
## What you can find in Search?
There are several things that you can find:
* Entities (Tasks, Projects, Events, Bugs, Features, etc.)
* Documents
* Comments
* Views (Table, Board, Report, etc.)
* Settings pages:Â Trash, Activity Log, etc. To keep search results clean, we only suggest system pages using a shortlist of keywords: e.g. `trash`, `restore`, and `undelete` for Trash.
* Databases
## Search Filters
### Filter Search Results by Final State
You can filter out Done, Closed, Final items from search. Just use `Done` switcher.
### Filter results by Database
Click `Any Database` to limit search results to a specific database. For example, you know that you want to find a Feature, then filter by the Feature database.
See also: [exclude Database from search](https://the.fibery.io/@public/User_Guide/Guide/Panels-and-Search-23/anchor=Exclude-a-Database-from-search--c2907303-1389-4e5f-8e65-6e9b53d7980c).
### Filter results by creation date
Use `When` filter to narrow down the search results to recently created items or items created in a specific timeframe:

> [//]: # (callout;icon-type=icon;icon=exclamation-circle;color=#fba32f)
> Filters Limitations:
>
> * doesn't work for AI search
> * doesn't apply when searching for Databases
### Filter results by View Type
You can filter search results by View type. For example, if you want to find some Table View, you can do it via the filter in Search faster.
### Filter Views by Space
You can filter Views in search results by Space. It will help you to find documents, whiteboards, and other views faster.
## Explore search results
You may quickly explore search results by opening items in the right panel.
1. Put the mouse cursor on a search result (or navigate the list using ↑ ↓ keys)
2. Click `Open a new panel on the right` icon (or use `Option + Enter` shortcut)

## Access recent items
By default, the search screen shows recently visited entities and views. This is a very handy way to quickly access a recent entity or view.

## Exclude Databases from search
If you don't want Entities of some Database to ever show up in search results (e.g. `Month` or `Commit`), exclude them **for everyone.**
Navigate to Space settings of the relevant Database and pick `Exclude … from search` in the context menu:

To bring the Entities back, pick the `Include … in search` option in the same context menu. Both operations require `Creator` access to the Space.
You can still search within the excluded Database by explicitly selecting it in the `What` filter:

## Search exact match using quotes
You can use quotes `"smth you are looking for"` around the search phrase and exact matches will be returned.
## Quickly add entities from search
If you didn't find the entity and you want to add a new entity, you can [Quickly add Entities](https://the.fibery.io/@public/User_Guide/Guide/Quickly-add-Entities-24) in search. Just select the database and you will see Create entity option.
## Search + Panels
You may open a search in your current panel, or open new panels on the left or right to find an entity or view and open it in the new panel. Find the search icon on the top right corner of the panel and hover your mouse cursor on top:

### Open a new panel on the left/right
`Cmd + Shift + <` and `Cmd + Shift + >`\
When writing a feature spec, you realize you can borrow some ideas from another, not yet related feature. So you open them side-by-side and figure out which parts to reuse
### Close all panels and open the search
`Cmd + Shift + K`\
You've just finished describing a huge project, your screen is full of panels, and you are ready to move on to the next task. So you close all the panels to open search and start a new “thinking sessionâ€
### Open search in the current panel
`Cmd + K`\
You are writing a long (and totally not boring) document on the right inspired by several sources on the left. You don't ever come back to a source, so you reuse the same panel
## OpenSearch integration to Fibery search
You can open Fibery search directly from your browser search bar. This feature works best in Firefox and requires a few more manual steps to set up in Chrome.
Just open any Fibery page, and if your browser supports that feature, it will suggest adding Fibery as a search engine.

To setup in Chrome:
1. Open any Fibery page.
2. Go to Chrome settings → Search engine → Manage search engines and site search.
3. Scroll to the end of the page, and click `Activate` near the row with the relevant Fibery workspace.
4. Click `Edit` on the new entry and change a shortcut to something you can easily remember, like `@fibery`
Done! Now, when you type `@fibery some cool bug` in the search bar, Chrome will suggest opening Fibery search right away.
## FAQ
### Do you have a search by the partial match?
Search has some fuzziness, sometimes it works good, sometimes not so good. If you feel it is not good enough, [leave your feedback in our community](https://community.fibery.io/t/turning-off-fuzzy-search/6312).
### Can I search through text fields (not rich text) & email fields?
Yes, all basic text fields are indexed, like `Basic Text`, `URL`, `Email`, and `Phone`.
### Why are some cards grey in search?
That means that these Entities are in the final state. For example, they are Done, Archived, Closed, etc.
### How does the database selector determine the order of items? Can I customize which databases appear first?
The database selector is organized alphabetically, following this structure:
Space name → Database name
This means:
* Spaces are listed alphabetically.
* Databases inside each space are also listed alphabetically.
There's no custom sorting option yet, but you can manually adjust the order by renaming:
* Add a prefix to space names:
* For example, adding `z` to the start will push that space and its databases to the bottom (e.g., `z Archive`).
# CUSTOM APP: FIELDS
____________________
Fields in Fibery integration app denote either user-supplied fields or fields within an information schema. There are various types of fields that each represent a different type of data. Fields are also used internally to denote information both required and optional for accounts and filters.
## **Field Types**
The table below lists the types of fields referred to in the Fibery integration app REST API.\
The first column denotes the string name of the type as expected in the API, the second column the type of underlying data, the third column any comments and remarks for each field type and the last one show additional options that may be specified
| type | datatype | comments and remarks | Additional options |
| --- | --- | --- | --- |
| text | string | UTF-8 encoding | \- |
| number | number | can be decimal, integer, or float | \- |
| bool | boolean | validates as true/false | \- |
| password | string | only used in account schemas, rendered as a password input | \- |
| link | \- (used for view) | show link to external source | Need to specify "value" field. It should contain link, for example "http://test.com". |
| highlightText | string | text with syntax highlight (json and sql supported for now) | Need to specify "editorMode" field. For now "json" and "sql" are supported. |
| datebox | date | single date selector | |
| date | date | date selection with support of [Custom App: Date range grammar](https://the.fibery.io/@public/User_Guide/Guide/Custom-App:-Date-range-grammar-271) | \- |
| oauth | \- (used for view) | display OAuth form | \- |
| list | variant | allows to select value from multiple options | Optional "datalist_requires" can be specified. For example "datalist_requires" = \["owner"\] means that fetching the list depends on "owner" field. |
| multidropdown | Array | allows to select multiple values from dropdown list | Optional "datalist_requires" can be specified. For example "datalist_requires" = \["owner"\] means that fetching the list depends on "owner" field. |
## **A Note on Dates**
Dates, both with and without times, that are parsed as a result of user-input (through the [Custom App: Date range grammar](https://the.fibery.io/@public/User_Guide/Guide/Custom-App:-Date-range-grammar-271)) are `timezone-naive` objects. Dates received from connected applications may be either aware or naive of timezones and should represent those dates as strings in an [ISO-8601 format](http://www.iso.org/iso/catalogue_detail?csnumber=40874).
# CREATE YOUR FIRST SPACE
_________________________
This is a detailed guide to creating your first space and learning some Fibery basics. We'll deliberately take a trivial, boring, but familiar domain — Task management. You'll learn something through this example and you will be able to apply your knowledge to more complex domain problems.
By the end of the guide you will have a task management application where you can collect tasks, assign them to people, track execution, and receive notifications about deadlines.
## How to Create Tasks space?
Fibery consists of connected [Spaces](https://the.fibery.io/@public/User_Guide/Guide/Spaces-18). Let's create a space where you will manage all tasks.
1. Click `+ New Space` in the bottom left.
2. Name this newly-created space Tasks Management and press Enter.

This is your new space. It contains a single database `Database 1`.
## Rename a database
1. Click on `Database 1` name.
2. Type `Task` and press enter.
This database now will store your tasks.
> [//]: # (callout;icon-type=icon;icon=exclamation-circle;color=#d40915)
> You should always name [Databases](https://the.fibery.io/@public/User_Guide/Guide/Databases-7) using the singular term (e.g. Task, Feature, Project).

## Add some fields to the Tasks database
A Task is very simple so far, but we want to be able to assign tasks to people, set estimated effort and due date.\
We need to add [Fields](https://the.fibery.io/@public/User_Guide/Guide/Fields-15) to the Task database.
1. Click `+` column and select `Assignments` field, click `Add Field` button.
2. Click `+` column and select `Number` field.
3. For the `Field Name` type `Estimated Effort`.
4. For the `Units` type `h` (we will estimate tasks effort in hours).
5. Click `Add Field` button.
6. Click `+` column again and select `Date` field.
7. Type `Due Date` in `Field Name` and click `Add Field` button.
We've now added three fields into Tasks database.

## Change sample task data
Now modify the content for the first sample task.
1. Double click on `Name` field and type `My first task` name
2. Double click on other fields and change the values.
3. Click `Open` in the left column and open the task full screen.

Here you can change task values as well. When done, close the task using `x` icon in the top right corner.
## Creating a tasks list view
Now let's learn how to create [Views](https://the.fibery.io/@public/User_Guide/Guide/Views-8).
1. Click `+ New View` near Task database name.
2. Select `List`.
3. New view will be created.
4. Click `Fields` in the top menu and select several fields to be visible in the tasks list.

Views are visible in the sidebar within the current space.

## Creating a tasks board view
Now let's create a task board view to display tasks by state. We have to add `Workflow` field to the task first.
1. Click `+ New field` button, select `Workflow`.
2. Click Add Workflow field button.
> [//]: # (callout;icon-type=icon;icon=exclamation-circle;color=#1fbed3)
> By default, a workflow has three states: Open, In Progress, Done. But you can modify them.
Now we are ready to create the new board view.
1. Click `+` near Tasks Management space and select `Board`.

2. Select `Tasks` in `Cards`.
3. Select `State` in `Columns`.
4. Click on a board name and type `Tasks board`.
As a result, you will have a board with tasks by states:

Here you can create new tasks, change tasks state via drag'n'drop between columns, filter and sort tasks.
> [//]: # (callout;icon-type=emoji;icon=:nerd_face:;color=#fba32f)
> We have two views in Tasks Management now and these views have the same data. A View in Fibery is just a window into a database, so you can visualize your data differently and work with the most natural view for your current case.
Play with the view settings to learn more. Try to add a filter, display more fields on a task, create some tasks.
## Writing a task description
Open any task and find the Description field. This is a [Rich Text](https://the.fibery.io/@public/User_Guide/Guide/Rich-Text-28) field with many hidden gems. You can just write text with formatting, or do some advanced things like creating new tasks from text, linking text to other tasks, mention people and other tasks, etc.
Play with the Rich Text field and try to discover some interesting actions.

## Adding projects
Now let's make our space more advanced by adding projects. Project will be a new database, so:
1. Click on `Tasks management` space.
2. Add a new Database.
3. Name it `Project`.

## Add a relation between tasks and projects
In real life a Project typically has many Tasks. Fibery handles such things via [Relations](https://the.fibery.io/@public/User_Guide/Guide/Relations-17). Let's add a relation between the Task and Project databases.
1. Click `+` column and select `Relation to…`
2. Select `Task` in a database selector.

3. Click `Add Field`.
4. Click on Tasks field value and link some tasks to this project:

5. Rename project to `My Project` and open it.
6. Notice the list of Tasks linked to the project:

7. Now open a task (click the Expand icon)

8. Find the Project reference.

> [//]: # (callout;icon-type=icon;icon=gift;color=#bec5cc)
> [Relations](https://the.fibery.io/@public/User_Guide/Guide/Relations-17) in Fibery are two-way: you always have a collection on one side and a reference (or a collection) on the other side as well.
## Group tasks by projects
1. Navigate to the Tasks board view
2. Click Cards and select Project as `Row`.

Now your tasks are grouped by projects. This is just a quick example what you can do with relations. Relations in Fibery are very powerful and you can use them everywhere (in views setup, filters, sorting, automation rules).
For a general introduction to what to think about when setting up a workspace, check out [this video](https://www.youtube.com/watch?v=X5JfZk72ZfU).
# SET SINGLE- AND MULTI-SELECT FIELDS IN AUTOMATIONS
____________________________________________________
### Using one select Field to update another

Propagate a single- or multi-select value from one Field to another, even across Databases:
* A Client is created from a Lead → copy `Tags` and `Segment`
* A Bug is created → set default `Priority` based on the parent Feature's `Priority`
* A Private Task is moved to the next state → move the linked Public Task to the same state
To do so, use an Automation Formula:
```
[Step 1 Entity].[Select Field]
```
We match select options between Databases by name.
> [//]: # (callout;icon-type=icon;icon=exclamation-circle;color=#673db6)
> Note that mapping is case-sensitive (`low` ≠`Low`).
### Additional details
* If the source select Field is empty:
* if the target Field is not required, it should be set to empty as well.
* if the target Field is required, we act as if the mapping has failed => the Rule fails with an error.
* If the source Field is not empty but the mapping fails to find a match => empty the Target Field.
* so far, we don't provide an option to create a select option in case it is missing.
* If the mapping finds multiple matching options with the same name, pick the one with lower Rank.
### **Things to remember for Multi Select Field**
* If the source Field has 5 options but the mapping finds only 2 matches => the target Field is set to these 2 options, the other 3 are ignored.
* If the source Field is not empty, but the mapping fails to find any matches => empty the Target Field.
* The source Field can be a single-select.
# TROUBLESHOOTING
_________________
Sometimes you may experience poor performance or encounter error messages signalling that some processes were paused. The reasons for this can vary. It could be due to us conducting technical maintenance or to external factors such as browser issues, connection problems, or operating system conflicts.
Here are our recommendations.
## Be patient with Fibery
Sometimes we run maintenance operations. For example, restarting our tech services can take a couple of seconds, and you may be fortunate enough to notice it.
It may take a bit longer — in this case, we update [Fibery Status](https://status.fibery.io/) page.
## Check internet connection
Try switching from mobile to Wi-Fi, from Wi-Fi to mobile. Try closing the tab and opening it again. ~~Try restarting your computer~~
🚨 If you are using a VPN, try changing the country.
🚨 If you live in a country that attempts to restrict your internet access, try using a VPN.
## Check browser extension
If Fibery is operational and your internet connection is strong, try opening Fibery in incognito mode.
🚨 If you discover that this is the problem, please send us a chat message with the name of the extension. We will investigate the case.
We also recommend to switch between browsers and ensure that they are up to date. Outdated browser versions can also impact Fibery performance.
## Keep in mind geolocation
In some countries, Fibery may not be very fast. It's not about the bandwidth - it's about the latency to our servers. For the record, they are located in the EU. This behavior can also vary from one internet service provider to another. Additionally, the same ISP may start using a different route on the next day.
We might start exposing our servers via AWS CloudFront. This would add edge location near the end user improving route and latency. The internal AWS network would be used for the majority of the path, presumably improving latency. However, since most of our customers are in the EU, it is unlikely that a new server will be added in the near future.
## Check throttle (for Linux users)
If you are using Linux, there is a small chance that something had happened to [throttle](https://github.com/erpalma/throttled "https://github.com/erpalma/throttled").
🚨 Unfortunately, there is no way for us to check it out, so please make sure that it works.
If that's the problem, you can reinstall it and maybe even set the TDP processor higher. This is a common issue when the built-in video card struggles to handle a 4K screen and causes excessive power consumption from the processor.
> [//]: # (callout;icon-type=icon;icon=windows;color=#673db6)
> Windows may have a similar problem. In that case, you will need to check ThrottleStop. Although we have never encountered such an issue.
## Errors and their explanation
#### Some entities of database to update were not found
It should be that you added few rows on a table but they are not yet actually added (error, or operation is still in progress). When you later update those rows with copy-paste, you will get such error.
## Nothing from the above? Contact us
If none of the above solutions have resolved the issue you are facing and it is a recurring one, please contact us.
# CALLOUT BLOCK
_______________
You can make your text more engaging and emphasise important points by using a Callout block.
Here are some examples:
> [//]: # (callout;icon-type=emoji;icon=:point_up:;color=#fba32f)
> This is something relatively important
> [//]: # (callout;icon-type=emoji;icon=:stuck_out_tongue_winking_eye:;color=#e72065)
> This is something really funny
> [//]: # (callout;icon-type=icon;icon=fire;color=#8ec351)
> This is something green
## How to add a callout block
There are a few options available. One way is to use the `/` command and then choose Callout from the menu.

A quicker method is to type `!` followed by a space, which will create a new callout block.

To convert a paragraph into a callout, simply select the paragraph and choose `Callout` from the formatting menu.

## How to customize a callout block
There are several options available to make your callouts look better:
1. Set icon
2. Set emoji
3. Set color (it will change callout background and icon color)
Here are the steps to follow: Click on an emoji or icon, then make all the necessary changes in the popup menu.

## How to exit callout block
To exit a callout block, you can either use `Shift + Enter` or simply move the cursor down. However, you only need to use `Shift + Enter` when the callout block is the last block in the document.
> [//]: # (callout;icon-type=emoji;icon=:sweat_smile:;color=#2978fb)
> Callout block is not vim, fortunately.
## FAQ
### Where can I use a callout block?
The callout block is available in:
* Documents.
* Rich Text fields.
* Comments (including inline comments).
* View description and Form description.
### Can I format text inside a callout block?
Yes, you can add headers, lists and other things if you feel like it. For example:
> [//]: # (callout;icon-type=icon;icon=coffee;color=#2978fb)
> ### What is important?
>
> * Cup of coffee
> * A book
> * A dog
> * Someone you **love**
# ACTIVITY LOG
______________
Activity Log lists all changes that have been made to items that are visible to you with your current access level.
* You can apply `Filters` for better search and to find answers to your questions.
* You can restore deleted Entities, Fields, Views, and Databases.
> [//]: # (callout;icon-type=icon;icon=exclamation-circle;color=#d40915)
> Please, note that on `Standard` plan history is limited for 90 days.
>
> Use `Pro` version for the unlimited history.
## How to access Activity Log
To find the Activity Log, click on your workspace name in the top left and choose `Activity Log` from the drop down menu.

You'll see a table that shows affected Entities, Fields, Views, Databases, events, and what was changed, by who and when:

## How to use Filters in the Activity Log
You can use `Filters` to find items that you're looking for or answer questions you might have. Here are a couple of examples:
### What did Michael change last week?
With a `Who` filter we should select the exact user (Michael), and with a `When` filter we should select the required period.

### Who added new fields to the Purchase Database?
We want to see schema changes and there is a special filter for that: `Schema Change`
1. Add `Schema Change` filter and select `Field` value in this filter.
2. Add `Event` filter and select `added` as a value.
3. Add `Entity Type` filter and select `Purchase` database.

### **Who deleted several Features recently?**
1. Add `Event` filter and select `deleted` value.
2. Select `Who` filter and select `is User` value (this filter ignores Fibery automation and integration services and focuses on changes made by real people only).

As you can see, `Filters` are very flexible and you can focus on just what you need.
You can also open entities affected by a change by clicking the Entity name.
## How to undelete or restore data from the Activity Log
Occasionally, you can't see the Entity (Field, View) that you have deleted in [Trash](https://the.fibery.io/@public/User_Guide/Guide/Trash-90). This can be the case when you have deleted not only an Entity (Field, View) but also its parent Database.
However, you'll be able to see all these changes in Activity Log. First, find the parent Database and restore it, and second, find the needed Entity (Field, View), and restore it too.
> [//]: # (callout;icon-type=icon;icon=band-aid;color=#fc551f)
> If you can't see the needed View after you've restored the parent Database, ask Admin to help with it. You may not have the necessary access level.
### How to restore from Activity Log
1. Use `Filters` to find the necessary event in the Activity log.
2. Click the checkbox on the left.

3. Click `Restore item`
## FAQ
### How to delete customer data in Fibery in accordance with GDPR requirements?
> [//]: # (callout;icon-type=emoji;icon=:face_with_peeking_eye:;color=#fc551f)
> It it not possible to completely delete customer data in Fibery in accordance with GDPR.
Under the GDPR, customers have the right to request deletion of their personal data. However, in Fibery, this data remains stored in the Audit Log and can be restored by authorized personnel. This retention is a crucial part of Fibery's technical infrastructure and cannot be altered.
> [//]: # (callout;icon-type=emoji;icon=:white_check_mark:;color=#4faf54)
> How to ensure GDPR compliance when deleting customer data in Fibery?
However, you can introduce clear amends to your Privacy Policy:
* Clearly indicate in your privacy policy that customer data will be deleted upon their request.
* Explain that while data is removed from active use, it remains stored in Fibery, our data storage system. It's important to note that all data will persist in the AuditLog until the workspace is fully deleted. This is a fundamental part of our solution, but upon request, the data can be removed from active use.
* In your privacy policy, clarify that only authorized administrators within your organization can access the Audit Log in Fibery. Moreover, stringent security measures are implemented to safeguard the Audit Log data from unauthorized access, disclosure, modification, or destruction.
* To meet GDPR requirements and adhere to internal security policies, state that specific data from the Audit Log can only be restored with a written request from the user and valid legal grounds, or at the direct request of the client for account restoration.
* Make sure to notify customers before their data is entered into the system. This allows them to make an informed decision about sharing their personal data.
### We have some entities which have Created by empty. How come?
This may happen in multiple cases. The most common causes are:
* The entities were created via a publicly shared link to a Form - we can't match the person who creates an entity using Form view via the public sharing link with a registered Fibery user.
* The entities were created with an API request with fibery/created-by explicitly set to null
### I restored deleted entity and deleted field but data is not here
Unfortunately, the order of restore operations does matter. In your case you've restored Entity when field was deleted so there were no place to restore the content of the field. Make sure, that you first undelete field, and then undelete entity.
# CUSTOM INTEGRATION FOR REPORTS
________________________________
## Overview
All communication between third party applications and Fibery's services is done via standard hypertext protocols, whether they be HTTP or HTTPS. All third party applications are expected to adhere to a particular API format as outlined in this documentation. The underlying technologies used to develop these third party applications are up to the individual developer.
All communication with third party services is done via Fibery reporting applications gallery. Users may register their applications with Fibery by providing a HTTP or HTTPS URI for their service. The service must be accessible from the internet in order for the applications gallery to successfully communicate with the service. It is *highly recommended* that service providers consider utilizing HTTPS for all endpoints and limit access to these services only to IP addresses known to be from Fibery custom app.
In essence, applications gallery service acts as a proxy between other Fibery services and the third party provider with some added logic for account and filter storage and validation.
## Tutorials
* [Simple app](https://the.fibery.io/@public/User_Guide/Guide/Simple-app-362)
* [App with schema](https://the.fibery.io/@public/User_Guide/Guide/App-with-schema-363)
## API
* [Overview](https://the.fibery.io/@public/User_Guide/Guide/Overview-364)
* [Domain](https://the.fibery.io/@public/User_Guide/Guide/Domain-365)
* [Field types](https://the.fibery.io/@public/User_Guide/Guide/Field-types-366)
## Specifications
* [Custom App: Date range grammar](https://the.fibery.io/@public/User_Guide/Guide/Custom-App:-Date-range-grammar-271)
## Examples
[Simple app](https://github.com/vizydrop/node-simple-app)
[App with authentication and predefined data schema](https://github.com/vizydrop/node-simple-app-with-schema)
[Build custom connector for Airtable](https://medium.com/vizydrop/custom-data-sources-in-vizydrop-45c7ce57e7cc)
# WORKING WITH MULTIPLE DATABASES AS A SOURCE IN REPORT
_______________________________________________________
In Fibery [Reports](https://the.fibery.io/@public/User_Guide/Guide/Reports-346) you can use multiple Databases as a source (like on many other Views).
For example, you might want to have on one graph:
* Bugs & Stories, grouped by Sprint
* Voice conversations & Emails, grouped by month
* Features & Insights, grouped by Product area
So, when you create a new Report, you can choose multiple databases as a Source. They can be from different Spaces.

What happens next?
* All unique fields from all chosen databases appear on the left
* An extra 'field' called `Entity Database` becomes available, whose values will be the names of the databases

> [//]: # (callout;icon-type=icon;icon=exclamation-circle;color=#46bcb2)
> **All same-name fields are merged**
>
> So, if Bug and Story have "common" aka same-named field-relation - Sprint, Created By, Creation date - it will be shown as a single field on the left.
This chart displays how many stories and bugs are included in each sprint, giving a shared overview of both planned work and reported issues. But I can also create a more granular view in this case - by using the `Entity Database` field that became available.

#### Using "Entity database" in report formulas
When you build reports that include multiple record types (for example: Bugs and Stories), the `Entity Database` field allows you to apply different logic depending on the type of record.
`Entity Database` contains the name of the database the record comes from — in this case either `'Bug'` or `'Story'`.
Let's say you want to count how many Bugs are in your dataset:
```
COUNTIF([Id],[Entity Database] == 'Bug')
```
This formula counts every record that comes from the Bug database, and not anything else.
You want to calculate total points, but only for Stories:
```
SUMIF([Points],[Entity Database] == 'Story')
```
This formula sums up `Points` only for records that are Stories. Bugs (and any other record types) are skipped.
**Combined logic - separate calculations for Bugs and Stories**
Let's say you want to calculate:
* Points for Stories
* Weight for Bugs\
...all in one formula:
```
SUM(
IF(
[Entity Database] == 'Story',
[Points],
IF(
[Entity Database] == 'Bug',
[Weight],
0
)
)
)
```
The formula will:
* Take `Points` for Stories,
* Take `Weight` for Bugs,
* Ignore any other record types.
> [//]: # (callout;icon-type=icon;icon=exclamation-circle;color=#d40915)
> Note: there are no [Lookups](https://the.fibery.io/@public/User_Guide/Guide/Lookups-16) possibilities in reports.
>
> Reports cannot automatically pull data from related records. This means that, for example, when you're building a report on the Bug level, you won't be able to see the Sprint status unless that information exists directly on the Bug entity.
>
> If you need data from a parent or related entity, you first need to create a Lookup field in the source database. This Lookup will copy the relevant information (e.g. Sprint status) to the Bug level, so it becomes available for reporting.
# MANAGE INTERVIEW TRANSCRIPTIONS
_________________________________
You can upload audio and video files to Fibery to create transcripts and use them as a feedback source.
# Default fields and settings
The **Interview** database includes the following fields:
* **Transcript:** paste the transcription text file or upload the audio or video file here and insert the transcription.
* **AI Summary:** a condensed version of the transcription for quick reference. It is used in the **Feedback Feed** as well.
* **AI Notes:** provides structured information from the transcript for a high-level overview.
* **Sentiment Score**: Offers a quick understanding of the overall tone of the interview.
# Initiate AI processing
Click the **Create AI Notes** button. The AI will process the transcript, performing the following actions:
* Calculate the sentiment score and store it in the **Sentiment Score** field.
* Write a 100-word summary and add it to the **AI Summary** field.
* Generate structured information and store it in the **AI Notes** field.
> [//]: # (callout;icon-type=icon;icon=book-open;color=#199ee3)
> Learn how to [Video and audio transcription](https://the.fibery.io/@public/User_Guide/Guide/Video-and-audio-transcription-313)
[https://demo.arcade.software/lmOnEnRpA2cz4C7zGh8x](https://demo.arcade.software/lmOnEnRpA2cz4C7zGh8x)
## Customize AI Prompts
You can customize the AI prompt to get the result that you need.
* Navigate to the **Feedback** section.
* Go to **Automation** and find the **Create AI Notes** button.
* Here, you can customize the AI prompt to get the desired results. Review the automation steps and prompts to understand how the AI processes the transcript information.
[https://demo.arcade.software/vTgH8yyGl0GicNaJhvgn](https://demo.arcade.software/vTgH8yyGl0GicNaJhvgn)
##
#
##
# ASANA INTEGRATION
___________________

Fibery integrates with Asana and fetches all important information from Asana. Fibery syncs Projects, Sections Status Updates, Tags, Tasks, Teams, Team Membership, Users, Workspaces, Custom fields, Comments and Attachments.
## Connect your Asana account
1. Click `Add Integration` in space … menu
2. Find and click Asana integration app
3. Click `Add account` and `Connect` for OAuth v2 (preferred)
4. Click `Allow` button in OAuth v2 dialog

## Setup data sources
Select workspaces and projects to be synced into Fibery and click `Next`.

Change databases and fields names if you want and click `Sync Now` at the bottom of the page.

Almost all data from Asana databases including custom fields, comments and attachments will be synchronized.
# EMAIL INTEGRATION (GMAIL, OUTLOOK & IMAP)
___________________________________________
This integration will help to fetch emails and connect them to Accounts, Issues, Candidates, etc. You can setup [Multiple email accounts sync](https://the.fibery.io/@public/User_Guide/Guide/Multiple-email-accounts-sync-381), enjoy [Email threads](https://the.fibery.io/@public/User_Guide/Guide/Email-threads-388) and [Link emails to accounts, leads, customers in Fibery CRM](https://the.fibery.io/@public/User_Guide/Guide/Link-emails-to-accounts,-leads,-customers-in-Fibery-CRM-382), or even [Send emails and reply to emails](https://the.fibery.io/@public/User_Guide/Guide/Send-emails-and-reply-to-emails-105).
## Setup email integration
### Gmail
1. Navigate to `Settings` → `Integrations`.
2. Find `Email` and click `Sync`.
3. Use Gmail OAuth to connect your email account.
### Outlook Business
1. Navigate to `Settings` → `Integrations`.
2. Find `Email` and click `Sync`, select `Outlook (Business)` tab.
3. Follow the links to the Microsoft instructions.
### IMAP
The necessary IMAP settings are available from your email provider. Find IMAP settings for some common services below:
* [Apple](https://support.apple.com/en-us/HT202304)
* [Microsoft](https://support.microsoft.com/en-us/office/pop-imap-and-smtp-settings-8361e398-8af4-4e97-b147-6c6c4ac95353)
* [Godaddy](https://uk.godaddy.com/help/use-imap-settings-to-add-my-workspace-email-to-a-client-4714 "https://uk.godaddy.com/help/use-imap-settings-to-add-my-workspace-email-to-a-client-4714")
### Synchronize your Emails with Fibery
The source configuration form will be shown after account setup. Messages (including attachments) and Contacts Databases will be created and synchronized with your inbox. Note that for Email Sync default interval is **5 minutes**. You can configure the start date of synchronization to avoid downloading old messages. The default setting is to retrieve messages starting from one year ago.

> [//]: # (callout;icon-type=icon;icon=asterisk;color=#199ee3)
> Fibery supports threads in the Email integration. Both the **Inbox** and **Sent** folders are part of the default settings to enable the proper thread view.
You can sync several email accounts into a single database, check [Multiple email accounts sync](https://the.fibery.io/@public/User_Guide/Guide/Multiple-email-accounts-sync-381) guide.
### Limitations
The solution has some limitations. We are collecting feedback, so please let us know if any of these limitations are an issue for you.
* Contacts are taken from emails. This means that only contacts you have had an email from will be synced.
* Google Groups are not supported at this time.
## Example: create a bug from email
Let's say your customers send bug reports to a dedicated email address. Here is an example of creating a bug from received emails.
Add a one-to-one relation between `Bug` and `Message` Databases.

Setup an automation rule to create a bug when a message with the "Issue" keyword in the subject is received (check [Rules](https://the.fibery.io/@public/User_Guide/Guide/Rules-51)):

## Example: Send notification when the server is down
Let's assume a mail message is sent to a dedicated email address when a server is down. It may be handy to send a notification (internal, Slack, or email) to the relevant team members so that they can react to this incident. Here is the rule that will do the trick:

### Notes
* POP & IMAP has to be enabled in your OS
* If you have a two-factor auth (2FA), [you have to use the App password](https://support.microsoft.com/en-us/account-billing/manage-app-passwords-for-two-step-verification-d6dc8c6d-4bf7-4851-ad95-6d07799387e9#:~:text=To%20create%20app%20passwords%20using,password%2C%20and%20then%20select%20Next "https://support.microsoft.com/en-us/account-billing/manage-app-passwords-for-two-step-verification-d6dc8c6d-4bf7-4851-ad95-6d07799387e9#:~:text=To%20create%20app%20passwords%20using,password%2C%20and%20then%20select%20Next")
* TLS should be checked in the relevant checkbox on the configuration screen
## Troubleshooting & FAQ
### Invalid Login: 550 5.1.1 Mailbox does not exist
This error may appear if you haven't set an app-specific password
### Generated app password for Groups
There is no IMAP access to Groups, so if you need that, you will need to create a user account.
### User is authenticated, but not connected

This problem is with the account connectivity. And most likely the reason was not on the Fibery side.
How to fix that?
* Manually reconnect the account
* Check data access for the user account used for data fetching on the email server. This depends on the email provider you use. For example, if you have a Microsoft email provider,[ this guide will help](https://learn.microsoft.com/en-us/answers/questions/280259/user-is-authenticated-but-not-connected.html).
### Login failed: Unable to authenticate to IMAP server. IMAP command failed: Login failed.
The reason for this error message is that either the password you have entered is incorrect, or you have not used the complete e-mail address as an incoming mail username.
The reason can be also disabling of IMAP by the admin in the organization.
### How do email threads work with this integration?
Check [Email threads](https://the.fibery.io/@public/User_Guide/Guide/Email-threads-388) guide.
### Where and how does Fibery store app password?
We are storing passwords in our database encrypted with a secret key.
### Can I send Gmail Emails in Bulk?
It depends. You can sent up to 500 emails a day via Gmail. If you need to send more, use some other service.
### Can I open Gmail from Fibery?
Yes, there is Email URL field. [Check this video to see how it works](https://www.loom.com/share/4f4a4a569fe8467aa8d18fff713d8094?sid=a5e78dc0-9ae3-4710-bf58-04c5e1c7ac16).
### Can I keep the original email formatting?
Yes, you can do it. Mark "Do not cleanup emails from tables and other formatting" checkbox in email setup and email original formatting will be preserved. Note that it may look really ugly in some cases.
### Can I connect emails to my CRM databases, like Companies?
Yes, you can do it via auto-relations, check this guide [Link emails to accounts, leads, customers in Fibery CRM](https://the.fibery.io/@public/User_Guide/Guide/Link-emails-to-accounts,-leads,-customers-in-Fibery-CRM-382)
### I don't see sent emails in Fibery
Fibery lacks SMTP integration and uses SendGrid, which might not save sent emails in the provider's 'Sent' folder, unlike Gmail or Outlook.
### I'm seeing a “Your Authorization Token has expired†message — what does this mean and what should I do?
This message appears when your authorization token has expired — typically because the account hasn't been used for a long time.
Fibery doesn't refresh tokens in the background; it only refreshes them when the account is actively used. If too much time has passed, the token expires and you'll need to create a new account connection.
Important:\
Creating a new account connection will trigger a full sync for that integration.
What you should do:
* Go to your integration settings.
* Remove the expired connection.
* Add a new one by authenticating again.
After this, your integration should start working properly again.
**When do we refresh the token?**
We refresh token when account is in use:
* webhooks are coming
* integrations are executed (manually & automatically)
* regarding actions (sending emails and etc.)
### Why is the `Message` field in Email Integration editable? Can I make it read-only?
The Message field in Email Integration is intentionally editable. This is because adding Highlights is currently only possible on editable fields, and Highlights are a valuable part of the email workflow.
However, we understand that having an editable Message can cause confusion — it might fall out of sync with the actual email data, since pressing the sync button does not overwrite manual edits.
Workarounds:
* ✅ If you want the Message content to remain read-only, you can create a read-only mirror of the field using formulas/lookups:
* Direct formulas cannot output rich text.
* As a workaround, you can use an auto-link self relation (based on Public ID), then create a lookup of the Message field. This gives you a read-only version of the content.
* ✅ Alternatively, you can rely on the editable Message field only for Highlighting, while directing your team to view the mirrored read-only field for reference.
# MAKE (INTEGROMAT) INTEGRATION
_______________________________
Connect Fibery to hundreds of other tools and automate repetitive tasks with no code.
Noted: in terms of Integromat rebranding (→ Make.com) some minor issues may appear. Fibery will run a necessary migration soon. If this is a showstopper for you now - please, ping us via Intercom.
[Make](https://www.make.com/en "https://www.make.com/en") is a powerful no-code automation and integration platform, "the glue of the internet" is how they describe it.
Connect Fibery to the rest of your tools and let the machine take over repetitive tasks:
* Get notified in Microsoft Teams when someone assigns you to a task in Fibery.
* Sync new leads from HubSpot CRM to Fibery.
* Create a new branch in Bitbucket when a user story progresses into a specific state in Fibery.
Alternatively, try [Zapier Integration](https://the.fibery.io/@public/User_Guide/Guide/Zapier-Integration-81) — it's more expensive but easier to learn.
If your goal is to sync data **into** Fibery, see if we have a native Integration (check [Integration templates](https://the.fibery.io/@public/User_Guide/Guide/Integration-templates-68)) and possibly save a few hours of your precious life.
## Fibery Modules

Triggers:
* âš¡ï¸ An entity is created, updated, or deleted.\
(instant, unlike in our Zapier connection)
Searches:
* Find entities.\
(search by text, date, and checkbox Fields)
Actions:
* Create an entity.
* Update an entity.
## Step-by-step Tutorial
### Due date reminder
Every morning send each teammate a list of tasks that are due today via Slack:
[https://youtu.be/r2gI-n-w214](https://youtu.be/r2gI-n-w214)
### **Level 1 — Notify me**

Let's pretend you are a manager and all communications must go through you 😈
1. Prepare sample data in Fibery: create a couple of tasks, set the due dates to today, and assign different people.
2. Add a new Integromat scenario and schedule it to run once a day.
3. Start with Fibery's *Find entities* module: look for the tasks that are due today. [`formatDate`](https://www.integromat.com/en/help/date-time-functions "https://www.integromat.com/en/help/date-time-functions")(\[now\]; "YYYY-MM-DD")
4. Add Slack's *Create a message* module: pick your IM and compose the message.\
`"[Name]" is due today`

### **Level 2 — Clickable links**

Navigating to Fibery tasks from Slack would be nice:
1. Add *Compose a string module* and build a [Slack-formatted link](https://api.slack.com/reference/surfaces/formatting#linking-urls) for each task.\
`<[entityLink]|[Name]>`
2. Use this text instead of the task name in the Slack module.\
`[Text] is due today`

### **Level 3 — Fibery users 🤠Slack users**

In order to send a reminder to each teammate, we link Fibery users to Slack users:
1. Add `Slack ID` text Field to Fibery's User and paste the IDs of a couple of test users.
2. Add another Fibery's *FInd entities* module to look for a User, hardcode your User's public ID for now.
3. Replace your IM with` Slack ID` that comes from Fibery in the Slack module.
### **Level 4 — Notify assignees**

Stop pretending you're an evil manager — let's send reminders to the actual assignees:
1. Add the [*Iterator*](https://www.integromat.com/en/feature/iterators) module to split each task with multiple assignees into several bundles (see the diagram below).
2. Use real Users' IDs when looking for a User in Fibery.

Feel free to stop at this point.
### **Level 5 — One person, one message (optional)**

Wouldn't it be nice to get the list of tasks in a single message?
1. Add the [*Array aggregator*](https://www.integromat.com/en/feature/aggregators) module to combine several tasks for each person into a single bundle, group by assignee's ID.
2. Use the ID from the Array aggregator when looking for a User in Fibery.
3. Convert the array of tasks back into text to send the Slack message.\
`join(map([array]; "value"); [newline])`

You should definitely stop here:

### **Level 6 — Error handling (really optional)**

Wouldn't it be great to retry on failures?
1. Enable storing of Incomplete Executions in the scenario settings.
2. Add the *Break* module to all Fibery and Slack modules.
3. Check *Automatically complete execution* in all *Break* modules.
4. Add *Sleep* modules to later Fibery and Slack modules to halt the execution of parallel bundles if an error occurs.
### **Level 7 — Prevent duplicate notifications (really optional)**

How do we prevent duplicate reminders on retries? Each time we send a reminder, we'll remember the person and the date:
1. Set `Today` variable to` format([now], "YYYY-MM-DD")`.
2. Create a [Data Store](https://support.integromat.com/hc/en-us/articles/360006248793-Data-store) with `Fibery User ID` (text) and `Date` (date) attributes.
3. Add a record to the Data Store after sending a message to Slack.\
`[Key]-[Today]` — record key for easy search.
4. Check if a record exists before looking for a User in Fibery.\
`[Key]-[Today]` — told ya.
5. Set up a filter: proceed to search only if the record doesn't exist.
😅
# ALLOCATION MANAGEMENT
_______________________
[**Link to install the template**](https://shared.fibery.io/t/0130f5fd-7a57-4fce-8afc-ad1ca8d8efd5-allocation-management)
This guide walks you through how to use the Allocation Management Template in Fibery to plan capacity, manage project allocations, and track workload distribution across your team.
> [//]: # (callout;icon-type=icon;icon=exclamation-circle;color=#d40915)
> This template is just one possible setup for allocation management. You can always customize it to match your process.
[https://youtu.be/DZo0jCnHlaU](https://youtu.be/DZo0jCnHlaU)
## Core Databases
The template includes three primary databases that work together:


### 1. Capacity Plans
Defines how much time each team member can dedicate to work within a given time period (usually monthly or weekly).
* Fields include: `Start Date`, `End Date`, `User`, `Capacity (hours)`
* Automatically calculates:
* `Hours Planned` based on Allocations
* `Capacity Status` (e.g., Available, Overbooked)
* Capacity Plans can be added manually
* Designed for monthly planning, but can be adjusted to weekly with formula changes
### 2. Projects
Represents the work initiatives your team is delivering.
* What you can track: `Planned Hours`, `Actual Hours`, `Start/End Dates`, `Status`, `Priority`, `Owner`
* From each project, you can:
* View current allocations
* Click `+ Plan Allocation` button to assign people directly
### 3. Allocations
Connects team members to projects, showing who is working on what, when, and for how long.
* Fields include: `User`, `Project`, `Allocated Hours`, `Start/End Dates`, `Status`
* Allocations auto-link to the corresponding Capacity Plan based on:
* Same User
* Matching Month and Year
## Views
Here's how you can track and visualize your planning:
### Capacity Planning Table

* Overview of all Capacity Plans
* Shows real-time capacity status per person
* Red indicators mean someone is overbooked
### Projects View
* Shows list of all Projects
* Use the “Active Only†filter to focus on current work
* From a Project, click Plan Allocation to assign work
### Allocations by User
* Visual timeline of allocations per team member
* Use layout options to see overlapping work
* Drag and drop to reschedule allocations easily

### Allocations by Project
* Similar to Allocations by User, but grouped by Project

### Allocation Graph (Reports)
* Summarizes Allocated Hours by Project
* Customize to show `Active`, `Upcoming`, `Finished` work
* Useful for spotting trends or capacity gaps
* Can be exported or shared publicly
### How to add your own View?
1. Add a View\
Click the **+** button in a Space or next to a database to add a new View.
2. Choose View Type
* Table View: For spreadsheet-like data - add columns, apply filters, sort, and group fields
* Board View: Create Kanban-style boards grouped by project, status, or team member.
* Timeline View: Visualize allocations against a timeline to spot overlaps or gaps.
3. Configure a View
* Show only “Active†allocations using filters.
* Customize visible fields via Manage Fields and Layouts in entity view to surface dates and hours
* Reorder, group, sort, and color-code cards to highlight busy days or over-allocation.
## Automation Logic
Allocations are automatically linked to Capacity Plans if:
* The `User` is the same
* The `Month & Year` of Allocation matches the Capacity Plan
> [//]: # (callout;icon-type=icon;icon=exclamation-circle;color=#d40915)
> If you're using weekly planning, you'll need to tweak the formulas to match by `Week & Year` instead. Reach out if you'd like help adjusting this.
# NUMERIC FUNCTIONS
___________________
#### ABS
Returns the absolute value of a number
`ABS([Delta])`
#### AVG
Returns the avg of a series of numbers
`AVG([Price] + ([Price] * [Tax Rate])/100)`
#### AVGIF
Returns the conditional avg of a series of numbers
`AVGIF([Price] + ([Price] * [Tax Percent])/100, [Price] > 0)`
#### CEIL
Rounds a number up to the next largest whole number or integer
`CEIL([Lead Time])`
#### COUNT
Returns the count of values
`COUNT([ID])`
#### COUNT_DISTINCT
Returns the distinct count of values
`COUNT_DISTINCT([ID])`
#### COUNTIF
Returns the conditional count of values
`COUNTIF([ID], [Project] != 'OS')`
#### COUNTIF_DISTINCT
Returns the conditional count of values
`COUNTIF_DISTINCT([ID], [Project] != 'OS')`
#### DATEDIFF
Returns the difference between the specified start date and end date
`DATEDIFF([Created On], [Completed On], 'year')`
#### DATEPART
Returns provided date part of date as a number
`DATEPART([Created On], 'year')`
#### DIFFERENCE
Returns the running difference for the given expression between current value and previous
`DIFFERENCE(SUM([Hours Spent]))`
#### LENGTH
Returns the length of text
`LENGTH('Hulk')`
#### MAX
Returns the max of a series of numbers
`MAX([Price] + ([Price] * [Tax Rate])/100)`
#### MAXIF
Returns the conditional max of a series of numbers
`MAXIF([Price] + ([Price] * [Tax Rate])/100, [Tax Rate] > 0)`
#### MEDIAN
Returns the median of a series of numbers
`MEDIAN([Price] + ([Price] * [Tax Rate])/100)`
#### MIN
Returns the min of a series of numbers
`MIN([Price] + ([Price] * [Tax Rate])/100)`
#### MINIF
Returns the conditional min of a series of numbers
`MINIF([Price] + ([Price] * [Tax Rate])/100, [Tax Rate] > 0)`
#### PERCENTILE
Returns the value at a given percentile of a dataset
`PERCENTILE([Price] + ([Price] * [Tax Rate])/100, 0.3)`
#### ROUND
Rounds a number
`ROUND([Price] + ([Price] * [Tax Rate])/100)`
#### RUNNING_AVG
Returns the running avg for a given expression from the first row to the current.
`RUNNING_AVG(SUM([Hours Spent]))`
#### RUNNING_MAX
Returns the running max for a given expression from the first row to the current
`RUNNING_MAX(SUM([Hours Spent]))`
#### RUNNING_MIN
Returns the running min for a given expression from the first row to the current
`RUNNING_MIN(SUM([Hours Spent]))`
#### RUNNING_SUM
Returns the running sum for a given expression from the first row to the current
`RUNNING_SUM(SUM([Hours Spent]))`
#### STDEV
Returns the standard deviation of a series of numbers
`STDEV([Price] + ([Price] * [Tax Rate])/100)`
#### SUM
Returns the sum of a series of numbers
`SUM([Price] + ([Price] * [Tax Rate])/100)`
#### SUMIF
Returns the conditional sum of a series of numbers
`SUMIF([Price] + ([Price] * [Tax Rate])/100, [Tax Rate] > 0)`
#### TOTAL
Returns the total for a given aggregation across the whole dataset
`TOTAL(SUM([Price]))`
# BUTTONS
_________
A Button is an Automation that is triggered manually.
There are two ways to execute it: you can click on the entity's dedicated button or choose the automation from the action menu (more on this later).
## How to add or edit a Button
Rules and Buttons are configured for each Database separately.
To add or edit a Button:
1. Go to a Space.
2. Choose a Database.
3. Choose Buttons section there
4. Click `+ New Button` in the opened window.
5. Give Button a name.
6. Add and edit the Actions that you want to be executed when Button is clicked. There is no limit to the number of actions you can set up. Just click `+ Add Action` button to add as many actions as you want.

## How to execute a Button
There are several places where you can access and execute Buttons:
1. In Entity view, a Button will be visible if it is not hidden. Also, click `•••` in the top right corner and find an action here.
2. In [Board View](https://the.fibery.io/@public/User_Guide/Guide/Board-View-9), [List View](https://the.fibery.io/@public/User_Guide/Guide/List-View-10), [Calendar View](https://the.fibery.io/@public/User_Guide/Guide/Calendar-View-13) and [Timeline View](https://the.fibery.io/@public/User_Guide/Guide/Timeline-View-12), click on `•••` for an Entity and find an action here.
3. In [Smart Folders](https://the.fibery.io/@public/User_Guide/Guide/Smart-Folders-26), click on `•••` for an Entity and find an action here.
4. In [Table View](https://the.fibery.io/@public/User_Guide/Guide/Table-View-11) select one or several rows using the checkboxes, click `Actions` and choose a required action.
## Button styles
Make a Button stand out by changing its color and picking a custom icon.
You may choose both icon and color when creating or editing Button

## List of Actions
* `Create` — creates an Entity with predefined Fields.
* `Update` — updates Entity Fields (including to-one relation fields)
* `Delete` — deletes an Entity.
* `Script` — execute [Scripts in Automations](https://the.fibery.io/@public/User_Guide/Guide/Scripts-in-Automations-54) to do complex things.
* `Notifications` — sends notifications.
* `Add comment` — adds a comment to an Entity if Comments field is present ([Markdown Templates](https://the.fibery.io/@public/User_Guide/Guide/Markdown-Templates-53) are supported).
* Set of actions for every to-many relation field:
* `Add Entities`
* `Update Entities`
* `Delete Entities`
* `Link Entity`
* `Unlink Entity`
For [Rich Text](https://the.fibery.io/@public/User_Guide/Guide/Rich-Text-28) Field(s)
* `Append content to Description` — adds content ([Markdown Templates](https://the.fibery.io/@public/User_Guide/Guide/Markdown-Templates-53) are supported).
* `Override Description` — replaces content.
* `Prepend content to Description` — adds content on top.
For Workflow Field
* `Move to the final state` — moves an Entity to the final state.
For People Field(s) e.g. Assignees
* `Assign to me` — assigns an Entity to the current user.
* `Add Assignees` — assigns selected users to an Entity.
* `Unassign Assignees` — clears Assignees field. Assignees will not be deleted from the system.
For Files Field
* `Attach PDF using Template `— creates a PDF file from the template and attaches it to an Entity ([Markdown Templates](https://the.fibery.io/@public/User_Guide/Guide/Markdown-Templates-53) are supported).
* `Treat template as HTML page` — creates a PDF file from the HTML template and attaches it to an Entity. Please refer to [Generate PDF File using Button](https://the.fibery.io/@public/User_Guide/Guide/Generate-PDF-File-using-Button-212)
> [//]: # (callout;icon-type=icon;icon=exclamation-circle;color=#FC551F)
> For a given automation, action steps are always executed sequentially. See [Automation execution logic](https://the.fibery.io/@public/User_Guide/Guide/Automation-execution-logic-332)
## Action modifiers
By default you can just manually set a value for an action, but there are more ways to specify the value:
* Add a Formula → [Add Formula to Automation Button](https://the.fibery.io/@public/User_Guide/Guide/Add-Formula-to-Automation-Button-211)
* Ask user → [Ask user for a value in Automation Button](https://the.fibery.io/@public/User_Guide/Guide/Ask-user-for-a-value-in-Automation-Button-345)
* Call AI → [AI in Automations](https://the.fibery.io/@public/User_Guide/Guide/AI-in-Automations-162)

## FAQ
#### How to check console.log() execution feedbacks
You may try having a browser console open, so that you can see the output without having to leave the view where the button is pressed.
#### Is it possible to authorize the Fibery Slack bot (or a shared account) for automation button steps, so messages are sent automatically without asking each user for authorization?
Currently, automation buttons in Fibery are executed on the user's behalf, which means each user must link their own account (via OAuth) for external services like Slack or Email. Here's how it works:
* The first time a user clicks a button, they'll be prompted to authorize an account.
* After that, their last used linked account is selected by default — no repeated authorization needed.
* This logic is the same for both Slack and Email integrations.
* It's not possible to skip the account selection popup entirely or use a shared account for all users in button-based automations.\
(Unlike automation *rules*, which run with the integration's authorized account.)
> [//]: # (callout;icon-type=icon;icon=exclamation-circle;color=#199EE3)
> Since each button click is a manual action performed in the context of a specific user, the system ensures it uses that user's authorized connection to external services.
### How does Fibery handle scripts triggered by batch button clicks?
When you select multiple entities and click a button that runs a script, Fibery executes the script once, not separately for each entity. The selected entities are passed into the script as an array via `args.currentEntities`.
This means the behavior of your script depends on how it's written:
If your script includes:
```
const entity = args.currentEntities[0]; // ... do something with `entity`
```
then only the first selected entity will be affected, because you're manually picking the first item in the array.
To process all selected entities, loop through them:
```
for (const entity of args.currentEntities) { // do something with each entity }
```
If you're working with commands (e.g., querying or creating related entities), and want to handle all entities at once:
* You can pass the whole `args.currentEntities` array into `executeSingleCommand`
* To modify many records efficiently, use:
`updateEntityBatch(…)`, `deleteEntityBatch(...)`, `createEntityBatch(...)`
These batch operations are optimized for handling large sets of entities.
| Action | Behavior |
| --- | --- |
| Click button on single entity | Script runs once with 1 entity |
| Click button on multiple entities | Script runs once, with all selected entities in `args.currentEntities` |
Make sure your script is designed accordingly - especially if you're processing hundreds of records.
# CUMULATIVE REPORT: COUNT NUMBER OF DAYS IN SPECIFIC STATE
___________________________________________________________
Let's say, we need to understand, which Stories/Issues/Features took us too much time. So in the future, we could better estimate the work.
## Final result

### Step 1. Create a Report View

We need to create a `Report` view, choose `Table` as a visualization method, mark this report as historical, choose databases, that we want to work with, and choose the `Date Range`.
### Step 2. Set some filters

We need to track only changes in the `State` field and we are also interested in how much time our Story is in the `Done` state.
### Step 3. Add details & data

Here the main field we're interested in is `Duration (Days)`
This field is generated by Fibery automatically and tracks the history of changes in Dates. As we set the filter, that `Changed filters contains only State`, then it tracks how much time a specific card spent in a specific State.
### Step 4. Get rid of Redundant fields
That is the most tricky and the least obvious step.
Click on the `Finish` button, then navigate to the three dots on the right upper corner and click on the `Remove Redundant Fields` button.

Cumulative reports are pretty special. When creating any kind of report, they use all the source data, which is possible, and track changes all across it. This button helps us to be sure, that those changes are tracked only within the State field.
If you want to know more about how that works and what are redundant fields, please, contact us via Intercom 💖\`
**Note:** if you make huge changes in the database used in this report - for example, you add a new relation, or a new field - please, navigate to this report and click on the `Remove Redundant Fields` button again. So these new changes didn't affect this report.
# HOW TO CREATE A WIKI IN FIBERY
________________________________
A well-organized company wiki serves as a centralized knowledge repository, enabling teams to efficiently access and manage information. To build an effective wiki, you'll need to:
## Start with a structure. Create a Company Wiki Space
We will start from creating two databases "Category" and "Document", connected with many-to-many relation

* Category is broad groupings such as:
* Policy
* Guidelines
* Procedures
* Document is a specific piece of information within a category, such as:
* Vacation policy
* Travel guidelines
Each document should have clear ownership, relevance, and an assigned category.
## "Polish" databases
Making documents visually appealing and easy to navigate is crucial for usability.
### Add Category database Icons
Enhance the appearance of categories by assigning meaningful icons. For example:
* 🔒 Resources
* âœˆï¸ Guidelines
* 🌞 Policies

### Enable Files and Comments on the Document database
To make documents more versatile:
* Allow users to attach files directly to documents
* Enable comments for collaborative discussions

### Use Markdown for Descriptions
Leverage Markdown for document content to:
* Create headers, lists, and emphasis.
* Add links to relevant resources, embed preview from other tools (like Figma)
* [Learn here about recent markdown capability updates](https://fibery.io/blog/product-updates/fibery-documents-2023/)
## Organizing Documents navigation
### Organizing left menu with Smart folders
Smart folders will help us to create a friendly navigation for teammates. And grouping Documents by Category would be definitely helpful.
Let's create a Smart folder and choose Category as a top level. As a result all categories will appear in the left menu!


Cool! Now you have two options:
1. Show Documents directly under related category
2. Show Documents in a View - like Table, Board or List
If you go with the first option, here is how it will look like:


It works well when you have relatively simple documents structure and not that many documents. By the way, that's how we (Fibery team) organize our [User Guide!](https://the.fibery.io/@public/User_Guide/Fibery-User-Guide-Start-6568)
Second option is to create Context views in every category. Navigate your cursor to any Category and click on `+` icon there. Choose the type of view you are going to create. We suggest starting from Table. Choose Document as a database level. Documents that appear there will have automatic context filter (based on category) applied.


Let's mirror this View to every Category.

Now every Category has it's own table with Documents!

## Assigning Access Rights to Documents
### Set Default Viewing Access
You may set basic Viewer permissions for every user in the Space itself.

These permissions set default viewing level to each document in this Space:
> [//]: # (callout;icon-type=icon;icon=shield-plus;color=#d40915)
> If you are on a Pro plan you may also use [Group permissions](https://the.fibery.io/@public/User_Guide/Guide/Group-permissions-47)
### Appoint Document Editors
Some users need more access than others. For example, if default access for everyone is Viewer, Authors need definitely more access, at least editor. It's possible to appoint document editors and automatically delegate editing rights. To do that, you will need to add `People` field. And set setting accordingly.

* You will need to click on `Sharing` icon
* And set higher permission level, like `Owner`
* Note, that you can create [custom access template](https://the.fibery.io/@public/User_Guide/Guide/Custom-Access-Templates-240)\
to define customer access levels if you are not happy\
with default ones
Thus, once a User is assigned to a document through Editors fields, he gains update access to that particular document.
> [//]: # (callout;icon-type=icon;icon=star;color=#fba32f)
> If you want some Users also be Viewers by default but have ability to create new Documents, you can share the relevant Database using `Submitter` access template and [automatically share created documents](https://the.fibery.io/@public/User_Guide/Guide/Automatically-Share-Entities-with-Assignees-327) via `Created By` Field.
>
> 
>
> 
Please, note, that Group access for databases/entities is not here yet, but it will be added in Q1 2025. Please, let us know, if you need it.
## Extra touches
### Mark documents as Archived for easier management
You may Archive outdated documents to declutter active views. To do that, simply add a Checkbox field, called Archived.

Once added, you may use filters to exclude archived documents from any view, including smart folders.
### Other ideas:
* Add Workflow field and document-related states - like Idea, Draft, Review, Published. It's helpful when you have different authors and content pipeline
* Use Teams database to manage access based on the Team, particular user belongs to
* Add Dates field to the Document level - one to control when Document was published, and another one to see when it was Archived.
* Create Smart folders in other Spaces with relevant documents for this particular Space. For example, in HR space you may show only Documents from Policies category. It will improve discoverability

## Search in Documents
### Standard Search capabilities
Our search includes capabilities to:
* Search by **names** of documents.
* Look through **rich text** fields, such as document descriptions.
* Include **comments** and basic text fields within the search scope.
> [//]: # (callout;icon-type=icon;icon=exclamation-circle;color=#d40915)
> Our search does not parse the content of linked files. For example, if a document has attached PDF or Word files, the content of those files will not be searchable. Please, let us know if you find that helpful.
### Enabling AI Search
For more advanced search functionality, you can enable [AI-powered search. ](https://the.fibery.io/@public/User_Guide/Guide/Semantic-Search-\(AI-Search\)-203)With AI you can:
* Parse the context of documents
* Find information even without using exact keywords

## FAQ
#### Is there a template to install?
Sure, you can[ install the template ](https://shared.fibery.io/t/483e839c-ebbd-449d-8737-92f16854b66b-company-wiki)from this guide. Or you can install the [Fibery User guide](https://shared.fibery.io/t/9065d71e-ed95-40e2-b01e-e8475d90e120-user-guide) - note, it has more complicated structure and content inside.
# GENERATE FEEDBACK SUMMARY BY AI
_________________________________
Manually sorting through the overwhelming volume of feedback is neither efficient nor pleasant. AI changes how we handle, analyze, and respond to user feedback. In particular, it comes handy for generating conversation summaries. Such short summaries are helpful for other teammates to have a glance at topics that were discussed.
In this guide, we'll explain how to configure AI in Automations to complete this task in Fibery automatically.
> [//]: # (callout;icon-type=emoji;icon=:superhero:;color=#fba32f)
> In the Product Team template, the Automations that rely on AI are described but disabled by default. Once you've set your OpenAI API key, you can enable them and tweak the prompts to your liking. To see an example of generating feedback summary, go to Feedback Space and proceed to Automations in the Interview Database.
## How it works
To automatically generate summary for a conversation with a customer, use [AI in Automations](https://the.fibery.io/@public/User_Guide/Guide/AI-in-Automations-162).
Here is the prompt for AI:
```
[ai temperature=0.5 maxTokens=300]
"""
{{Messages}}
"""
Summarise the text above
[/ai]
```
### Example
Let's say we use Intercom for customer success, and we want to automatically summarize the chat when its closed.
So we set an Intercom Integration, and now we have a Conversation Database were all chats are stored.
This how the Automation Rule will look like:

> [//]: # (callout;icon-type=emoji;icon=:scroll:;color=#fc551f)
> To control the length of the summary, adjust `maxTokens` parameter.
> [//]: # (callout;icon-type=emoji;icon=:bulb:;color=#6A849B)
> We recommend storing the Summary in a separate Rich Text Field to easily distinguish it from the other notes or conversation itself.
## How to visualize summaries
Dynamic [Feed View](https://the.fibery.io/@public/User_Guide/Guide/Feed-View-14) is handy when you need to review text of many Entities, so we recommend using it.
This is how it [Intercom integration](https://the.fibery.io/@public/User_Guide/Guide/Intercom-integration-73) Feed from the example may look like:

The biggest limitation here is volume. Sometimes users prefer to reopen a conversation with a new question instead of creating a new conversation. If this becomes the preferred way of communication, summarizing effectively becomes less effective over time.
## See also
* Check [How Fibery team uses AI](https://the.fibery.io/@public/User_Guide/Guide/How-Fibery-team-uses-AI-194) for more examples for various cases.
* Check blogpost [Using AI for Product Feedback](https://fibery.io/blog/product-management/ai-product-feedback/) management. It's written by our CEO and he honestly shares his experience about using AI.
* Check our [community ](https://community.fibery.io/)to discuss your ideas, and write to support chat should you have any questions!
# PANELS
________
Fibery has a relatively [unique panels navigation](https://fibery.io/blog/multi-panel-navigation/ "https://fibery.io/blog/multi-panel-navigation/"). This user guide is an example. When you open a new document, it opens in the right panel. Try it → [Learn the building blocks](https://the.fibery.io/@public/User_Guide/Guide/Learn-the-building-blocks-5).
Multi-panel navigation is enabled by default.
> [//]: # (callout;icon-type=emoji;icon=:f017819a-810e-4380-8605-cb94fe047a65:;color=#673db6)
> If you prefer one-panel navigation, you can switch it on `Settings.` Note that this guide explains how multi-panel navigation works.
Depending on your screen size, you may see two or more panels. Visited views are folded in the left or right area, you may click them to open.

You can also open entities and views in the new panel from the left sidebar. Click … and find `Open in a new panel` action.
## Focus on a single panel
You may expand any panel to the full screen. Find `Expand` command the arrows icon in the top panel's menu and click it.
## Panels navigation commands
Click `•••` in any view to access navigation commands.
* Close Panel `Shift +Esc`
* Close other Panels `Shift + Option + O`
* Close Panels to the right `Shift + Option + R`
* Close All Panels `Cmd + Shift + K`
## Go-to navigation from Entity View
Find `>>` icon in the top right corner. You can quickly jump to database setup or to any view that contains this database. For example, here you can see all Views we have with Features and can quickly jump to relevant views and go back.
By clicking on the Database badge, you can quickly navigate to the Database setup screen from the Entity View, if you have access to the database configuration page (aka your are Admin or Creator).
## FAQ
### Can I resize the panels?
No. We designed panel navigation with fixed panels, but you may leave feedback and explain your case.
# REVIEWING SHARED ITEMS
________________________
It can sometimes be useful to have an overview of what has been shared in the Workspace (Entities, Views or Documents).
## How to get a report of shared items?
For this, you can create and configure a report view to see who has shared what. You can check the relevant guide on [Reports](https://the.fibery.io/@public/User_Guide/Guide/Reports-346) to discover all the possibilities.
Here are the steps to configure a Report View for shared items.
#### Step 1
Create a Report and choose the `Report from link` option:

### Step 2
In the top right hand corner, choose `Switch account` and the `Header Authentication` tab.

### Step 3
Fill in the fields as follows:
* **Account Name**: whatever name you want, e.g. 'Admin'
* **Name of the header**: Authorization
* **Type**: Bearer
* **Token**:
> [//]: # (callout;icon-type=icon;icon=key-skeleton;color=#6A849B)
> needs to be a workspace API token which confers Admin level privileges.
>
> See [Managing Tokens (API Guide)](https://api.fibery.io/#managing-tokens. "https://api.fibery.io/#managing-tokens.").
After that, click `Connect`.
### Step 4
In the `Data from link` field, type the name of your workspace, followed by `/api/sharing/commands/list-shares`

and then click `Create Chart` or `Create Table`.
Whichever report type you choose, you can now choose what data you want to show, and how :party-blob:
> [//]: # (callout;icon-type=icon;icon=globe;color=#6A849B)
> Note that the items shown do not include Spaces which have been shared publicly.
## Consider who should be able to see a report
Because the report is using Admin privileges to generate the list of shared items, there may be items listed that not all member users have access to.
> [//]: # (callout;icon-type=icon;icon=exclamation-triangle;color=#d40915)
> Consider who should be able to see this Report, so as to not disclose information that would otherwise be hidden.
## Examples
You might want a chart, where the x-axis is the `userName` and the y-axis is the `entityTitle`:

…or you might want a table of the `entityTitles`, grouped by the `typeName`:

# GENERIC CLONING OF A HIERARCHY
________________________________
Unfortunately, great power brings great responsibility and complexity for some cases. And Hierarchy duplication is one of them.
So far, this is not an "out-of-the-box" functinality in Fibery, this is why `Script` is the best way to achieve that.
To achieve generic cloning you have to:
1. [Install this Space](https://shared.fibery.io/t/dbd848b9-50db-4a3b-aa1d-333daa5b7aba-deep-clone), which contains powerful script inside
2. Once you have installed the space, go to the ‘High level goal' Objective and find its UUID.

3. Copy this into the UUID cell in the Clones table, and tick the trigger box.

4. You should get a perfect clone of the entire hierarchy from Objective through Project to Tasks.
Now, try adding a row to the Clones table with the full name of another database in your workspace, and the UUID of a specific entity in that database, and trigger this one.
> [//]: # (callout;icon-type=icon;icon=exclamation-circle;color=#6A849B)
> Note: because there is no limit on the depth of cloning, it is possible for it to get stuck in a never ending loop\
> e.g. if you have these relations\
> Project A → Task 1, Task 2\
> Task 1 → Project A, Project B\
> and you try to clone Project A, it will never terminate.
>
> If this happens, you'll need to disable the automation.
### \
Discussions:
* Discuss this solution [in this community topic](https://community.fibery.io/t/generic-cloning-of-a-hierarchy/6152)
* Discuss initial problem [here](https://community.fibery.io/t/intra-space-deep-copy/6079)
# GRAPHQL QUERIES
_________________
# Queries
The list of entities can be retrieved from the database by using `find` query which is defined for every database for each space. For example `findBugs`, `findEmployees`.
> [//]: # (callout;icon-type=icon;icon=exclamation-circle;color=#3e53b4)
> Find more information about GraphQL queries [here](https://graphql.org/learn/queries).

## **List of entities**
Use `findXXX` without arguments to retrieve all records, but note that there is a limit of 100 by default, so use offset and limit to retrieve data page by page if it is required.
```
{
findFeatures {
id
name
state {
name
}
}
}
```
Use Docs → Query section to explore possible fields selection.

Curl:
```
curl -X POST https://my-space.fibery.io/api/graphql/space/Software_Development \ 2 ↵ alehmr@MacBook-Pro-Oleg-2
-H "Authorization: Token YOUR_TOKEN" \
-H "Content-Type: application/json" \
-d '{"query":"{findBugs{id,name,state{name}}}"}'
```
JavaScript:
```
import {config} from 'dotenv';
config();
import fetch from 'node-fetch';
const YOUR_SPACE_ENDPOINT = `https://my-space.fibery.io/api/graphql/space/Software_Development`;
const YOUR_TOKEN = process.env[`YOUR_TOKEN`];
(async () => {
const query = `{findBugs{id,name,state{name}}}`;
const response = await fetch(YOUR_SPACE_ENDPOINT, {
method: 'POST',
body: JSON.stringify({query}),
headers: {
'Content-Type': `application/json`,
'Authorization': `Token ${YOUR_TOKEN}`,
}
});
const result = await response.json();
console.log(JSON.stringify(result));
})();
```
Output
```
{
"data": {
"findBugs": [
{
"id": "b3814a20-e261-11e8-80ea-7f915d8486b5",
"name": "🞠The first ever bug",
"state": {
"name": "Done"
}
},
{
"id": "fa39df10-912b-11eb-a0bf-cb515797cdf8",
"name": "Nasty bug from the trenches",
"state": {
"name": "To Do"
}
}
]
}
}
```
## Filtering
There is a variety of filtering capabilities for each database including filtering by one-to-one fields or inner lists content. Filters can be applied by providing filtering arguments for find queries.
The filter operators available can be discovered through autocomplete while creating a query in GraphiQL.

Filtering by native fields
```
{
findBugs(
name: {contains: "disaster"}
state: {name: {in: ["Open", "Done"]}}
)
{
id
name
state {
name
}
}
}
```
Filtering by one-to-one fields
Find Open and Done bugs, for example:
```
{
findBugs(
state: {name: {in: ["Open", "Done"]}}
)
{
id
name
state {
name
}
}
}
```
Find High priority bugs:
```
{
findBugs(orderBy: {rank: ASC}, priority: {name: {is: "High"}}) {
name,
}
}
```
Filtering by many fields (AND statement is used)
```
{
findBugs(
release:{ startDate: {isNull: false}, name: {contains: "1.0"}},
state: {name: {in: ["Open", "Done"]}}
)
{
id
name
release{
startDate
name
}
state {
name
}
}
}
```
**String** filtering operators
```
is: String
isNot: String
contains: String
notContains: String
greater: String
greaterOrEquals: String
less: String
lessOrEquals: String
in: [String]
notIn: [String]
isNull: Boolean
```
**Int** filtering operators
```
is: Int
isNot: Int
greater: Int
greaterOrEquals: Int
less: Int
lessOrEquals: Int
in: [Int]
notIn: [Int]
isNull: Boolean
```
**Float** filtering operators
```
is: Float
isNot: Float
greater: Float
greaterOrEquals: Float
less: Float
lessOrEquals: Float
in: [Float]
notIn: [Float]
isNull: Boolean
```
**Boolean** filtering operators
```
is: Boolean
isNull: Boolean
```
**ID** filtering operators
```
is: ID
isNot: ID
in: [ID]
notIn: [ID]
isNull: Boolean
```
### **Filtering by inner lists**
The database can be filtered by content of inner list, but it is a bit different from filtering by one-to-one or native fields. For example the query to the left allows to find releases which contains bugs in "Open" state or with effort greater than 0.
The following operators can be used for filtering database by inner list:
```
isEmpty: Boolean
contains: [InnerListDbFilter] // AND statement
containsAny: [InnerListDbFilter] // OR statement
notContains: [InnerListDbFilter] // AND statement
notContainsAny: [InnerListDbFilter] // OR statement
```
Filtering by inner lists:
```
{
findReleases(
bugs:{
containsAny: [
{state:{name:{is:"Open"}}}
{effort:{greater:0}}
]
})
{
name
bugs{
name
state{
name
}
}
}
}
```
### **Filtering inner lists**
The inner list of database can be filtered in the same way the database filtered. For example if you want to show only "To Do" bugs for releases:
Sample of filtering inner list
```
{
findReleases
{
name
bugs(state:{name:{is: "To Do"}}){
name
state{
name
}
}
}
}
```
## **Sorting**
The database or content of inner lists of the database can be sorted using `orderBy` argument which can be applied for native fields or one-to-one properties.
```
{
findReleases(
bugs: {isEmpty:false}
orderBy: {
releaseDate: DESC
}
)
{
name
releaseDate
bugs(
orderBy: {
name: ASC
createdBy: {email: ASC}
}
)
{
name
state {
name
}
}
}
}
```
## **Rich fields and comments**
You can download content of [Rich Text](https://the.fibery.io/@public/User_Guide/Guide/Rich-Text-28) fields or comments in four formats: `jsonString`, `text`, `md`, `html`.
```
{
findBugs{
name
stepsToReproduce{
text
}
comments{
md
}
}
}
```
Output
```
{
"data": {
"findBugs": [
{
"name": "🞠The first ever bug",
"stepsToReproduce": {
"text": "Open up the Mark II\n\n\nCheck all the relays one-by-one\n\n\nFind a little naughty moth"
},
"comments": [
{
"md": "Please fix ASAP"
}
]
}
]
}
}
```
## **Paging and limits**
By default, find database query returns 100 records. The default can be changed by setting `limit` argument. Use `offset` argument to retrieve next page if the current page contains 100 records (or equals to limit value).
Retrieve first page (limit is 3)
```
{
findBugs(limit:3){
name
}
}
```
Retrieve second page (limit: 3, offset: 3). Retrieve only if first page size equals to 3
```
{
findBugs(limit:3,offset:3){
name
}
}
```
## **Aliases**
GraphQL aliases can be used for find query if you would like to get separated results or as alternative to OR statement.
Using aliases:
```
{
todo: findBugs(state:{name:{is:"To Do"}}){
name
state{
name
}
}
done: findBugs(state:{name:{is:"Done"}}){
name
state{
name
}
}
}
```
Output:
```
{
"data": {
"todo": [
{
"name": "Nasty bug from the trenches",
"state": {
"name": "To Do"
}
}
],
"done": [
{
"name": "🞠The first ever bug",
"state": {
"name": "Done"
}
}
]
}
}
```
# CUSTOM APP: WEBHOOKS (BETA)
_____________________________
Most 3rd party systems allow reacting to updates almost immediately thanks to webhooks. Custom apps in Fibery can also take advantage of it and update the data immediately without the need to wait for a scheduled synchronization run
> [//]: # (callout;icon-type=icon;icon=star;color=#9c2baf)
> Only Fibery Admins can configure webhooks.
## Connector Configuration
To enable webhooks fist of all you need update connector's [synchronizer configuration](https://the.fibery.io/@public/User_Guide/Guide/Custom-App-REST-Endpoints-272/anchor=POST-api-v1-synchronizer-config--5962aed8-56d1-40f4-a58a-c4f0eb8c0cc4) by specifying `webhooks` configuration:
```
{
"types": [...],
"filters": [...],
"webhooks": {
"enabled": true,
"type": "ui"
}
}
```
NOTE: `type: 'ui'` is the only supported type for now. Most of the 3rd party system allow configuring webhooks via their UI instead of API request, hence the name
Then developers in connector should implement following URLs:
* [install](https://the.fibery.io/@public/User_Guide/Guide/Custom-App-REST-Endpoints-272/anchor=POST-api-v1-synchronizer-webhooks--45da0bf5-5ccc-4621-be2f-4821963052e0)
* [pre-process](https://the.fibery.io/@public/User_Guide/Guide/Custom-App-REST-Endpoints-272/anchor=POST-api-v1-synchronizer-webhooks-pre-pr--2a0558cb-db29-4509-a14d-cd7be9f54cb1)
* [data transformation](https://the.fibery.io/@public/User_Guide/Guide/Custom-App-REST-Endpoints-272/anchor=POST-api-v1-synchronizer-webhooks-transf--31250d72-4ad1-4d86-a92c-a80a209d3386)
## Accepting webhook events
Each app has its own enter point [`https://webhooks-svc.fibery.io/apps/:app-id`](https://webhooks-svc.fibery.io/apps/:app-id) (e.g. [`https://webhooks-svc.fibery.io/apps/slack-app`](https://webhooks-svc.fibery.io/apps/:app-id)). This url should be registered in 3rd party system as a target url for incoming messages
**How to get your app-id?**
Unfortunately that's not easy for now. You'll have to use browser's devtools and get the id from the request in Fibery. Here's a video showing how you can get it
# POST /VALIDATE
________________
This endpoint performs account validation when setting up an account for the app. The incoming payload includes information about the account type to be validated and all fields required:
```
{
"id": "basic", // identifier for the account type
"fields": { //list of field values to validate according to schema
"username": "test_user",
"password": "test$user!",
/*...*/
}
}
```
If the account is valid, the app should return HTTP status 200 with a JSON object containing a friendly name for the account:
```
{"name": "Awesome Account"}
```
If the account is invalid, the app should return HTTP status 401 (Not Authorized) with a simple JSON object containing an error message:
```
{"error": "Your password is incorrect!"}
```
## Refresh Access Token
In addition this step can be used as a possibility to refresh access token. The incoming payload includes refresh and access token, also it can include expiration datetime. Response should include new access token to override expired one.
Request sample:
```
{
"id": "oauth2",
"fields": {
"access_token": "xxxx",
"refresh_token": "yyyy",
"expire_on": "2018-01-01"
}
}
```
Response sample after token refresh:
```
{
"name": "Awesome account",
"access_token": "new-access-token",
"expire_on": "2020-01-01"
}
```
# HISTORICAL AND CUMULATIVE REPORT EXAMPLES
___________________________________________
Historical/cumulative reports are not so easy to create. You should be patient and learn how to copy and paste some formulas. I'll try to explain how you can create a Cumulative Flow diagram, Burn Up chart, and Burn Down chart.
A cumulative report is an example of a report using historical data. See [Current vs Historical data in Reports](https://the.fibery.io/@public/User_Guide/Guide/Current-vs-Historical-data-in-Reports-168).
> [//]: # (callout;icon-type=icon;icon=exclamation-circle;color=#fc551f)
> You can't build a historical context report using many-to-many relations
Let's say, we have a Space with Releases, User Stories, and Bugs. In this video I show how to create CFD and Burn Down charts:
[https://youtu.be/U0nh2j8_mmM](https://youtu.be/U0nh2j8_mmM)
## Cumulative Flow Diagram (CFD)
[Cumulative Flow Diagram](https://en.wikipedia.org/wiki/Cumulative_flow_diagram) is handy to understand how Cycle Time changes and get the feel of the whole process. We are going to build a CFD for Bugs and User Stories in our Space:

### Step 1. Select Report type
Create a new Report and select "Cumulative, Burn Up & Down charts". Select required entities (User Stories and Bugs in our case):

### Step 2. Set X-axis using Timeline function
`Timeline` is a special date function used for grouping data by date period, defined by start and end. [Here is the detailed description](https://vizydrop-svc.fibery.io/svc/vizydrop/api/v1/docs/calculations/timeline).
```
TIMELINE(
start date expression,
end date expression,
stop on current date (true or false, optional),
timeline start field (optional),
timeline end field (optional))
```
* Optional `stop on the current date` can be true or false to indicate if a timeline should be stopped at the current date.
* Optional `timeline start and end fields` are used to get min and max dates for date scale.
* Date expression**:** Date calculation created using date functions, data fields, or constants.
For our needs we should use this code:
```
AUTO(
TIMELINE(
[Modification Date],
[Modification Valid To],
TRUE)
)
```
Here is how you do it:

### Step 3. Set Y-axis as count of entities
Click `+` sign in Y axis and set the formula like this:
```
COUNT([Id])
```
It will calculate the number of entities in some states for some date.
### Step 4. Set Chart Type and States as colors
Now you should set `State` field as a color to calculate state transitions and set a chart type. You can also change the time group to Weeks or Days for X-axis:

## Burn Down Chart
Let's create a [Burn Down Chart ](https://en.wikipedia.org/wiki/Burn_down_chart)for Release 1.0. It will be a chart that shows the remaining effort of Bugs and User Stories in a release and shows Ideal and Forecast lines:

### Step 1. Filter data by Release 1.0
We want to see Stories and Bugs from Release 1.0 only, so we will create a Filter, like this:

### Step 2. Set X-axis Timeline function
Now we should set a [TIMELINE](https://vizydrop-svc.fibery.io/svc/vizydrop/api/v1/docs/calculations/timeline) function like this (note that two last values cut chart by release dates):
```
AUTO(
TIMELINE(
[Modification Date],
[Modification Valid To],
TRUE,
MIN([Release Dates Start]),
MAX([Release Dates End])
)
)
```
### Step 3. Set Y-axis and chart type
In a Burn Down we calculate the remaining Effort, so in Y-axis we will set a basic formula
```
Sum(Effort To Do)
```
And we'll set Line as a chart type:

### Step 4. Add an Ideal line
The ideal line should just move from the first to the last day of the release and from the top effort to zero. It can be created as an Annotation, use this [IDEAL_LINE](https://vizydrop-svc.fibery.io/svc/vizydrop/api/v1/docs/annotations/ideal_line) function:
```
IDEAL_LINE(
FIRST([SUM(Effort To Do)]),
0
)
```
Here is how you add a new Annotation line:

### Step 5. Add a forecast line
The forecast line shows basic prediction about release completion date based on team velocity. We'll use [FORECAST_LINE](https://vizydrop-svc.fibery.io/svc/vizydrop/api/v1/docs/annotations/forecast_line) function:
```
FORECAST_LINE(
[Sum(Effort To Do)],
0
)
```

`Note:` if instead of Effort, you use other parameters to estimate your Stories (or Tasks, Issues, or Tickets) - please, use it instead of the Effort field.
If you want to build a Burndown chart based on the number of Done items, this guide is for you [BurnDown Chart based on "Done" Cards Counts](https://the.fibery.io/@public/User_Guide/Guide/BurnDown-Chart-based-on-%22Done%22-Cards-Counts-99)
## Burn Up Chart (by Effort)
Burn Up Chart is somewhat more informative than Burn Down, since it shows how scope changes over time. For example, in this chart, we see that the release scope was increased twice (blue line). The red line shows the completed effort, so you can create a forecast line that will show when the whole scope will be completed:

### Step 1. Filter Data by Release 1.0
We want to see Stories and Bugs from Release 1.0 only, so we should create a Filter, like this:

### Step 2. Set the X-axis Timeline function
Now we will set a [TIMELINE](https://vizydrop-svc.fibery.io/svc/vizydrop/api/v1/docs/calculations/timeline) function like this (note that the two last values cut the chart by release dates):
```
AUTO(
TIMELINE(
[Modification Date],
[Modification Valid To],
TRUE,
MIN([Release Dates Start]),
MAX([Release Dates End])
)
)
```
Click on `+` in X axis and set a calculation like this:

### Step 3. Set Total and Completed Efforts on Y-axis
Y-axis will show two things:
* Total Effort
* Effort Completed
We'll calculate the Effort Completed like this:
```
SUM([Effort] - [Effort To Do])
```
Let's set both efforts in the chart:

### Step 4. Add Ideal Line and Forecast Line
The ideal line goes from 0 to the last date of the release, basically. Here is the formula:
```
IDEAL_LINE(
FIRST([Effort Completed]),
LAST([Total Effort])
)
```
Forecast Line shows when the scope of the Release can be completed:
```
FORECAST_LINE(
[Effort Completed],
LAST([Total Effort])
)
```
Click on `Total Effort` settings and add these two annotations:

## Historical Data Structure
We tend to use `[Modification Date] `and `[Modification Valid To]` fields in cumulative charts, but what is the structure of the historical data? Let's check this raw data to understand that.
This data shows changes for a single entity ("Full-Text Search" Feature) from 15 to 19 April:

For example, the first row shows that State was set to Open on 15 April 2021 and this information was valid till 15 April 2021. It also means that "Full Text Search" Feature was changed again on 16 April and something changed here.
Basically, this is a list of events that indicate what was changed, when, and for how long these changes are valid.
You can learn more about [Current vs Historical data in Reports](https://the.fibery.io/@public/User_Guide/Guide/Current-vs-Historical-data-in-Reports-168).
## Filters
You can also apply filters on creation. See [here](https://the.fibery.io/@public/User_Guide/Guide/Current-vs-Historical-Data-in-Reports-168/anchor=Filtering--5be6ed34-bf4a-42f7-a128-4ac420ce5ec5).
Note that filters are by current values only, so set filters wisely to not filter out important data. For example, if you create a report for a Release and want to know what entities were moved out to another release, do not filter by Release then, since these entities will not be included.

## FAQ
### I don't see my formula field and can't use it in report
Formulas, that are based on “today†syntax are automatically excluded from fields set for the historical report
### I can't find "Created by …" filter
That was excluded on purpose, as we don't support dynamic results for historical reports. You can use [Context Views](https://the.fibery.io/@public/User_Guide/Guide/Context-Views-20) with User on the top level instead, Please, let us know if you need that functionality.
### Can I use Duration calculation in filters?
Even though `Duration` appears in the "Data Fields" section, it's not a field, but a complex formula. Similar to Timeline, Count of Records, etc.\
We added those formulas for simplicity, to allow drag and drop. As only a few people are able to write the Duration formula themselves 😅.\
You can't filter by a calculation using field filters.\
But you can filter by those aggregated values in the chart data section.
### How does the Date Range field work during the initial setup?
The report will show entities that were not created but modified within the last 90 days. For example, if an entity was created one year ago and modified within the last 90 days, it will appear in the report.

> [//]: # (callout;icon-type=icon;icon=exclamation-circle;color=#d40915)
> Please, note that on `Standard` plan history is limited for 90 days.
>
> Use `Pro` version for the unlimited history.
# SIMPLE CUSTOM APP TUTORIAL
____________________________
In the tutorial we will implement the simplest app with token authentication. We will use NodeJS and Express framework, but you can use any other programming language. Find source code repository here:
[https://gitlab.com/fibery-community/integration-sample-apps](https://gitlab.com/fibery-community/integration-sample-apps)
To create simple app you need to implement following [Custom App: REST Endpoints](https://the.fibery.io/@public/User_Guide/Guide/Custom-App:-REST-Endpoints-272):
* getting app information: `GET /`
* validate account: `POST /validate`
* getting synchronizer configuration: `POST /api/v1/synchronizer/config`
* getting schema: `POST /api/v1/synchronizer/schema`
* fetching data `POST /api/v1/synchronizer/data`
Let's implement them one by one. But first let's define dataset:
```
const users = {
token1: {
name: `Dad Sholler`,
data: {
flower: [
{
id: `47fd45cf-5a07-40aa-9ee4-a4258832154a`,
name: `Rose`,
},
{
id: `4f3afc75-2fb9-4ff8-b26f-ab4bf2f470a3`,
name: `Lily`,
},
{
id: `d7525fc1-1979-4cfb-ba32-0dfab9280b24`,
name: `Tulip`,
},
],
regionPrice: [
{
id: `56c50696-1d9f-4e4d-9678-448017d25474`,
flowerId: `d7525fc1-1979-4cfb-ba32-0dfab9280b24`,
price: 10,
name: `Eastern Europe`,
},
{
id: `503e5efb-7650-4c3a-85e9-f4ebc23adfd5`,
name: `Western Europe`,
flowerId: `d7525fc1-1979-4cfb-ba32-0dfab9280b24`,
price: 15,
},
{
id: `87ccd5ef-ed3f-49db-9bcc-c9d1daf91744`,
name: `Eastern Europe`,
price: 20,
flowerId: `47fd45cf-5a07-40aa-9ee4-a4258832154a`,
},
],
},
},
token2: {
name: `Ben Dreamer`,
data: {
flower: [
{
id: `4f3afc75-2fb9-4ff8-b26f-ab4bf2f470a3`,
name: `Lily`,
},
{
id: `d7525fc1-1979-4cfb-ba32-0dfab9280b24`,
name: `Tulip`,
},
],
regionPrice: [
{
id: `c3352e8c-e62c-4e26-9a8b-852c1a3d2435`,
flowerId: `d7525fc1-1979-4cfb-ba32-0dfab9280b24`,
price: 10,
name: `East Coast`,
},
{
id: `7a581588-d5fc-46aa-a084-8e2b28f3d6e5`,
name: `West Coast`,
flowerId: `d7525fc1-1979-4cfb-ba32-0dfab9280b24`,
price: 15,
},
{
id: `6e510195-41e3-499b-9a76-9ad928720882`,
name: `Asia`,
price: 20,
flowerId: `4f3afc75-2fb9-4ff8-b26f-ab4bf2f470a3`,
},
],
},
},
};
```
## Getting app information
App information should have the structure described in [Custom App: Domain](https://the.fibery.io/@public/User_Guide/Guide/Custom-App:-Domain-269). Let's implement it. We can see that the app require token authentication and responsible for data synchronization.
```
app.get(`/`, (req, res) => {
res.json({
id: 'integration-sample-app',
name: 'Integration Sample App',
version: `1.0.0`,
type: 'crunch',
description: 'Integration sample app.',
authentication: [
{
description: 'Provide Token',
name: 'Token Authentication',
id: 'token',
fields: [
{
type: 'text',
description: 'Personal Token',
id: 'token',
},
],
},
],
sources: [],
responsibleFor: {
dataSynchronization: true,
},
});
});
```
## **Validate account**
Since authentication is required we should run an authentication and return corresponding user name. You can find more information about the endpoint here.
```
app.post(`/validate`, (req, res) => {
const user = users[req.body.fields.token];
if (user) {
return res.json({
name: user.name,
});
}
res.status(401).json({message: `Unauthorized`});
});
```
## **Getting sync configuration**
This is basic a scenario and we don't need any dynamic. So we will return a static configuration with no filters.
```
app.post(`/api/v1/synchronizer/config`, (req, res) => {
res.json({
types: [
{id: `flower`, name: `Flower`},
{id: `regionPrice`, name: `Region Price`},
],
filters: [],
});
});
```
## Getting schema
We should provide schema for selected types.
```
const schema = {
flower: {
id: {
name: `Id`,
type: `id`,
},
name: {
name: `Name`,
type: `text`,
},
},
regionPrice: {
id: {
name: `Id`,
type: `id`,
},
name: {
name: `Name`,
type: `text`,
},
price: {
name: `Price`,
type: `number`,
},
flowerId: {
name: `Flower Id`,
type: `text`,
relation: {
cardinality: `many-to-one`,
name: `Flower`,
targetName: `Region Prices`,
targetType: `flower`,
targetFieldId: `id`,
},
},
},
};
app.post(`/api/v1/synchronizer/schema`, (req, res) => {
res.json(
req.body.types.reduce((acc, type) => {
acc[type] = schema[type];
return acc;
}, {}),
);
});
```
## **Fetching data**
The endpoint receives requested type, accounts, filter and set of selected types and should return actual data.
```
app.post(`/api/v1/synchronizer/data`, (req, res) => {
const {requestedType, account} = req.body;
return res.json({
items: users[account.token].data[requestedType],
});
});
```
And that's it! Our app is ready for use. See full example [here](https://gitlab.com/fibery-community/integration-sample-apps).
# REQUIRED FIELDS
_________________

Sometimes you need to enforce mandatory fields to ensure data consistency and integrity when creating or updating entities. This can be done with the Required fields option in the Advanced section of Field setup.
> [//]: # (callout;icon-type=icon;icon=exclamation-circle;color=#fba32f)
> When a field is marked as required, it is not possible to have an entity in database where this field is not set. For example, you mark the Effort field as required for Features but have some features with empty efforts. Fibery will ask you to provide a value for such tasks.
## What fields can be marked as required?
You can require a value option for almost all fields, including: Basic Text, URL, Email, Phone, Number, Date, Single Select, Parent relation (many-to-one).
Here are some limitations:
* ⌠Multiple relations (many-to-many) and multi-select fields can't be required
* ⌠Formulas and Lookups can't be required
* ⌠Required fields can not be selected for [Highlights](https://the.fibery.io/@public/User_Guide/Guide/Highlights-310) database
## How to Add New Required field or mark existing field as required?
To make a field required, open its settings, click Advanced and switch `Always require a value`. You will have to choose a value for all existing entities that have no value set for this field yet.
For example, we want to set Estimated Effort for Feature as required field and we choose to set 0 as the value for all Features where the Estimated Effort is currently empty.

Required fields are marked with \* in the fields list, so you can quickly see what fields are required in a database setup.
Note that you can always remove `require a value` option from a field and it will work as before.
## Creating new entities with required fields
Remember, it is not possible to have an entity without a value if a field is required. This means Fibery will always asks a user to fill this value for new entities. It makes new entities creation harder, but it is what you wanted!
For example, here we have two required fields for the Feature database, and when a user tries to add a new Feature from a table view, a form for the new feature will appear with required fields marked yellow:

The same popup appears when you try to create an entity in any other way, including Search, inline from selected text, etc.
### Updating entities with required fields
Nothing in general changes here, but it is not possible to clear a value from a required field. If you try to delete a value, it will be reverted back to a previous value.
### How required fields affect API, Automations and other services?
In all cases where Fibery does not have a value for a required field, it will throw an error `Some required fields values are missing, here are required fields list: [field1, field2]`.\
You have to make sure that your automations/API calls provide values for required fields.
### Deleting and restoring a db with required fields
If a database which has required fields is deleted, and then subsequently restored, the 'required' toggle will need to be re-enabled.
## FAQ
#### Can I change the order of required fields in the small pop-up?
No - currently, it's not possible to reorder required fields in the small pop-up that appears when you create an item directly from the table view. The field order there is fixed.
#### Can I make non-required fields appear in the small pop-up?
No — the only way to make non-required fields appear in that pop-up is by including them in the **Name** formula. Otherwise, they won't be displayed.
# SHOW IMAGES AS COVERS ON CARDS
________________________________
You can see images (uploaded into Files section in an entity) as covers on a Board View, thus turning your Board View into Gallery View.
Here is the flow:
1. Upload an Image in Files section inside an entity. Only first image is visible, so if you want to make some image a cover, drag it in Files section and drop to the first position, like that:

2. Go to Board View, click `Fields` , find `Cover Image` selector on top, and select `Files and media` as a cover image.

You may change how image is displayed:
1. Click `…` near `Cover Image` selector
2. Select `Fit` or `Crop` option.

> [//]: # (callout;icon-type=icon;icon=lightbulb-alt;color=#fba32f)
> Use cases ideas:
>
> * Inventory management - show images of the inventory for better discoverability
> * Employee management - make sure everyone knows how teammates look like
> * Assets management - show the latest prototype as a cover
> * Content hub - make sure your content looks sexy
> * Manage the catalogue of UI components
# WEBHOOKS
__________
Use webhooks to update other tools based on changes in Fibery.
There is no webhooks UI at the moment, so please use `/api/webhooks/v2` endpoint to add or delete a webhook.
> [//]: # (callout;icon-type=icon;icon=star;color=#9c2baf)
> Only Fibery Admins can configure webhooks.
## Add webhook
Add a webhook to subscribe to Entity changes of a particular [Type API](https://the.fibery.io/@public/User_Guide/Guide/Type-API-262).
> [//]: # (callout;icon-type=icon;icon=bookmark-full;color=#673db6)
> In the interface, Type = Database, App = Space. To find out why, check [Terminology](https://the.fibery.io/@public/User_Guide/Guide/Fibery-API-Overview-279/anchor=Terminology--15f750ec-571c-48f6-9b0b-6861222c1a27).
When one **or several** changes occur, Fibery sends a JSON with new and previous values to the specified URL.
Filter and process the payload in your integration. If you need some extra fields, send a request to the regular API (check [Select Fields](https://the.fibery.io/@public/User_Guide/Guide/Entity-API-264/anchor=Select-Fields--e01360bf-8926-4edb-b725-f1a4148aa8ce "https://the.fibery.io/@public/User_Guide/Guide/Entity-API-264/anchor=Select-Fields--e01360bf-8926-4edb-b725-f1a4148aa8ce") for more).
> [//]: # (callout;icon-type=icon;icon=exclamation-circle;color=#1fbed3)
> Please note that you can send correlationId, as shown in API call example, to match it with webhook call.\
> Then you will receive the same correlationId in corresponding webhook event.
Limitations:
> [//]: # (callout;icon-type=icon;icon=exclamation-circle;color=#fba32f)
> Webhooks do not support rich text Field changes at the moment.
```
curl -X POST https://YOUR_ACCOUNT.fibery.io/api/webhooks/v2 \
-H 'Authorization: Token YOUR_TOKEN' \
-H 'Content-Type: application/json' \
-d \
'{
"url": "http://webhook.site/c2d6d113-aebe-4f68-a337-022ec3c7ab5d",
"type": "Cricket/Player"
}'
```
Result:
```
{
"id": 5,
"url": "http://webhook.site/c2d6d113-aebe-4f68-a337-022ec3c7ab5d",
"type": "Cricket/Player",
"state": "active",
"version": "2",
"runs": []
}
```
Once you update a couple of Fields:
```
curl -X POST https://YOUR_ACCOUNT.fibery.io/api/commands \
-H 'Authorization: Token YOUR_TOKEN' \
-H 'Content-Type: application/json' \
-d \
'[
{
"command": "fibery.command/batch",
"correlationId": "cd4490f1-21d8-4881-b85c-423ef98edc3d",
"args": {
"commands": [
{
"command": "fibery.entity/update",
"args": {
"type": "Cricket/Player",
"entity": {
"fibery/id": "d17390c4-98c8-11e9-a2a3-2a2ae2dbcce4",
"fibery/modification-date": "2019-07-30T07:18:48.449Z",
"Cricket/name": "sir Curtly Ambrose"
}
},
},
{
"command": "fibery.entity/add-collection-items",
"args": {
"type": "Cricket/Player",
"field": "user/Former~Teams",
"entity": { "fibery/id": "d17390c4-98c8-11e9-a2a3-2a2ae2dbcce4" },
"items": [
{ "fibery/id": "d328b7b0-97fa-11e9-81b9-4363f716f666" }
]
}
}
]
}
}
]'
```
the endpoint receives an array of effects:
```
{
"sequenceId":392,
"authorId":"4044090b-7165-4791-ac15-20fb12ae0b64",
"creationDate":"2021-04-22T12:40:14.325Z",
"command": {
"correlationId": "cd4490f1-21d8-4881-b85c-423ef98edc3d"
},
"effects":
[
{
"effect": "fibery.entity/update",
"id": "d17390c4-98c8-11e9-a2a3-2a2ae2dbcce4",
"type": "Cricket/Player",
"values": {
"fibery/modification-date": "2019-07-30T07:18:48.449Z",
"Cricket/name": "sir Curtly Ambrose"
},
"valuesBefore": {
"fibery/modification-date": "2019-07-04T11:12:13.423Z",
"Cricket/name": "Curtly Ambrose"
}
},
{
"effect": "fibery.entity/add-collection-items",
"id": "d17390c4-98c8-11e9-a2a3-2a2ae2dbcce4",
"type": "Cricket/Player",
"field": "user/Former~Teams",
"items": [
{
"fibery/id": "d328b7b0-97fa-11e9-81b9-4363f716f666"
}
]
}
],
}
```
## Delete webhook
Delete a webhook when you no longer need it to save the account resources.
```
curl -X DELETE https://YOUR_ACCOUNT.fibery.io/api/webhooks/v2/WEBHOOK_ID \
-H 'Authorization: Token YOUR_TOKEN' \
-H 'Content-Type: application/json' \
```
Status code 200 means that the deletion has been successful.
## Get webhooks
Get a list of webhooks together with their latest 50 runs.
```
curl -X GET https://YOUR_ACCOUNT.fibery.io/api/webhooks/v2 \
-H 'Authorization: Token YOUR_TOKEN' \
-H 'Content-Type: application/json' \
```
Result:
```
[
{
"id": 5,
"url": "http://webhook.site/c2d6d113-aebe-4f68-a337-022ec3c7ab5d",
"type": "Cricket/Player",
"state": "active",
"runs": [
{
"http_status": "200",
"elapsed_time": "209",
"request_time": "2019-07-30T07:18:49.883Z"
},
{
"http_status": "200",
"elapsed_time": "181",
"request_time": "2019-07-30T07:23:06.738Z"
}
]
}
]
```
# CUSTOM APP: OAUTH
___________________
if your app provides OAuth capabilities for authentication, the authentication identifiers must be `oauth` and `oauth2` for OAuth v1 and OAuth v2, respectively. Only one authentication type per OAuth version is currently supported.
## **OAuth v1**
### **POST /oauth1/v1/authorize**
The `POST /oauth1/v1/authorize` endpoint performs obtaining request token and secret and generating of authorization url for OAuth version 1 accounts.
Included with the request is a single body parameter, `callback_uri`, which is the redirect URL that the user should be expected to be redirected to upon successful authentication with the third-party service. `callback_uri` includes query parameter `state` that MUST be preserved to be able to complete OAuth flow by Fibery.
Request body sample:
```
{
"callback_uri": "https://oauth-svc.fibery.io/callback?state=xxxxxxx"
}
```
Return body should include a `redirect_uri` that the user should be forwarded to in order to complete setup, `token` and `secret` are granted request token and secret by third-party service. Replies are then POST'ed to `/oauth1/v1/access_token` endpoint.
> [//]: # (callout;icon-type=icon;icon=exclamation-circle;color=#fba32f)
> The OAuth implementation requires the account identifier to be `oauth` for OAuth version 1.
>
> If service provider has callback url whitelisting than `https://oauth-svc.fibery.io?state=xxxxx` has to be added to the whitelist.
Response body sample:
```
{
"redirect_uri": "https://trello.com/1/OAuthAuthorizeToken?oauth_token=xxxxxxxxxxxxxxxxxxxxxxxxxxxxxxxx&name=TrelloIntegration",
"token": "xxxx",
"secret": "xxxx"
}
```
### **POST /oauth1/v1/access_token**
The `POST /oauth1/v1/access_token` endpoint performs the final setup and validation of OAuth version 1 accounts. Information as received from the third party upon redirection to the previously posted `callback_uri` are sent to this endpoint, with other applicable account information, for final setup. The account is then validated and, if successful, the account is returned; if there is an error, it is to be raised appropriately.
The information that is sent to endpoint includes:
* `fields.access_token` - request token granted during authorization step
* `fields.access_secret` - request secret granted during authorization step
* `fields.callback_uri` - callback uri that is used for user redirection
* `oauth_verifier` - the verification code received upon accepting on third-party service consent screen.
Request body sample:
```
{
"fields": {
"access_token": "xxxx",
// token value from authorize step
"access_secret": "xxxxx",
// secret value from authorize step
"callback_uri": "https://oauth-svc.fibery.io?state=xxxxx"
},
"oauth_verifier": "xxxxx"
}
```
Response can include any data that will be used to authenticate account and fetch information.
> [//]: # (callout;icon-type=icon;icon=exclamation-circle;color=#199ee3)
> Tip: You can include parameters with `refresh_token` and `expires_on` and then on [validate step](https://the.fibery.io/@public/User_Guide/Guide/Custom-App-REST-Endpoints-272/anchor=POST-validate--8dcd5e4d-b839-4ca0-955f-71f8271107fd "https://the.fibery.io/@public/User_Guide/Guide/Custom-App-REST-Endpoints-272/anchor=POST-validate--8dcd5e4d-b839-4ca0-955f-71f8271107fd") proceed with access token refresh if it is expired or about to expire.
Response body sample:
```
{
"access_token": "xxxxxx",
"refresh_token": "xxxxxx",
"expires_on": "2020-01-01T09:53:41.000Z"
}
```
## **OAuth v2**
### **POST /oauth2/v1/authorize**
The `POST /oauth2/v1/authorize` endpoint performs the initial setup for OAuth version 2 accounts using `Authorization Code` grant type by generating `redirect_uri` based on received parameters.
Request body includes following parameters:
* `callback_uri` - is the redirect URL that the user should be expected to be redirected to upon successful authentication with the third-party service
* `state` - opaque value used by the client to maintain state between request and callback. This value should be included in `redirect_uri` to be able to complete OAuth flow by Fibery.
Request sample
```
{
"callback_uri": "https://oauth-svc.fibery.io",
"state": "xxxxxx"
}
```
Return body should include a `redirect_uri` that the user should be forwarded to in order to complete setup.\
Replies are then POST'ed to `/oauth2/v1/access_token` endpoint.
> [//]: # (callout;icon-type=icon;icon=exclamation-circle;color=#fba32f)
> The OAuth implementation requires the account identifier to be `oauth2` for OAuth version 2.
>
> If service provider has callback url whitelisting than `https://oauth-svc.fibery.io` has to be added to the whitelist.
Response example:
```
{
"redirect_uri": "https://accounts.google.com/o/oauth2/token?state=xxxx&scope=openid+profile+email&client_secret=xxxx&grant_type=authorization_code&redirect_uri=something&code=xxxxx&client_id=xxxxx"
}
```
### **POST /oauth2/v1/access_token**
The `POST /oauth2/v1/access_token` endpoint performs the final setup and validation of OAuth version 2 accounts. Information as received from the third party upon redirection to the previously posted `callback_uri` are sent to this endpoint, with other applicable account information, for final setup. The account is then validated and, if successful, the account is returned; if there is an error, it is to be raised appropriately.
The information that is sent to endpoint includes:
* `fields.callback_uri` - callback uri that is used for user redirection
* `code` - the authorization code received from the authorization server during redirect on `callback_uri`
Request body sample:
```
{
"fields": {
"callback_uri": "https://oauth-svc.fibery.io"
},
"code": "xxxxx"
}
```
Response can include any data that will be used to authenticate account and fetch information.
> [//]: # (callout;icon-type=icon;icon=exclamation-circle;color=#199ee3)
> Tip: You can include parameters with `refresh_token` and `expires_on` and then on [validate step](https://the.fibery.io/@public/User_Guide/Guide/Custom-App-REST-Endpoints-272/anchor=POST-validate--8dcd5e4d-b839-4ca0-955f-71f8271107fd "https://the.fibery.io/@public/User_Guide/Guide/Custom-App-REST-Endpoints-272/anchor=POST-validate--8dcd5e4d-b839-4ca0-955f-71f8271107fd") proceed with access token refresh if it is expired or about to expire.
Response body sample:
```
{
"access_token": "xxxxxx",
"refresh_token": "xxxxxx",
"expires_on": "2020-01-01T09:53:41.000Z"
}
```
# GET NOTIFICATION WHEN A BIRTHDAY IS COMING
_____________________________________________
We have an Employee management setup in Fibery. And we want to use Fibery to track teammates' birthdays 🎉
And for sure we want our HR's be warned in advance. In 7 days, for example.
> [//]: # (callout;icon-type=icon;icon=asterisk;color=#199ee3)
> We assume you have Employee database to track Employees. Check [Employee Tracking](https://fibery.io/templates/employee-management) template.
## Step 1. Add birthday date and a clever formula
First, navigate to Employee database and add `Birthday` date field.
Then create a Formula field and copy into it the formula below (check [Formulas Reference](https://the.fibery.io/@public/User_Guide/Guide/Formulas-Reference-44) if you want fully to understand it 😅)
```
ToDays(Date(Year(Today()), Month(Birthday), Day(Birthday)) - Today()) = 7
```
The result of this formula will be a read-only checkbox, that is filled in automatically.
Name this formula field `Is Birthday in 7 Days`.
## **Step 2. Set Notification**
Let's add a Notification. Navigate to Employee database and add a new rule. We need to set a Recurring [Rules](https://the.fibery.io/@public/User_Guide/Guide/Rules-51)
Set a `Trigger` like this:

> [//]: # (callout;icon-type=icon;icon=exclamation-circle;color=#199EE3)
> If you have former employees and distinguish them with the Status field, add additional filter to the trigger - "Status is Active"
>
> So you didn't receive notifications about employees that already left the company
Set an `Action` like this:

Here is it. Now interested users will receive notifications about upcoming birthdays.
# ADD ENTITIES WITH MANY FIELDS USING FORMS
___________________________________________
In some cases you want to see many fields when adding new entities. You can do it using [Forms](https://the.fibery.io/@public/User_Guide/Guide/Forms-134). We suggest creating a Form for each popular database to simplify data entry (especially on mobile), even if you don't have a use case to share it externally.
## How to create a new Form that is visible in Views?
Just create a [Forms](https://the.fibery.io/@public/User_Guide/Guide/Forms-134) for a database you need, set required fields, etc.
Alternatively, you can create forms from any View fast. Navigate to any View and click arrow near button `[New Ë…]` in the top right. Select database and create a new form.

## How to add new entities via Form?
1. Navigate to any View where you have entities of this database and click arrow near button `[New Ë…]` in the top right.
2. List of Forms appears. For example, in some View we have Feature and Bug databases and popover can look like this:
1. ■`Feature` → Huge Feature
2. ■`Feature` → Small Feature
3. ■`Bug` → Blocking Bug
4. ■`Bug` → Bug with some Tasks
3. Click on a Form, for example, Blocking Bug
4. Popup with the form appears.
5. Fill the fields and click `Submit` button
1. There is also `Submit & Add another` button. If a user clicks it, entity is created and a form with clear field is visible again.
6. New entity is added into database.

## How to re-order, edit and delete Forms?
Click … near form name and then click `Edit` or `Delete` action.

You can re-order forms in this popover, just find the dots handler on the left and drag and drop forms in the list.
## FAQ
### I want to always force users to add entities via forms. Can I?
So far it is not possible, but we have a feature for this in our backlog. Provide your use case in Intercom chat and we will add it into the feature.
# MARKDOWN TEMPLATES
____________________
There are a couple of actions that can create comments, or change the contents of [Rich Text](https://the.fibery.io/@public/User_Guide/Guide/Rich-Text-28) fields of an entity. All of these actions have a text area that supports the markdown template.
## Markdown basics
Fibery supports almost all features of basic markdown syntax in Rich Text fields and documents.
Please check [this guide](https://www.markdownguide.org/basic-syntax/) and apply it for actions with a markdown template.
This is an example of a simple markdown template:
```
# Hello
Hi, **dear friend**. Nice to meet you.
```
This one will work for adding checklists
```
### My checklist
- [ ] Conquer markdown
- [ ] Procrastinate for the rest of the day
### My nested checklist
- [x] Task 1
- [ ] Task 2
- [x] Subtask A
- [ ] Subtask A
- [x] Task 3
```
### Callout blocks
To add a callout block of a specific color with a custom icon, use this syntax:
```
> [//]: # (callout;icon-type=icon;icon=sun;color=#fc551f)
> My pretty orange callout
> has multiple
> lines
```
With an emoji instead of an icon:
```
> [//]: # (callout;icon-type=emoji;icon=:tangerine:;color=#FBA32F)
> My pretty orange callout
> has multiple
> lines
```
## Using entity fields
You can refer to entity fields in the template when there is a need to use field values.
The syntax is `{{Field Name}}`.
## Using to-one relations
Use `.` when you need to put a values from a relation item into the template: `{{Relation Name.Field Name}}`.
> [//]: # (callout;icon-type=icon;icon=exclamation-circle;color=#4A4A4A)
> This way for referencing entity fields in markdown is different to the syntax used in [Formulas](https://the.fibery.io/@public/User_Guide/Guide/Formulas-39). Specifically, field names that have spaces do not need to be enclosed in square brackets.
Here we will get the entity's Name and its State Name:
```
# My name is {{Name}}
My current status is {{State.Name}}
```
## Using to-many relations
You can get the contents of a collection field (to-many relation) into a document, but you need to decide how these entities' values should be formatted. You can format collection fields as a table, a bulleted list or a comma-separated list using special syntax (or you can use Javascript to format in other ways).
### Collection → Table formatting
There is a way to include entity collections into the output document: `{{Collection Name:Field1,Field2,...,FieldN}}`. The result of the collection shortcut is a table.
Let's say Story has a collection of Bugs. You can print them into a document like this:
```
## Quick Overview of {{Name}}
Current state is **{{State.Name}}**.
### Bugs
{{Bugs:Name, State.Name}}
```
1\. We created a button with "Add comment" action

2\. The result of the button click:

### Collection → bulleted list formatting
Use `{- Collection Name:Field1 -}` to create a bulleted list.
For example, `{- Assignees:Name -}` will produce:
* Teddy Bear
* Jerry Mouse
### Collection → comma-separated list formatting
Use `{= Collection Name:Field1 =}` to create comma-separated list.
For example, `{= Assignees:Email =}` will produce:
teddy@fibery.io, jerry@fibery.io
### More complex formatting
For more complex formatting, you can use Javascript on collections if you declare them first using `{! Collection Name:Field Name !}` e.g.
```
{!Tasks:Id,Name!}
<%= Entity.Tasks.map((task) => task.Name).join(` | `) %>
```
See [later](https://the.fibery.io/@public/User_Guide/Guide/Markdown-Templates-53/anchor=Using-Javascript-code-and-Fibery-API-in--b13b30fe-ef56-40c4-9ae3-cacfe6ba9598 "https://the.fibery.io/@public/User_Guide/Guide/Markdown-Templates-53/anchor=Using-Javascript-code-and-Fibery-API-in--b13b30fe-ef56-40c4-9ae3-cacfe6ba9598") for how to use Javascript.
> [//]: # (callout;icon-type=icon;icon=exclamation-circle;color=#4a4a4a)
> You can only get collection fields from one link deep. That is to say, if you have a Product, linked to Features, which have Assignees, you can use markdown at the Product level to get 'simple' field values of its Features, e.g.`{{Features:Name}}` but you can't get values from Features' collections, i.e.`{{Features.Assignees:Name}}` will not work.
## Using rich text fields
You can use Rich Text fields in automation templates. It works for native entity fields, fields accessible via 'to-one' relations and even collections. Here are some examples:
```
Hello: {{Description}}
This is one-to-one: {{Epic.Description}}
This is collection {{Bugs:Description}}
```
> [//]: # (callout;icon-type=icon;icon=exclamation-circle;color=#4a4a4a)
> In case you're wondering, if you're referencing a rich text field in your markdown, and the content of the field includes text which follows the `{{…}}` notation, this text will not be dynamically replaced. In other words, the evaluation of fields only occurs for one level.
## Access rich text field in collections
You can access rich text fields in collections attached to an entity in markdown templates in automations and AI prompts. What does it mean?
For example, you have a list of Highlights linked to some Feature. So you can create an AI prompt that will take content of all these highlights and generate a feature spec for you based on customers problems.
[https://www.loom.com/share/b873e8ba6cfb43fdb4c2605c65c788f2?sid=b32d9c05-4a73-4341-8708-9560938cded5](https://www.loom.com/share/b873e8ba6cfb43fdb4c2605c65c788f2?sid=b32d9c05-4a73-4341-8708-9560938cded5)
Here is the prompt, for the reference.
```
You are a very experienced product manager. You need to write a good specification for a feature "{{Name}}" based on customers requests. Let's work on this step by step.
First, generate a short list of main problems based on customers feedback Make problems unique, do not repeat them. Generate a list of problems via bullet points. Here is the customers feedback below:
"""
{- Highlights:Highlight -}
"""
Next step. Now merge similar problems and return a list of main problems only. No more than 5 problems.
Next step. Now think and invent a feature specification for feature {{Name}} that will solve the problems above.
Return in the following template:
## Problems
[list of main problems above as bullet points]
## Solution
[brief solution overview]
```
Here are few examples how to access rich text fields:
* Get all highlights content: `{- Highlights:Highlight -}`
* Get all comments content: `{- Comments:Text -}`
* Get all bugs descriptions linked to a feature: `{- Bugs:Description -}`
* Get all meeting notes content linked to a project: `{- Project:Summary and Notes -}`
> [//]: # (callout;icon-type=icon;icon=exclamation-circle;color=#d40915)
> Note: There is a limit of 100 entities in a collection, so if you have large collections it will just cut remaining entities due to performance limitations.
## Mentioning Entities and Users
To mention an Entity or a colleague (User) via markdown, you need to utilise the database ID and the entity's UUID:
```
[[#^DB_ID/ENTITY_ID]] is important, [[#@USER_DB_ID/USER_ENTITY_ID]] please take a look.
```
A raw example:
```
[[#^7c2da640-2abf-11ed-ac0b-05d5e363c932/7d3cf360-2abf-11ed-ac0b-05d5e363c932]] is important, [[#@1b728600-af9c-11e9-95b5-2985503542d7/b5754020-0ab5-11ea-848a-cdd700770a5f]] please take a look
```
The easiest way to get all the Database IDs apart from [querying the API](https://api.fibery.io/#schema "https://api.fibery.io/#schema"), is via this small script:
```
const fibery = context.getService('fibery');
const schema = await fibery.getSchema();
const dbID = schema['typeObjects'].filter((obj) => obj.name == Entity.Type)[0]['id'];
```
You can find more details on scripts in a dedicated [Scripts in Automations](https://the.fibery.io/@public/User_Guide/Guide/Scripts-in-Automations-54) guide.
Using Entity Fields:
```
[[#^7c2da640-2abf-11ed-ac0b-05d5e363c932/{{Goal.Id}}]] is important, [[#@1b728600-af9c-11e9-95b5-2985503542d7/{{Team.Leader.Id}}]] please take a look
```
Here is an example. You have an Author database with a collection of Books. You want to create [Buttons](https://the.fibery.io/@public/User_Guide/Guide/Buttons-52) that insert a list of references into Author's description rich edit field.

You should create a new Action Button for Author database, select `Append content to Description` action and write the following template code:
```
{!Books:Id!}
<%
const fibery = context.getService('fibery');
const schema = await fibery.getSchema();
const dbID = schema['typeObjects'].filter((obj) => obj.name == 'Strategy/Book')[0]['id'];
%>
<%= Entity.Books.map((book) => "[[#^" + dbID + "/" + book.Id + "]]").join('\n') %>
```
## Markdown Templates AI Assistant
You can use AI to create markdown templates in automation action for rules or buttons. Use Ask AI button near any markdown template. It can generate quite dumb templates with just some fields, or some clever templates using scripts. Check it out:
[https://www.loom.com/share/ce09b23c79154441a115758dd891d5fe?sid=48eea43c-d1b0-4ebf-88be-6a1f7e1ccdc7](https://www.loom.com/share/ce09b23c79154441a115758dd891d5fe?sid=48eea43c-d1b0-4ebf-88be-6a1f7e1ccdc7)
## Using Javascript code and Fibery API in templates
Javascript code and [Fibery API](https://api.fibery.io "https://api.fibery.io") can be used in templates. Javascript code can be executed using `<% const sample = 1; %>` syntax. You may place output from your code into the template using `<%= sample%>` syntax.
An entity can be referenced as `Entity` if you need to make calls to Fibery API and retrieve additional entity data. Entity contains `Id` and `Type` properties.
Here is an example of using Javascript and [Fibery API](https://api.fibery.io "https://api.fibery.io") in a template.
```
### Overview of assignees
<%= Entity.Type %> (#<%= Entity.Id%>)
#### Assignees
<%
const fibery = context.getService('fibery');
const entityWithAssignees = await fibery.getEntityById(Entity.Type, Entity.Id, ['Assignees']);
entityWithAssignees.Assignees.forEach((assignee) => {
%>
- <%= assignee.Name %>
<% });%>
Date of comment: <%= new Date()%>
```
The output of this template if it is used for "Add Comment" action can be found below

> [//]: # (callout;icon-type=icon;icon=lock-alt;color=#FC551F)
> Javascript code in markdown templates has some limitations for security reasons.
Another example — using Javascript to show prettier dates
instead of `<%= new Date()%>` you can use:
```
<%
let d = new Date(2010, 7, 5);
let ye = new Intl.DateTimeFormat('en', { year: 'numeric' }).format(d);
let mo = new Intl.DateTimeFormat('en', { month: 'short' }).format(d);
let da = new Intl.DateTimeFormat('en', { day: '2-digit' }).format(d);
%>
<%= `${da}-${mo}-${ye}` %>
```
### Using async calls during collection traversal
During collection traversal, it is sometimes necessary to use async calls to Fibery API.
In this case use [for … of syntax](https://developer.mozilla.org/en-US/docs/Web/JavaScript/Reference/Statements/for...of) instead of `collection.forEach(…)` .
Here is an example:
```
# Closed Tickets in Release
{!Tickets:Id,Name,IdOfTicketInExternalSystem!}
<%
const http = context.getService('http');
for (let ticket of Entity.Tickets) {
const content = await http.getAsync(`https://external-system-url/tickets/${ticket.IdOfTicketInExternalSystem}`);
%>
## <%= ticket.Name %>
<%= content %>
<% } %>
```
### **Current User**
Every template receives information about the current user if the rule was triggered by the user:
```
Changes were made by **{{CurrentUser.Email}}**
```
**Note:** If a rule has been triggered by something other than a user action, e.g. when the value of a formula field containing the Today() function changes, then {{CurrentUser}} will return empty object.
**Note:** `{{CurrentUser.Notes}}` won't work for a rich-text Field, use the scripted approach below instead.
### **Insert Comments or Documents into template**
Find below an example on how insert last comment into template
```
{! Comments:Author.Name,Document Secret !}
<%
const fibery = context.getService('fibery');
const lastComment = Entity.Comments[Entity.Comments.length-1];
%>Comment added for {{Name}} by <%= lastComment['Author.Name'] %>
<%= await fibery.getDocumentContent(lastComment['Document Secret'], 'md') %>
```
## FAQ
#### Why does Trigger reaction time seem to be inconsistent for Entity Updated > Rich Text field?
[Here ](https://community.fibery.io/t/5700)you can read full discussion and ask more questions.
Overall given that a sentence typed in a rich text field can contain dozens of typed letters, it doesn't make sense to trigger on each new character. Accordingly, changes are ‘batched' together, and an automation is only triggered when Fibery thinks there has been a natural break in editing.
Also, each workspace has an automation ‘queue' so triggered automations may not execute immediately if others are still active/pending.
# AI AGENT IN AUTOMATIONS
_________________________
The [AI Agent (new)](https://the.fibery.io/@public/User_Guide/Guide/AI-Agent-(new)-333) in Fibery is a built-in AI tool that can read structured or unstructured data and generate intelligent output — summaries, insights, transformations — based on natural language prompts.
The Smart Agent becomes especially powerful in automations when you have a repeating prompt that should be executed on a regular basis. Unlike ad-hoc analysis, this use fits situations where structured AI output can complement your ongoing reporting or workflows.
## When to use it?
Use Smart Agent in automations when you want to:
* Analyze performance regularly\
e.g. Summarize how a person or team is progressing week-to-week (fast).
* Continuously process feedback\
e.g. Group and summarize feedback received in some timeframe
* Generate periodic insights\
e.g. Automatically create a weekly or monthly report from project updates, research notes, or changelogs.
> [//]: # (callout;icon-type=icon;icon=heart;color=#199ee3)
> Good Practice
>
> Smart Agent is best used as a supplement, not a replacement, for structured reporting.\
> We recommend combining AI-generated reports with traditional visual dashboards or text-based summaries for full context and reliability.
## Actions overview
When configuring automations in Fibery, you can invoke Smart Agent and put results into rich text field via `[ai-agent]` special tag, like this
```
[ai-agent]
{{Prompt}}
[/ai-agent]
```
In a rule it can look like this. Here we take text from Prompt field, put it into AI Agent and it will return result of the prompt when it is ready and put it into Description field (Below I will explain the setup for this use case)

## Suggested structure
> [//]: # (callout;icon-type=icon;icon=exclamation-circle;color=#199EE3)
> You can install ready-to-go template [with this link](https://shared.fibery.io/t/340dd57e-3ec8-419d-88a5-9795dd31c095-ai-reports).
>
> To automate AI-powered reporting in Fibery, we recommend setting up two connected databases:
>
> * AI Prompts
> * AI Reports.
>
> The AI Prompt database stores reusable prompts and serves as the source for automation. Each prompt includes a Prompt rich text field (used in automation). It also links to the AI Report database, where historical reports are saved. Automations (via rules or buttons) trigger the Smart Agent, which processes the prompt creates a new AI Report.
#### `AI Prompt`
This database stores reusable AI instructions and context. Each item defines:
* The goal of the automation (e.g. "Summarize Feedback from Last 30 Days")
* The prompt text to send to the Smart Agent
Think of this as the template brain - what you want the AI to do.
#### `AI Report`
This stores the actual outputs produced by the Smart Agent. Each entry captures:
* The resulting AI-generated text
* The run timestamp
* A link to the prompt that generated it
This acts as a history of executions, helping with:
* Versioning and tracking changes over time
* Comparing results from different prompts or inputs
* Adding AI-generated insights to other workflows (dashboards, exports, reviews)
#### Relations Between Them
* Each `AI Report` belongs to one `AI Prompt`
* One `AI Prompt` can produce many `AI Reports` over time (1→∞)
* This relation allows you to:
* Filter reports by prompt type (e.g. “Only performance reportsâ€)
* Re-run the same prompt with updated data

### AI prompt fields overview

The `AI Prompt` database acts as the home for reusable AI instructions. Each prompt defines what kind of report or insight should be generated.
### Button action logic
When:
* Trigger: Button Clicked
Then - Step 2: Add AI Reports Item
* Creates a new item in the AI Reports list.
* Fields mapped:
* `Name`: `[Step 1 AI Prompt].Name + " [timestamp]"`
* `Description`: `[ai-agent]{{Prompt}}[/ai-agent]` (i.e., AI-generated report)

What happens if you click the button?
1. A button click triggers the automation.
2. Fibery sends a static prompt to the Smart Agent, asking it to summarize recent feedback. The Smart Agent processes the data (based on the Highlights DB), generates a markdown summary, and returns the result in Description field.
3. The automation creates a new report entry in the AI Reports database with that content.
That's it. Use this setup to automate recurring insights, track progress over time, and summarize unstructured data - like feedback or updates. It gives you a consistent, repeatable way to generate AI-powered reports without manual effort. By separating prompts and results, you keep things clean, reusable, and easy to manage.
## Prompt examples
### Fresh feedback
> We capture feedback via Highlights database.
>
> Create a clever report for all Highlights created for last 30 days. Try to group feedback by problems, ideas, and find repeating patterns.
>
> Do not mention any customer data.
>
> Do not add recommendations.
[Here you can check sample report ](https://the.fibery.io/AI_Reports/AI_Report/Fresh-Feedback-2025-06-03-91?sharing-key=09f2d251-8ca0-49f8-8e6a-c2ad9d754f2a)generated with such a prompt.
### Create a report about Features "In Progress".Â
> I want to know
>
> * Amount of features
> * Open bugs for every feature and overall evaluation of quality for every feature
> * When feature is going to be released (check feature release, and if it empty, try to guess)
> * Who works on the featureÂ
> * Total MRR of all customers that requested these features (calculate it via Highlights linked to feature)
>
> Do not generate PDF. Generate HTML and Text reports.
[Here you can check sample report](https://the.fibery.io/AI_Reports/AI_Report/In-Progress-Features-report-2025-06-10-106?sharing-key=bf61d186-fb31-4ec1-88d2-6eca73715337) generated with such a prompt.
# HOW TO CHECK IF RICH TEXT (DESCRIPTION) IS EMPTY
__________________________________________________
## Using Rich Text Snippets in Views
Every rich text can be shown as a snippet on any view.
Rich-text Snippet is supported in the filter, sort, and colors. It can be used in all views.

And it works in the Automation as well:

# PRODUCTBOARD INTEGRATION DATABASE STRUCTURE
_____________________________________________
# Default database mapping

| | |
| --- | --- |
| **Feature** | |
| **Productboard Field** | **Type** | **Fibery Field** | **Description** | **Example** |
| Archived | Checkbox | Archived | Indicates if the Feature is archived. | `true` |
| Created At | Date and Time | Created At | Stores the date and time when the Feature was created in the Productboard. | 2024-03-01T10:37:24.613Z |
| Description | Rich Text HTML | Description | Description of the Feature. | Anything |
| Display URL | URL | Display URL | URL to access the feature in Productboard. | Productboard URL |
| Last Health Update Date | Date and Time | Last Health Update Date | Stores the date and time of the last health update in the Productboard. | 2024-03-01T10:37:24.613Z |
| Last Health Update Message | Rich Text HTML | Last Health Update Message | Last Health check message. | Anything |
| Last Health Update Status | Single Select | Last Health Update Status | Stores the Health check status of the last health update. `on-track` `off-track` `needs-attention` | `on-track` |
| **Name** | **Text Name** | **Name** | **Name of Product.** | **Anything** |
| Owner Email | Email | Owner Email | Email address of the owner. | Email |
| Parent Component Id | Relation | Parent Component | Parent of the Feature | N/A Only one of them will be used |
| Parent Feature Id | Relation | Parent Feature | Parent of the Feature |
| Parent Product Id | Relation | Parent Product | Parent of the Feature |
| Status | Single Select | Status | Status of the Feature | `Planned` |
| Timeframe | Date Range | Timeframe | Product start and end date. | 2024-06-01 - 2024-06-30 |
| Timeframe Granularity | Single Select | Timeframe Granularity | Granularity of the timeframe. `month` `quarter` `year` | `month` |
| Type | Single Select | Type | Feature type. | `feature` `subfeature` |
| Updated At | Date and Time | Updated At | Date and time when the Feature was last updated on Productboard. | 2024-03-01T10:37:24.613Z |
| | Relation | Children Features | Children Features of this Feature. | N/A |
| | Relation | Releases | Connected Releases to this Feature. | N/A |
| | Relation | Relevances | Connected Relevances to this Feature. | N/A |
| | |
| --- | --- |
| **Component** | |
| **Product Board Field** | **Type** | **Fibery Field** | **Description** | **Example** |
| Created At | Date and Time | Created At | Date and time when the Component was created in the Productboard. | 2024-03-01T10:37:23.324Z |
| Description | Rich Text HTML | Description | Description of the Component. | Anything |
| Display URL | URL | Display URL | URL to access the Component in Productboard. | Productboard URL |
| **Name** | **Text Name** | **Name** | **Name of the Component.** | **Anything** |
| Owner Email | Email | Owner | Email address of the owner. | Email |
| Parent Component Id | Relation | Parent Component | Parent of the Component | N/A Only one of them will be used |
| Parent Product Id | Relation | Parent Product | Parent of the Component |
| Updated At | Date and Time | Updated At | Date and time when the Component was last updated in Productboard. | 2024-03-01T10:37:23.324Z |
| | Relation | Children Components | Children Components of this Component. | N/A |
| | Relation | Children Features | Children Features of this Component. | N/A |
| | Relation | Notes | Connected Notes to this Component. | N/A |
| | |
| --- | --- |
| **Product** | |
| **Productboard Field** | **Type** | **Fibery Field** | **Description** | **Example** |
| Created At | Date and Time | Created At | Date and time when the Product was created in the Productboard. | 2024-03-01T10:37:23.324Z |
| Description | Rich Text HTML | Description | Description of the Product. | Anything |
| Display URL | URL | Display URL | URL to access the Product in Productboard. | Productboard URL |
| **Name** | **Text Name** | **Name** | **Name of the Product.** | **Anything** |
| Owner Email | Single Select | Owner Email | Email address of the owner. | Email |
| Updated At | Date and Time | Updated At | Date and time when the Product was last updated in Productboard. | 2024-03-01T10:37:23.324Z |
| | Relation | Children Components | Children Components of this Product. | N/A |
| | Relation | Children Features | Children Features of this Product. | N/A |
| | Relation | Relevances | Connected Feature Relevance to this Product. | N/A |
| | |
| --- | --- |
| **Company** | |
| **Productboard Field** | **Type** | **Fibery Field** | **Description** | **Example** |
| Description | Rich Text HTML | Description | Description of the Company. | Anything |
| Domain | URL | Domain | URL of the Company. | [microsoft.com](http://microsoft.com) |
| **Name** | **Text Name** | **Name** | **Name of the Company.** | **Anything** |
| Source Origin | Text | Source Origin | Type of source origin. | csv |
| Source Id | Text | Source Id | Origin identifier | Anything |
| | Relation | Notes | Connected Notes to this Company. | N/A |
| | |
| --- | --- |
| **Note** | |
| **Productboard Field** | **Type** | **Fibery Field** | **Description** | **Example** |
| Company Id | Relation | Company | The company where the insight is related. | N/A |
| Content | Rich Text HTML | Content | Content of the Note. | Anything. |
| Created At | Date and Time | Created At | Date and time when the Note was created in the Productboard. | 2024-03-01T10:37:24.613Z |
| Created by Email | Email | Created by Email | Email of the Note's creator. | Email |
| Created by Name | Text | Created by Name | Name of the Note's creator | Anything |
| Display URL | URL | Display URL | URL to access the Product in Productboard. | Productboard URL |
| External Display URL | URL | External Display URL | Public URL to access the Product in Productboard. | Public Productboard URL |
| Followers | Multi Select | Followers | List the email addresses that follow the note. | Emails |
| **Name** | **Text Name** | **Name** | **Name of the Note.** | **Anything** |
| Owner Email | Email | Owner Email | Email address of the owner. | Email |
| Owner Name | Text | Owner Name | Name of the owner. | Anything |
| Relevance Id | Relation | Relevance | Related relevances | N/A |
| Source Origin | Text | Source Origin | Type of source origin. | Anything |
| Source Id | Text | Source Id | Origin identifier | Anything |
| State | Single Select | State | State of the Note. `unprocessed` `processed` `archived` | `unprocessed` |
| Tags | Multi Select | Tags | Stores multiple tags associated with the Note. | `tag1` `tag2` |
| Updated At | Date and Time | Updated At | Date and time when the Note was last updated on Productboard. | 2024-03-01T10:37:24.613Z |
| User Id | Relation | User | User related to the Note. | N/A |
| | Relation | Components | Component related to the Note. | N/A |
| | Relation | Relevances | Feature relevances related to the Note. | N/A |
| | Relation | Products | Product related to the Note. | N/A |
| | Text | Raw content | The raw version of the content for post-processing. | see below |
| | Text | Raw Followers | The raw version of the followers for post-processing. | see below |
Raw Content example
```
Linked to two features
another feature
sample text not highlighted
```
Raw Followers example
```
"followers": [ { "memberId": "00000000-0000-0000-0000-000000000000", "memberName": "string", "memberEmail": "string", "teamId": "00000000-0000-0000-0000-000000000000", "teamName": "string"}]
```
| | |
| --- | --- |
| **Relevance** | |
| **Productboard Field** | **Type** | **Fibery Field** | **Description** | **Example** |
| Component Id | Relation | Component | Highlight relevance to the Component | Only one of them applied |
| Features Id | Relation | Feature | Highlight relevance to the Feature |
| Product | Relation | Product | Highlight relevance to the Product |
| Importance | Integer Number | Importance | The importance level of the Highlight | N/A |
| **Name** | **Text Name** | **Name** | **Customer's Username** | **Anything** |
| | Relation | Notes | Connected Notes to this User. | N/A |
| | |
| --- | --- |
| **User Database** | **Customer (person) who provides feedback.** |
| **Productboard Field** | **Type** | **Fibery Field** | **Description** | **Example** |
| Email | Email | Email | Email address of the Customer's User. | Email |
| External Id | Text | External Id | A unique identifier for the User is given to the Productboard. | Anything |
| **Name** | **Text Name** | **Name** | **Customer's Username** | **Anything** |
| | Relation | Notes | Connected Notes to this User. | N/A |
| | |
| --- | --- |
| **Release Group** | |
| **Productboard Field** | **Type** | **Fibery Field** | **Description** | **Example** |
| Archived | Checkbox | Archived | Indicates if the Release Group is archived. | `true` |
| Description | Rich Text HTML | Description | Description of the Release Group. | Default Release Group |
| **Name** | **Text Name** | **Name** | **Name of the Release Group.** | **Important Releases** |
| | Reference | Releases | Releases of this Release Group | N/A |
| | |
| --- | --- |
| **Release** | |
| **Productboard Field** | **Type** | **Fibery Field** | **Description** | **Example** |
| Archived | Checkbox | Archived | Indicates if the Release is archived. | `true` |
| Description | Rich Text HTML | Description | Description of the Release. | Anything |
| Features Ids | Relation | Features | Links to a Feature | N/A |
| **Name** | **Text Name** | **Name** | **Name of the Release** | **Anything** |
| Release Group Id | Relation | Release Group | Parent of the Release | N/A |
| State | Single Select | State | State of the Release. `upcoming` `in-progress` `completed` | `upcoming` |
| Timeframe | Date Range | Timeframe | Release start and end date. | 2024-06-01 - 2024-06-30 |
| Timeframe Granularity | Single Select | Timeframe Granularity | Granularity of the timeframe. `month` `quarter` `year` | `month` |
| | |
| --- | --- |
| **Objective** | |
| **Productboard Field** | **Type** | **Fibery Field** | **Description** | **Example** |
| Archived | Checkbox | Archived | Indicates if the Objective is archived. | `true` |
| Created At | Date and Time | Created At | Date and time when the Objective was created in the Productboard. | 2024-03-01T10:37:24.613Z |
| Description | Rich Text HTML | Description | Description of the Objective | Anything |
| Display URL | URL | Display URL | URL to access the Objective in Productboard. | Productboard URL |
| Level | Integer Number | Level | Hierarchy level of the Objective. | |
| **Name** | **Text Name** | **Name** | **Name of the Objective** | **Anything** |
| Owner Email | Single Select | Owner Email | Email address of the owner. | Email |
| State | Single Select | State | State of the Objective. `upcoming` `in-progress` `completed` | `upcoming` |
| Timeframe | Date Range | Timeframe | Release start and end date. | 2024-06-01 - 2024-06-30 |
| Timeframe Granularity | Single Select | Timeframe Granularity | Granularity of the timeframe. `month` `quarter` `year` | `month` |
| Updated At | Date and Time | Updated At | Date and time when the Objective was last updated on Productboard. | 2024-03-01T10:37:24.613Z |
| | Relation | Parent | Parent of the Objective | N/A |
| | Relation | Children | Children of the Objective | N/A |
#
# FIBERY BROWSER EXTENSION (CHROME)
___________________________________
Use the [Fibery browser extension](https://chrome.google.com/webstore/detail/fibery-browser-extension/dkjdciblofkgdfoolehaahjajoggmdbp "https://chrome.google.com/webstore/detail/fibery-browser-extension/dkjdciblofkgdfoolehaahjajoggmdbp") (available in Google Chrome) to create Entities directly from web pages.
It works great for design and tech references, competitor analysis, and market research. Also, consider it for collecting candidates for open positions, and maintaining an interesting shared wiki.
## How to use Fibery browser extension
When you stumble upon an interesting web page:
1\. Highlight the most relevant part.
2\. Click the Fibery icon :fibery: on the top right of your Google Chrome browser.
3\. Choose Workspace and Database, and click `Create `
> [//]: # (callout;icon-type=icon;icon=heart;color=#d40915)
> Web clipper saves text formatting, like headers, links, lists, and images as well.
Note, that browser extension:
* saves the URL of a page you capture to the first URL Field of the target Database if it finds one;
* saves the page content into the first rich-text Field it finds in the target Database, not necessarily named `Description`.


Thinking of a full-blown web clipper? Would like to attach highlights to existing Entities? Let us know via Intercom chat! This is not even the final form of the extension, so we would be glad to hear your feedback.
## FAQ & Improvements
#### Relevant discussions:
You can find some relevant topics in Fibery community:
* [Script that places an Embedly frame in the Description of an entity created by the Fibery Chrome extension](https://community.fibery.io/t/this-script-places-an-embedly-frame-in-the-description-of-an-entity-created-by-the-fibery-chrome-extension/5326)
* [Topic to share feedback and suggest ideas](https://community.fibery.io/t/web-clipper-desktop-browsers-all-ideally/1174/26) and [another one](https://community.fibery.io/t/improve-the-chrome-extension-to-add-entities-through-entity-forms-and-prepopulation-of-form-fields/4729/14)
# LOCK ENTITIES, DOCUMENTS, AND VIEWS
_____________________________________
Sometimes users make unintended changes to important entities. You can Lock Entity or Document and prevent unexpected changes. It works on Entity View and all other Views, but this entity still can be modified via Automation rules or API calls. Lock works on UI only and the main goal of this feature is to add some friction to changes.
Click … in the top right corner on entity or document view and select `Lock editing` action. Click `Locked` banner on top if you want to make some changes and then click `Re-lock` banner to lock the entity again.
### Who can lock an entity or document?
Any user with Edit access can lock an entity or document.
### What can be done with a locked entity, document or view?
Entity or Document:
* It is possible to add a new comment to the entity (main entity comments).
* It is possible to do all actions in the … top entity menu (like delete, convert, etc)
View:
* It is possible to change entities on this view and add new entities
## FAQ
### So it a user can edit entities on locked Views, why lock them?
View Lock helps to prevent changes in View configuration, like database, filters, fields, etc. Data still can be modified.
# IMPORT FROM CSV
_________________
There are several ways to bring data into Fibery, and importing good old CSV files is one of them.
## How to import data using CSV import
To import data into a **new** Database:
1. Click `+` in the sidebar next to the Space where the new Database should belong to;
2. Select `Database → Import from… → CSV`

To import data into an **existing** Database:
1. Make sure the Databases are visible in your Space
2. Click `…` context menu for the desired Database
3. Select `Import from… → CSV`

> [//]: # (callout;icon-type=emoji;icon=:feet:;color=#1fbed3)
> If you are just a regular user and don't see the Database in the sidebar, you can find the same `Import from…` option on any Table View.
## How to map CSV columns to Fibery Fields
Before uploading your CSV file, make sure that:
1. the first row includes headers;
2. the file size is less than 50 MB.
As soon as you upload the file, you'll be able to map columns to Fibery Fields:

We try our best to guess the Field type based on the data, but you can always manually correct it. When importing into an existing Database, you can both select existing Fields or create new ones. If you don't want to import a particular column, you can skip it.
> [//]: # (callout;icon-type=emoji;icon=:paperclip:;color=#1fbed3)
> Here's [sample.csv](/api/files/ddb360bb-c421-4956-bf40-4cc31d311473?is-public=1) with all kinds of columns to serve as a reference.
Here are tips for some tricky data formats.
### Self-relations (e.g. Tasks → sub-Tasks)
To import a nested hierarchy (e.g. Task → Tasks → Tasks → …), include a column that specifies the name of the parent of each row. Then map this column to `Relation to… → `.

The same applies if you have a many-to-many self-relation (e.g. dependencies). Pick any side (e.g. `Blocked By` or `Blocking`) and include the corresponding column. Make sure to select `Many` prefix in this case:

### Date ranges
If you need to import the Date Field with start and end date, make sure that it follows this format:
```
2025-03-14 - 2025-12-05
2025-03-14T14:48:00.000Z - 2025-12-05T14:48:00.000Z
```
### Percentages %
A percent in Fibery is a number between 0 and 1. So if you enter 100, it becomes `10000%`.
What are the options?
* Import into a dummy (temporary) field and use Formula/Automation to copy and paste into the percent Field.
* Correct the data in the original CSV before importing.
### Locations
Format that we support should be like this .
## How to update existing data via CSV
When you import a CSV file into an existing Database, some rows in your file might correspond to existing entities.
There are three options on how to deal with such records:
1. Always create an entity per row, regardless of whether it's a duplicate.
2. Update existing entities when found based on a specific Field.
3. Skip duplicates when found based on a specific Field.

If you pick updating or skipping, we'll ask you to select a Field to detect matching records:

> [//]: # (callout;icon-type=emoji;icon=:snowflake:;color=#1fbed3)
> If you want to prevent duplicates at all times, not just during import, check out [Fields with unique values](https://the.fibery.io/@public/User_Guide/Guide/Fields-with-unique-values-402).
### Example
Imagine, this is your Dogs DB:
| | | |
| --- | --- | --- |
| **Name** | **Score** | **Last Reviewed At** |
| Winnie | 13 | 2025-08-14 |
| Doug | 14 | 2025-08-13 |
| Milo | 12 | 2025-08-07 |
And this is the CSV file you are importing:
| | | |
| --- | --- | --- |
| **Name** | **Score** | **Last Reviewed At** |
| Winnie | | 2025-09-30 |
| Milo | 14 | 2025-09-20 |
| Horus | 14 | 2025-09-15 |
Here's what you get depending on the way you choose to treat duplicates.
**Create new** Dogs:
| | | |
| --- | --- | --- |
| **Name** | **Score** | **Last Reviewed At** |
| Winnie | 13 | 2025-08-14 |
| Doug | 14 | 2025-08-13 |
| Milo | 12 | 2025-08-07 |
| Winnie | | 2025-09-30 |
| Milo | 14 | 2025-09-20 |
| Horus | 14 | 2025-09-15 |
**Updating existing** Dogs based on Name:
| | | |
| --- | --- | --- |
| **Name** | **Score** | **Last Reviewed At** |
| Winnie | | 2025-09-30 |
| Doug | 14 | 2025-08-13 |
| Milo | 14 | 2025-09-20 |
| Horus | 14 | 2025-09-15 |
> [//]: # (callout;icon-type=emoji;icon=:broom:;color=#fba32f)
> An empty cell in a CSV file clears the existing value.
> [//]: # (callout;icon-type=emoji;icon=:pencil2:;color=#FBA32F)
> Rich-text contents and to-many relations are always overriden, not merged, if they are present in the import.
**Skip duplicates** based on Name**:**
| | | |
| --- | --- | --- |
| **Name** | **Score** | **Last Reviewed At** |
| Winnie | 13 | 2025-08-14 |
| Doug | 14 | 2025-08-13 |
| Milo | 12 | 2025-08-07 |
| Horus | 14 | 2025-09-15 |
### Supported Fields to detect duplicates
When updating existing entities or skipping duplicates, you provide a Field that we will use to look for matches.
This has to be an existing Database Field selected in the [mapping above](https://the.fibery.io/@public/User_Guide/Guide/Import-from-CSV-67/anchor=How-to-map-CSV-columns-to-Fibery-Fields--966ab44b-f213-4a02-b65e-30ab24c156e4). These are the supported Field types:
1. Text (incl. Name)
2. Email
3. URL
4. Number (without decimal places, aka Integer)
5. Phone
6. Date (without time or range)
### Edge cases
| | | |
| --- | --- | --- |
| **Scenario** | **Duplicate treatment** | **Outcome** |
| Duplicates already present in the Database | Update existing | The entity created last will be updated |
| Duplicates in the CSV file | Always create | No exceptions necessary |
| Update existing | The later rows override the earlier rows' values |
| Skip duplicates | 2nd+ rows with the duplicate value are skipped |
| Updated Field values are required to be unique | Update existing | If at any point during import, the uniqueness is violated, the import fails. |
## Who can import data via CSV
Anyone who has the permission to create entities can import them as well, even a [Submitter](https://the.fibery.io/@public/User_Guide/Guide/Share-Database-342/anchor=How-to-share-a-Database--fdb8f8cf-7d41-4611-b0d3-33956a261aa9). Navigate to any Table View and select `Import from…` from the actions menu:

Depending on the selected way to [treat duplicates](https://the.fibery.io/@public/User_Guide/Guide/Import-from-CSV-67/anchor=How-to-update-existing-data-via-CSV--cbbaeab6-e3ac-408e-9b60-d8a015a0f983), additional permissions might be required:
| | | | |
| --- | --- | --- | --- |
| | **Always create** | **Update existing** | **Skip duplicates** |
| Create entities in the Database | + | + | + |
| See all entities in the Database | | + | + |
| Update all entities in the Database | | + | |
## FAQ
### How to import unique characters? (like diacritics, etc.)
Please, use Unicode to save your CSV and then upload it as usual.
# QUICKLY ADD ENTITIES
______________________
## Quickly Add Entites from left sidebar
Click `Create new entity` icon in the left sidebar or just use `C` shortcut. Then select required database and add new entity fast:

Admin or Creator (for some databases) can customize this quick add screen and display more fields. Click Fields and select as many fields as you want. You can drag and drop fields to re-arrange them:

Supported shortcuts:
* `C` to show quick add popup.
* `Cmd + Enter` to create new entity.
* `Cmd + Shift + Enter` to create and open new entity.
## Quickly Add Entities from Search
This is the best place to quickly create new entities.
1. Click `Search` in the sidebar (or use `Cmd + K` to open the search console)
2. Type the name of the new entity.
3. Then select a required Database and click `Create`.
You can also create new entities fast using just the keyboard.
## Create a new entity or document from the selected text
You can also create new Documents and Entities from selected text.
Select some text, invoke `Create Entity` command (`Cmd + E`) and create it. You can create many documents/entities from a list. Just select a list and a new document will be created for each list item.

# ICON FIELD
____________
Make your workspace prettier by picking emoji icons for tag-like [Databases](https://the.fibery.io/@public/User_Guide/Guide/Databases-7) like Category, Segment, or Team:

### Enable icons for a Database
To enable icons for a certain Database, create an Icon Field:

### Pick an icon for an Entity
Navigate to any Entity of the Database and pick an icon using the button in the top-left corner:

You can also see (and sometimes update) the icon throughout your workspace:
## Set icon automatically via Formula
You can set icon automatically via a formula, and it can unfold quite interesting use cases. For example, you can
* change task icon based on missing deadline (🟢 🔴)
* invent your own status icon for people (🎧 🌴 🔕)
* show the value growth status based on some delta (📉 📈)
* and even use custom emoji icons for some advanced magic (:boredparrot: :blunt_parrot: :hyperfastparrot:)
. It can be done in the following places:
* Database Settings → Fields → Icon field
* Table View → Icon field → Edit
Then select `Generate Icon using Formula` action and set some formula.

Some hints:
* Formula output should be text that represents emoji.
* You can use either `":heart:"` or `"`💖`"` as a result of the formula.
* Custom emojis are supported, so you can upload them in Settings and use them as `:some-custom-emoji:`
* Basic formula you can have is just an emojy itself, like `"`💖`"` . Thus you can set the same emoji for all entities for some database automatically.
* In most cases you will use `If()` function to display different emojis depending on some fields combination.
### Some formulas for icons examples
Set icon depending on Task State:
```
If(
State.Name = "Done",
"✅",
If(
State.Name = "In Progress",
"🔄",
If(State.Name = "Ready", "⚡", If(State.Name = "To Do", "📋", ""))
)
)
```
And here is the result:

Set phone icon for accounts without recent touches:
```
If(ToDays(Today() - [Latest outreach date]) > 7, "📞", "")
```
Set the same emoji for all entities of this database:
```
"ðŸ™"
```
## FAQ
### Can I set an Icon field from a script?
Yes.
```
await fibery.updateEntity(entity.type, entity.id, {'Icon': ':grimacing:'});
```
Note that the name of the field is `icon/icon` for icon extension fields, and `enum/icon` for single/multi-selects
### Which icon pack does Fibery use?
For space icons we use this set [Unicons - 7000+ Free SVG Icons, 3D Icons, Animated Icons and Icon Fonts | IconScout](https://iconscout.com/unicons) , for Fibery itself custom ones.
# CUSTOM APP: TEST AND DEBUG
____________________________
## **Expose local instance**
It is possible to run your app on local machine and make the app's url publicly available by using tools like [ngrok](https://ngrok.com/). Then you will have an ability to debug the app locally after adding it Fibery apps gallery. Don't forget to remove the app from Fibery integration apps catalog after testing.
Expose local instance to world:
```
brew install ngrok
ngrok http 8080
```
## **Integration tests**
It is recommended to create integration tests before adding your custom app to Fibery apps gallery. Check some tests I created for holidays app.
```
const request = require(`supertest`);
const app = require(`./app`);
const assert = require(`assert`);
const _ = require(`lodash`);
describe(`integration app suite`, function () {
it(`should have the logo`, async () => {
await request(app).get(`/logo`)
.expect(200)
.expect(`Content-Type`, /svg/);
});
it(`should have app config`, async () => {
const {body: appConfig} = await request(app).get(`/`)
.expect(200).expect(`Content-Type`, /json/);
assert.equal(appConfig.name, `Public Holidays`);
assert.match(appConfig.description, /public holidays/);
assert.equal(appConfig.responsibleFor.dataSynchronization, true);
});
it(`should have validate end-point`, async () => {
const {body: {name}} = await request(app).post(`/validate`)
.expect(200).expect(`Content-Type`, /json/);
assert.equal(name, `Public`);
});
it(`should have synchronization config`, async () => {
const {body: {types, filters}} = await request(app)
.post(`/api/v1/synchronizer/config`)
.expect(200)
.expect(`Content-Type`, /json/);
assert.equal(types.length, 1);
assert.equal(filters.length, 3);
});
it(`should have schema holidays type defined`, async () => {
const {body: {holiday}} = await request(app)
.post(`/api/v1/synchronizer/schema`)
.send()
.expect(200)
.expect(`Content-Type`, /json/);
assert.deepEqual(holiday.id, {name: `Id`, type: `id`});
});
it(`should return data for CY`, async () => {
const {body: {items}} = await request(app)
.post(`/api/v1/synchronizer/data`)
.send({
requestedType: `holiday`,
filter: {
countries: [`CY`],
}
}).expect(200).expect(`Content-Type`, /json/);
assert.equal(items.length > 0, true);
const holiday = items[0];
assert.equal(holiday.id.length > 0, true);
assert.equal(holiday.name.length > 0, true);
});
it(`should return data for BY and 2020 year only`, async () => {
const {body: {items}} = await request(app)
.post(`/api/v1/synchronizer/data`)
.send({
requestedType: `holiday`,
filter: {
countries: [`BY`],
from: 2020,
to: 2020
}
}).expect(200).expect(`Content-Type`, /json/);
assert.equal(items.length > 0, true);
const holidaysOtherThan2020 = _.filter(items, (i) =>
new Date(i.date).getFullYear() !== 2020);
assert.equal(holidaysOtherThan2020.length > 0, false);
});
});
```
# FORMS
_______
Forms - the most popular way to grab outside data from users, customers, co-workers, and potential employees. After you've created your first form, go through our sub-guides where we offer potential workflows and combinations you can try for your unique business needs.
[https://youtu.be/Pa4u_JCwn9Q](https://youtu.be/Pa4u_JCwn9Q)
## Make a Form
1. Find one of your Spaces and click the `+` button to add a new View.
2. Click `Form` and you will be brought to a blank page. In the top right of your screen, there will be a dropdown asking you to select a `Database`.
3. And just like that, we have a form! Notice on the right sidebar that the fields created in the Database you chose are the ones available as a field. You can choose which ones to **show to the public** and which ones are **only used internally.**

The form description is a rich text field, so you can use `/` for rich text commands.
### Preview
You can `Preview` the form to see what it will look like to the end user. Anything filled out in `Preview` mode will be submitted to the database it is linked to. This is a great way to test the flow of the form and any automations that you've built, like notifying your Customer Success Manager of a new piece of feedback, or HR of a new job application.
> [//]: # (callout;icon-type=icon;icon=exclamation-circle;color=#199ee3)
> An existing form opens in Preview mode by default, thus it is easier to add new entities for users.
### Sharing
To share the form with your users, click the `Share` button to generate a public link. Anything that is currently being shared will have a dot by `Share`.

You can embed a Form View into your website. Click `Share`, copy the **Embed Form** code, and insert it into your gorgeous website page.
Form View preview in social media and web works shows actual form name and description
## Tips and Hints
Here are some hints that will help you to create a useful form.
If you have some forms created for a database, you can select them in Quick Add. It may be handy if you have several scenarios for new entity.

### Use default values in Rich Edit fields to capture additional info
Sometimes you don't want to add new fields to the database to capture some info, in this case, you can capture it into a single rich edit field.

Here we have a Description rich edit field with some questions, so a user can answer these questions inline.
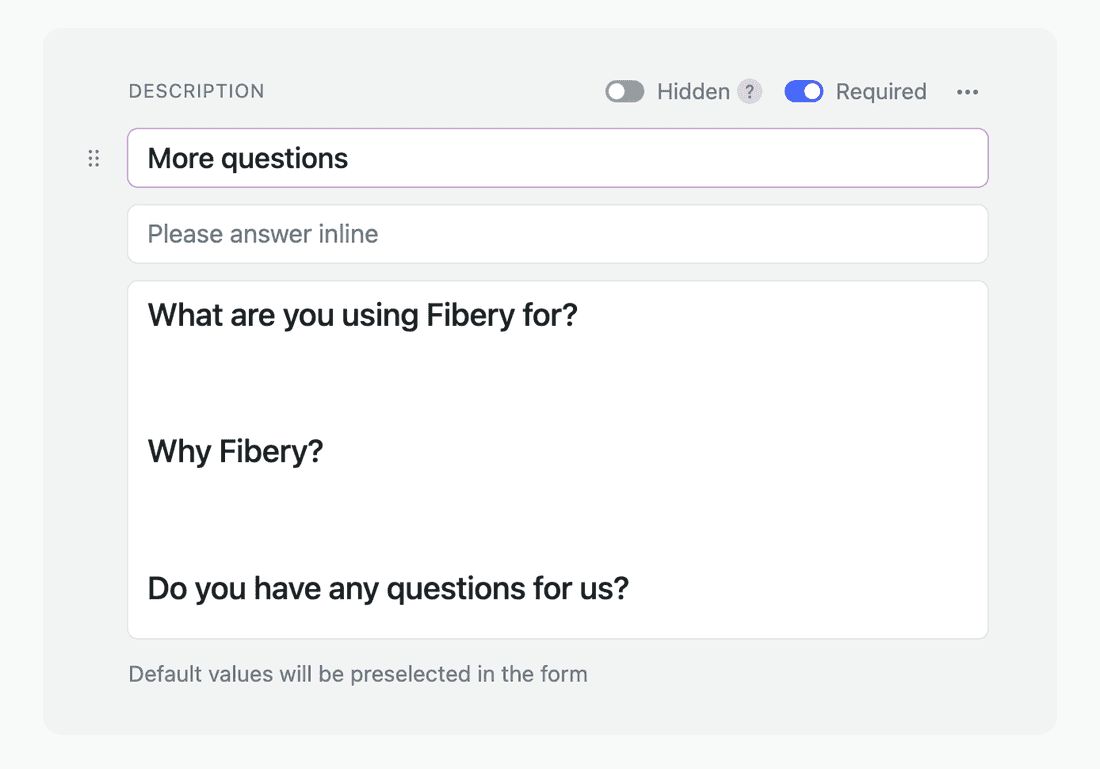
### Select between compact and full layout for quick add
Compact Form is not displaying fields descriptions and it is more dense. Full form shows all the details and it more sparse.
Choose desired layout for every form on every view:

### Use hidden fields to set some fields automatically
In some cases, you just want to hardcode values in fields. For example, you can create a checkbox “Created via Form†and mark it in a Form View.
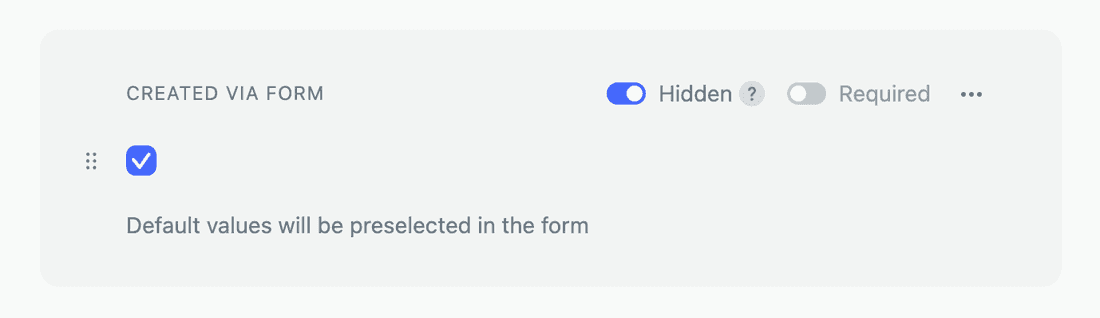
You can use it in automations to execute some actions for entities created via form view.
### Create a meaningful form description
You can explain why the form should be filled out and include some links to useful pages.

### Create a separate database to capture form results
You can collect data into an existing database, but in some cases, it is better to create a new database. For example, we created a separate Application database to collect requests for Startups, Educational, and Nonprofit organizations.
Then we linked the Application database to the Account database in our CRM Space and set up Slack notifications for every new Application. Thus we are not overloading the Account database and can create better Form Views.

### Set initial field values via URL
You can pre-fill parts of forms or connect created entities to existing stuff. Add required values in the URL after the ? symbol as query parameters, here is the example:
```
fibery_io/public/forms/wLLEvDIy?What+is+your+name%3F=Dmitry&date=2022-01-01&free-shipping=yes&price=340
```
Check detailed guide how to do it → [Set Initial Field Values via URL Parameter on Form View](https://the.fibery.io/@public/User_Guide/Guide/Set-Initial-Field-Values-via-URL-Parameter-on-Form-View-246)
You can also enable `Allow to set hidden fields via URL` setting for a Form. When this option is enabled, any database field can be set via URL (well, except rich text field).

## FAQ
If you're missing any functionality - please, let us know 💖
#### Can I get a source of where was the form filled in? (ex. landing, user id, page name, etc.)
Unfortunately, not at the moment.
#### Why can't I choose the formula field on the Form?
It's quite hard to do, since the formula result is only calculated when the entity exists, and the entity doesn't exist til the form is submitted. So we postponed that for a while. Please, let us know about the use case you have in our support chat.
#### How do you get notifications when a user has completed a form and therefore a record has been created in the database?
Please, go to the database that your form is populating. There you may open “Automations†tab. Set it up as follows:
1\. When created (trigger)
2\. Then send notification (action)
You can choose which users it goes to. If those users have turned on email notifications in their settings they'll get an email, if not it just goes to inbox.
If you want it to ONLY trigger when the form is used, then you need to create a new field like “form triggered†(maybe a checkbox). You will have to add it to the form pre-ticked, and then change the tick box “hidden†on the form (not excluded, hidden). Now go to the rule you just created and add a filter to Step 1 specifying the relevant checkbox is ticked.
Please, [check this community topic](https://community.fibery.io/t/5770 https://community.fibery.io/t/5770 "https://community.fibery.io/t/5770 https://community.fibery.io/t/5770") for more details
#### Can I share the Form publicly but only among employees of my company? (based on the email domain)
Not yet. Please, let us know if this functionality is needed.
#### I am trying to use this iframe to show a form on my website. I want to change the background color of the form to match that of the website, it is possible to do?
Unfortunately no, but it is possible to specify theme, by appending `&force-theme=dark` or `light`
#### Why does the form sometimes preselect a different default value for some users?
> *We've set up a default form for Task creation with "Task" as the default type. However, for one user, the form shows "Bug" as default instead. Why does this happen?*
>
> \
> This behavior depends on where the form is opened from. If a user opens the form from a specific view (e.g. Board, Table, Timeline), Fibery applies the view's filters as default values. This ensures that newly created entities automatically match the filters of the view they are being created in, so they appear in that view after creation.
For example:
* If a user opens a form from a view filtered to show only `Type = Bug`, then Fibery pre-fills "Bug" in the Type field.
* If another user opens the same form from a view without filters (or with `Type = Task` filter), the form pre-fills "Task."
This behavior is intentional and applies to all views.\
To avoid filters affecting the default values, you can use the global "New" button in the sidebar — it always opens the form without any context filters applied.
#### How required fields work in Forms?
Fibery automatically adds all [Required fields](https://the.fibery.io/@public/User_Guide/Guide/Required-fields-393) to form on new Form Creation. It is not possible to remove required fields from Form View. If there are some public Forms for a database, Fibery shows a warning when marking fields as required, listing affected public forms.
#### What if I found phishing Fibery form?
If you believe this is actually a malicious site impersonating Fibery, you should:
**Report to Fibery directly** - contact Fibery support at [support@fibery.io](mailto:support@fibery.io) or via intercom chat.
# CUSTOMIZE HIGHLIGHTS
______________________
Customizing highlights allows you better to tailor the feedback prioritization process to your needs. You can adjust severity levels and company size values to optimize the Highlight score.
# Severity
Highlights can be classified into several severity levels based on the impact and urgency of the issue reported. Each level is assigned a weight using a version of Fibonacci numbers, which helps prioritize feedback based on severity.
Here are the defined levels:
* **Blocker (8)**: Represents a critical issue that prevents users from using the product or a major feature entirely. Immediate action is required.
* **High (5)**: Indicates a significant issue affecting major functionality but does not completely block user operations. High priority is given to these issues.
* **Medium (3)**: Covers issues that affect minor features that do not degrade the product's core functionality. These issues are addressed but are of lower priority.
* **Low (1)**: This category pertains to minor inconveniences that users may face that do not significantly affect their overall experience.
* **Positive (0):** Positive feedback is also important as it provides insights into what users appreciate or find useful. It is categorized under 'Positive' severity with a weight of 0, so it will not be counted when calculating the priority. This category helps recognize and reinforce the features or services that users receive well.
Feel free to add or remove levels or change the value to fine-tune the severity impact on the Priority score.
[https://demo.arcade.software/KfKp6mYFtfpIRIh2Z5Nk?embed&show_copy_link=true](https://demo.arcade.software/KfKp6mYFtfpIRIh2Z5Nk?embed&show_copy_link=true)
# Company Size value
The Highlight score is adjusted based on the company's size. In the company database settings, you can add more options and values.
By default, the score increases based on the company size, but this is highly customizable. If your target segments are medium-sized companies, thereby you can set the value to the highest, increasing the score and tailoring the prioritization number to meet your needs.
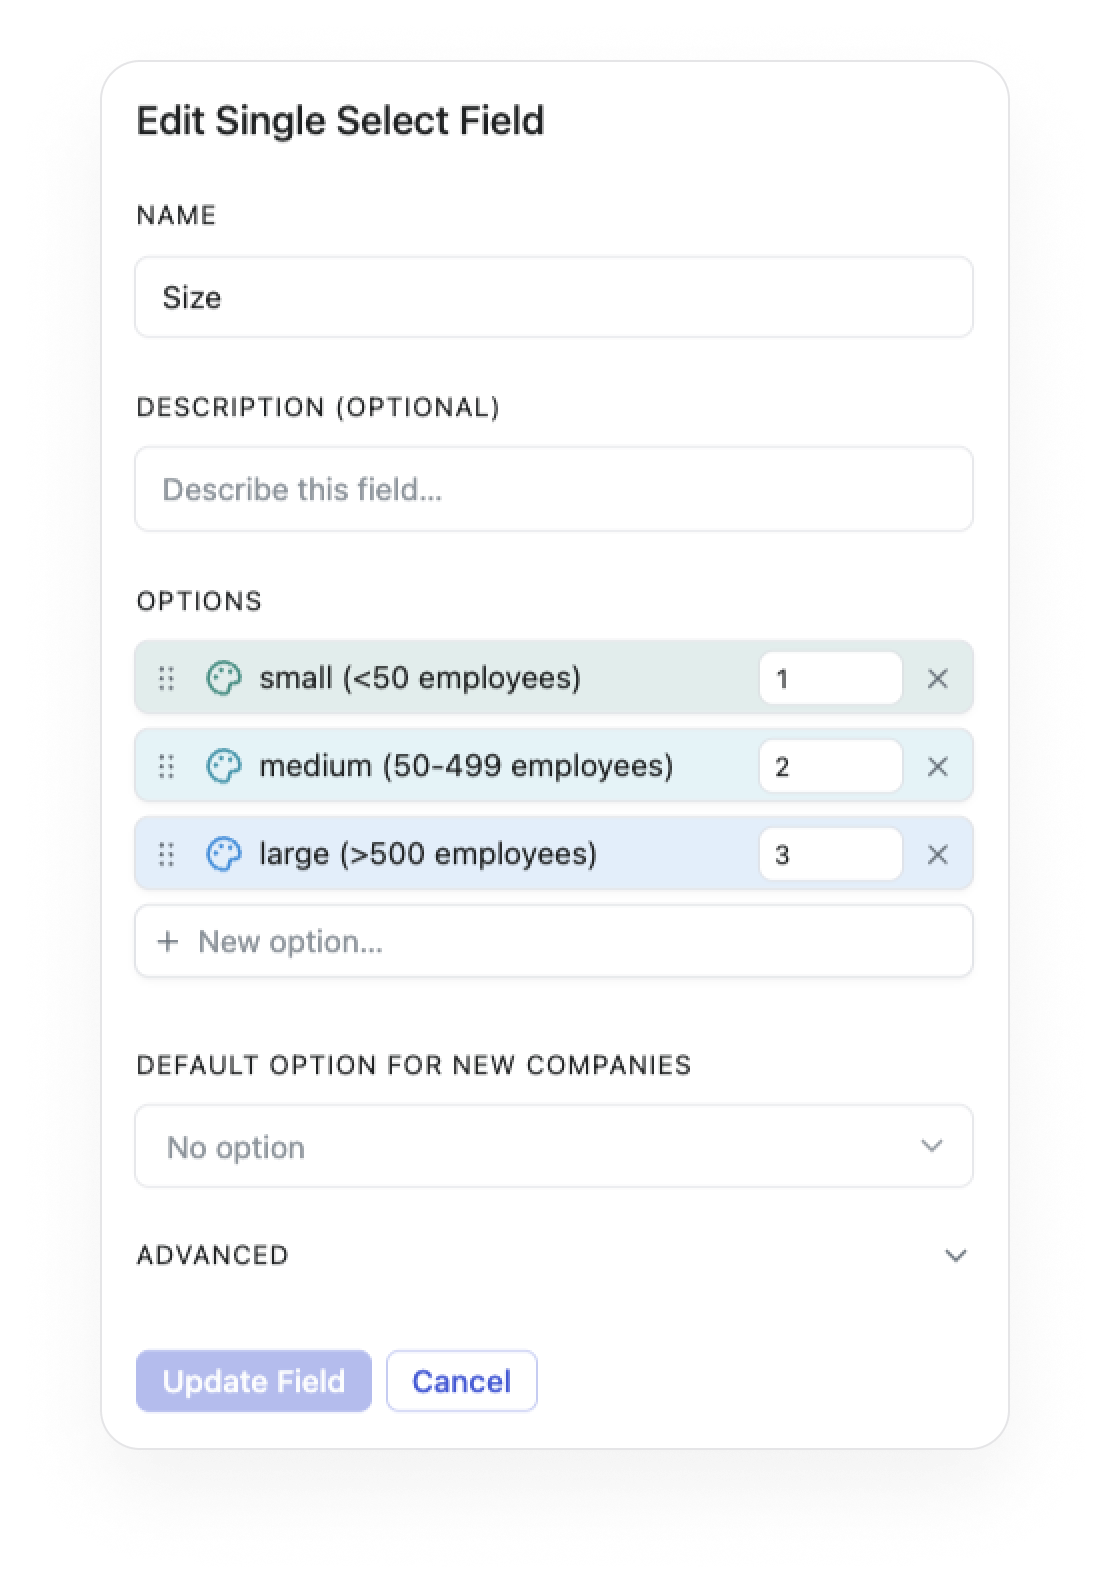
# Score
You can change the default formula to calculate the Highlight score in the Highlight settings.
Calculating the highlight score is essential when calculating the Priority score at the feature level because just counting the number of Highlights does not help prioritize.
The default formula is \
`IfEmpty(Severity.Value, 1) * IfEmpty([Company Size].Value, 1)`
This means the Highlight score results from multiplying the severity and company size values. If one of these fields is not set (no severity or no company size), the default value is 1.
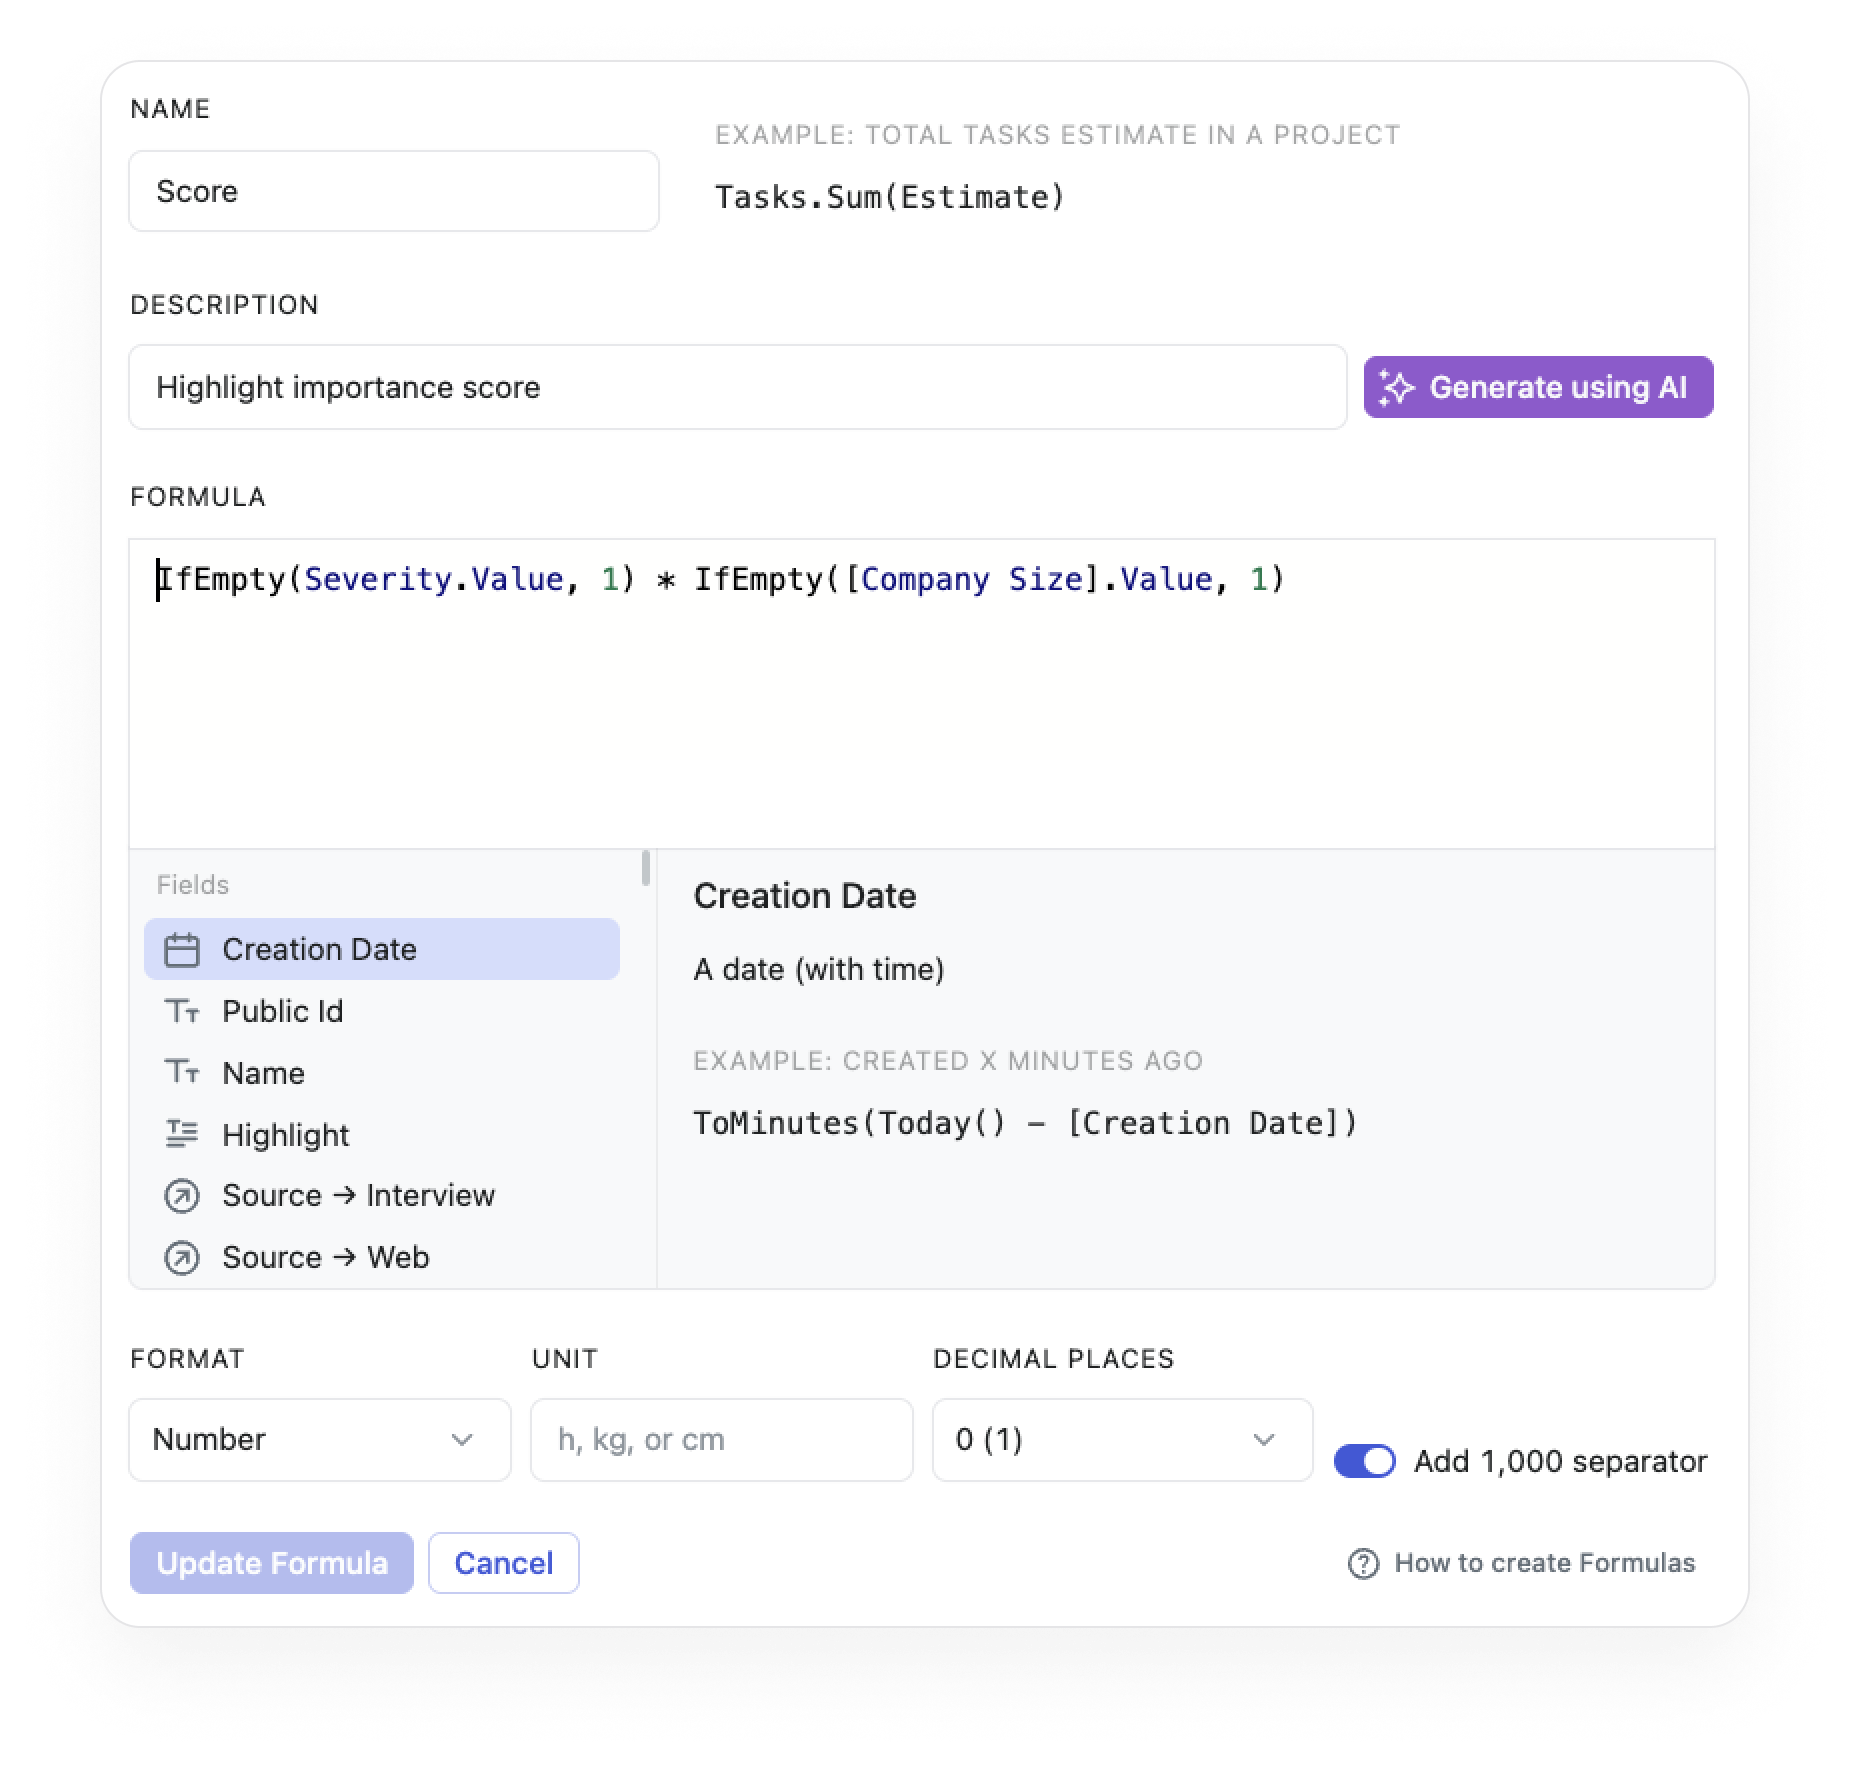
## Pinned fields
The Severity and Score fields will be visible on the Highlight popup based on the pinned field settings when creating or reading highlights.
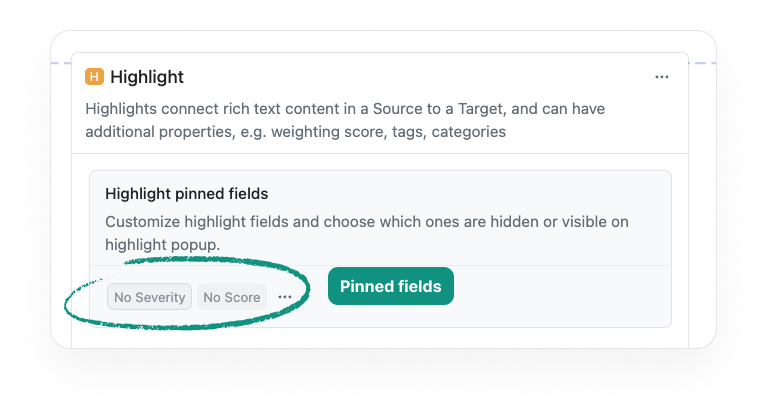
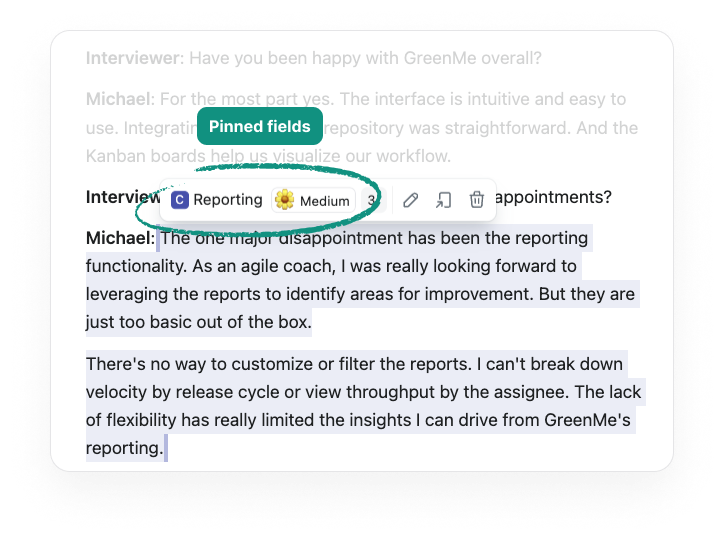
# SET INITIAL FIELD VALUES VIA URL PARAMETER ON FORM VIEW
_________________________________________________________
You may provide initial values in URL params. Here are some use cases:
* pre-fill known parts of forms to simplify users job: name, email, etc
* filled form attribution: provide some id to connect the created entity to some existing stuff - user, campaign, department, etc
> [//]: # (callout;icon-type=icon;icon=exclamation-circle;color=#fba32f)
> This currently only works for public forms
Just add a required values in url after `?` symbol, as query parameters: [`https://your-workspace.fibery.io/@public/forms/form-id?field-name=value&another-field=another-value`](https://your-workspace.fibery.io/@public/forms/form-id?field-name=value&another-field=another-value)
See syntax description [on wiki](https://en.wikipedia.org/wiki/Query_string#Structure)
Examples for different field types:
| | |
| --- | --- |
| text, url, phone, email, etc | `key=value` `name=John` `campaign+title=clickdown` `phone=321-11-11` |
| date, date and time | ISO format should work well here `date=2022-01-01` `deadline=2023-12-08T14:01:40.860Z` |
| date range | same as dates, separated with `:` `estimate=2022-01-01:2022-03-04` |
| numbers | `rating=4.5` |
| checkboxes | `true, yes, on, 1` will be treated as checked, any other value - unchecked `shipped=yes` |
| to-one references | you need to provide a full UUID here, can be copied using Alt+click on public id badge on entity view `state=ecebeec0-e34f-11ed-a326-e9cc78af8dd6` |
| to-many references | the list of UUIDs separated with `,` `subtasks=ecebeec0-e34f-11ed-a326-e9cc78af8dd6,ecebeec0-e34f-11ed-a326-e9cc78af8dd6` |
| locations | limited support, only coordinates, like in csv `location=53.893009,27.567444` |
| emoji | use `:short-code:` notation, hover over any emoji on fibery to find it out: 🴠`animal=:horse:` |
| rich text | not supported |
## Caveats
### We only match fields by their title
If you have a long sentence in place of field title, the parameter in the url looks ugly, like `?What+is+your+name%3F=Dmitry`.
# HOW TO SETUP SOFTDEV STRUCTURE FROM SCRATCH
_____________________________________________
In this guide, we will explain how to configure Fibery to meet your software development needs.
In Fibery, when we use the term "structure", we are referring to Spaces and Databases.
Let's begin by creating a new Space and naming it Software Development.

> [//]: # (callout;icon-type=icon;icon=exclamation-circle;color=#d40915)
> Please note that only Admins can create Spaces.
Next, we need to add Databases, set Relations between them, and add Views to visualize our processes.
## Adding Databases
As a next step, we have to add Databases and name them the way that reflects our processes. How do you decompose Features? Do you work with Stories? Maybe Tasks? Most likely you have Bugs too. Choose the definitions you prefer, and create the necessary Databases.
> [//]: # (callout;icon-type=icon;icon=laughing;color=#4faf54)
> Don't feel confident with Databases and all that tech stuff? Check out [Design a database](https://fibery.io/blog/guides/how-to-design-a-database-in-fibery/) guide.
Let's say, we decided to go with Stories and Bugs.

Feel free to add new Fields such as Workflow (to keep an eye on state), Assignees (to know who is working on what), Number (to track effort), etc.
> [//]: # (callout;icon-type=icon;icon=star;color=#e72065)
> If you plan to work with the Scrum framework, please don't forget to add a Number Field called Effort. There you can put your estimations.
## Setting Relations
We want our software development to be connected with product development. This means that, most likely, Stories and Bugs are parts of Feature.
* Story is a piece of work that can be planned in a Sprint. Finishing all related Stories signals that the Feature is done.
* Bugs - well, we're not the one to explain to you what they are 😉
To connect them, we need to set one-to-many [Relations](https://the.fibery.io/@public/User_Guide/Guide/Relations-17) between Bug and Feature, Story and Feature Databases.

Why one-to-many? Relations between Bug and Feature, and between Story and Feature are as follows:
* When testing one Feature, we can find many Bugs.
* When decomposing one Feature, we create many Stories.
Cool, the structure is almost ready! Let's make it look nice 💅
## Adding Context Views
Open any Feature you have and scroll down. There you will see Relations that we have created.

A bit inconvenient, right?
First, let's move them to the top, above References and maybe even Comments.

Second, let's show Bugs and Stories on the Board in a Feature - that gives the necessary overview. This is called [Context Views](https://the.fibery.io/@public/User_Guide/Guide/Context-Views-20):

You can create not only a Board but any View you prefer - Table, Calendar, or Timeline. You can create as many as you want, set filters, and sort, just like on the ordinary View. And you can quickly switch between them.
> [//]: # (callout;icon-type=icon;icon=star;color=#4faf54)
> In the Fibery team, we are heavily relying on those Views. Here is what our Context View for Features looks like:
>
> 
And of course, you can decide which Fields you want to see on the Story cards. To hide or unhide Fields, switch the toggle on or off.

We are done! Add some data - manually or with [Import from CSV](https://the.fibery.io/@public/User_Guide/Guide/Import-from-CSV-67), and enjoy the way it looks.
## Summary
Let's repeat what we have done:
* Added Databases that reflect our process - Story and Bug.
* Connected those Databases with the ones from Product Development Space.
* Created necessary Context Views that help you easily understand what you are working on.
> [//]: # (callout;icon-type=icon;icon=lightbulb-alt;color=#fba32f)
> You can also dynamically track the progress of a Feature using a Formula. At the Feature level, add a Formula Field that tracks progress based on the number of closed Stories (and/or Bugs):
>
> `(Stories.Filter(State.Final = true).Count() / Stories.Count()) * 100`
# HOW TO SHARE DATA WITH CUSTOMERS - GRANULAR ACCESS CONTROL
____________________________________________________________
In this guide, we'll walk through how to set up a simple but effective access model — one that reflects how most service or project-based businesses operate.
Let's say you manage work for multiple customers. Each customer has several projects. Every project includes tasks to complete and invoices to send.
### ✅ Use Cases this covers:
* A customer can see only their own projects, tasks, and invoices — never anyone else's.
* Finance or admin teams can still have full access as needed.
By combining entity relations with Fibery's flexible permissions, you can neatly map your customer relationships and project workflows, while ensuring that sensitive project data stays properly scoped.
Let's dive into how to set this up!

### Database setup
We'll work with four databases: Customer, Project, Task, and Invoice.
Each Customer can have multiple Projects, and each Project links to multiple Tasks and Invoices. Access is managed primarily at the Customer level — when a user has access to Customer's card, they automatically inherit access to its related Projects, Tasks and Invoices. This structure can easily be extended if needed, for example by adding Subtasks under Tasks, additional financial entities under Invoice, or custom fields to fit your specific workflow.

### Creating Access template
Here you can read what are access templates - [Custom Access Templates](https://the.fibery.io/@public/User_Guide/Guide/Custom-Access-Templates-240)
> [//]: # (callout;icon-type=icon;icon=exclamation-circle;color=#d40915)
> Please, note, that this functionality works on Pro and Enterprise plans only.
Here is how our template (created on Customer database) looks like:

> [//]: # (callout;icon-type=icon;icon=rocket;color=#199EE3)
> #### In short:
>
> > Access flows like this:\
> > Customer âž” Projects âž” Tasks & Invoices
>
> As a result, you only need to manage access at the Customer level, and the system automatically ensures that users only see the Projects, Tasks, and Invoices belonging to Customers they have permission for.
The Customer Access template defines how permissions are inherited across related databases. Access starts at the Customer level and flows down through related entities:
1. Customer
* This is the top-level entity where access is directly assigned.
* A user with access to a specific Customer automatically gains access to that Customer's Projects, Tasks, and Invoices.
2. Projects (linked to Customer)
* When a user has access to a Customer, they inherit access to all Projects under that Customer.
* There's no need to assign Project access separately — it is fully controlled by the Customer relation.
3. Tasks (linked to Project)
* Since Tasks are children of Projects, and Projects are children of Customers, access to Tasks is inherited through both levels.
* This means users can only see Tasks if they have access to the parent Project (which they get via Customer).
4. Invoices (linked to Project)
* Same logic as Tasks: access is inherited via Project.
* Only users with access to the relevant Project can see associated Invoices.
> [//]: # (callout;icon-type=icon;icon=key-skeleton;color=#199EE3)
> This setup is flexible and can be extended. For example, you can add Subtasks (under Tasks), Payments (under Invoices), or additional relations - and permissions will continue to follow the same parent-child inheritance logic.
>
> You can also exclude any level, for example revoke access to Invoices anytime
#### Permissions indicators

Each level shows different types of access:
* ðŸ‘ï¸ View: Enabled
* 💬 Comment: Enabled
* âœï¸ Edit / ðŸ—‘ï¸ Delete / 🌠Public access: Disabled
* Here customers would be able to view and comment any level
* However Tasks were granted Edit access - maybe your Customer wants to make some changes, for example, change Tasks priority
> [//]: # (callout;icon-type=icon;icon=heart;color=#e72065)
> You are very welcome to configure access for every database on your own
### Apply the template
Now we can use the template.
The Customer Access template defines *how* access is inherited across related databases (Customer → Projects → Tasks → Invoices), but it doesn't assign access to anyone by itself.
By applying the template to the People field (which connects Users to specific Customers), you're telling Fibery:
> "When a user is linked to a Customer via this field, automatically give them access to this Customer (with View & Comment rights), and propagate that access down to related Projects, Tasks, and Invoices according to the template."

Note, that you can assign as many customer representatives to their card, as you need 🙂
Amazing! Now entity-permissions are ready, and we have to make sure that our customers can see their data the way that makes sense to them.
### Proper visualization and Spaces access
We are organizing customer access using two separate Spaces to ensure both security and convenience.
* **Internal Space:** this space contains all core databases and views relevant for our internal team's work. Customers will have No access by default.
* **Customer Space:** this space contains only curated views that are specifically designed for customer needs. It does not include any full databases. Customers will typically have Contributor or Editor access here, enabling them to interact with the views as needed (e.g., add comments, update allowed fields, or collaborate on specific tasks), while they will have access to their data only.
This structure allows us to provide customers with meaningful and safe access to the information they need, while protecting core data structures and maintaining clear separation of internal and external operations.
> [//]: # (callout;icon-type=icon;icon=heart;color=#d40915)
> Thanks to the access templates, each customer will only see their own data in the Public Space.
**Customer's space default access:**


**Internal's space default access:**


### Invite customers - to pay or not to pay?
When inviting customers to the workspace, you can assign different roles depending on the level of access they need:
* **Member:**
* Customers invited as Members may have full edit and create capabilities (depending on permissions set).
* This role allows customers to contribute actively, update records, create new items where permitted, and collaborate more deeply.
* âš ï¸ *Note:* Inviting customers as Members will require purchasing a license for each Member account.
* **Observer:**
* Customers invited as Observers will have view and comment access only.
* They can review data and leave comments but cannot create or modify records.
* This role does not require an additional paid license, making it a cost-effective option for customers who only need visibility into their data.

### What else?
The flexible permission model allows you to safely collaborate with external contributors by controlling exactly which data each person can access. Here are some ideas for you:
* Temporary Access for Consultants or Auditors\
Grant short-term access to specific data sets needed for audits, compliance checks, or consulting projects — without exposing the full system.
* Freelancers and Contractors\
Provide limited access to the projects or tasks they are directly working on. Freelancers can contribute content, update assigned records, or collaborate, while sensitive or unrelated data remains hidden.
* Partners and Vendors\
Enable external partners (e.g. logistics providers, suppliers, agencies) to access only the data relevant to their services — such as assigned orders, shipments, or campaigns — while keeping the rest of your workspace fully protected.
# HIGHLIGHTS AND TARGETS FORMULAS
_________________________________
The Highlights is a database, so you can add formulas to calculate what you want. Here is the most basic use case. Let's say, you connect Highlights to Features and want to calculate Features Priority based on two things:
* Feedback volume linked to a Feature (some Features may have 10 Highlights linked, while others just 2)
* Feedback severity (some Highlights can be blockers, while others are just nice to have)
First, let's add a Score formula for a Highlight to capture Highlight Severity. Navigate to Settings → Highlights, click New Field, select Formula, and add this Formula named `Score`:
```
Severity.Value
```
Thus, for every Highlight, you will have a Score formula representing Highlight importance. Note that the Severity field for Highlight can be set like this, so Highlights with Blocker Severity will give more weight to the Score than Highlights with Low Severity:

Then go to your Target entity (in this case, it is Feature), add a New Field, select Formula, and name it `Priority Score`. The formula itself is very simple, we just take all linked Highlights and summarize Highlights Scores:
```
Highlights.Sum(Score)
```
Finally, create a backlog view for Features sorted by Priority Score.

> [//]: # (callout;icon-type=icon;icon=exclamation-circle;color=#4faf54)
> It is possible to setup quite complex Prioritization formulas that take into consideration parameters like:
>
> * Customer Size
> * Customer Segment
> * Feedback freshness
> * Development Effort
>
> We will add a detailed guide how to do it later, so far contact us in Intercom or in our [Community](https://community.fibery.io/) and we will help you.
# MAP VIEW
__________
Map View works best to visualize entities with [Location field](https://the.fibery.io/@public/User_Guide/Guide/Location-field-163).
For example, you may visualize:
* Accounts on a world map and quickly see in what country you have more customers and leads.
* Customers you need to visit today in some Cities and think about the best routes.
* Event planning: find where you have upcoming events
* Asset management: knowing where things are that you manage is useful.

## Add Map view to a space
1. Put the mouse cursor on a Space and click `+` icon
2. Select Map View from the menu

## Configure Map View
You may display several databases and locations on a single map.
1. Click `Layers` menu option.
2. Click `Add Database`.
3. Select Database.
4. Select [Location field](https://the.fibery.io/@public/User_Guide/Guide/Location-field-163) for the database.
5. Add more databases with location fields if you need them.
## Set map style
1. Click the Map menu option.
2. Select map style: Default, Monochrome, or Satellite.

## Open items
Just click on a marker on a Map view and Entity View will be opened on the right side.

## Zoom Map View
There are several ways to zoom into a map:
* Use `+` and `-` buttons on a map.
* You can use the scroll wheel on your mouse to zoom the map view.
* Double-click on the map. If you want to quickly zoom in on a particular area of the map, you can double-click on that area. This will zoom in on the location you clicked on.
* If you're using a touchpad, you can use the pinch and spread gesture to zoom in and out on the map. Simply pinch your fingers together to zoom out, or spread them apart to zoom in.
> [//]: # (callout;icon-type=icon;icon=exclamation-circle;color=#6a849b)
> Zoom state will be remembered, so when you visit the map again you will see the same zoom level.
In some zoom levels items start to clusterize and display a total number of entities in this area.

## Filter items
You may filter Items on Map View this way:
1. Click `Filter` in the top menu.
2. Select required properties and build filter conditions.
## Color items
You may color code markers on a map to highlight some important things. For example, mark Paid Accounts with green.
1. Click on `Colors` in the top menu,
2. Set one or many color rules.
> [//]: # (callout;icon-type=icon;icon=heart;color=#e72065)
> We support marker clustering on map view when color-coding is enabled
### Display Location Field as a point on a map on Entity View
You can display Location fields as map previews directly in the Entity View. Just head to Layout settings, toggle the Location field to Preview, and pick your preferred map style and zoom level.
Whether you're tracking events, customers, real estate, or anything else tied to a place – this feature helps you see your data in context.
> [//]: # (callout;icon-type=icon;icon=exclamation-circle;color=#199EE3)
> Note: Map previews are static – but don't forget, you can always create an interactive Map View for deeper exploration.
## FAQ
### I store addresses in a Text field, how can I see them in a Map View?
Unfortunately, this is not possible, you have to use [Location field](https://the.fibery.io/@public/User_Guide/Guide/Location-field-163). There is no easy way to convert text addresses to Locations right now.
### Can I create new entities in a Map View?
Nope, but we would like to hear your use case. Ping us in the intercom. We will add this feature when some people request it.
# VIDEO AND AUDIO TRANSCRIPTION
_______________________________
The transcription feature in Fibery allows users to transcribe audio or video files and insert the transcriptions directly into the rich text field. This eliminates the need to manually create transcripts elsewhere and simplifies the process of highlighting important sections within Fibery.
> [//]: # (callout;icon-type=icon;icon=exclamation-circle;color=#1fbed3)
> Supported formats: 3ga, 3gp, 3gpp, aac, aif, aifc, aiff, amr, flac, m4a, m4b, m4p, mkv, mov, mp2, mp3, mp4, mpg, mpga, ogg, opus, wav, weba, webm, wma, wmv
## How to run the transcription
First, you need to upload audio file via `/File` command or video via `/Video` command in rich text field.
Then click `Transcribe` button near File name and wait till transcription is ready.
Click `Insert transcription` button and the transcription text will be inserted below.

Sometime language auto-detection does not work well. You can select any language from a list of 37 languages.

NOTE: We use service for the transcription.
# CREATE CUSTOM INTEGRATIONS
____________________________
Integrations are ready-made services that make it simple to configure and customize specific processes. You can create your own [Integration templates](https://the.fibery.io/@public/User_Guide/Guide/Integration-templates-68) and sync data from any external system.
Fibery has a lot of built-in integrations like Jira, Trello, Github, etc. but sometimes the need arises to integrate custom data. In this article, we will show how to create simple integration app which does not require any authentication.
Let's imagine we intend to create a [public holidays app](https://gitlab.com/fibery-community/holidays-integration-app) which will sync data about holidays for selected countries. The holidays service [https://date.nager.at](https://date.nager.at/) will be used to retrieve holidays.
> [//]: # (callout;icon-type=icon;icon=gift;color=#199ee3)
> For holidays, we have [Sync public holidays from Google Calendar](https://the.fibery.io/@public/User_Guide/Guide/Sync-public-holidays-from-Google-Calendar-138) native integration, if you need it.
> [//]: # (callout;icon-type=icon;icon=check;color=#1fbed3)
> Please keep in mind that Type = Database, App = Space. To find out why, check [Terminology](https://the.fibery.io/@public/User_Guide/Guide/Fibery-API-Overview-279/anchor=Terminology--15f750ec-571c-48f6-9b0b-6861222c1a27).
## **Getting Started**
All communication between an integration application and Fibery services is done via standard hypertext protocols, whether that be HTTP or HTTPS. Please check out the full documentation starting from [Integrations API](https://the.fibery.io/@public/User_Guide/Guide/Integrations-API-267).
The choice of underlying technologies used to develop integration applications is up to the individual developer. We are going to implement all required endpoints in web app step by step. We will use Node.js for implementing this integration app.
> [//]: # (callout;icon-type=icon;icon=exclamation-circle;color=#9c2baf)
> The source code can be found [here](https://gitlab.com/fibery-community/holidays-integration-app).
### **App configuration endpoint**
Every integration should have the configuration which describes what the app is doing and the authentication methods.
The [app configuration](https://reports-help.fibery.io/integration_apps/api/app_schema) should be accessible at **GET "/"** endpoint and should be publicly available. For example, we used Heroku to host the app.
This is the [endpoint implementation.](https://gitlab.com/fibery-community/holidays-integration-app/-/blob/master/app.js#L34-35)
```
const appConfig = require(`./config.app.json`);
app.get(`/`, (req, res) => res.json(appConfig));
```
This is how [config.app.json](https://gitlab.com/fibery-community/holidays-integration-app/-/blob/master/config.app.json) looks like.
```
{
"id": "holidays-app",
"name": "Public Holidays",
"version": "1.0.1",
"description": "Integrate data about public holidays into Fibery",
"authentication": [
{
"id": "public",
"name": "Public Access",
"description": "There is no any authentication required",
"fields": []
}
],
"sources": [],
"responsibleFor": {
"dataSynchronization": true
}
}
```
> [//]: # (callout;icon-type=icon;icon=exclamation-circle;color=#4faf54)
> All properties are required. Find the information about all properties [here](https://the.fibery.io/@public/User_Guide/Guide/GET-367).
Since we don't want my app be authenticated, we didn't provide any fields for "Public Access" node in authentication. It means that any user will be able to connect their account to the public holidays app. Find an example with token authentication [here](https://gitlab.com/fibery-community/integration-sample-apps/-/blob/master/samples/simple/src/app.js).
> [//]: # (callout;icon-type=icon;icon=exclamation-circle;color=#199EE3)
> Note that case matters.
### **Validate**
This endpoint is [responsible for app account validation](https://reports-help.fibery.io/integration_apps/api/account_validate). It is required to be implemented. Let's just send back the name of account without any authentication since we are creating an app with public access.
POST /validate
```
app.post(`/validate`, (req, res) => res.json({name: `Public`}));
```
### **Sync configuration endpoint**
The way data is synchronised should be described.
The endpoint is **POST /api/v1/synchronizer/config**
```
const syncConfig = require(`./config.sync.json`);
app.post(`/api/v1/synchronizer/config`, (req, res) => res.json(syncConfig));
```
[config.sync.json](https://gitlab.com/fibery-community/holidays-integration-app/-/blob/master/config.sync.json)
```
{
"types": [
{
"id": "holiday",
"name": "Public Holiday"
}
],
"filters": [
{
"id": "countries",
"title": "Countries",
"datalist": true,
"optional": false,
"type": "multidropdown"
},
{
"id": "from",
"type": "number",
"title": "Start Year (by default previous year used)",
"optional": true
},
{
"id": "to",
"type": "number",
"title": "End Year (by default current year used)",
"optional": true
}
]
}
```
**The types** are responsible for describing types which will be synced. For the holidays app it is just one type with id "holidays" and name "Public Holidays". It means that only one integration Fibery database will be created in the space, with the name "Public Holidays".
**The filters** contain information on how the type can be filtered. In our case, there is a multi drop down ('countries') which is required and marked as data list. It means that options for this drop down should be retrieved from app and special end-point should be implemented for that. Also, we have two numeric filters from and to which are optional and can be used to filter holidays by years .
> [//]: # (callout;icon-type=icon;icon=exclamation-circle;color=#e72065)
> Find information about filters in [Custom App: Domain](https://the.fibery.io/@public/User_Guide/Guide/Custom-App:-Domain-269)
### **Datalist**
Endpoint [POST /api/v1/synchronizer/datalist](https://the.fibery.io/@public/User_Guide/Guide/Custom-App-REST-Endpoints-272/anchor=POST-api-v1-synchronizer-datalist--afbdfc9b-4304-4e4c-84cf-e6eb0d37e4cd) should be implemented if synchronizer filters has dropdown marked as "datalist": true.
Since we have countries multi drop down which should contain countries it is required to [implement the mentioned endpoint](https://gitlab.com/fibery-community/holidays-integration-app/-/blob/master/app.js#L45-48) as well.
```
app.post(`/api/v1/synchronizer/datalist`, wrap(async (req, res) => {
const countries = await (got(`https://date.nager.at/api/v3/AvailableCountries`).json());
const items = countries.map((row) => ({title: row.name, value: row.countryCode}));
res.json({items});
}));
```
> [//]: # (callout;icon-type=icon;icon=exclamation-circle;color=#1fbed3)
> For this app, only the list of countries is returned since our config has only one data list. In the case where there are several data lists then we will need to retrieve "field" from request body which will contain an id of the requested list. The response should be formed as an array of items where every element contains title and value properties.
For example, part of countries response will look like this:
```
{ "items": [
{ "title": "Poland", "value": "PL"},
{ "title": "Belarus", "value": "BY"},
{ "title": "Cyprus", "value": "CY"},
{ "title": "Denmark", "value": "DK"},
{ "title": "Russia", "value": "RU"}
]}
```
### **Schema**
[POST /api/v1/synchronizer/schema](https://the.fibery.io/@public/User_Guide/Guide/Custom-App-REST-Endpoints-272/anchor=POST-api-v1-synchronizer-schema--40f75d29-0bb6-4ecb-a8af-e4e284149f72 "https://the.fibery.io/@public/User_Guide/Guide/Custom-App-REST-Endpoints-272/anchor=POST-api-v1-synchronizer-schema--40f75d29-0bb6-4ecb-a8af-e4e284149f72") endpoint should return the data schema of the app. In our case it should contain only one root element ["holiday"](https://gitlab.com/fibery-community/holidays-integration-app/-/blob/master/schema.json) named after the id of holiday type in sync configuration above.
```
const schema = require(`./schema.json`);
app.post(`/api/v1/synchronizer/schema`, (req, res) => res.json(schema));
```
schema.json content can be found below
```
{
"holiday": {
"id": {
"name": "Id",
"type": "id"
},
"name": {
"name": "Name",
"type": "text"
},
"date": {
"name": "Date",
"type": "date"
},
"countryCode": {
"name": "Country Code",
"type": "text"
}
}
}
```
NOTE: Every schema type should have "id" and "name" defined.
### **Data**
The data endpoint is responsible for retrieving data. Check the documentation on [how request body looks](https://the.fibery.io/@public/User_Guide/Guide/Custom-App-REST-Endpoints-272/anchor=POST-api-v1-synchronizer-data--575d212d-58cc-4a67-9e82-c48c1088778f "https://the.fibery.io/@public/User_Guide/Guide/Custom-App-REST-Endpoints-272/anchor=POST-api-v1-synchronizer-data--575d212d-58cc-4a67-9e82-c48c1088778f"). There is no paging needed in case of our app, so the data is returned according to selected countries and years interval. The source code can be found [here](https://gitlab.com/fibery-community/holidays-integration-app/-/blob/master/app.js#L51-73).
**POST /api/v1/synchronizer/data**
```
app.post(`/api/v1/synchronizer/data`, wrap(async (req, res) => {
const {requestedType, filter} = req.body;
if (requestedType !== `holiday`) {
throw new Error(`Only holidays database can be synchronized`);
}
if (_.isEmpty(filter.countries)) {
throw new Error(`Countries filter should be specified`);
}
const {countries} = filter;
const yearRange = getYearRange(filter);
const items = [];
for (const country of countries) {
for (const year of yearRange) {
const url = `https://date.nager.at/api/v3/PublicHolidays/${year}/${country}`;
console.log(url);
(await (got(url).json())).forEach((item) => {
item.id = uuid(JSON.stringify(item));
items.push(item);
});
}
}
return res.json({items});
}));
```
The requestedType and filter can be retrieved from the request body.
The response should be returned as array in "items" element.
```
{ "items": [] }
```
## **Testing custom integration app**
1. It is recommended to create integration tests before adding your custom app to Fibery apps gallery. Check some tests I created for holidays app [here](https://gitlab.com/fibery-community/holidays-integration-app/-/blob/master/test.js).
2. It is possible to run your app on local machine and make the app's url publicly available by using tools like [ngrok](https://ngrok.com/).
```
brew install ngrok
ngrok http 8080
```
Then you will have an ability to debug the app locally after adding it Fibery apps gallery. Don't forget to remove the app from Fibery integration apps catalog after testing.
## **Add, edit or remove a custom integration app**
Let's assume you created an app, made it's url available and are ready to try it in Fibery.
### **How to add a custom app**
Navigate to space you would like to integrate and click integrate button, find add custom app option and click.

### **How to edit a custom app**
You can change the link to a custom app or force an update to the configuration of the app after deploying it to production by finding your app in catalog and clicking on settings icon in right upper corner.

### **How to delete a custom app**
You can delete a custom app by finding your app in the catalog and clicking on settings icon in right upper corner. In case of app deletion, the databases will not be removed and relations to the databases will not be affected.

Find the source code of this app and other examples in [our public gitlab repository](https://gitlab.com/fibery-community).
## FAQ
#### Where can I ask questions regarding API & Integrations?
The best place is to ping us in chat [or in our community](https://community.fibery.io/c/api-programming/10 "https://community.fibery.io/c/api-programming/10").
#### Is there any way to pass batch entity data to an external action?
No, there is no batch actions avaliable\
However, batch actions can be implemented in custom app just by accumulating incoming items into app store and performing action using batch\
Please, note that Automation API calls custom action for Entities one by one in queue. That means, that the whole execution will be stopped with first action failed. That's a trade we have.
### Community examples:
* [Toggl integration](https://community.fibery.io/t/fibery-toggl-integration/4151 "https://community.fibery.io/t/fibery-toggl-integration/4151") from Reify academy
* [Zotero](https://community.fibery.io/t/zotero-integration/1802 "https://community.fibery.io/t/zotero-integration/1802") from Seaotternerd
# MULTIPLE EMAIL ACCOUNTS SYNC
______________________________
You may want to sync emails from several accounts into a single database. It can be done in two ways:
1. Admin can setup several accounts by herself. For example, you have emails like [support@fibery.io](mailto:support@fibery.io) and [sales@fibery.io](mailto:sales@fibery.io) and want to sync them both into a single Emails database.
2. You may grant permissions to other users to setup email accounts. For example, you may have 4 sales reps. that communicate with leads and want to sync all their emails into a single Email database.
> [//]: # (callout;icon-type=icon;icon=asterisk;color=#fba32f)
> This feature is available in [Pro and Enterprise plans](https://fibery.io/pricing) only.
## Setup Email integration
> [//]: # (callout;icon-type=icon;icon=exclamation-circle;color=#d40915)
> If you already have some older Email Integration setup, you will have to remove it and re-setup again. If you absolutely don't want to do it, please contact us via Intercom, we will figure something our for your account.
### Setup several email accounts as an admin
Setup [Email integration (Gmail, Outlook & IMAP)](https://the.fibery.io/@public/User_Guide/Guide/Email-integration-(Gmail,-Outlook-&-IMAP)-66). Then click Add Account and add as many email accounts as you want. Click … near the account to change it or delete it completely.

### Grant email setup to users
Admin should add Email Integration to any Space and setup one email account. Then admin can invite other people to add their own accounts.
Turn on `Allow users to add personal integrations` and invite several users.

They will receive a notification in Inbox to setup an account. Invited user can navigate to Settings → My integrations → Email and setup own email account:
When everything is configured, `Synced By` field is added to Email and Contact. It is used to indicate what user synced this record and set access. For example, there can be the same email synced by two different users, and in this case email will not be duplicated, but Synced By field will contain two users.
## How to limit what emails are synced?
In most cases you will not want to sync all your work emails into Fibery. It is quite dangerous, since it can contain sensitive information, like your new salary, some very personal communication with your manager, etc. How to fix it?
### Use Inbox and Sent folders to sync everything
In rare cases you may decide to sync all emails. Just select **Inbox** and **Sent** folders and all emails will be synced.
### Use Labels to sync only selected emails (⌠this case does not work without Force Full Sync so far)
You may create a special Label and use it to mark emails threads you want to sync into Fibery. For example, you can create **Fibery** label and marked some email conversations with **Fibery** label. Then it is required to select this Label as a Folder in email setup and remove all other Folders, like this:

As a result, only emails marked with Fibery label will be synced, so you define visibility of your emails.
> [//]: # (callout;icon-type=icon;icon=laughing;color=#fba32f)
> Fibery does not sync old emails with **labels** by default so far. For example, you have a month-old email. You put Fibery label on this email, but it will not be synced. Only **Force Full Sync** will make it work, so you have to ask Admin to run it:
>
> 
## What are default visibility of all incoming emails?
It depends on Space setting where you added Email Integration.
### Email Space with no access
Let's say, you created Email Space and setup Email Integration on this Space and did not give access to this Email Space to any other users. In this case:
1. Admins will see all emails from all Email Accounts.
2. Email account owner will see only emails synced by her email integration
For example, there are two non-admin users configured Email Integration, Michael and Anton. In this case Michael will see only his emails and Anton's emails will be invisible for Michael.
### Email Space with some access
Let's say, you created Email Space and setup Email Integration on this Space and make Email Space visible to all users. In this case all emails synced to Fibery will be visible to all users.
You can also invite several users to Email Space and these serveral users will have access to all emails inside.
## How a user can see her emails?
When Email sync setup is done, a user will receive a notification into Inbox and **My Emails** view will be created in My Space section for this user.
A user can create other Views in My Space section to see emails differently.
## Can a user reply to emails via Fibery?
Yes, Admin can configure **Reply** button via [Send emails and reply to emails](https://the.fibery.io/@public/User_Guide/Guide/Send-emails-and-reply-to-emails-105).
## Can I connect emails to my CRM databases, like Companies?
Yes, you can do it via auto-relations, check this guide [Link emails to accounts, leads, customers in Fibery CRM](https://the.fibery.io/@public/User_Guide/Guide/Link-emails-to-accounts,-leads,-customers-in-Fibery-CRM-382)
# NUMBER FIELD
______________

Pick between Number, Money, and Percentage formatting.
## Decimal places
Select the precision of a Field by specifying the number of decimal places: e.g. 2 for `1.32` and 0 for simply `1`.
> [//]: # (callout;icon-type=emoji;icon=:point_up:;color=#bec5cc)
> If later you find out that you need more or fewer decimal places:
>
> * 👌 0 → multiple;
> * 👌 multiple (e.g. 2) → multiple (e.g. 4);
> * 🙅 multiple → 0.\
> *(if this is your case, please get in touch)*
## Decimal and thousands separators
Every person sees numbers in a format set in their [Personal preferences](https://the.fibery.io/@public/User_Guide/Guide/Personal-preferences-288). This means the same Number Field value might look like `1,234.56` for you and `1 234,56` for your colleague — see our [internationalization principles](https://community.fibery.io/t/twitter-post-about-potentially-new-fibery-settings/5728/4?u=antoniokov). The preferences are initially based on the user's browser locale but everyone is free to adjust them.
The Field creator only specifies if a given Number Field needs a thousand separator.
## Visualize as a progress bar
You can visualize numeric values of the Number field as a progress bar in Views. It works only for the percentage field type. For example, if you have a Field `Completion`, you will see `Completion (progress bar)` unit in the View setup. The field is fully editable.

## FAQ
### Why does a field set to N decimal places still allow N+ decimals?
The decimal setting only affects how values *look* in the UI - not how they're stored or compared.\
If you set a number field to show 2 decimal places, a value like `1.23456` will appear as `1.23` in the UI, but it's still stored in full precision behind the scenes. That means two values that *look* the same (e.g. `1.23`) might still be treated as different if their hidden digits differ.\
If you need values to be compared or stored using a specific precision, use a formula with rounding:
```
If(Round(valueA, 2) = Round(valueB, 2), "equal", "different")
```
Or round values via Automation when they're created or updated, if consistency is critical.
# 🙈 EMPLOYEE MANAGEMENT
________________________
In the second part of the guide for HR Workspace Template, we'll explain how to set the employee management process.
If you prefer video, check this 18-min detailed step-by-step explanation:
[https://youtu.be/lwZj7_n5s0A?si=k0Ubn4gwmvo4Sf7e](https://youtu.be/lwZj7_n5s0A?si=k0Ubn4gwmvo4Sf7e)
If you prefer text, explore the **Employee Management Space** with this guide. While doing it, you'll also be able to test whether the template works for you, and make necessary changes if needed.
## Step 1. Create your company wiki
Add your company guidelines and structure them in the most reasonable way.
> [//]: # (callout;icon-type=icon;icon=brightness;color=#4faf54)
> Tip: [store documents near work.](https://fibery.io/blog/new-wiki-approach-store-your-documents-close-to-work/)
>
> * The hiring guidelines are in Hiring Space.
> * The vacation policies are in the Vacation Space.
> * The overall Employee management wiki may refer to those docs and contain a high-level overview.
>
> In Fibery, we have such a document called "101". You may find it in the template. It's a shortened version, but still a real one!
## Step 2. Add all necessary information about the employee to the system
When the Candidate is hired, we automatically create his Employee Card.
For that, we need an Automation [Rules](https://the.fibery.io/@public/User_Guide/Guide/Rules-51) .

Note that we separated the Candidate and Employee databases because not every Candidate becomes an Employee. The information we need to collect is different for each. As a result, we will have have cards of the same name in two different places. However, it's not duplication issue.
> [//]: # (callout;icon-type=icon;icon=book-open;color=#fc551f)
> If you want to learn more about how databases work and when to create a new one, we recommend checking the guide on [How to create a database in Fibery.](https://fibery.io/blog/how-to-design-a-database-in-fibery/ "https://fibery.io/blog/how-to-design-a-database-in-fibery/")
Coming back to the topic.
The easiest way to see all the Employees is to show them all in a single View.
For example, you can choose a Grid View. Remember that you can use features `Filter` and `Sort` to get answers to your questions. For example, if you want to see the most recently joined first, sort Employees by Start Date.

To keep an eye on Winnie who's joined recently, you can open his Card and fill in all the necessary information. You might want to use a multi-panel navigation because it helps maintain context. Also, it works well on large screens. Check [Panels](https://the.fibery.io/@public/User_Guide/Guide/Panels-23) to understand benefits of multi-panel and one-panel navigations.

> [//]: # (callout;icon-type=icon;icon=bullseye;color=#4faf54)
> Don't hesitate to add new Fields and delete the ones you don't need.
>
> For example, if all your team is in the same country, and the same city, you won't need Map View. Therefore, the Location Field won't be helpful.
>
> If you need to track Employee experience level (Junior, Mid, Senior), it makes sense to add a separate Field for that. Alternatively, you can make it a part of the title.
You can also choose where Fields should be placed, either on the top of the Card or on the right. We recommend pinning the most important ones on the top, and others on the right. Also, you can hide the ones you don't use regularly to avoid distraction.

## Step 3. Plan HR team tasks and track the progress
So you've filled in the Employee Card. Now it's time to see what other important tasks are left, such as preparing a contract, notifying insurance partners, etc. There may also be tasks remaining related to existing employees or general company operations, such as organizing trainings, preparing renewal contracts, etc.
There are several places where you can check what is happening, depending on the context.
For example, to see all Tasks planned for all teammates, you can use the Board View. Konstantin has two tasks to work on: he needs to prepare the training and send all Winnie documents to the Legal Department.

> [//]: # (callout;icon-type=icon;icon=balance-scale;color=#4faf54)
> This Board View is common for everyone. It means that if someone changes the settings, the Board will be changed for everyone. To prevent that, you will most likely set up [Sharing & Permissions](https://the.fibery.io/@public/User_Guide/Guide/Sharing-&-Permissions-46)
>
> But what if Winnie wants to see his Tasks only and apply custom `Sort` and `Filters`? The best way would be to duplicate this Board to [Private Space](https://the.fibery.io/@public/User_Guide/Guide/Private-Space-25) Any teammate can do this if they have personal preferences.
Another example. Let's say Winnie came to you and asked when all paperwork would be ready. So you need to check how much work is left for a specific employee.
What do we do? Correct, we open Winnie's Employee Card.
You will see the HR Tasks section. This is what we call [Context Views](https://the.fibery.io/@public/User_Guide/Guide/Context-Views-20) , and on every Employee card, you'll automatically see only Tasks related to them.

> [//]: # (callout;icon-type=icon;icon=bullseye;color=#4faf54)
> Don't hesitate to add new Fields and delete the ones you don't need.
>
> Tasks are different for everyone. You may want to add priority options or exclude deadlines. The States may be different. Please customize Fields to reflect the way you work.
## Step 4. Run employee meetings: one-on-ones, salary reviews and others
We suggest separating different types of meetings and create several databases for your purposes. For example, if in the future you decide to integrate the financial system into Fibery, you might want to connect meetings from Salary Review Database with Databases from Finance Space.
In the Calendar View, you can see all meetings (both Salary Reviews & One-on-Ones that are planned). You can also add new meeting by clicking a small arrow near the `New` Button.
For sure, that's not the only place to track all the meetings, and that Button is not the only one to add through. However, that's on of the easy ways.

When you click on the `One on ones` form button, you'll see a popup. It is an internal Form that prompts you to fill in all the required fields.

Those internal Forms live in the sidebar. Check [Add Entities with Many Fields Using Forms](https://the.fibery.io/@public/User_Guide/Guide/Add-Entities-with-Many-Fields-Using-Forms-164) to understand the configuration logic.

After filling in the form, the new meeting appears both in the Calendar View and on the Employee card. To see the latest meetings, use `Sort` in the upper panel.

Here are some other ideas for meetings:
💡 Use [Rules](https://the.fibery.io/@public/User_Guide/Guide/Rules-51) and recurring options to plan meetings automatically. For example, generate one-on-ones on a monthly basis, and salary reviews on a yearly one. All employees can be assigned automatically.
💡 Use [Notify people using Buttons or Rules](https://the.fibery.io/@public/User_Guide/Guide/Notify-people-using-Buttons-or-Rules-109) to notify people about their meetings today.
💡 Check this video to get some ideas on how to make meeting notes.
[https://youtu.be/93hSE2Le-74?si=tr1luUf2FfQyjTOz](https://youtu.be/93hSE2Le-74?si=tr1luUf2FfQyjTOz)
## FAQ
#### When does it make sense to have a separate Employees database?
* It's mainly needed if:
1. Employees ≠Users in count (e.g., not every system user is a company employee, or vice versa).
2. You want to store additional employee‑specific data (like birthdays, personal info) and control visibility of that data separately from the user object.
3. You need dedicated permissions: decide who can view, edit, or add employee records independently from user permissions.
If you don't have these needs, the existing User database + layouts can often cover most scenarios.
Current permissions model (Users):
* Admins can edit all users.
* Users can edit their own profile (except restricted fields like role).
* Other users have read‑only access.
# INTEGRATIONS API
__________________
Integrations in Fibery are quite unusual. It replicates a part of an external app domain and feed data into Fibery and create several Databases.
Dedicated service (integration application) should be implemented to configure and fetch data from an external application.
## How it works
All communication between integration application and Fibery services is done via standard hypertext protocols, whether it can be HTTP or HTTPS. All integration applications are expected to adhere to a particular API format as outlined in this documentation. The underlying technologies used to develop these integration applications are up to the individual developer.
Users may register their applications with Fibery by providing a HTTP or HTTPS URI for their service. The service must be accessible from the internet in order for the applications gallery to successfully communicate with the service.
> [//]: # (callout;icon-type=icon;icon=lock-alt;color=#fba32f)
> It is highly recommended that service providers consider utilizing HTTPS for all endpoints and limit access to these services only to IP addresses known to be from Fibery.
In essence, Fibery's applications gallery service acts as a proxy between other Fibery services and the third party provider with some added logic for account and filter storage and validation.
> [//]: # (callout;icon-type=emoji;icon=:nerd_face:;color=#b04e31)
> To understand more about our approach, please check the blog post about [Fibery approach to integration](https://fibery.io/blog/product-updates/fibery-approach-to-integration/).
## Availability for users
Installed application will be available for all users in your Fibery workspace that have either Admin role in workspace, or Creator access in Space, were application was configurated. Users from another worskpaces won't be able to see or use your integration application.
Once you sync data with this application, you can apply standard Fibery permissions on it.
> [//]: # (callout;icon-type=emoji;icon=:point_up:;color=#1fbed3)
> In the interface, Type = Database, App = Space. To find out why, check [Terminology](https://the.fibery.io/@public/User_Guide/Guide/Fibery-API-Overview-279/anchor=Terminology--15f750ec-571c-48f6-9b0b-6861222c1a27).
## Dig deeper
[Create Custom Integrations](https://the.fibery.io/@public/User_Guide/Guide/Create-Custom-Integrations-83)
[Custom Integration Apps](https://the.fibery.io/@public/User_Guide/Guide/Custom-Integration-Apps-268)
[Custom App: Fields](https://the.fibery.io/@public/User_Guide/Guide/Custom-App:-Fields-270)
[Custom App: REST Endpoints](https://the.fibery.io/@public/User_Guide/Guide/Custom-App:-REST-Endpoints-272)
[Custom App: OAuth](https://the.fibery.io/@public/User_Guide/Guide/Custom-App:-OAuth-273)
[Custom App: Date range grammar](https://the.fibery.io/@public/User_Guide/Guide/Custom-App:-Date-range-grammar-271)
[Custom App: Test and debug](https://the.fibery.io/@public/User_Guide/Guide/Custom-App:-Test-and-debug-274)
[Integration Schema types](https://the.fibery.io/@public/User_Guide/Guide/Integration-Schema-types-213)
[Integration Filters](https://the.fibery.io/@public/User_Guide/Guide/Integration-Filters-282)
[Custom App: External actions API (beta)](https://the.fibery.io/@public/User_Guide/Guide/Custom-App:-External-actions-API-(beta)-278)
[Custom App: Webhooks (beta)](https://the.fibery.io/@public/User_Guide/Guide/Custom-App:-Webhooks-(beta)-380)
### Tutorials
[Simple custom App tutorial](https://the.fibery.io/@public/User_Guide/Guide/Simple-custom-App-tutorial-275)
[Custom holidays App tutorial](https://the.fibery.io/@public/User_Guide/Guide/Custom-holidays-App-tutorial-276)
[Custom Notion sync App tutorial](https://the.fibery.io/@public/User_Guide/Guide/Custom-Notion-sync-App-tutorial-277)
# RELATION VIEWS
________________
Every to-many relation on an Entity View can be visualized using a set of **relation Views**:

Relation Views are fully functional mirrored [Context Views](https://the.fibery.io/@public/User_Guide/Guide/Context-Views-20), so you can apply custom grouping, sorting, and color-coding — as you would on any other View. By default, we offer a simple List View, but you can customize and even replace it with a View of a different kind — for example, a Table or a Timeline.
> [//]: # (callout;icon-type=emoji;icon=:unlock:;color=#6A849B)
> Anyone can see relation Views (except for Reports) if they have access to any Entity of the relevant DB.
You can duplicate Relations Views. Find `Duplicate` action in … in Relation View.

## How to switch between Relation Views?
Once you create a relation View, it appears in the switcher for all Entities of the DB:

The first relation View in the list becomes the default one for all users. If someone switches to another relation View, we remember the selection per relation per user.
## How to link existing Entities via relation View?
Unlike on regular Views where you can only create new Entities, on relation Views you can additionally link existing Entities:

> [//]: # (callout;icon-type=emoji;icon=:loudspeaker:;color=#1fbed3)
> Linking is currently only supported on relation Lists — if your use case calls for linking on a Table or a Board, please describe it to us in the chat.
## \
Pin Relation Views
You can pin relation views and enjoy better visibility and faster navigation (in expense of more busy UI):
# POST /DATALIST
________________
This endpoint performs retrieving datalists from filter fields that marked with `datalist` flag. Included are two query parameters: `source` and `field` denoting the source identifier and field name the datalist is to be grabbed for.
## Request
The POST body includes a JSON serialized authentication object formatted according to the authentication scheme provided in the initial [GET /](https://the.fibery.io/@public/User_Guide/Guide/GET-%2F-367) request:
```
//POST BODY /datalist?source=supersource&field=country
{
'auth': 'basic', // the identifier of the account type
'username': 'Superman', // all fields according to the account format
'password': 'annoyingj0k3r',
/*...*/
}
```
The app should utilize these authentication credentials to gather possible values for the `field` provided.
## Response
The response from your API should be a JSON-serialized list of name-value objects:
```
//POST /datalist?source=supersource&field=country
[
{'title': 'United States', 'value': 'US'},
{'title': 'Belarus', 'value': 'BY'},
/*...*/
]
```
The `title` in each object is what is displayed to the end-user for each value in a combobox and the `value` is what is stored with the filter and what will be passed with subsequent requests that utilize the user-created filter.
# SCRIPTS IN AUTOMATIONS
________________________
There can be times when you want an automation to do something a bit more complicated, something which might not be possible using the existing actions. In these cases, scripting can help.
> [//]: # (callout;icon-type=icon;icon=exclamation-circle;color=#1fbed3)
> The scripts are executed with Node.js 22, so feel free to use async/await and other recent JS features.
## Script
Select Script in Actions to create a script. All scripting is written using the JavaScript language. You don't need to be a complete master, but having a [basic understanding](https://developer.mozilla.org/en-US/docs/Learn/Getting_started_with_the_web/JavaScript_basics) will help.

### AI Assistant
You can generate Scripts in automations using AI prompts. For example, let's generate a script to close all tasks related to a product:
You can use AI to learn Scripts and write them faster. In most cases it is way faster to start with an incorrect script and fix some errors than type everything from scratch.
> [//]: # (callout;icon-type=icon;icon=laughing;color=#fba32f)
> AI-generated scripts are not always correct, they can have mistakes, so please review them carefully.
Some prompts examples to spark the creativity:
* Add tasks with following names to feature: “Designâ€, “Implementationâ€, “Testingâ€.
* Move all tasks to the final state
* Move all non-completed features to new sprint with name of “Sprint X Splitâ€
* Post product entity as JSON to https://SOME_URL
* Add tasks descriptions to description of a feature
### Services
A script has access to the following services: `fibery`, `http` and `utils`.
Use the `fibery` service to perform some operations on your Fibery workspace.
```
const fibery = context.getService('fibery');
```
Use `http` to make arbitrary requests on the web.
The `utils` service has some commonly-used utilities.
Once a service has been defined, the functions available for that service can be used, e.g.
```
fibery.deleteEntity("Tasks/Task","6a5ca230-da86-11ea-a1b3-ff538984283f")
```
### Await
The available Fibery functions are [asynchronous](https://developer.mozilla.org/en-US/docs/Learn/JavaScript/Asynchronous/Async_await), so you will need to use the await keyword when calling them, and since some of the functions return a result, you will typically want to save the result in a variable, e.g.
```
const newTask = await fibery.createEntity("Tasks/Task",{"Name":"New Task"});
```
### Arguments
When an action button is run or a rule is triggered, there are pieces of data that are available to be accessed within the script.
This includes the entity (or entities) that was (were) selected/active when the button was pressed/trigger occurred, the identity of the user that pressed the button/triggered the rule, and the results of previous steps.
#### Trigger
The triggering entity (or entities) is available as `args.currentEntities `which is an array of objects.
It will look something like this:
```
[
{
"Public Id": "1",
"Id": "a129d810-f8a0-11e8-88d2-3d1a5c86c61f",
"Creation Date": "2018-12-05T15:15:41.738Z",
"Modification Date": "2019-09-27T08:48:08.873Z",
"Rank": 500000,
"Name": "Swim farthest",
"State": {
"Name": "Done",
"Id": "70df7a70-f8a0-11e8-a406-9abbdf4720ab"
},
"type": "Tasks/Task"
},
{
...
}
]
```
#### User
The User causing the automation to run is available as `args.currentUser` which is an object that will typically look something like this:
```
{
"Public Id": "1",
"Id": "fe1db100-3779-11e9-9162-04d77e8d50cb",
"Email": "vincent@gattaca.dna",
"Creation Date": "2019-02-23T14:47:49.262Z",
"Modification Date": "2019-09-27T08:17:46.608Z",
"Name": "Vincent Freeman",
"Role": {
"Id": "57d5dd70-b9df-11e9-828d-51c8014f51c9",
"Name": "Navigator"
},
"type": "fibery/user"
}
```
> [//]: # (callout;icon-type=icon;icon=exclamation-circle;color=#fba32f)
> If a rule has been triggered by something other than a user action, e.g. when the value of a formula field containing the `Today()` function changes, then `args.currentUser` will return `null`.
#### Steps
The results of previous steps are available as `args.steps` which is an array of objects. Each element is an object corresponding to a previous step. An automation that added a Task to a Project (in step 2) might generate something like this for `args.steps` :
```
[
{ result: null },
{
result: {
entities: [
{
id: 'f18fcef0-d225-11ed-b709-adb989f0f62c',
type: 'SpaceName/Project'
}
]
}
},
{
result: {
message: 'Add Tasks Item: 1 Task added',
entities: [
{
id: '14642800-31d4-11ee-a348-0999a062bf2d',
type: 'SpaceName/Task'
}
]
}
}
]
```
> [//]: # (callout;icon-type=icon;icon=exclamation-circle;color=#fba32f)
> The first element (`args.steps[0]`) has no valid result since there is no step zero.
### Success and error messages (Buttons)
A scripted Button can display custom messages to the person who clicked it:

To add a custom success message, return this message as a string at the end of your script:
```
<...>
return `${tasks.length} Tasks have been added from the template`;
```
You can also stop Button execution at any time by throwing an error:
```
if (!project.template) {
throw new Error("Please specify the template");
}
```
The user who clicked the Button will see this error message and will have a chance to make things right:

### Activity log
The Activity log for each automation is the place to look to see when an automation has been executed and what happened.

### Debugging
When running a script from a button press, if everything goes OK, there will be a pop-up message to let you know: "Script button is completed".
Sometimes, things might not always go as planned. It can be useful to add steps to the script that report relevant information to the browser console, e.g. `console.log(args.currentEntities[0]);`

It varies from browser to browser; in the case of Chrome, the browser console can be opened with `Cmd + Shift + J`.
## Fibery service workspace functions
The following functions are available in scripting for the `fibery` service:
| | |
| --- | --- |
| **Function (arguments)** | **Returned data type** |
| `getEntityById(type: string, id: string, fields: string[])` | object |
| `getEntitiesByIds(type: string, ids: string[], fields: string[])` | object array |
| `createEntity(type: string, values: object)` | object |
| `createEntityBatch(type: string, entities: object[])` | object\[\] |
| `updateEntity(type: string, id: string, values: object)` | object |
| `updateEntityBatch(type: string, entities: object[])` | object\[\] |
| `addCollectionItem(type: string, id: string, field: string, itemId: string)` | \- |
| `addCollectionItemBatch(type: string, field: string, args: {id: string, itemId: string}[])` | \- |
| `removeCollectionItem(type: string, id: string, field: string, itemId: string)` | \- |
| `removeCollectionItemBatch(type: string, field: string, args: {id: string, itemId: string}[])` | \- |
| `deleteEntity(type: string, id: string)` | \- |
| `deleteEntityBatch(type: string, ids: string[])` | \- |
| `setState(type: string, id: string, state: string)` | \- |
| `setStateToFinal(type: string, id: string)` | \- |
| `assignUser(type: string, id: string, userId: string)` | \- |
| `unassignUser(type: string, id: string, userId: string)` | \- |
| `getDocumentContent(secret: string, format: string)` | string |
| `setDocumentContent(secret: string, content: string, format: string)` | \- |
| `appendDocumentContent(secret: string, content: string, format: string)` | \- |
| `addComment(type: string, id: string, comment: string, authorId: string, format: string)` | object |
| `addFileFromUrl(url: string, fileName: string, type: string, id: string, headers: object)` | object |
| `executeAction(action: string, type: string, args: [object])` | object |
| `executeSingleCommand(command: FiberyCommand)` | any\* |
| `graphql(spacename: string, command: string)` | any\*\* |
| `getSchema()` | any\*\*\* |
\* the `executeSingleCommand` function allows a script to run any [Fibery API](https://api.fibery.io "https://api.fibery.io") command. This gives tremendous flexibility, but requires a bit of experience with the low-level Fibery API that is beyond the scope of this article.
\*\* the `graphql` function allows a script to execute a GraphQL command within the script. The usage of GraphQL is explained in more detail here: [How to use Graphql API and IDE ](https://the.fibery.io/@public/User_Guide/Guide/How-to-use-Graphql-API-and-IDE--101).
\*\*\* the `getSchema` function will return a complete, structured description of all space/database information.
### **Function arguments**
The `type` argument is the name of the database, e.g. `"Task"`.
If there is more than one database with the same name, you should prefix with the workspace name, e.g. `"Project management/Task"`
The `id` / `itemId` is the UUID of the entity, e.g. `"fe1db100-3779-11e9-9162-04d77e8d50cb"`
`field` and `fields` are the name(s) of the entity's fields, as a string or an array of strings, e.g. `"Creation date"` or `["Name","Assignees"]`
`values` is a object containing one or more field name/value pairs, e.g.
```
{
"Name" : "My entity",
"Effort" : 10
}
```
`state` is the name of a workflow state, as a string, e.g. `"In Progress"`
`secret` is a UUID string that represents a collaborative document, e.g. `"20f9b920-9752-11e9-81b9-4363f716f666"`. It is the value returned when reading a rich-text field and the value used to access/manipulate that rich-text field's contents.
`userId` and `authorId` are UUIDs for Fibery users in the workspace.
Note: the button presser's Id is accessible as `args.currentUser['Id']`
## Http service functions
The following functions are available in scripting for the `http` service:
| | |
| --- | --- |
| **Function (arguments)** | **Returned data type** |
| `getAsync(url: string, options?: { headers?: { [key: string]: string } })` | any |
| `patchAsync(url: string, options?: { body?: any, headers?: { [key: string]: string } })` | any |
| `postAsync(url: string, options?: { body?: any, headers?: { [key: string]: string } })` | any |
| `putAsync(url: string, options?: { body?: any, headers?: { [key: string]: string } })` | any |
| `deleteAsync(url: string, options?: { body?: any, headers?: { [key: string]: string } })` | any |
These functions represent standard [http request methods](https://developer.mozilla.org/en-US/docs/Web/HTTP/Methods).
## Utils service functions
The following functions are available in scripting for the `utils` service.
| | |
| --- | --- |
| **Function (arguments)** | **Returned data type** |
| `getEntityUrl(type: string, publicId: string)` | string |
| `getFileUrl(fileSecret: string)` | string |
| `uuid()` | string |
As the name suggests, `getEntityURL` allows you to generate a URL (entity view) for the selected entity.
`getFileUrl` allows you to determine the correct download URL for a given file, based on it's secret. The secret is available in the entity's object data (via the 'files' field).
`uuid` generates a string which can be used when creating a new entity, if for example, you need to refer to that entity before the async `createEntity` function has completed.
## Example
Here is an example of what you can use scripting to achieve:
Suppose you want to assign yourself to a number of tasks (which may or may not already have other users assigned). You might also want to remove yourself from a bunch of tasks.
Of course, you could manually open each task and add/remove your name to/from the list of users, but with a button that calls a script action, you can automate this process:

Here is the script:
```
const fibery = context.getService('fibery');
// do this for all tasks
for (const entity of args.currentEntities) {
// make sure you have the information from the Assignees field
const entityWithAssignees = await fibery.getEntityById(entity.type, entity.id, ['Assignees']);
// extract the IDs of all users currently assigned
const assigneeIds = entityWithAssignees['Assignees'].map(({ id }) => id);
// get the ID of the user who pressed the button
const userId = args.currentUser['id'];
// if the user is already assigned...
if (assigneeIds.includes(userId)) {
// ... then remove them
await fibery.removeCollectionItem(entity.type, entity.id, 'Assignees',userId);
}
else {
// otherwise, add them
await fibery.addCollectionItem(entity.type, entity.id, 'Assignees', userId);
}
}
```
## FAQ
#### Is it possible to use an external script library in scripting automation?
Unfortunately, no.
#### Is there a utility I can use to decompress a zip file directly from a script automation?
I'm afraid the answer is "no" and we won't allow this. Compressing/decompressing are cpu-heavy operations, and our scripts are not designed for that.
# MANAGE YOUR SUBSCRIPTION
__________________________
## Fibery plan options
> [//]: # (callout;icon-type=icon;icon=moneybag;color=#4faf54)
> There are four plans in Fibery: Free, Standard, Pro, and Enterprise.
>
> We are encouraging you to check [this page](https://fibery.io/pricing) for all the details and differentiators.

### Free plan
It's a collaborative free plan. Not a camouflaged trial with the limit on database records, but a true free offering that a small team with simple processes can use indefinitely.
We hope having a free plan will reduce the friction of getting started with Fibery, especially inside departments of larger organizations where procurement might be quite a hassle.
* Free of charge
* Up to 10 users
* 10 databases at max
* Unlimited entities
* Automations: 250 runs → [Monthly usage caps for automations, integrations, and AI](https://the.fibery.io/@public/User_Guide/Guide/Monthly-usage-caps-for-automations,-integrations,-and-AI-384)
### Standard
* Costs $12 per user, per month with an annual subscription.
* Read-only users: unlimited
* Users: unlimited
* Databases: unlimited
* AI included
* Automations: 1,000 runs + 100 per paid seat → [Monthly usage caps for automations, integrations, and AI](https://the.fibery.io/@public/User_Guide/Guide/Monthly-usage-caps-for-automations,-integrations,-and-AI-384)
* Does not include: [User Groups](https://the.fibery.io/@public/User_Guide/Guide/User-Groups-47), [Custom Access Templates](https://the.fibery.io/@public/User_Guide/Guide/Custom-Access-Templates-240), and [SAML SSO](https://the.fibery.io/@public/User_Guide/Guide/SAML-SSO-49).
* No option to pay by invoice
### Pro
* Costs $20 per user, per month with an annual subscription.
Everything from Standard plus:
* No Fibery branding on Forms
* JS Automations
* Automations: 10,000 runs + 1,000 per paid seat → [Monthly usage caps for automations, integrations, and AI](https://the.fibery.io/@public/User_Guide/Guide/Monthly-usage-caps-for-automations,-integrations,-and-AI-384)
* Option to pay by invoice
* Advanced permissions
### Enterprise
* Costs $40 per user, per month with an annual subscription.
* Requires at least 25 users for purchase
Everything in Pro plus:
* No limits
* SAML
* Option to choose data residency
* SCIM Provisionig
* Fibery-to-Fibery sync
> [//]: # (callout;icon-type=icon;icon=moneybag;color=#4faf54)
> Please, note, that this is not the whole list of differentiators. [Check this page for more details](https://fibery.io/pricing)
### AI included
AI features are included in the regular paid plans.
* [AI in Automations](https://the.fibery.io/@public/User_Guide/Guide/AI-in-Automations-162)
* [AI Text Assistant](https://the.fibery.io/@public/User_Guide/Guide/AI-Text-Assistant-156)
* [Video and audio transcription](https://the.fibery.io/@public/User_Guide/Guide/Video-and-audio-transcription-313)
* [Find Highlights (manually and with AI help)](https://the.fibery.io/@public/User_Guide/Guide/Find-Highlights-(manually-and-with-AI-help)-308)
* [Semantic Search (AI Search)](https://the.fibery.io/@public/User_Guide/Guide/Semantic-Search-(AI-Search)-203)
* [Create Space Using AI](https://the.fibery.io/@public/User_Guide/Guide/Create-Space-Using-AI-174)

## Discounts:
We provide:
* **50% discount** for [non-profit](https://the.fibery.io/@public/forms/13DHmF57), [educational](https://the.fibery.io/@public/forms/XGkWgfEf), and [Ukrainian](https://the.fibery.io/@public/forms/pcQt7Rie) organizations.
* **100% discount** for [open-source](https://the.fibery.io/@public/forms/wLLEvDIy) projects.
* **6 months** for free [for startups](https://fibery.io/startup-program)
## Upgrade to a paid plan
1. Click `Settings` in the sidebar.
2. Click `Plan and Billing` option.
3. Choose your desired plan
4. Enter your account details, followed by your billing address details.
* Note: If you need to specify a VAT ID, this field will appear only after you select your country.
5. Enter your payment method information.
6. Review all information for accuracy, then confirm the upgrade.
> [//]: # (callout;icon-type=emoji;icon=:moneybag:;color=#fba32f)
> Payments are tricky beasts, and sometimes they will not work. Please, contact us in support chat (click `?` in the bottom right corner → `Chat with support`) and we will help.
## Apply promo code
That's the most hidden part! First, Click on the Plan name

Then you will see `Apply coupon` button. That's what we need!


## Change/update billing information
You can also anytime change your billing information - including card, card holder, VAT, address, etc.
1. Click on the name of your workspace.
2. Click `Settings` in the sidebar.
3. Click `Plan and Billing` option.


4. Click on `Manage Subscription` under your current plan.
5. Update the card details/billing address.
## Payment methods
Here are the payment methods we currently accept:
* Credit cards (self-service)
* PayPal (self-service)
* Apple Pay (Cmd/Ctrl-click the Upgrade button, ensure the popup isn't blocked. Apple Pay will appear as a payment option when using Safari on Mac)
* Bank transfer (Pro and Enterprise customers with annual or $1000+ invoices, contact us for payment details)
## How to access your invoices
All your invoices are available in the Settings → Plan and Billing. Additionally, they are automatically sent to the billing email address used in the Billing & Shipping addresses.
## Downgrade the plan or cancel the subscription
### Downgrade
You can downgrade to a cheaper plan any time, if you think it works better for you.
1. Click on the name of your workspace.
2. Click `Settings` in the sidebar.
3. Click `Plan and Billing` option.
4. Choose appropriate billing plan according to your needs

> [//]: # (callout;icon-type=icon;icon=exclamation-circle;color=#199EE3)
> If you first decided to switch from a paid plan to Free but then changed your mind 🥲, you can cancel the scheduled downgrade in the billing settings.
### Cancel the subscription
Feel free to cancel your subscription at any time. All the benefits of the paid plan will remain till the end of your billing cycle. Once the billing cycle is over, we won't charge you again, and your workspace will switch to the Free plan.
1. Click on the name of your workspace.
2. Click `Settings` in the sidebar.
3. Click `Plan and Billing` option.
4. Click on `Manage subscription` button
5. Choose the plan


You can also write an email to [new@fibery.io](mailto:new@fibery.io) and we will help as well.
## FAQ
### Do you offer any discounts?
Yes, check [Free offers and discounts](https://the.fibery.io/@public/User_Guide/Guide/Free-offers-and-discounts-61).
### What happens if we invite/deactivate users when on a paid plan?
When you invite a new user, we charge you proportionally to the time left in the billing cycle. For example, if you pay annually and there are six months left until the next payment, the prorated amount is $12\*(6/12)\*12=$72.
When you deactivate a user, the unspent amount will be deducted from your next bill.
Check out [User Management](https://the.fibery.io/@public/User_Guide/Guide/User-Management-45).
### How is the payment being processed?
We use Braintree to process your payment. [Braintree](https://www.braintreepayments.com/) handles billions of dollars in transactions and is trusted by companies like Uber, Dropbox, and GitHub. We do not store or handle your credit card information directly.
By the way, we have a [Braintree integration](https://the.fibery.io/@public/User_Guide/Guide/Braintree-integration-80) if you use this service too and want to connect your financial, sales customer care processes.
We use Chargebee to manage our subscriptions and billing. Chargebee acts as a subscription management platform, handling tasks such as invoicing, recurring billing, tax calculations, and payment retries. The *actual* payment processing is done by Braintree
### What if I want to purchase Enterprise but have less than 25 teammates?
You still have to purchase at least 25 seats.
* If you have 7 users on Pro plan and upgrade to Enterprise, we charge for 25 seats;
* If while being on Enterprise you have 30 users and deactivate 10 of them, we still charge for 25, not 20 seats.
### If I upgrade my plan mid-month, do my AI usage limits increase immediately?
Yes. When you upgrade (for example, from Standard to Pro), your AI usage limits are increased to the new plan's limits right away—without waiting for the next billing cycle. This means you can start using the higher AI quota on the same day you upgrade, even if you've already reached your previous plan's limit.
**Note:** The limit update is generally effective within a few minutes after the upgrade.
### What happens if my payment doesn't go through?
We will try to charge your card again and again once every few days. If this doesn't work, we will nudge you to update your payment method, gradually increasing the urgency:
* **day 0:** a banner appears in the sidebar for Admins;

* **day 14:** a banner now is visible to everyone;
* **day 21:** the workspace becomes locked while waiting for the payment;
* **day 28:** the subscription gets cancelled and the workspace is downgraded to a free plan.
# LINK HUBSPOT CRM DATA TO PRODUCT FEEDBACK
___________________________________________
> [//]: # (callout;icon-type=icon;icon=laughing;color=#199ee3)
> This guide is quite advanced, if you are not familiar with the Highlights concept, check [Highlights](https://the.fibery.io/@public/User_Guide/Guide/Highlights-310) first.
Integrating your HubSpot CRM with Fibery allows you to augment feedback data with valuable CRM information. It will help you to answer the following questions:
* What does a specific company want?
* Is this feedback from our target company?
* Is this feedback from a customer or a prospect? What is the deal size of this prospect?
* What are the backlog priorities based on company size, market segment, revenue, etc.?
You can have all this information in Fibery automatically.
## Overview
Here is what we should do:
1. Enable HubSpot sync
2. Auto-link HubSpot Contacts to feedback Sources and add Company lookup to every Source database
3. Auto-link Highlights to the Company from a Source database
4. Setup custom prioritization framework based on feedback volume and company size (or any other Company fields). You need this step only if you want to build this custom prioritization framework, otherwise you can just skip it.
## Enable HubSpot sync
Check [HubSpot integration](https://the.fibery.io/@public/User_Guide/Guide/HubSpot-integration-76) integration to install HubSpot. In general, it is very easy, just find HubSpot in Templates → Integrations and follow the steps.
Fibery creates HubSpot space and syncs all databases from HubSpot, including Contacts, Companies, Deals, etc.
## Auto-link HubSpot Contacts and Companies to feedback Sources
Now, we should connect feedback Sources to Contacts that get synced from HubSpot. The best ID for this is email. For example, you have Interview as a feedback source database, and there is an Email field where you put an email of a person who attended a call.
There is also an Email field in the Contact database, so our next step is to create a relationship between the Interview and Contact databases.
1. Go to Interview entity and click `New Field`, select `Relation`
2. Select Contact from the HubSpot space
3. Click `Advanced` and enable `Automatically link Interviews and Contacts`
4. Select `Email` field in the Interview database and select `Email` field in the Contact database
5. Save changes

Now, when you set an Email field for an Interview, a relation to HubSpot contact will be created automatically. Here is how it looks:

### Add Company lookup to a Source
Contact is not enough since all important information is stored in a Company. Let's link the Company to the Interview as well. This can be done via [Lookups](https://the.fibery.io/@public/User_Guide/Guide/Lookups-16) field:
1. Go to Interview entity and click `New Field`, select `Lookup`
2. Select `Contact` relation
3. Then select `Associated Company` field

Now, every interview is linked to a Company via Contact!

## Link Highlights to Company
The next step is to add Company relation to Highlights.
1. Navigate to `Settings` → `Highlights`
2. Click `New Field` → `Formula` for Highlight database and add the following formula named `Source Company`.
```
IfEmpty([Source → Interview].Company)
```
This ensures every Highlight created from an Interview is linked to a Company (if the Interview itself is linked to a Company).
For example, this feature has two Highlights, one from Test IO company (remember, this is a Company from HubSpot, and it appeared here automatically).

You can create a view that shows all Highlights for a single Company. For example, you can create a Table View, select Highlight as a database, and filter Highlights by some exact company. This way, you can see the requests and features related to a specific company.

> [//]: # (callout;icon-type=icon;icon=laughing;color=#6a849b)
> Note that if you have several Sources, you will have to make formula like this and mention every Source database (here we assume that you have Company relation in Interview, in Conversation and in Chat databases
>
> ```
> IfEmpty(
> [Source → Interview].Company,
> [Source → Conversation].Company,
> [Source → Chat].Company
> )
> ```
## Setup custom prioritization framework based on Company Size (or other fields)
Imagine that you want to calculate Feature priority based on feedback volume and value feedback from large companies more.
First, let's define the Score formula for a Highlight.
1. Navigate to `Settings` → `Highlights`
2. Click `New Field` → `Formula` for Highlight database and add the following formula named `Score`.
```
IfEmpty(Severity.Value, 1) *
If(
[Source Company].[Number of Employees] >= 100, 2,
If([Source Company].[Number of Employees] >= 20, 1.5,
1)
)
```
This formula takes into consideration the Highlight Severity value, see [Highlights and Targets formulas](https://the.fibery.io/@public/User_Guide/Guide/Highlights-and-Targets-formulas-312), and multiply it by the Company Size coefficient. We define the Company Size coefficient this way:
* 2 if a company has more than 100 employees
* 1.5 if a company has more than 20 employees
* 1 otherwise
Note how we extract `Number of Employees` information from a Company. Similarly, you can extract any information you store in HubSpot Company and use it to calculate Score, like Total Revenue, Country, Deal Value, etc.
For example, the Time Tracking feature has two linked Highlights, and every Highlight has some Score.

The final step is to define `Priority Score` for Features.
The simplest way is just to summarize all linked Highlights Scores:
```
Highlights.Sum(Score)
```
Or maybe you want to consider Effort. Let's say you estimate Features using T-shirt sizes.
In this case, the formula may look like this (basically, we divide by effort since large effort should reduce priority):
```
(Highlights.Sum(Score) * 10)/IfEmpty(Effort.Value, 1)
```

When you have the Priority Score field set, the final step is to create a Backlog view and sort features by Priority Score:

# LINK EMAILS TO ACCOUNTS, LEADS, CUSTOMERS IN FIBERY CRM
_________________________________________________________
## How to link Emails to Accounts, Leads, Customers in Fibery CRM?
You have your emails in Fibery, now what?
Let's say, you have an Accounts database with all leads and customers and you want to connect emails to these accounts. Here is the main idea and steps. We will setup an auto-relation between Account and Email database based on domain.
1. Every Account you want to link emails to should have a field to represent the `Domain Name` (e.g. [fibery.io](https://fibery.io)). We will use this field to link Emails to Accounts via an automatic relation. You might already have a `Website` field already in the Accounts db. In this case you could use the `Website` field to create a `Domain Name` formula field. It will look like this:
```
Replace(
Replace(Replace(Replace(Website, "http://", ""), "https://", ""), "www.", ""),
"/",
""
)
```
2. For the sync'd Contact database, we will setup a `Domain Name` field as a formula, where we extract the domain from Contact's Email address. It will look like this:
```
Right(Email, Length(Email) - Find(Email, "@"))
```
3. The Email database is more complicated, since you will be syncing sent and received emails and so we should choose correct domain depending on that. The Email database is linked to the Contact database via several relations, including `From` and `To`. We'll create a `Customer Domain` formula field in the Email database. If From Domain is your company domain, then we ignore it and take first domain from `To` (it is a list of Contacts). Here is the formula:
```
If(
From.[Domain Name] != "fibery.io",
From.[Domain Name],
To.Sort([Public Id]).First().[Domain Name]
)
```
4. Now we can setup an automatic relation between Email and Account. Create a new relation, enable "Automatically link Emails to Accounts" in the Advanced section and select to match on the `Customer Domain` field for Email and the `Domain Name` for Account.

5. The last step is to properly setup the Emails relation view inside an Account entity. By default, a List is created automatically, but you will probably want to group it by Thread. For any Account entity, configure the Emails relation view so that `Thread (recursive)` is the grouping option for the list.

# PRODUCT MANAGEMENT TEMPLATE
_____________________________
> [//]: # (callout;icon-type=icon;icon=plus-circle;color=#6A849B)
> This template can be installed by selecting the Product Management option during the [Fibery signup](https://fibery.io/sign-up "https://fibery.io/sign-up").
Fibery's **Product Management** solution is a powerful tool designed to streamline capturing, organizing, and acting upon customer feedback. Integrating customer insights into your Product Hierarchy allows you to prioritize backlog items more effectively, create a more accurate roadmap, and ensure that your product development efforts always align with customer needs.

The [Highlights](https://the.fibery.io/@public/User_Guide/Guide/Highlights-310) feature seamlessly integrates customer insights into your Product Hierarchy, enabling you to prioritize Backlog items more effectively, create a Product Roadmap, and ensure that your product development efforts are always in sync with customer needs.
> [//]: # (callout;icon-type=icon;icon=presentation;color=#199ee3)
> Check the [Feedback Management concept](https://the.fibery.io/@public/document/Feedback Management concept-12314) whiteboard overview.
# Collect customer feedback
Feedback can come from various sources, such as user research calls, support tickets, notes from the sales team, emails, surveys, and more. Fibery is designed to collect all this feedback in one place, making it easy to process.
To process feedback, we use a Highlights database that allows you to connect feedback (source) to product hierarchy (target) by identifying insights or facts from the feedback. A segment of this information is known as a **Highlight**.
> [//]: # (callout;icon-type=icon;icon=book-open;color=#199ee3)
> Learn more about [Highlights](https://the.fibery.io/@public/User_Guide/Guide/Highlights-310)
##
## Feedback sources
In the Product management template, there are two default source sets up in the Highlight settings:
**Interview:** Nowadays, most user interviews happen during video calls, where the video and audio are recorded and processed later. When you have a recorded user interview, you can add it to a specific document, and Fibery can create a transcript that you can use as a feedback source.
> [//]: # (callout;icon-type=icon;icon=book-open;color=#199ee3)
> Learn how to [Manage interview transcriptions](https://the.fibery.io/@public/User_Guide/Guide/Manage-interview-transcriptions-326)
**Web:** You can discover valuable feedback beyond the usual integration on X. You could browse Reddit or read articles about competitors to find useful insights. Our Chrome extension lets you send selected information directly to the Fibery database from your browser. It works flawlessly and streamlines the data collection process.
> [//]: # (callout;icon-type=icon;icon=book-open;color=#199ee3)
> Learn more about [Fibery Browser Extension (Chrome)](https://the.fibery.io/@public/User_Guide/Guide/Fibery-Browser-Extension-(Chrome)-217)
You can directly add other integrations (Intercom, Zendesk, Discourse, Email, Slack) in the [Highlights database settings](https://the.fibery.io/@public/User_Guide/Guide/Highlights-Overview-310/anchor=How-to-setup-Highlights--247f049e-33c0-4d21-8476-8a7a87b6ee7b).
## Feedback views
**Feedback Inbox** functions similarly to your email inbox by gathering feedback from various sources in one location.
You can view incoming items and extract the key points by creating Highlights. After completing your review, you can click the "Reviewed" button to remove it from the Feedback Inbox so you can concentrate on the rest of the unprocessed feedback.
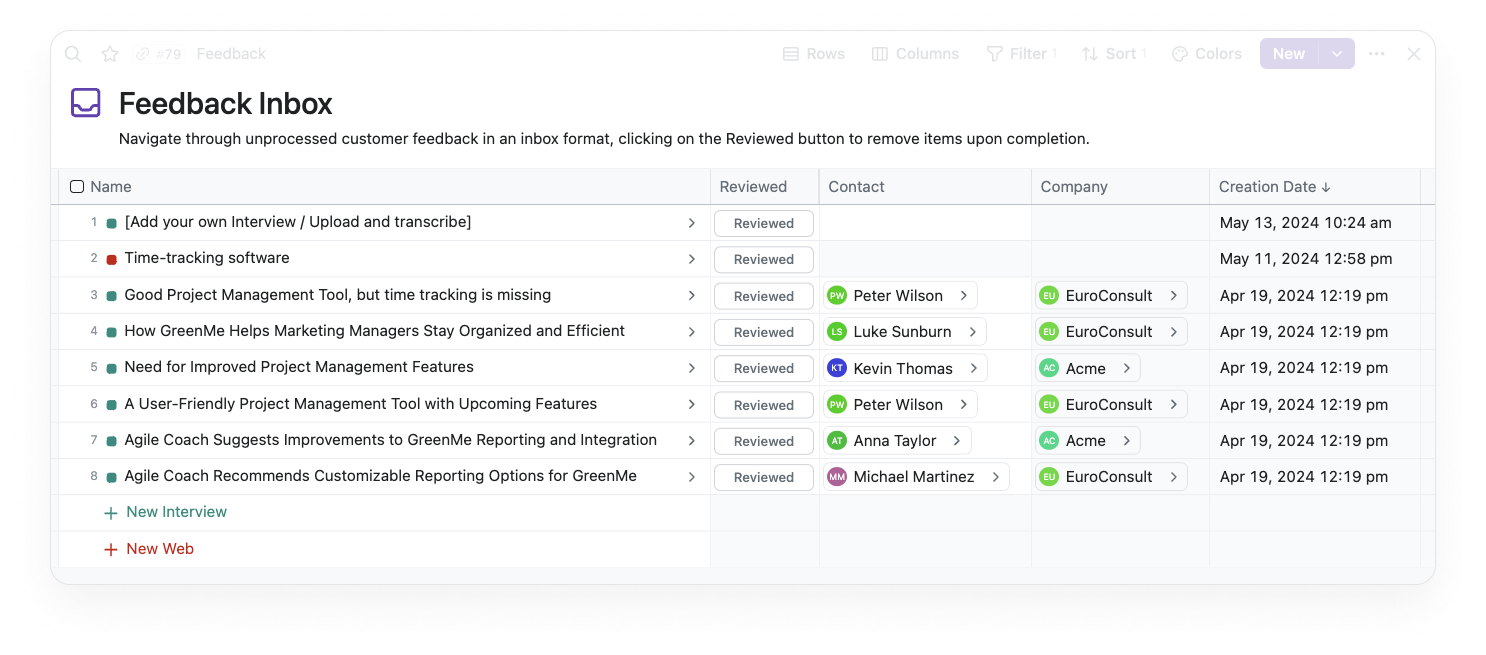
**Feedback Feed** is like a news portal where you can see the latest feedback from different sources. You search and filter the way you want to understand what is happening in the feedback collection.
In the Feedback view, you can find a lot of useful information about the feedback, which is fully customizable.
> [//]: # (callout;icon-type=icon;icon=book-open;color=#199ee3)
> Learn how to customize the [Feed View](https://the.fibery.io/@public/User_Guide/Guide/Feed-View-14)
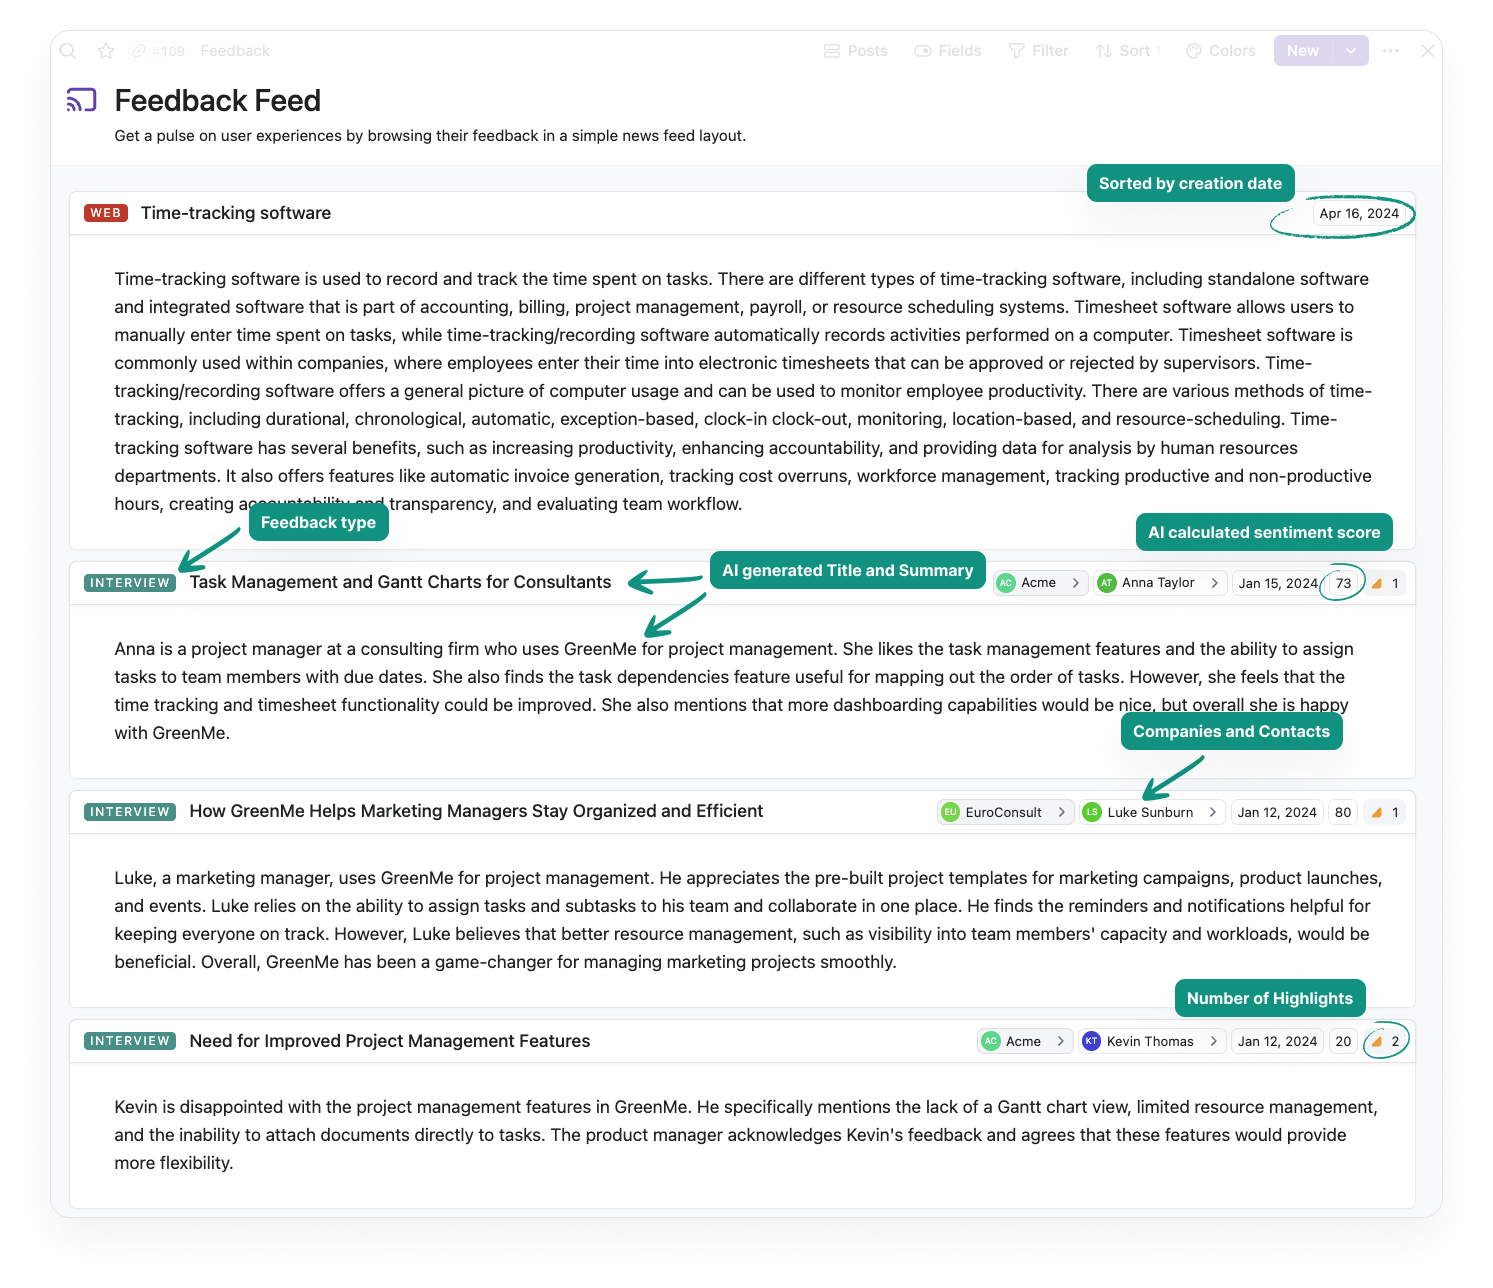
# The Product Hierarchy
**Product Hierarchy** is a structured representation of the various elements of a software product. This hierarchy can be broken down into the following levels:
* **Product** is the highest hierarchy level and represents the software solution being developed. It encompasses all the components, features, and subfeatures of the software. This is only needed when you have more than one product in your portfolio.
* **Component** is a unique part of a product that serves a particular function. It usually consists of several features and can function independently of other components. For instance, in project management software, components may include task management, team collaboration, and reporting. Components can also contain other components.
* **Feature** is a specific functionality within a component that provides value to the user. For example, within the task management component of project management software, features could include task creation, task assignment, and task tracking. Features can also contain other components.
This hierarchy helps organize the development process, making planning, tracking, and managing work easier. It also aids in communicating the software's structure and functionality to stakeholders, including developers, project managers, and end-users.
> [//]: # (callout;icon-type=icon;icon=exclamation-circle;color=#6A849B)
> Like most features in Fibery, the Product Hierarchy is highly adaptable. You can modify the names, the number of levels, and many other aspects to suit your unique needs perfectly.
# Default Highlights setup
The following default Highlight database settings are included in this template.
### Source
Sources of feedback include the Interview and Web databases mentioned above. Only from these database settings can you create a Highlight.
### Target
These databases represent the Product Hierarchy that the Highlights refer to.
### Highlight
Highlight is a special Fibery database with features similar to all other databases. The default setup includes the following fields, formulas, and rules.
**Name:** This field is automatically generated by the "Generated Highlight Title" rule that uses AI to add the name to the Highlight based on the highlighted text.
**Severity:** This is where you can specify the severity level of the highlight, which will impact the priority calculation.
**Score:** This field will store the severity value for further processing and display the severity in numerical form.
> [//]: # (callout;icon-type=icon;icon=tachometer-fast;color=#199ee3)
> Learn more about how to [Customize Highlights](https://the.fibery.io/@public/User_Guide/Guide/Customize-Highlights-324)
# Capture Highlights
Highlights are an important connection between customer feedback and the Product Hierarchy. Once a Highlight has been identified, it can be linked to any level in the Product Hierarchy.
> [//]: # (callout;icon-type=icon;icon=book-open;color=#199ee3)
> Learn how to [Find Highlights (manually and with AI help)](https://the.fibery.io/@public/User_Guide/Guide/Find-Highlights-(manually-and-with-AI-help)-308)
**Highlight view** view shows all the created Highlights.
# Backlog prioritization
**Backlog** view shows the Feature priority list based on the severity of the Highlight.
> [//]: # (callout;icon-type=icon;icon=abacus;color=#199ee3)
> Learn how the [Prioritization score](https://the.fibery.io/@public/User_Guide/Guide/Prioritization-score-325) is calculated.
**The roadmap view displays a plan's timeline**. It arranges all features with a time range organized by Components.
> [//]: # (callout;icon-type=icon;icon=book-open;color=#199ee3)
> Learn more about the [Timeline](https://the.fibery.io/@public/Intercom/Tag/Timeline-68) view.
**Feature progress** view provides a dynamic Kanban-style board that visually represents the development status of each feature.
While Fibery provides a comprehensive [solution for software development](https://fibery.io/software-development), you can enhance its capabilities by connecting with third-party [software development tools](https://fibery.io/templates#software-development).

# Customer Management
The Feedback Management workspace template utilizes two interconnected databases: **Companies** and **Contact**. \
This structure is pivotal in tracing the origins of the feedback.
Linking feedback directly to specific contacts and their companies allows for a more refined approach to prioritizing user needs based on direct customer input.
In addition to building a [Sales CRM in Fibery](https://fibery.io/templates/sales-crm), connecting third-party CRM is possible. Tools like [HubSpot can be seamlessly integrated](https://fibery.io/templates/hubspot), enriching our customer data and automating workflows. This integration provides a more comprehensive view of customer interactions and behaviors, enabling personalized customer engagement and strategic decision-making.
Syncing data between platforms eliminates silos and ensures customer information is up-to-date and actionable. Sales tools like Hubspot can also provide feedback collected from customers.

# HOW TO COLLECT FEEDBACK ABOUT PUBLIC ROADMAP
______________________________________________
Many tools help you to collect feedback from users.
Here are the main ways we suggest you try:
* Community-building tools
* Discourse
* Slack
* Others
* Public Forms
* Chat tools
* Intercom
* Zendesk
* Others
Let's go through every of those sections one by one.
# BITBUCKET INTEGRATION
_______________________
Sync Projects, Repositories, Branches, Pull Requests and Commits into Fibery. A common case is to link Pull Requests to real work items, like Features, User Stories, or Tasks. Thus you will see Pull Requests statuses right inside Fibery.
## Setup BitBucket sync
1. Navigate to `Templates` and find `Bitbucket` template
2. Click `Sync`.
3. Authorize the `Bitbucket` app.
4. Choose what databases you want to sync from Bitbucket. Specify starting date for the sync, by default it is a month ago, but you may want to fetch all the data.
5. Click `Sync now` and wait. Bitbucket Space will appear in the sidebar and all the data should be synced eventually.
## Link Pull Requests to Features (or any other Databases)
To have this connections, you have to encode `Feature Id` in your Merge Requests. In our team we include Feature Id into a Pull Requests name, like this:
```
[feature/2013] Documents ant Whiteboards collections on entity as extensions
```
The main idea is to extract `Feature Id` from Pull Request name and link Feature and Pull Request Databases via automatic rule ([Auto-linking (Set Relations Automatically)](https://the.fibery.io/@public/User_Guide/Guide/Auto-linking-(Set-Relations-Automatically)-50)). This is a two-steps process.
### Step 1. Create Feature Id formula field inside Merge Request
Open any Pull Request and add a new formula, in our case formula will look like this:

Here is the formula for your convenience:
```
If(StartsWith(Name,"\[feature/"),Trim(ReplaceRegex(Name,"\[feature\/(\d+).+"," \1 ")),"")
```
### Step 2. Create automatic connection between Pull Request and Feature
Inside a Pull Request create a new `Relation` field, `set relation to Feature and set automatic rule` to match any Pull Request with a Feature by Id.
As a result, you will have the list of Pull Requests inside a Feature.
## FAQ
#### We adhere to the scheme when there is a central repository and forks of this repository from the developers. Will the plugin work correctly in this format? Will it be necessary to add each fork manually during setup?
It will work out of the box if the repositories are inside the same project. in this case, during configuration, you need to leave the Repositories field empty.
#### Is it possible to integrate with Bitbucket Data Center?
Please, let us know, if you need - we will considering adding that.
# 🌴 VACATION TRACKING
______________________
In the forth and the last part of the guide for HR Workspace Template, we'll explain how to set the Vacation tracking process. Well, not only vacations in fact. Also Sick days, Overtime, Public holidays, etc. Perfect for remote teams!
If you prefer video, check this 16-min detailed step-by-step explanation:
[https://youtu.be/CaBRMJ7lKQk?si=WmwTj-wMNXGEQo5B](https://youtu.be/CaBRMJ7lKQk?si=WmwTj-wMNXGEQo5B)
If you prefer text, explore the **Vacations and Business Calendar Spaces** with this guide. While doing it, you'll also be able to test whether the template works for you, and make necessary changes if needed.
We will start with the easy part, where we will check how to add sick days, vacations, etc. Then, we will switch to a more complicated but necessary part of the business calendar.
## Step 1. Generate yearly allocation for every employee
Employees may have different number of vacation days per year. These numbers can vary because of a country, years spent in a company, and other attributes. We keep this information in Allocation Database.
In our case, Winnie joined the company in October, so we have to set allocation manually to proportionally reduce the number of vacation days left.
To do that, let's get back to our Employees Grid in Employee Management Workspace.

There is a Button called `Add vacation allocation`. When you click it, you'll need to fill in information about number of days and year for selected type of allocation. Hit `Run`, and all the info will be recorded in Allocation Database.

To understand how Buttons work, check the relevant guide — [Buttons](https://the.fibery.io/@public/User_Guide/Guide/Buttons-52).
We need to know the sum of all allocations added per Employee to calculate their days off left - we'll get there soon.
## Step 2. Add new vacation, sick day, or overtime
We also have Vacation, Sick Leave, and Overtime Databases.
There are several ways to record new information in them.
For example, the Vacations Timeline is a perfect for adding long events that take more than three days. To create a new event (vacation, sick day, overtime), click `New` in the upper right corner and choose what you want to log in.

You can also do that on any other View using Forms. The same as we did with Meetings before, remember?

And a nice bonus.
As everything lives in a single tool, we can create a View that shows who is off today, who is sick, and who is enjoying a day off. For that, we just need to adjust `Filter` a bit. We set a dynamic Filter that compares the date of event with today's date.

Puzzled how it works? Setting such Views with Filters it's just a matter of time and practice 💪
## Step 3. Get access to the powerful reporting
All the previous steps where needed to set a up a neat and powerful Report on days off left.
Ok, so what we have? Available day offs are calculated based on previously added allocations. Vacations are periods of time off from work. Overtime is working during weekends or public holidays.
So to combine all this information from Allocation, Overtime, Sick Leave, and Vacation Databases, we create a Report that displays days off left for each employee. You have an out-of-the-box one after the template installation.

If you like it and want to have more power, we recommend checking [Reports](https://the.fibery.io/@public/User_Guide/Guide/Reports-346) guide. It's not an easy part but is really a powerful one.
Here is one extra sneak pic from the Fibery team. When our founder, Michael Dubakov, moved to Cyprus, he definitely started getting sick less often! ☀ï¸

## Step 4. Setup business calendar
That's a part of the solution where you don't have to add anything. This is what you only need to update once a year, and that's it.
🔨 You need to upload public holidays for countries where your employees are located.
You can find the source data at [Timeanddate](https://www.timeanddate.com/holidays/ "https://www.timeanddate.com/holidays/"), then move it to the spreadsheet, and then to Fibery Table View.
âœ”ï¸ Our setup will exclude uploaded public holidays from the vacation duration.
Once you understand how the processes work and feel more confident with all those things, I recommend watching this video about Vacations Pro solution.
[https://youtu.be/UC0hZZVxbJI?si=bCmu2QB47pvQG5Kh](https://youtu.be/UC0hZZVxbJI?si=bCmu2QB47pvQG5Kh)
## Thank you 💖
That was the final part of our current solution.
Of course, it is a template. You may require approval management. You may need to establish strict permissions. You may need to have a skill matrix.
Whatever you need, please send the questions in Intercom chat[ or in our community](https://community.fibery.io/). We will answer and update this guide accordingly.
# AUTOMATICALLY SHARE ENTITIES VIA PEOPLE FIELD
_______________________________________________
In addition to manually sharing an Entity (see [Share Entity](https://the.fibery.io/@public/User_Guide/Guide/Share-Entity-233)), you can configure automatic access for assignees, owners, reviewers, etc.

> [//]: # (callout;icon-type=emoji;icon=:busts_in_silhouette:;color=#1fbed3)
> The same mechanism works for User Groups: [Automatically Share Entities with linked Groups](https://the.fibery.io/@public/User_Guide/Guide/Automatically-Share-Entities-with-linked-Groups-395).
## When to use automatic sharing
These are the typical use cases:
* A freelancer should only see and edit the Tasks they are assigned to.
* Every person should be able to see everything related to their Employee Entity.
* A sales manager should only see their Leads and their Contacts and Deals.
* A requester should be able to see and update the Tickets they create.
If you find yourself repeatedly providing access to someone who is already assigned to an Entity, consider automatic sharing. Once configured, it will save you and your teammates hundreds of clicks and will prevent awkward situations when an assignee can't access their task.
> [//]: # (callout;icon-type=emoji;icon=:point_up:;color=#fba32f)
> Guests won't receive access via automatic sharing.
## How to configure automatic sharing
Instead of manually sharing every Entity, you provide access to all users that are somehow linked to an Entity.
To configure automatic access, navigate to the corresponding Database (e.g. by typing its name in search) and select `Share` option in the context menu:

Automatic sharing is configured per Field: for example, if Task DB has `Assignees` and `Reviewer`, you can grant less permissions to assignees and more to the reviewer. Automatic sharing works via any user relation, including `Created By`:

> [//]: # (callout;icon-type=emoji;icon=:unicorn_face:;color=#1fbed3)
> Customizing access is exclusive to the [Pro Plan](https://fibery.io/pricing). When on Standard, you have a choice between no access and `Owner` access.
You can also manage automatic access in the People Field's settings:

## How to extend automatic access

You can share not only an Entity itself (e.g. Project) but also all the Entities linked to it (e.g. Tasks and Time Logs). If you are not familiar with the access templates yet, check out [Share Entity](https://the.fibery.io/@public/User_Guide/Guide/Share-Entity-233) and [Custom Access Templates](https://the.fibery.io/@public/User_Guide/Guide/Custom-Access-Templates-240).
> [//]: # (callout;icon-type=emoji;icon=:point_up:;color=#6A849B)
> While all other relations support custom access templates, `Created By` does not. If that's what you need, please let us know.
Automatic access works independently of Space access (see [Share Space](https://the.fibery.io/@public/User_Guide/Guide/Share-Space-232)): even with access to assignees disabled, Space Contributors will still be able to edit the Entities they are assigned to. Eventually, we are looking to deprecate `Contributor` Space access to simplify things.
## What changes with automatic sharing
Everyone assigning people gets a heads-up to prevent accidental sharing. If automatic sharing is enabled for a Field, a hint appears in the user dropdown:

> [//]: # (callout;icon-type=emoji;icon=:exclamation:;color=#fba32f)
> Unlike with manual sharing, we don't check if the person assigning someone has enough access to share the Entity. If they have edit access, they can assign => they can automatically provide access.
## Who can configure automatic sharing
To configure automatic access via User relations, one has to be a `Creator` in the Space and have all the capabilities of the selected access template.
For example, to enable `Editor` automatic access for Features DB, one has to have the following capabilities:
* **Template-independent**
* configure the Features DB itself;
* revoke access to all Features;
* see all Users in the workspace.
* **Template-specific**
* see all Features;
* comment on all Features;
* update all Features;
* delete all Features.
If you are having trouble configuring automatic access due to permissions, consider asking an Admin for help.
## ðŸŽžï¸ Example: automatically sharing everything related to an Employee with them
Grant every employee access to their own performance reviews, vacations, and sick leaves without touching the `Share` button:
## FAQ
* **If we change automatic access from `Owner` to `Viewer`, will it affect the existing assignees or only the future ones?**\
Both the existing and the future ones.
* **Are the items shared via automatic access visible in the `Shared with Me` section of the sidebar?**\
They are not since there can be too many of them.
* **What if we disable or delete a custom access template used in automatic access?**\
Disabling won't affect automatic access that's already been configured while deleting will stop it from working.
* **Can we use automatic access via Formula or Lookup user relation?**\
You can!
* **What happens if I delete a user relation that has automatic access enabled and later restore it?**\
Automatic access will be turned off because of the potential security vulnerabilities.
# PRIVATE SPACE
_______________
Private Space lives in Personal sidebar section. The Private Space section is visible to you only and hidden even from admins. You can put **Documents**, **Whiteboards**, and **Views** here and do whatever you want with them.
> [//]: # (callout;icon-type=icon;icon=exclamation-circle;color=#fba32f)
> It is not possible to create private Databases
Here are several useful cases:
* Start and store unfinished documents in Private Space section and move them into some public space later when you are ready to share them.
* Create several Views that you need and don't touch other parts of the sidebar at all.
* Experiment with Views safely.
## Creating views, documents and whiteboards in Private Space
To create a private view or a document, click `+` icon near Private Space and add it.

* Any View/Doc/Whiteboard can be dragged from Private Space to another Space where you have permission to create Views/Docs
* When you mention someone in Private Space, the user won't receive [Inbox and notifications](https://the.fibery.io/@public/User_Guide/Guide/Inbox-and-notifications-35)
## Export
When you [Export your data](https://the.fibery.io/@public/User_Guide/Guide/Export-your-data-63) → Private Space is exported as well.
You can also export documents in Private Space to markdown
## FAQ
### Can I create my own personal databases?
No. We are collecting feedback to decide whether it should be implemented. Please share your case with us (click `Help & Support` in the bottom right and `Human Support`)
### What if I mention someone in a Document in Private Space?
In this case, this person will not receive any notification since your space is private.
### What if I delete some entity from a Table/Board/… View in Private Space?
It will be deleted **everywhere**. A View is just a window to the database, and by deleting an entity via a view, you are deleting it from its database.
# INTEGRATION TEMPLATES
_______________________
Integrations are ready-made services that make it simple to configure and customize specific processes.
Integrations in Fibery are quite unusual. They replicate a part of an external app domain by creating [Databases](https://the.fibery.io/@public/User_Guide/Guide/Databases-7) in Fibery and feeding them with the external data.
## Setup integrations
1. Navigate to `Templates` (left bottom button) and click `Integrations` section.
2. Select the required integration and click `Sync` button.
3. Follow the steps, set up auth, and select the database to sync from an external system.
4. New integration space will appear in the sidebar when everything is OK.
## Modify integrations
1. Navigate to the Integration space in the sidebar.
2. Click on integration database (database name).
3. Click … in the top right corner and select `Configure`.
4. Make the required changes.

You can also exclude unnecessary Fields and rename confusing ones via `Edit Fields to Sync`:

In the integration window, you can configure the following settings:
**Sync data:** This setting controls how often Fibery data is synchronized with the integration (in this case, Slack).
By default, synchronization is set to "Manual," meaning it occurs only when clicking the "Sync now" button.
You can also select automatic synchronization intervals of 60 minutes, 120 minutes, 240 minutes, or Daily.

**Receive instant data updates with webhooks:** This setting is available for integrations that support webhook synchronization.
Webhook sync allows for near-instant updates between systems (like Fibery and Slack). Instead of waiting for scheduled sync intervals, a webhook sends information when a change happens in the source system. This allows you to receive certain data types near-instantly, even if your overall synchronization schedule is set to a daily interval.
Webhooks can only send data that the source system's API makes available. If certain data isn't exposed through the API, it won't be available via webhook updates. For comprehensive synchronization, we use a combination of webhook updates (for immediate changes) and scheduled syncs (for a complete data refresh).
If this setting is turned OFF, synchronization will occur primarily according to your chosen synchronization interval settings.
**Do not delete Fibery entities:** This option determines whether Fibery entities deleted in the integrated system (in that case, in Slack) should also be deleted in Fibery. By default, it is turned OFF.
**Last configured by:** It shows who last configured the synchronization settings.
**Sync results:** This section shows the results of the last synchronization, including the number of entities in the databases that were synced successfully.
**Disconnect and Migrate**: remove the integration while converting its Databases into native Fibery DBs.
**Remove and Delete**: permanently delete an integration, including the associated Databases and data (hard delete).
> [//]: # (callout;icon-type=icon;icon=exclamation-circle;color=#d40915)
> To avoid unexpected sync issues, the sync configuration will disable newly added third-party fields to already running integrations.
## Integration Databases
For Intercom integration, we import Companies, Contacts, and Conversations connected together. These are **Integration Databases**.
For Integration Databases almost all fields are read-only since the content of the fields is retrieved from an external system (Airtable in the example below):

However, you can work with Integration Databases as with other Databases. For example, you can create Views to see a list of Features:

You can enhance Integration Databases with additional [Fields](https://the.fibery.io/@public/User_Guide/Guide/Fields-15) and connect them to other Fibery native [Databases](https://the.fibery.io/@public/User_Guide/Guide/Databases-7) using [Relations](https://the.fibery.io/@public/User_Guide/Guide/Relations-17). For example, you might want to connect a Company from your Intercom integration to an Account in your Fibery CRM.
Usually, you want to have these connections between Databases automatically. You can do that using the [Auto-linking (Set Relations Automatically)](https://the.fibery.io/@public/User_Guide/Guide/Auto-linking-(Set-Relations-Automatically)-50) feature. For example, you can match Company and Account by Name.
> [//]: # (callout;icon-type=icon;icon=book-open;color=#4faf54)
> Check [Fibery's approach to integration](https://fibery.io/blog/fibery-approach-to-integration/ "https://fibery.io/blog/fibery-approach-to-integration/") article to learn more.
# CREATE SPACE USING AI
_______________________
Creating a new space in Fibery takes about 1-3 minutes, but it's worth the wait! By automating the creation of databases, fields, and views, Fibery saves you a ton of time in the long run. The dummy data that populates the databases will also give you a clear vision on how the data is linked between databases. So sit tight, it won't be long before you're up and running!
> [//]: # (callout;icon-type=emoji;icon=:crown:;color=#FC551F)
> Accessing this feature requires **Admin** permissions.
1. Click + in the left sidebar, select Space → Generate with AI
2. This shows you a popup asking you to describe the `Space` you need.

## What is created?
When you create a new space with AI, several artefacts are automatically generated to help you get started:
| | |
| --- | --- |
| Databases with Fields and Relations | Based on the request to the AI, we set up all the necessary [Fields](https://the.fibery.io/@public/User_Guide/Guide/Fields-15) and [Relations](https://the.fibery.io/@public/User_Guide/Guide/Relations-17), so you can organize your things right away. |
| Sample data | AI creates sample data you can play around with to show you how everything works. This sample data is designed to help you understand how to use Fibery and can be customized to fit your needs: you can change it, get rid of it, or add more stuff as you like. |
| Basic Views | [Views](https://the.fibery.io/@public/User_Guide/Guide/Views-8) are like different ways of looking at your data. AI sets up basic views, like [Table View](https://the.fibery.io/@public/User_Guide/Guide/Table-View-11) and [Board View](https://the.fibery.io/@public/User_Guide/Guide/Board-View-9), based on the databases, so you can easily see and work with your data. You can also change your views or existing ones to suit your needs. |
| Overview document | We call it Read.me document, a little cheat sheet AI makes for you. It tells you the name of your space and what databases and fields were created. You can change it to give your team more information or help them get started. |
## Tips on Talking with our AI
There are a few different ways you can prompt our AI. Here are a few examples to get you started:
| | |
| --- | --- |
| Brief Description | Software Testing Fishing tracking |
| Simple/Complex Sentence | I want to manage my personal tasks and to-do lists. I want to manage my bookstore's inventory and orders, store customer information and order history, categorize books by genre, and add attributes like page number and weight to calculate transportation costs and keep track of my inventory more efficiently. |
| Verbose Description | I am Watto from Star Wars, and I own a junk shop in Mos Espa, on Tatooine. I am interested in organizing the inventory of my shop, and I am also a fan of podracing. I want to keep track of my bets on podracing, especially those involving my junk shop creations. I am Boba Fett from Star Wars, and I work as a freelance bounty hunter throughout the galaxy. I want to organize my contracts, expenses, and income to better understand my financial results. Additionally, I want to keep track of my clients and the planet systems I've worked on for each contract. |
## Configure Space via AI commands
You can also modify Spaces using AI commands. For example, here we create a new Account database in CRM space with some fields:
What you can do?
* Create, delete, and rename databases
* Create fields of various types and with specified values, rename and delete fields
* Create relations, delete relations
* Rename databases and fields
It can be handy if you need to quickly add many fields into some database or don't want to deal with UI.
The operation is relatively dangerous, so this is a two-step process. First, you describe what you need and click `Generate changes` button, Fibery shows what it will do, and you can apply these changes.

## Limitations
The space creation AI can't create [Formulas](https://the.fibery.io/@public/User_Guide/Guide/Formulas-39), [Rules](https://the.fibery.io/@public/User_Guide/Guide/Rules-51), or more advanced [Views](https://the.fibery.io/@public/User_Guide/Guide/Views-8)… yet. If you are looking for these examples, take a look through our [Templates](https://the.fibery.io/@public/User_Guide/Guide/Templates-19). These are created by our team, tailored for a specific solution.
# GANTT VIEW
____________
The **Gantt View** is a powerful project management visualization in Fibery that displays entities as horizontal bars on a timeline, showing their planned dates, dependencies, and hierarchical relationships. This view is perfect for project planning, resource management, and tracking progress across complex, interconnected work items.
> [//]: # (callout;icon-type=emoji;icon=:unicorn_face:;color=#9c2baf)
> Gantt View is available in [Pro and Enterprise plans](https://fibery.io/pricing) only.

## Gantt vs. Timeline
Here are the main differences between Gantt and [Timeline View](https://the.fibery.io/@public/User_Guide/Guide/Timeline-View-12):
* Gantt view visualizes hierarchy much better, so you can see hierarchy like Product → Epics → Features → Tasks
* You can re-order entities vertically
* You can show/hide fields in the left hierarchy panel and on the main time panel
* Gantt view has no backlog, it shows all entities according to filters
* Planning usually much faster on Gantt, since you can quickly create new items and plan them for dates with a single click.
## Add Gantt view to a space
1. Click + icon near Space name or folder
2. Select Views → Gantt from the menu
## Configure Gantt view
1. Click Items and select one or more databases to be visualized as a part of hierarchy on Gantt View.
1. You can also have nested entities with self-relations any level deep.
2. Select date fields. It can be a single Date Range field or two different fields that you will use as start/finish fields. In most cases Date Range is preferable.

## Configure visible fields for rows and items
You may select what [Fields](https://the.fibery.io/@public/User_Guide/Guide/Fields-15) will be visible on items and lanes:
1. Click `Fields` in the top menu
2. Select the fields you want to see. You can show unique fields for every database, just click on a database on the left and select the required fields.

## Add new entities
There are several ways to add new entities.
1. Click `+ New` button in the top menu
2. Rich click on top level entity to add a lower level entity. For example, here we are adding a new Task to Phase.

## Open entities
Just click on a lane or item and an entity will be opened on the right.


## Change entities dates and plan entities
You may drag and drop cards to change entities' dates.
1. Drag the left or right side of the row if you want to change start/end date respectively.
2. Drag the whole row if you want to change both dates at the same time.
Entity without dates can be quickly planned to some dates with a single click. When you move mouse cursor over timeline area for this entity, placeholder becomes visible and you can click to set the dates.

## Change vertical position
You may change vertical position of cards using drag and drop.
> [//]: # (callout;icon-type=icon;icon=exclamation-circle;color=#fba32f)
> Make sure that you have no custom sorting enabled, otherwise vertical drag and drop will not work
It can be handy to organize the order of the entities.

## Configure secondary dates
You can display secondary pair of dates on a Gantt View. The most popular use case is Planned vs. Actual dates. Click `Items` and then click `Add secondary dates` button. Select dates fields.
## Filter cards
You may filter rows.
1. Click `Filter` in the top menu
2. Select required fields and build filter conditions
## Hide empty groups
Make your gantt denser by removing groups that don't contain any entities via `Hide Empty Groups`:

## Sort rows and lanes
You may sort rows and lanes by fields.
1. Click `Sort` on the top menu.
2. Add one or more sorting rules.
## Color cards
You may color code rows to highlight some important things. For example, mark features that are in progress green.
1. Click on `Colors` in the top menu.
2. Set one or many color rules.
## Manage Dependencies
You can manage [Dependencies](https://the.fibery.io/@public/User_Guide/Guide/Dependencies-392) on a Gantt View. Dependency is a self-relation. Click Enable Dependencies for some database and you will be able to see, create and delete dependencies in a timeline area.
### Creating and deleting dependencies
Put cursor over a card, find small circle and drag a arrow from this circle to another card to create a dependency.
Put cursor over an arrow and click â“ circle to delete a dependency.

When dates of cards overlap, relation is red to indicate overlapping.
### Card shifting strategies
On a timeline dependent cards can change dates automatically. There are three strategies to select from:
* Do not automatically shift dates
* Shit dates only when they are overlap
* Shift dates and keep time between entities
Try them and see how they work.

## Visualize Milestones
You can see milestones on a Gantt View as vertical lines.
1. Click `Milestones` option in the top menu:
2. Select a Database as Milestone
3. Select any Date field in this Database.
## Adjust the first day of the week
Every person sees a timeline according to their [Personal preferences](https://the.fibery.io/@public/User_Guide/Guide/Personal-preferences-288): the same timeline view might start on Monday for you and on Sunday for your colleague.
The personal preferences, in turn, are set based on your browser locale and can be adjusted if needed.
## Duplicate Gantt view
You may duplicate the current timeline view into the same Space.
1. Click `•••` on the top right.
2. Click `Duplicate Gantt` option.
## Link to your Gantt View
You can copy an anchor link to this specific view so you can share it elsewhere. There are two ways to do it:
1. Click `•••` on the top right and click Copy Link
2. Click on timeline `Id` in top left corner and the link will be copied to your clipboard
# HOW TO WORK WITH TAGS
_______________________
At the moment, there is no built-in Tag functionality in Fibery.
In most cases, we suggest using [Entity mentions and bi-directional links](https://the.fibery.io/@public/User_Guide/Guide/Entity-mentions-and-bi-directional-links-31) instead. Unlike basic Tags, they help to save the original context.
Let's understand what are the solution for twi popular scenarios:
* You need to tag a specific piece of content - a single Database. Tag Book, tag Article, tag Task, etc.
* You need to tag multiple Databases. Tag Book and Article, tag Task and Feature, etc.
## Case 1. Tag a single Database
For this case, the best choice is Multi Select [Fields](https://the.fibery.io/@public/User_Guide/Guide/Fields-15).
Choose the Database you want to tag, and a Multi-select Field there. Put some values inside, color them, and add nice recognizable emojis. That's it! 💖
> [//]: # (callout;icon-type=icon;icon=exclamation-circle;color=#fc551f)
> You have to have Creator access to the Space, or be an Admin

## Case 2. Tag multiple Databases
Here we suggest to make another Database called Tag, and connect it using many-to-many Relations with the Databases you want to tag. Since Relations can be cross-Space, your centralized Tag Database can be used anywhere in your workspace.

Here is how the tagged card looks like:

> [//]: # (callout;icon-type=icon;icon=bookmark-full;color=#fc551f)
> If you don't want to see the tag all the time, just hide this Field.
>
> Use Move Above action to show tags on the top
When you open any Entity in Tag Database, you'll see a list of all connected (tagged) Entities in other Databases.

# HOW TO BATCH REPLACE TEXT IN THE NAME FIELD
_____________________________________________
Imagine, we faced some major company changes, the company's name was changed from "Loosers" to "Winners" and now we need to update all Project Names according to new requirements.

### Step 1.
Create a button, that will apply `Replace` formula syntax.
The button will be created on a Database, where you must make changes. In our case it's `Project`.

You may check [Buttons](https://the.fibery.io/@public/User_Guide/Guide/Buttons-52) an [Formulas Reference](https://the.fibery.io/@public/User_Guide/Guide/Formulas-Reference-44) for more details.
### Step 2.
Find all Projects, in which you need to apply your changes.
We will create a Table and apply a filter to help us find all "Looser" Projects.

### Step 3.
Replace Names with a Batch action.
First, choose all cards in this table. That checkbox is located left to the Name field.
And then find the Actions tab. There you will see all the buttons, that were created on this Database.

Once you click it, ✨ magic will happen.
> [//]: # (callout;icon-type=icon;icon=lightbulb-alt;color=#fba32f)
> Don't forget to turn off Filter to see renamed cards again in this table

# API FAQ
_________
Here are some answers to the popular questions about API. If this page doesn't answer your question, please contact us in the support chat.
## How to create Single-Select and Multi-Select fields via Integration API?
Here are the prompts.
#### Single-select:
```
type: 'text',
subType: 'single-select'
```
#### Multi-select:
```
type: 'array[text]',
subType: 'multi-select',
```
#### Sample:
```
{
state: {
name: `State`,
type: `text`,
subType: `workflow`,
options: [
{
name: `New`,
default: true,
},
{name: `In Work`},
{
name: `Closed`,
final: true,
},
],
},
}
```
> [//]: # (callout;icon-type=icon;icon=lightbulb-alt;color=#fba32f)
> Note, that if you want to update the values of the Multi-select, you need to treat that as a collection and use this guide - [addToEntityCollectionField](https://the.fibery.io/@public/User_Guide/Guide/Entity-API-264/anchor=Update-entity-collection-Field--ea6b2bd3-6085-41ed-abf8-77c81d627ba9)
>
> ```
> await fibery.entity.addToEntityCollectionField({
> 'type': 'Cricket/Player',
> 'field': 'comments/comments',
> 'entity': { 'fibery/id': PARENT_ENTITY_ID },
> 'items': [
> { 'fibery/id': COMMENT_ID }
> ]
> });
> ```
#### Workflow:
```
type: 'text',
subType: 'workflow`
```
Optionally you can pass a list of `options`. If the options property is missing, Fibery will try to identify options based on your data dynamically.
#### Options format:
```
[
{
name: 'Open',
color: '#123414', // OPTIONAL
default: true/false, // Workflow should have record with default flag
final: true/false // workflow final step
}
]
```
> [//]: # (callout;icon-type=icon;icon=exclamation-circle;color=#1fbed3)
> It's also possible to pass multi-select with type `text` but in this case, options should be comma-separated (e.g. `dev,high prio,r22`)
## How can I create a Muli Select using the API?
It's maybe not clear from the documentation, but select fields (single- and multi-selects) are basically databases, where each entity is an option, and there is a relation (many-to-one or many-to-many) from the main database to the select db.\
So to create a select field, you have to create an `enum db` and then create a field in your main db that is a relation to it.\
See [here](https://the.fibery.io/@public/User_Guide/Guide/Field-API-263/anchor=Relation-\(entity-collection-Field\)--a3c35d51-339b-4d06-bd70-45fc441e65ae) for some helpful info.
## Is there a way to see logs and print out something in Script Actions (Execute Javascript Code)?
Please use `console.log()` in js code, and it's output will be available in the Button/Rule Activity Log
## How to call the Location field via API?
#### GraphQL
Unfortunately, not possible at the moment.
#### REST API
The location field should work like any other field, both in regular / HTTP API and in javascript API in automations.

## How to update the avatar with a URL to an image?
Avatars is the same file collection as the files, so check [File API](https://the.fibery.io/@public/User_Guide/Guide/File-API-265)
You can find a [nice discussion in our community ](https://community.fibery.io/t/manipulating-the-avatar-via-automation-script/3918 "https://community.fibery.io/t/manipulating-the-avatar-via-automation-script/3918")🙂
## How to update the Icon Field?
```
await fibery.updateEntity(entity.type, entity.id, {'Icon': ':grimacing:'});
```
## How to work with the Lookup Field?
A Lookup Field is basically the same as a Formula field.
Feel free to share your use case in [the community](https://the.fibery.io/@public/User_Guide/Guide/Entity-API-264/anchor=Get-Entities--0a5b17e3-bb53-4ee2-b14a-4e2757e1af9d "https://the.fibery.io/@public/User_Guide/Guide/Entity-API-264/anchor=Get-Entities--0a5b17e3-bb53-4ee2-b14a-4e2757e1af9d").
## How to work with Documents?
This API is still undocumented. However, to work with Document View content using ordinary or api documents, you need only the document secret.
To obtain that secret for a document view with public id "45" one may query views api as described here - [View API](https://the.fibery.io/@public/User_Guide/Guide/View-API-266)
```
{
"jsonrpc": "2.0",
"method": "query-views",
"params": {
"filter": {
"publicIds": ["45"]
}
}
}
```
Response
```
{
"jsonrpc": "2.0",
"result": [
{
"fibery/id": "43addb30-1fd0-11ee-9009-a7c752e861c6",
"fibery/public-id": "45",
"fibery/name": "Supa Doc",
"fibery/icon": null,
"fibery/description": null,
"fibery/rank": -9006999178042705,
"fibery/type": "document",
"fibery/meta": {
"documentSecret": "e27df257-0e6f-441f-8dcc-fde2591d12c3"
},
...
}
]
}
```
See the `"fibery/meta"` property with `"documentSecret"` in it. With this UUID you may do whatever you need with document content via standard documents API.
## API Token Activity Details
You can see the "Created" and "Last Used" dates for API tokens, along with the token prefix. For older tokens, the creation date won't be available and will show as "N/A." Activity tracking (last used date) will also be shown from September 19th, 2024.
## Is it possible to create a Formula field via API?
At the moment, we don't have a public API for this specific functionality. That said, it is technically possible to observe how Fibery's UI interacts with the backend by inspecting network requests — and from there, infer the structure of the API calls.
However, please note that these internal APIs aren't officially supported and may change at any time without notice, so we can't guarantee stability or backward compatibility.
If you have a particular use case in mind, feel free to share it — we might be able to suggest a safer or more stable approach.
## Troubleshooting
#### I'm trying to connect to my PostgresQL database and get "Server is not available... Caused by: SSL/TLS required" error
You can use `?ssl=true` to fix the issue. Find the example reference in [this community thread](https://community.render.com/t/ssl-tls-required/1022/3 "https://community.render.com/t/ssl-tls-required/1022/3").
#### I have error "Version is required"
Please, check you config.app.json file
The config must contain the following keys:
```
[
`name`,
`version`,
`authentication`,
`sources`,
`description`,
]
```
#### I'm facing timeouts
We recommend dividing your entities into separate batches that are processed individually by different Rules, all of which perform the same operation but on distinct subsets of entities.
The downside is that you now need to maintain multiple Rules instead of one.
[Here](https://community.fibery.io/t/7506) you can check our community discussion and vote for potential improvements. You are also welcome to check [Fibery Script Management tool](https://community.fibery.io/t/beta-testers-wanted-for-fibery-script-management-tool/5466) written by our partner Matt – so you could write and maintain a single script that could be automatically pushed to multiple Rules.
#### I have problem "\[Violation\] 'SetTimeout' handler"
This error is not related directly to the rule. Maybe it was caused by something else (e.g. a browser extension).
We don't write `console.log` statements from a script to the browser console when executing rules.
It's impossible, as the rule is run automatically, not triggered by a user. For buttons, we do this.
What you can do right now:
* Check the outputs of `console.log` statements in the rule's Activity Log.
* Add steps to the scripts as described in the [debugging](https://the.fibery.io/@public/User_Guide/Guide/Scripts-in-Automations-54/anchor=Debugging--a77fbd4d-dc37-489f-9f46-00d8294a1f47) part.
# DEPENDENCY MANAGEMENT
_______________________
## Setting up a Space Structure
> [//]: # (callout;icon-type=icon;icon=exclamation-circle;color=#199EE3)
> Check [Dependencies](https://the.fibery.io/@public/User_Guide/Guide/Dependencies-392) guide for more details.
So, let's start... from the beginning. I've installed `Project Management` template from our Template gallery. So, create a many-to-many relation, between Task and Task. Because sometimes our Task can be a blocker for many other tasks and can be blocked by multiple Tasks as well.
Click Advanced and Mark `Use relation as dependency` switcher on relation creation.
One relation with two fields is created automatically and fields are named `Blocking` and `Blocked By`. You can rename them if you wish.
## View Configuration
So, the main target for the Views are:
* track Blockers and Blocked cards - bird View 🦅
* determine deadlines and prevent a disaster - to save the day â¤
### **Tracking Blockers and Blocked Tasks**
One way to track Tasks is through the Board. Here is the configuration

You can also add some color coding to make Blockers more visible.

Another way is to create a [Timeline View](https://the.fibery.io/@public/User_Guide/Guide/Timeline-View-12) and enable dependencies, they will be visualized as arrows. Click `Items` on Timeline View and enable dependencies for Tasks database.

### Determine deadlines and prevent a disaster
This can be done with a small, but powerful combo: Formula + Color Coding + Sorting
#### **Formula**
We will use the Formula field to determine Tasks, that have an Upcoming deadline and are Blockers/Blocked.

Change this formula up to your needs - change "`and`" to "`or`", delete unnecessary conditions, or make it even more complicated!
#### Color Coding
Let's paint Dangerous one black.

#### Sorting
And Sort it! To see the Dangerous one in the beginning.

# AUTOMATIONS USE CASES AND EXAMPLES
____________________________________
## Automatically synchronize fields
You may configure entity fields synchronization in case of relation change. An example below shows how to make the Product Area of a Task the same as the Product Area of a User Story when Product Area of User Story changes.
You have to create two rules to maintain fields integrity:
### 1. Auto-update product area of tasks when product area of a story is changed

### 2. Auto-update product area of a task when it is linked to a story

## Set a completion date when a task is done
An example below shows how to set the completion date of a task when it is moved to the final state.

## Archive "done" user stories every hour
A scheduled task executed hourly to mark completed stories as archived.

## Create a release with two iterations every four weeks
The example shows how to automatically create a release with two iterations every four weeks.


## Add related entity
You may use formulas to create a related entity and set some calculated values to some fields. Here we create a Bug for the Request and this Bug has the same Name as the Request.

##
# AUTOMATION PERMISSIONS
________________________
## Who can create Rules and Buttons
To set up any automation, you have to be a Creator in the Database's Space — see [Share Space](https://the.fibery.io/@public/User_Guide/Guide/Share-Space-232).
Since you can traverse relations beyond the current Space via automation, we additionally check for the corresponding capabilities when saving a Rule or clicking a Button. For example, if you want to close all the Bugs (`Issue Tracking` Space) when their Feature (`Product Management` Space) is done, you'll need at least Editor access to the Bug DB's Space in addition to Creator access to the Feature DB's Space.
Check out the [corresponding section](https://the.fibery.io/@public/User_Guide/Guide/Automation-permissions-337/anchor=What-capabilities-are-needed-for-each-ac--e7ff5812-d001-42b3-9e9f-4015a2da5026) for a detailed breakdown.
## When permissions are checked for Rules and Buttons
For Rules, we check permissions on save. If the user saving the Rule has the right capabilities at the time of saving, that's enough. Even if the user loses access, gets deactivated or even deleted, the Rule will continue to work regardless.
For Buttons, we check permissions on click. Whatever a user can do manually, they'll be able to do with a Button — but not more.
Here's a quick overview:
| | | |
| --- | --- | --- |
| | **Rules** | **Buttons** |
| Triggers | 🔒 | 🟢 |
| Create, update, or delete Entities | 🔒 | ðŸ–±ï¸ |
| Formulas | 🔒 | 🔒 |
| Notifications | 🟢 | 🟢 |
| External actions | 🟢 | 🟢 |
| Scripts | 🔒👑 | ðŸ–±ï¸ |
| Markdown and HTML templates | 🔒 🔒👑 JS | ðŸ–±ï¸ |
*🔒 on save, 🔒👑 on save (Admins-only), ðŸ–±ï¸ on click, 🟢 no check*
## What capabilities are needed for each action
The access necessary is the same as when performing the same action manually, only scaled to the whole Database.
| | |
| --- | --- |
| **Action** | **Capabilities required** |
| Create | `createEntity(DB)` |
| Update Append/prepend/overwrite rich-text Field (note [markdown templates](https://the.fibery.io/Product_Management/feature/Allow-non-Admins-to-create-automation-Rules-3566/anchor=Markdown-and-HTML-templates--2e51ed41-240e-4213-9a6a-fb9c493a2dce)) Add/clear Assignees Move to final state Attach PDF Add File from URL Add comment | `updateEntity(DB)` |
| Delete | `deleteEntity(DB)` |
| ***Related Entities*** |
| Link/unlink Entity of Type A to/from Entity of Type B includes (un)assigning people | Either of: `readEntity(DB.A)` + `updateEntity(DB.B)` `updateEntity(DB.A)` + `readEntity(DB.B)` |
| Add linked Entities of Type B to Entity of Type A | `createEntity(DB.B)` + either of `readEntity(DB.A, User)` + `updateEntity(DB.B, User)` `updateEntity(DB.A, User)` + `readEntity(DB.B, User)` |
| Update linked Entities of Type B | `updateEntity(DB.B, User)` |
| Delete linked Entities of Type B | `deleteEntity(DB.B, User)` |
| ***Notifications*** |
| Notify Created By/Assignees/Users | — |
| Watch | — |
## Q&A
### I need to set up a scripted Rule but I'm not an Admin — what do I do?
Rules with Script actions have unlimited power so they are reserved to Admins. However, any Creator can configure a scripted Button. We suggest you create a temporary Button to write and test the script.
Once are you confident with the code, create a disabled Rule (we don't check permissions for those) and copy the script from the Button. Then ask an Admin to enable the Rule.
# GENERATE PDF FILE USING BUTTON
________________________________
A Button is type of [Automations](https://the.fibery.io/@public/User_Guide/Guide/Automations-27) that is triggered manually.
There is an unlimited number of Actions you can execute using Buttons, including generating PDF files. This comes in handy when, for example, you want to generate and attach PDF invoices to Entities.
> [//]: # (callout;icon-type=icon;icon=copy;color=#673db6)
> Please note that you need to have Files Field for this Action.
You can go with two options: either generate a PDF using [Markdown Templates](https://the.fibery.io/@public/User_Guide/Guide/Markdown-Templates-53) or using HTML template. The latter allows you to use custom CSS styles and rich HTML formatting, so your design is not limited by standard Markdown options.
> [//]: # (callout;icon-type=icon;icon=exclamation-circle;color=#673db6)
> Please keep in mind that Buttons are configured for each Database separately.
## How to generate PDF file using Markdown template
1. Choose a Database.
2. Click `Automations` in the upper right corner.
3. In the opened window, click `Button`.
4. Go to `Action` and choose `Attach PDF using template`. You need to have Files Field in your Database for this Action.
5. Provide a markdown template for generating the document. Please find examples in [Markdown Templates](https://the.fibery.io/@public/User_Guide/Guide/Markdown-Templates-53).
6. Save `Button`.
7. Go to an Entity in a chosen Database and execute `Button` to generate a PDF file.

## How to generate custom designed PDF file using HTML template
1. Choose a Database.
2. Click `Automations` in the upper right corner.
3. In the opened window, click `Button`.
4. Go to `Action` and choose `Attach PDF using template`. You need to have Files field in your Database for this Action.
5. Provide an HTML page template for generating the document.
6. Tick `Treat template as HTML page` checkbox.
7. Save `Button`.
8. Go to an Entity in a chosen Database and execute `Button` to generate a PDF file.

> [//]: # (callout;icon-type=icon;icon=times;color=#673db6)
> Please note that Markdown is not processed in this case.
If you want to generate and send custom designed PDF files, please also check [Generate and Send Custom Designed PDF Files](https://the.fibery.io/@public/User_Guide/Guide/Generate-and-Send-Custom-Designed-PDF-Files-219).
## How to generate PDF files for multiple Entities
If you want to generate PDF files for multiple Entities at a time, please create a View of a needed Database first.
> [//]: # (callout;icon-type=icon;icon=check;color=#673db6)
> This is applicable both for Markdown and HTML templates
1. Select all Entities using the checkbox in the left column.

2. Go to `Actions` and execute the needed Button.

3. Voila! You generated PDF files for multiple Entities.

## How do I get examples of Markdown and HTML templates
For Markdown, please refer to [Markdown Templates](https://the.fibery.io/@public/User_Guide/Guide/Markdown-Templates-53)
For HTML templates, please refer to [Lean HTML.](https://www.learn-html.org/ "https://www.learn-html.org/")
If nothing helps, drop us a line in support chat
## FAQ
### How do I travel through relations?
We support one level of hierarchy depth. For example `{{Company.Name}}`
For other cases we suggest creating a formula, and using formula result instead.
### How can I ensure the PDF button only works when mandatory fields are filled?
It is possible. You will need to use JS to query the entity and check for valid data.
As an alternative, create a checkbox, and use the button to tick the box, and then have an automation rule (with necessary filters) that does the PDF generation.
And another automation (for the case where the filter conditions are not met) to generate an alert (and also to clear the checkbox).
# FREE OFFERS AND DISCOUNTS
___________________________
## 😠Free offers
Fibery is free for:
1. [Open-source](https://the.fibery.io/@public/forms/wLLEvDIy) projects.
2. [Startups](https://fibery.io/startup-program "https://fibery.io/startup-program") with < 42 employees for 6 months (check the link for detailed requirements).
## 😄 50% discount offers
Fibery provides 50% discounts for:
* [Educational](https://the.fibery.io/@public/forms/XGkWgfEf) organizations
* [Nonprofit](https://the.fibery.io/@public/forms/13DHmF57) organizations
* [Ukrainian](https://the.fibery.io/@public/forms/pcQt7Rie) companies (till 2030)
## How to apply?
1. [Register Fibery account](https://fibery.io/sign-up).
2. Click one of one of the links above and fill in the form.
3. We will contact you and arrange everything.
> [//]: # (callout;icon-type=icon;icon=gold;color=#4faf54)
> Check [Fibery pricing](https://fibery.io/pricing "https://fibery.io/pricing") for more info.
# ANNOTATIONS
_____________
#### AVG
Returns the avg of chart numbers
`AVG([Sum(Hours Spent)]) + 10`
#### COUNT_DISTINCT
Returns the distinct count of values for provided chart dimension
`COUNT_DISTINCT(MONTH([End Date]))`
#### FIRST
Returns the first value of chart numbers
`FIRST([Count Of Records])`
#### FORECAST_LINE
Shows the forecast line for defined numerical chart dimension and end
`FORECAST_LINE([Count of Records], LAST([Count Of Records]))`
#### IDEAL_LINE
Shows the line by defined start and end
`IDEAL_LINE(0, LAST([Count Of Records]))`
#### LAST
Returns the last value of chart numbers
`LAST([Count Of Records])`
#### MAX
Returns the max of chart numbers
`MAX([Sum(Hours Spent)]) + 10`
#### MEDIAN
Returns the median of chart numbers
`MEDIAN([Sum(Hours Spent)]) - 5`
#### MIN
Returns the min of chart numbers
`MIN([Sum(Hours Spent)]) + 10`
#### PERCENTILE
Returns the value at a given percentile of chart numbers
`PERCENTILE([Sum(Hours Spent)], 0.3)`
#### STDEV
Returns the standard deviation of chart numbers
`STDEV([Sum(Hours Spent)])`
#### SUM
Returns the total sum of chart numbers
`SUM([Count Of Records])/10`
#### VELOCITY_FORECAST
Shows the forecast based on custom velocity.
`VELOCITY_FORECAST(FIRST([Count Of Records]), 0, 5)`
# SMART FOLDERS
_______________
Smart Folders can be created inside [Spaces](https://the.fibery.io/@public/User_Guide/Guide/Spaces-18) and on the top level. They show a nested list of entities in the sidebar, and allow you to create automatically filtered [Context Views](https://the.fibery.io/@public/User_Guide/Guide/Context-Views-20) inside entities. Smart Folders support filtering and sorting.
You can organize your sidebar by products, clients, teams, or any other high-level Entities by creating Smart Folders. Add Views and Docs that are unique for each product/client but also [mirror](https://the.fibery.io/@public/User_Guide/Guide/Context-Views-20/anchor=Mirroring-a-context-View--4e26bf4d-a013-4a00-970f-147020606301) the same kind of View to all of them to save time.
## When Smart Folders are useful
Typical use cases:
* You have several Teams and want to aggregate information (Views, Documents, etc) by teams.
* You have several ongoing Projects and want to quickly explore the same information by Project (Plan, Report, etc).
## How to create a Smart Folder
1. Click `+` near Space name and select `Smart Folder`.
2. Select a database to be visible as the first folder level.
3. Filter the database with conditions if you want to restrict the list of entities.
You can created nested hierarchies as well.
1. Click `+` button near top level database.
2. Select nested database.
## How to create context Views that filter data automatically
Smart Folders are usually most valuable when you add [Context Views](https://the.fibery.io/@public/User_Guide/Guide/Context-Views-20) inside:
Check out the dedicated guide on how to automatically replicate a View across all Entities of a Smart Folder to avoid double work.
## How to rename Smart Folder
1. Click `•••` near Smart Folder name and select `Rename` action.
2. Type a new name.
3. Push Enter to save the changes.
## How to show nested hierarchies
You can visualize self-referenced hierarchies as well. For example, you have a hierarchy of projects that are nested. In this case select Project as a database and click this weird `Group by the same database relation` action — and projects will be nested.

You can also visualize recursive relationships at any level in List, Table and Smart Folder. For example, if you have Product Areas (nested) and Features (nested), you can see them like this
```
Product Area 1
- Product Area 1-1
- Feature 1
- Feature 1-1
- Feature 1-2
- Feature 2
Product Area 2
- ...
```
## How to filter and sort entities in a Smart Folder
1. Click `•••` near Smart Folder name and select `Configure` action.
2. Click `Filter` tab to create some filters.
3. Click `Sort` tab and create a sorting criteria.
## Who can see a Smart Folder and entities inside
The access to the Smart Folder itself depends on where it is located:
* **Within a Space:** anyone with access to this Space can see it.
* **Outside Spaces:** anyone, including Guests, can see it. In fact, top-level Smart Folders might be a [great way](https://youtu.be/BeMOfpFZffY?si=tm_7o0YXHbW0YEeG) to organize navigation for Guests who otherwise have nothing in their sidebar.
Inside a Smart Folder, each user will only see entities they have access to. See [Sharing & Permissions](https://the.fibery.io/@public/User_Guide/Guide/Sharing-&-Permissions-46) for all the ways to provide access to entities, ranging from Space level to individual entity level.
Access to [Context Views](https://the.fibery.io/@public/User_Guide/Guide/Context-Views-20) depends on whether they are mirrored or not. Check out the corresponding guide for the details.
## FAQ
### How can I restore Smart Folder?
When a Smart Folder is deleted, it does not appear in the Trash the same way Entities, Documents, or Views do. Therefore, it cannot be restored from the Trash. However, if you create a new Smart Folder with the same Database, it will restore the path, and the Views can be found again in the sidebar. Check the full explanation [here](https://the.fibery.io/@public/User_Guide/Guide/Trash-90/anchor=How-to-restore-a-Smart-Folder--3accab23-dfb2-4040-bc80-e963adc462d2 "https://the.fibery.io/@public/User_Guide/Guide/Trash-90/anchor=How-to-restore-a-Smart-Folder--3accab23-dfb2-4040-bc80-e963adc462d2").
# BROKEN FIELDS IN REPORT
_________________________
Sometimes when you open a report you see, that instead of nice visualization you have `Broken fields` error.

To figure out the problem, we need to check the report's configuration.
> [//]: # (callout;icon-type=icon;icon=exclamation-circle;color=#FC551F)
> You have to have an Editor or higher access to change Views for those actions

## When does this error appear?
### If the field used in the report was deleted
In this case, the only way to figure out the details is to check the [Activity Log](https://the.fibery.io/@public/User_Guide/Guide/Activity-Log-92) for details
### If you have several Databases as source, and use the "united" field in a report, it will break if that field is renamed in one of the Databases.
Because it won't be "united" anymore, as we unite by name.
Example:
1. We have two databases - Story and Bug
2. Report uses Feature field. Both Story & Bug has a relation called `Feature`. And this relation is the same-named in both databases.
3. We rename the relation field from `Feature` to `Feature1`. But only in Story Database
4. Report breaks, because the common `Feature` field does not exist any more. Instead, there are now two differently named fields - `Feature` & `Feature 1`
## How to find out broken reports?
Unfortunately, there are no notifications from Fibery about report errors. You have to open the report to find out.
# MANAGE ACCESS FOR USER OR GROUP
_________________________________
In Fibery, Admins can see all the Spaces, Databases, and Entities a person or a group has access to in one place:

## When to manage access from User's or Group's side
Typically, you would start with **what** you'd like to share ([Share Space](https://the.fibery.io/@public/User_Guide/Guide/Share-Space-232), [Share Database](https://the.fibery.io/@public/User_Guide/Guide/Share-Database-342), or [Share Entity](https://the.fibery.io/@public/User_Guide/Guide/Share-Entity-233)) and only then decide **who** should get access.
However, sometimes you care about **who** before **what**. For example, when:
* troubleshooting \[the lack of\] access;
* providing access to a newly created group or newly invited user;
* reviewing permissions when someone changes roles within their company.
In these cases, it's tedious (or even unfeasible) to go through Spaces or Databases one by one. Instead, you start with a User or a Group.
## Where to find User's and Group's access management
To review and update a User's or Group's access, select `Manage access` from the context menu anywhere in your workspace:


## What kind of access can be managed for User or Group
You can see what Spaces, Databases, and Entities (e.g. Tasks, Features, or Contacts) a User or a Group has access to:

If you have the right permissions yourself, you can also update or revoke the existing access as well as share more Spaces, Databases, and Entities:

> [//]: # (callout;icon-type=emoji;icon=:point_up:;color=#fba32f)
> So far, only **direct** access appears here: for example, if group `Developers` gets access to a Space and Bernard is a member, we'll display this Space on the Developers' access page but not on the Bernard's.
## Who can manage User's and Group's access
**User:** Admins only.
**User Group:** anyone who can revoke access for the Group, meaning `Owner` of a particular Group or `Creator` in Space/Database the Group comes from.
# RICH TEXT
___________
In Fibery, rich text lives in special Rich Text [Fields](https://the.fibery.io/@public/User_Guide/Guide/Fields-15) or in [Documents](https://the.fibery.io/@public/User_Guide/Guide/Documents-85) (and in Comments). Rich text works the same way in all areas. It's just a collaborative text editor, so write something, add some images, and collaborate.
## '/' commands
Type `/` to quickly insert some specific content into your document or rich text. For example, if you want to quickly insert an image, type `/im` and find `Insert Image` command.
## Basic formatting
Select any text and you will see a formatting menu…
* Style dropdown
* Normal Text.
* Heading 1: The largest heading, can be easily added with shortcut `/h`.
* Heading 2: The medium-sized heading.
* Heading 3: The smallest heading.
* Caption Header
* Code (see [Code blocks](https://the.fibery.io/@public/User_Guide/Guide/Code-blocks-30) )
* Callout (see [Callout block](https://the.fibery.io/@public/User_Guide/Guide/Callout-block-186))
* Divider
* Bold
* Italics
* Strikethrough
* Code (inline formatting)
* Highlight: Makes text more visible
* Quote: Creates larger text to break quotes out from the rest of a document
* Checklist: Checkboxes for simple inline tasks. Shortcut `[]`
* Bulleted list: Bullet points. Shortcut `- space`
* Ordered list: Indents a list and automatically generates the next number
…as well as options to
* Insert a [link](https://fibery.io "https://fibery.io") to a webpage
* Create an entity
* Link to an entity
* Add comment
#### Nested checkboxes
* Create checkbox Item, push Enter
* Push Tab → Checkbox item becomes nested
* Push Enter
* Push Tab → Checkbox item becomes nested as 3d level
## Media & Embeds
There are several types of media you can add in Fibery.
* [Images and Video](https://the.fibery.io/@public/User_Guide/Guide/Images-and-Video-29): Upload images or video files (\*.mp4).
* [Files in Rich Text & Documents](https://the.fibery.io/@public/User_Guide/Guide/Files-in-Rich-Text-&-Documents-183): Upload any file.
* [Code blocks](https://the.fibery.io/@public/User_Guide/Guide/Code-blocks-30): Add a block of code in any language, complete with formatting.
* [Embeds](https://the.fibery.io/@public/User_Guide/Guide/Embeds-206): embed content from external services (Youtube, Figma, Miro, Twitter, Google Maps, etc.)
## Tables
You can insert simple Tables using `/` command. Tables are very basic and just here to format text. Like this:
| | |
| --- | --- |
| True | False |
| 1 | 0 |
Click `•••` in any cell to invoke a table menu with actions like add row, delete row, etc.
#### Keyboard shortcuts:
You can also quickly add new rows and columns in rich-text tables using a mouse or a keyboard.
We hope you'll find the keyboard shortcuts intuitive:
* Add row after: `Ctrl + Option + ↓`
* Add row before: `Ctrl + Option + ↑`
* Add column after: `Ctrl + Option + →`
* Add column before: `Ctrl + Option + â†`
`Option` on Mac = `Alt` on Windows
## Links to entities and views
Use `#` to link entities and views in a rich text. For example, here is the link to an entity [May 26, 2022 / Customize pinned Fields, rename Workspace, 16 fixed bugs](https://the.fibery.io/@public/Changelog/Release/May-26,-2022-%2F-Customize-pinned-Fields,-rename-Workspace,-16-fixed-bugs-12)
Alternatively, you may select some text and link it to an entity using `Cmd + L` shortcut. Linked entities can be accessed if you double click on a colored text. This mechanism preserves original text and works better when you want to link feedback to feature, for example:

Unlike traditional web hyperlinks, links from rich text to entities are [Entity mentions and bi-directional links](https://the.fibery.io/@public/User_Guide/Guide/Entity-mentions-and-bi-directional-links-31).
### Convert usual links into Fibery links (mentions)
When you copy a link to an entity or a view and paste it to a document or any rich text field, Fibery will display a popup so you can convert it into a Fibery link. Click `Mention` to do the conversion.

## Link to header
You can give a link to the exact header in any document or entity with a rich text field. Just hover your cursor over a header and click the small icon on the right side of the header → a link to the header will be copied to the clipboard. Send it to anyone.

## Create entities from text
You may select any text and find `Create Entity` command (`Cmd + E`). Select database and click `Create` button to create an entity.

### Create many entities from a list
Moreover, you can select a list and create many entities from the list. For example, you have a list like this:
* Task 1
* Task 3
* Task 3
Select the list, press `Cmd + E`, select a database (for example, `Task`) and click `Create` button. As a result, three Tasks will be created 😎.
## Markdown & shortcuts
Fibery supports markdown formatting, so you can format your text fast using shortcuts:
* Type `**` on either side of your text to bold.
* Type `*` on either side of your text to italicize.
* Type `` ` `` on either side of your text to create inline code. (That's the symbol to the left of your 1 key.)
At the beginning of any line of text, try these shortcuts:
* Type `*`, `-`, or `+` followed by space to create a bulleted list.
* Type \[\] to create a to-do checkbox. (There's no space in between.)
* Type `1.` followed by space to create a numbered list.
* Type `#` followed by space to create an H1 heading.
* Type `##` followed by space to create an H2 sub-heading.
* Type `###` followed by space to create an H3 sub-heading.
* Type `>` followed by space to create a quote
* Type `!` followed by space to create a callout
* Type `Ctrl + Shift + -` followed by space to create a divider
## Mentions and comments
Use `@` to mention any Fibery user. The user will be notified about the mention, so it's a good mechanism to draw user's attention to something.

Select any text and find `Add Comment` action in the formatting menu. Discuss things and resolve comments thread when everything is settled. Check [Comments and mentions](https://the.fibery.io/@public/User_Guide/Guide/Comments-and-mentions-34) section for more details.
## Checklists
Type `[]` in a new line and push `Enter` to create a checklist item.
Or click `/` and select `Insert Checklist` command.
- [ ] Item 1
- [ ] Item 2
- [x] Item 3
You can create hierarchical checklists by pushing `Tab` key.
You can convert usual lists (or text paragraphs) into checklists. Select a list and click `Check List` command from the toolbar.
## Insert Views
Type `<<` to insert [Views](https://the.fibery.io/@public/User_Guide/Guide/Views-8) or create a new View inside this document or entity. For example, here is our roadmap inserted as view:

Check [Views inside Rich Text (Embed Views)](https://the.fibery.io/@public/User_Guide/Guide/Views-inside-Rich-Text-(Embed-Views)-200) for more details.
## LaTeX support
You can type, edit, and render [LaTeX](https://en.wikibooks.org/wiki/LaTeX/Mathematics) equations right in Fibery's rich text fields. There are `Inline Equation` and `Block Equation` commands, so you can type `/math` or `/equation` or `/latex` and select one.
You can also select existing text and convert it to inline equation via a command or via `Cmd + Shift + E` shortcut.

If you want to learn more about what LaTeX is, check out [this wonderful page.](https://en.wikibooks.org/wiki/LaTeX/Mathematics)
## AI Assistant
Type `>>` to invoke [AI Text Assistant](https://the.fibery.io/@public/User_Guide/Guide/AI-Text-Assistant-156).
AI Assistant may help you with text editing and writing, so check it out.
## FAQ
### Do you have any limits regarding the Document's size?
There is a limit on the size of the document - 2.7 Mb. But this size can't be calculated simply by the number of characters - it includes inner document metadata.
So there is no limit to the number of characters on the same page before breaking down, but once the document is full - it will reject any new typings with a warning.
### How to calculate how many ticked/unticked checkboxes there are in the text?
Unfortunately, at the moment formulas don't work with a Rich text field. (snippets only, please check [Formulas Reference](https://the.fibery.io/@public/User_Guide/Guide/Formulas-Reference-44) for more details)
However, you can use automation to calculate how many ticked/unticked checkboxes there are (and put the result in some fields of your choice):
```
const fibery = context.getService('fibery');
for (const entity of args.currentEntities) {
const content = await fibery.getDocumentContent(entity['Description']['Secret'], 'md');
const tickedregex = /- \[x\]/g
const ticked = content.match(tickedregex);
const untickedregex = /- \[ \]/g
const unticked = content.match(untickedregex);
await fibery.updateEntity(entity.type, entity.id, { 'Ticked': ticked.length, 'Unticked': unticked.length });
}
```
This looks in the Description field and puts the counts of ticked/unticked as values in the ‘Ticked' and ‘Unticked' number fields.
You could have this run as an automation that triggers whenever there is an update to the Description field.
Check [Rules](https://the.fibery.io/@public/User_Guide/Guide/Rules-51) guide to learn more about Fibery Automations.
# REPORT FILTERS
________________
Report filters can be defined during the configuration of the report (in the [Report editor](https://the.fibery.io/@public/User_Guide/Guide/Report-editor-352)) or when viewing the report, via the filter symbol in the top right of the report.
Such filters are applied in addition to [source data filters](https://the.fibery.io/@public/User_Guide/Guide/Reports-346/anchor=Filtering--5ab22756-b03b-483b-aaec-5caff317367e).
> [//]: # (callout;icon-type=icon;icon=exclamation-circle;color=#6A849B)
> Filters defined during configuration cannot be removed when viewing the report, but can be disabled/enabled by users viewing the report.
>
> When viewing a report, additional (user-specific) filters can be defined or deleted (as well as disabled/enabled) by anyone with view access to the report, irrespective of whether they have configuration permission.
## Setting up filters
To add a filter, click the filter symbol so that the filter bar appears, then click `+ Add filter`.
A report filter can be applied to any of the fields in the source (provided they have not been deliberately excluded - learn about removing redundant fields [here](https://the.fibery.io/@public/User_Guide/Guide/Report-editor-352/anchor=Available-fields--3fdea514-0ed5-487c-af79-f51080cfd45a)).
It is also possible to apply a filter to a visualisation parameter (which can be fields or [Calculations in Reports](https://the.fibery.io/@public/User_Guide/Guide/Calculations-in-Reports-347)). If a filter is configured based on a visualisation parameter, it will become broken if that parameter is removed, or its type changed.

Note: for date filtering, reports utilise a specific [date range grammar](https://the.fibery.io/@public/User_Guide/Guide/Custom-App-Date-range-grammar-271).
### Showing/hiding data in charts
If your report view is a chart with a color parameter set, you can also choose what is and isn't displayed via the legend, when viewing the report.
Click to hide/show an item (or group of items).

You can also click on a specific data point and choose to exclude it. If you want to re-include data that has been excluded, click the filter icon so that the filter bar appears (or is hidden if already showing).
# PERSONAL PREFERENCES
______________________
Customize Fibery's behavior and look via personal preferences. Unlike [Workspace settings](https://the.fibery.io/@public/User_Guide/Guide/Workspace-settings-62), preferences only apply to you and don't affect other workspace users.
## How to navigate to preferences

Here is how to navigate to preferences:
1. click on the workspace name in the top-left corner;
2. select `Settings`;
3. pick `Preferences` from the sidebar.
You can also type `preferences` (in full) in search.
## Regional Format

Adjust dates and numbers in the preferences, so you don't have to do mental arithmetic every time you see one. We remember these preferences **per user** per workspace across all devices.
| | | |
| --- | --- | --- |
| **Preference** | **Applies to** (shortlist) | **Default** |
| First day of the week *(Monday, Sunday, or any other day)* | Date pickers Calendar View Timeline View | Based on your browser locale |
| Weekend days (*Specify non-working days)* | Date pickers Calendar View Timeline View | Based on your browser locale |
| Date format *(`d/m/y` vs. `m/d/y`, short vs. long)* | Date Fields Filters Calendar events | `Feb 28, 1992` |
| Time format *(12-hour vs. 24-hour)* | Based on your browser locale |
| Number format *(thousands and decimal separators)* | Number Fields (both for display and input) |
If you are curious, take a look at the [internationalization principles](https://community.fibery.io/t/twitter-post-about-potentially-new-fibery-settings/5728/4?u=antoniokov) behind the preferences: they explain why the settings are user-specific and not workspace- or at least Field-wide.
If your preferred format is missing, please let us know.
## Appearance

Tailor Fibery's look and feel: enable the dark theme, adjust the sidebar, and turn on the one-panel navigation mode. We remember these preferences per workspace **per device**.
# HOW TO CREATE TURNOVER REPORT
_______________________________
### What is Turnover report and why may you need it?
> [//]: # (callout;icon-type=icon;icon=head-side;color=#199EE3)
> This Employee Turnover report in Fibery offers a clear, year-by-year snapshot of staffing dynamics, showing how many employees left and joined the company annually. The turnover percentage, calculated against the number of employees at the start of each year, provides a quick measure of organizational stability.
Beyond monitoring staffing changes, the report also supports strategic decision-making. It helps teams evaluate the effectiveness of HR initiatives, forecast recruitment needs, and plan for resource allocation.

This report helps you understand employee turnover trends year by year. It answers questions like:
* How many employees joined the company in a given year?
* How many employees left the company in that year?
* What was the total number of active employees at the start of each year?
* What is the Turnover %, helping you gauge organizational stability?
### What you need to start:
Make sure your Employee database has these two fields:
* 📅 Start Date — When the employee started.
* 📅 End Date — When the employee left (empty if still active).
* 🙌 Support - technical formula to use the [Split trick](https://youtu.be/sK2RTuQZdmI?si=KezFIDk9tf6mAuaK), so that a single employee manifests as two separate data points in the report

These three fields are enough to build all the logic you'll need.
### Report configuration
When creating a report, start from Table format.
#### Year
> This formula calculates two different year values for each employee, one based on their start date and one based on their end date (if they have one).
```
YEAR(
IF(
SPLIT(
[Support],
'|'
) == '1',
[Start date],
IFNone(
[End date],
NOW()
)
)
)
```
**Here's how it works:**
`IF(SPLIT([Support], '|') == '1', [Start date], IFNone([End date], NOW()))`\
Using the 'SPLIT trick' each entity will be plotted once against its `[Start date]` and once against its `[End date]` — or if `[End date]` is empty (e.g. the employee is still active) the current date (`NOW()`).
`YEAR(...)`\
The YEAR formula extracts just the year from the resulting date — either the start date, end date or current date — to use it as the grouping value for the report.
#### Total at start of year
> This formula computes the cumulative number of employees at the *start* of each year, using the `RUNNING_SUM(...)` function across all prior entries.
>
> This field tells you, for each year how many employees were on staff *at the start of that year*, considering previous hires and exit, while ignoring gaps in data (e.g. missing `End date`).
```
RUNNING_SUM(
((COUNTIF(
[Id],
SPLIT(
[Support],
'|'
) == '1'
) - DIFFERENCE(
COUNTIF(
[Id],
SPLIT(
[Support],
'|'
) == '1'
)
)) + DIFFERENCE(
COUNTIF(
[Id],
SPLIT(
[Support],
'|'
) == '2' and IS_NOT_NULL([End date])
)
)) - COUNTIF(
[Id],
SPLIT(
[Support],
'|'
) == '2' and IS_NOT_NULL([End date])
)
)
```
**Here is how it works:**
`COUNT - DIFFERENCE` is equivalent to the value from the previous row. For example, if the `COUNT` values are 44, 66, 78. then `DIFFERENCE` values are -, 22, 12 (where - means not determined). So `COUNT - DIFFERENCE` = -, 44, 66.
The formula takes the `COUNT - DIFFERENCE` of the employees with a Start date in the given year, and subtracts `COUNT - DIFFERENCE` of the employees with an End date in a given year (provided the End date is not empty). This gives the net change in employees, and keeps a running sum of that.
#### Stopped
> By showing the number of employees who left each year as a negative value, it helps highlight attrition clearly - especially when visualized with red bars or color coding in Fibery.
>
> This formula calculates a negative count of employees who left the company in a given year.
> [//]: # (callout;icon-type=icon;icon=exclamation-circle;color=#199EE3)
> We recommend using Bottom line visual encoding for this column
>
> 
```
0 - COUNTIF(
[Id],
SPLIT(
[Support],
'|'
) == '2' and IS_NOT_NULL([End date])
)
```
**Here is how it works:**
This counts each employee once (provided they have an end date) putting them in the row corresponding to their End date.
#### Started
> [//]: # (callout;icon-type=icon;icon=key-skeleton;color=#199EE3)
> Here you may also use Bottom Line encoding
>
> 
```
COUNTIF(
[Id],
SPLIT(
[Support],
'|'
) == '1'
)
```
**Here is how it works:**
This counts each employee once, putting them in the row corresponding to their Start date.
#### Turnover
> This formula measures employee turnover by combining the count of currently active employees and those who have left, adjusting for changes over time, and scaling the result to give you a turnover figure that reflects your workforce dynamics.
```
((COUNTIF(
[Id],
SPLIT(
[Support],
'|'
) == '1'
) + COUNTIF(
[Id],
SPLIT(
[Support],
'|'
) == '2' and IS_NOT_NULL([End date])
)) / 0.02)
/ RUNNING_SUM(
((COUNTIF(
[Id],
SPLIT(
[Support],
'|'
) == '1'
) - DIFFERENCE(
COUNTIF(
[Id],
SPLIT(
[Support],
'|'
) == '1'
)
)) + DIFFERENCE(
COUNTIF(
[Id],
SPLIT(
[Support],
'|'
) == '2' and IS_NOT_NULL([End date])
)
)) - COUNTIF(
[Id],
SPLIT(
[Support],
'|'
) == '2' and IS_NOT_NULL([End date])
)
)
```
**How it works:**
It works to take the average of the number of arriving employees and the number of leaving employees i.e.
`( Started + Stopped ) / 2`
and then calculates this number as a percentage of the number of employees at the start of the year.
Overall, this is
`100 * ( (Started + Stopped) / 2 ) / Total at start of year )`
and `100 / 2` can be replaced with `1 / 0.02` :smart:
> [//]: # (callout;icon-type=icon;icon=rocket;color=#199EE3)
> Here is the visual encoding that make is look nice
>
> 
There you are!
After all the struggles we have this wonderful report and (hopefully!) few powerful insights 🙌
## FAQ
### Adding grouping to Reports
#### Can I group the report by some Single select (e.g.,Contract type, Team, etc.) to get more detailed insights?
We don't recommend using groupings in this report, because it relies on `Running Sums*` — grouping breaks this logic and leads to incorrect numbers.For example, grouping can shift totals from one category to another, resulting in misleading data (e.g., showing future counts in past years).\
The best way is to duplicate the original report and apply a filter on the source to include only one contract type (e.g., Freelance or Payroll). This ensures the running sum calculations remain accurate.
Thus you have two options:
* Use filters on the source duplicating the report for each option
* Set up a smart folder, which can organize multiple filtered views in one place, allowing easier navigation - please, note, that Smart folders won't work with Single select, but with Databases only.
Due to the way the report is built (running sums over time), combining multiple dimensions/single selects in one grouped report will likely produce incorrect results. We recommend creating separate filtered views for each combination if needed.
\*`Running Sums` function computes a cumulative total across rows in your report, allowing you to see how values accumulate over time or across a sequence.
# DASHBOARD VIEW
________________
Dashboard View can visualize information in a dense way via flexible layouts. You can insert existing views (or create new views) as widgets.
> [//]: # (callout;icon-type=icon;icon=grin-tongue-wink-alt;color=#199EE3)
> Available to workspaces on any plan
Use Dashboards to track metrics & monitor trends, combine relevant views together, explore a lot of information in a single place.

## Creating Dashboard
You can create Dashboard View on top level, inside any Space or inside any Entity (as [Context Views](https://the.fibery.io/@public/User_Guide/Guide/Context-Views-20)). Simply click + and select Dashboard from the menu:

## Organizing Dashboard
You can add, re-arrange, re-size and delete widgets, thus creating any layout you need on a grid.
* To re-size a widget, drag the bottom right corner. You can change width and height of any widget
* To move a widget, drag the top left corner

Some practical advices:
* Reports are happy to be inside Dashboards and make them nice.
* If you need some text section, create a new Document via Add Widget and write what you need. This document will be inside Dashboard and will not bloat navigation anywhere.
* If you need automatic filter by some entity, like by Project or by Team, create context Dashboard inside Project or Team entity. Check [Context Views](https://the.fibery.io/@public/User_Guide/Guide/Context-Views-20).
### Context Dashboard View
You can create context Dashboard Views inside Smart Folders. All Views inside Dashboard will be automatically filtered by the parent entity. For example, in this scenario single Dashboard shows Features and Insights views and reports for the selected Initiative.

### Embed widget for Dashboard
You can add embeds as Widgets on Dashboard Views. For example, you can add a link to educational video, some website, Figma prototype, etc.

## FAQ
### What widgets are available?
You can insert views (Table, Board, Feed, List, Timeline, Gantt, Map and Report), Documents and Whiteboards.
You can also embed external links, like websites, videos, figma prototypes, etc.
### Are there any cross-filters?
No. So if you insert several reports into the Dashboard, each report will have its own filters. However, you may create context Dashboard (inside an entity) and all content will be filtered by this entity. For example, you may create Dashboard View inside some Project, and filter by this Project will be automatically applied to all views inside this Dashboard.
# AI TEXT ASSISTANT
___________________
Fibery AI Assistant integrates Fibery with [Open AI](https://openai.com/api/ "https://openai.com/api/"). It works in Rich Text fields and Documents. We use `gpt-5-chat-latest` model.
General restrictions:
* Fibery AI Assistant is not trained on your Fibery data (yet), it works only with what you send it in a prompt.
* AI Text assistant is included in [paid plans](https://fibery.io/pricing "https://fibery.io/pricing") (1,000 responses per month on the Standard plan; Unlimited on Pro and Enterprise) but is not available on the Free plan.
## Run existing commands
You can invoke Fibery AI Assistant in several ways:
* Type `>>` anywhere in text
* Type `/` and find `AI Assistant`
* Highlight some text and find AI Assistant icon on the left or use `Option + Enter` shortcut.
First AI Assistant popup looks like this.

Here you can select a command from the list, type quick prompt or create your own command to re-use it later.
For example, you selected a text and invoked `Make it funnier` command. Here is the UI of the AI Assistant panel:

## Create and manage commands
You can create commands and save them to re-use later.
> [//]: # (callout;icon-type=icon;icon=gift;color=#199ee3)
> Commands can be private or public. When you create a new command it is private by default and only you see it.
### How to create a new AI command?
Invoke Fibery AI Assistant and select `Create your own command…` option and the new panel will appear on the right:
Type some prompt and run it.
> [//]: # (callout;icon-type=icon;icon=gift;color=#199ee3)
> Prompt can have a special `{{input}}` keyword, it defines what context will be passed to GTP. You can think about `{{input}}` as a selected text.
Run the prompt and observe the results. When you are happy with the result, click `Save changes` button.
Name your command and click **Save changes**.
> [//]: # (callout;icon-type=emoji;icon=:ok_hand:;color=#199ee3)
> Use emojis to help users find the command.

If you want to make this command visible to all people, click on 🔒 icon.
### Commands visibility
#### Documents vs. Databases
Fibery has Documents and Databases (Task, Project, Feature) and it does matter where you create the AI command.
Here are the rules.
1. If you create a command in a Document, it will be visible in all Documents and all Entities.
2. If you create a command in an Entity (of some Database) and does not use special Fibery fields, it will visible everywhere as well.
3. If you create a command in an Entity and use some Fibery fields, like {{Name}} to access Entity name, then this command will be visible only inside all Entities of this Database.
For example, you are inside a Feature and write this prompt:
```
Generate a list of requirements for feature {{Name}}
```
When you save this command, it will be visible only inside all Features.
#### 🔒 Private vs. Private Commands
All commands you create are private and visible to you only.
You can edit a command and turn make it public by clicking in 🔒 icon. Then it will be visible to all users.

### Prompt structure and Fibery fields
You should be able to create good prompts to get good results from Fibery AI Assistant. Here is [the nice guide about prompts best practices](https://help.openai.com/en/articles/6654000-best-practices-for-prompt-engineering-with-openai-api "https://help.openai.com/en/articles/6654000-best-practices-for-prompt-engineering-with-openai-api").
#### Prompts templates with Fibery fields
You can use Fibery fields from current or related entity in a prompt.
For example, you have Public Announcement field and want to fill it automatically based on Feature `Name` and `Description` fields. Here is how you can do it:
```
Generate a markdown checklist with tasks for feature {{Name}} based on a feature description in triple quotes below:
"""
{{Description}}
"""
```
Read about templates [Markdown Templates](https://the.fibery.io/@public/User_Guide/Guide/Markdown-Templates-53). Here is the very short summary
* Entity Field value `{{Field Name}}`. Example: `{{Name}}`, `{{Total Effort}}`
* Parent entity Field value `{{Parent.Field Name}}`. Example: `{{Project.Start Date}}`, `{{Feature.Effort}}`
* Collection of entities' as a list of field values `{- Collection Name:Field Name -}`. Example: `{- Tasks:Name -}`
* Collection of entities as a comma-separated string of field values `{= Collection Name:Field Name =}`. Example: `{= Assignees:Email =}`
### 📠Markdown format
Fibery AI Assistant supports markdown format. You can ask to generate something in markdown and insert it into a document.
Here is the prompt example
```
Generate a markdown table with 10 top countires by population. First column is country name, second column is country population.
```
And here is how you can insert this table into Fibery document:

Here is another example for a Job Description in markdown:
```
Write a job description in markdown for a head of marketing in post round A B2B SaaS startup that wants to double its ARR in the next year
```

### Command temperature (creativity level)
For every command you can set some creativity level (temperature).
> [//]: # (callout;icon-type=emoji;icon=:nerd_face:;color=#9c2baf)
> Temperature is a parameter used to control the randomness of the generated text. It is a number between 0 and 1. A lower temperature will cause the model to make more predictable choices, while a higher temperature will cause the model to take more risks and generate more diverse and interesting text.
Lower creativity is needed when you want to have a more predictable result, like some math or logic operations. Play with it if you feel like your command produces something crazy.
Click on Settings icon near Edit Command:

### How to delete a command
1. Select a command you want to delete from a list of commands.
2. Click `Edit` button.
3. Click `Delete` icon.
## Some use cases
### Summarize text
Type `>>` in the end of some text and select Summarize command. For example, here is how it summarized an article:

Then you can insert this text into a document via `Insert` command.
### Explain text or term
Select some text, invoke AI assistant and select `Explain` command.

### Write a public announcement for a feature
In Fibery we write public announcements for all released features. We have a special field for that. The following prompt takes `{{Description}}` field of a Feature and does the trick:
```
Write a public announcement of a feature {{Name}} based on the text
"""
{{Description}}
"""
```
### FAQ
#### Why does the AI sometimes reply in English when I ask in another language?
Right now, there's no built-in rule telling the AI to always reply in the same language the question was asked.
Usually, it will *eventually* catch on after a few messages, but it's not 100% reliable. For the best results, we recommend explicitly asking the AI to reply in your preferred language - for example: *"Please reply in Portuguese."*
We hope to improve that logic, please, let us know, whether this is a case for you!
# JIRA INTEGRATION: CLOUD & SERVER
___________________________________
In this guide, we'll explain how to integrate Fibery with Jira and how to link Jira Issues to Fibery Features.
Let's assume that you use Fibery for product management, but your software development team sticks to Jira (for now).
Here are the steps to connect product management and software development processes:
1. Setup Jira Integration in Fibery
2. Add Feature ID Custom Field in Jira Issues
3. Connect Jira Issues to Fibery Features
4. Manage the process
Now let's delve into the details.
> [//]: # (callout;icon-type=icon;icon=sync;color=#673db6)
> You can choose between Jira Cloud or Jia Server for integration.
## Step 1. Setup Jira Integration in Fibery
Navigate to `Templates` at the bottom of the sidebar, choose `Jira` template from Templates Gallery, and sync it. As a result, you will have a Jira Space similar to the one shown.

## Step 2. Add Feature ID Custom Field in Jira Issues
Add `Text` Feature ID Custom Field into your Jira issues. Please note, that it should be exactly a Text custom field (namely, `Short Text` with plain text only), otherwise, it won't be synced with Fibery leading to linking issues.

For every Issue you want to link to Fibery, you will have to fill in the Feature ID field with an ID from Fibery.
When you add Feature ID into some Issues, you have to Force Sync between Jira and Fibery. To do that, go to Jira Space `Settings` and click `Sync Now` button.
#### Using JQL Filters in Jira Integration
When setting up a Jira integration, you can narrow down the imported data by creating a `JQL (Jira Query Language)` filter directly in Jira. Once you've defined and tested your filter in Jira, you can apply it to your integration source in Fibery. This ensures that only the issues matching your filter criteria will be synchronized, helping you keep your workspace clean and relevant.


## Step 3. Connect Jira Issues to Fibery Features
Now it's time to connect Issues and Features via [Auto-linking (Set Relations Automatically)](https://the.fibery.io/@public/User_Guide/Guide/Auto-linking-(Set-Relations-Automatically)-50). Go to Feature and add a new Relation between Feature and Issue.
The setup is the following:

And here is how the flow looks like:

Now all Issues imported from Jira will be linked to Features in Fibery based on ID match.
## Step 4. Manage the process
As a result, you can manage all your products and features in Fibery, while the software development team uses Jira.
In Fibery, you can see the current development status of each Feature. For example, you see that the Feature has one user story and one bug, and no tasks have been completed yet. You can also see who is responsible — and easily navigate to Jira if you need to contact developers or add more user stories.

> [//]: # (callout;icon-type=icon;icon=rotate-360;color=#673db6)
> In most cases, Fibery can replace Jira fully.
Let us know if there are any obstacles preventing you from doing so - just contact us in the support chat!
## FAQ
### I want to have a bi-directional sync between Fibery and Jira
It's possible, please check [Jira two-way sync](https://the.fibery.io/@public/User_Guide/Guide/Jira-two-way-sync-159)
### I want to import data from Jira only once during a migration
For this, you need to setup the integration and then `Disable Sync` in the integration settings.
Navigate to Jira Space, click any Jira database, click `…` in the top right, and disable sync. Now you have Jira data in Fibery!
Here is a video explaining the options for Jira data migration after it has been synced with Fibery.
[https://www.loom.com/share/bd81d4b56f674771b910eca08afd65e5?sid=405b8c0d-8e6a-48f2-83bd-3690f8e235b4](https://www.loom.com/share/bd81d4b56f674771b910eca08afd65e5?sid=405b8c0d-8e6a-48f2-83bd-3690f8e235b4)
### I want to highlight Jira texts, like you do in Intercom
Text from Jira can be changed dramatically, and we can't preserve highlights. That's a conceptual problem, and unfortunately. we can't solve it. If you have a really good case in mind, please, don't hesitate to share it with us.
## Troubleshooting
#### Why query parameter "username" is not supported?

This error occurs when attempting to connect certain fields that cannot be connected due to GDPR compliance. For instance, Jira Users. Please exclude those fields or databases and try the sync again.
#### Why does the “Time Estimate (minutes)†field shows unexpected values?
This behavior comes from how Jira sends time tracking data through its API. The “Time Estimate (minutes)†field reflects the remaining time (in minutes) to complete the issue, not the original estimate or time spent.
Here's how Jira tracks time:
* **Original Estimate** → The total time originally estimated for the issue.
* **Remaining Estimate** → The remaining time left to complete the issue (this is what the **"Time Estimate (minutes)"** field reflects).
* **Time Spent** → The total time already logged on the issue.
When the Remaining Estimate reaches 0 minutes, the "Time Estimate (minutes)" field will also show 0 — even if there was an original estimate or time spent recorded.

#### **How do I change the password for a Jira integration?**
You cannot directly update the password for an existing account used in the Jira integration. If the password for the Jira account changes (for example, due to your company's security policy), you'll need to:
1. Go to the **integration settings** in Fibery.
2. **Add a new Jira account** with the updated password.
3. Once the new account is connected, **remove the old account**.
This approach has been in place for a long time and ensures the integration continues to work smoothly without needing to recreate it entirely.
# EMAIL INTEGRATION AND FUNDRAISING PROCESS FOR VC COMMUNICATION
________________________________________________________________
Email integration can be really helpful for the Fundraising process, that lives in Fibery.
You will have a VC pipeline, and directly in Fibery track all the VC communications without any extra manual effort.
Also, you can automate some processes: set reminders for answers, mark with color investors, you haven't contacted for more than N days, etc.
Let's see, how we can configure that!
> [//]: # (callout;icon-type=icon;icon=envelope;color=#fba32f)
> We recommend configuring a separate inbox folder/label in your email provider that will collect all the communication.
>
> Most likely there is a dedicated person, that reaches out to VCs from a personal email.
>
> Most likely this email is used for other purposes as well.
>
> So it makes sense to configure some rules in the email, to store investor interactions in a special folder. Here is a guide on[ how to handle that in Gmail.](https://support.google.com/mail/answer/6579?hl=en "https://support.google.com/mail/answer/6579?hl=en")
### Configure the email integration
Here is a complete guide to that [Email integration (Gmail, Outlook & IMAP)](https://the.fibery.io/@public/User_Guide/Guide/Email-integration-(Gmail,-Outlook-&-IMAP)-66)
We suggest adding this integration directly to the Fundraising Space. Navigate to Fundraising Space Settings, click Add Integration and select Email.
And sync a dedicated folder, you created.
### Connect emails with investors
> [//]: # (callout;icon-type=icon;icon=exclamation-triangle;color=#1fbed3)
> All integration databases (Message and Contact) are read-only. That is done, to keep data consistency. However, you can add new fields, and connect this data with "active" Fibery databases
We can automatically connect them using the email field.

Now you can connect `Investor` and `Email` with [Auto-linking (Set Relations Automatically)](https://the.fibery.io/@public/User_Guide/Guide/Auto-linking-(Set-Relations-Automatically)-50). Create a new Relation for Investor to Email database, enable "Automaitically link Candidates to Emails" and select Contact Email in Investor and Email field in Email database.
Now you will see all Emails sent by this Investor inside every Investor entity.
# FIBERY AI FAQ
_______________
### Is there a free trial of Fibery AI? How much does it cost?
You can use AI Workspace assistant on any plan, however, the rest of the features (Text assistant, Video & audio transcription, Semantic search, etc) are available on paid plans only. Check out our [pricing page](https://fibery.io/pricing "https://fibery.io/pricing") to see the limits.
### Can I turn Fibery AI off for the whole account?
Yes, go to `Settings` → `AI`.
### What are the privacy implications?
If you don't use this feature, the privacy situation is the same as before.
We don't use the prompt's text as training data. Check [OpenAI Terms](https://openai.com/policies/terms-of-use). According to the latest version they don't use your data as well:
*"We do not use Content that you provide to or receive from our API (“API Contentâ€) to develop or improve our Services."*
For additional information specific to Fibery AI, see the [Fibery AI Additional Terms](https://fibery.io/terms/ai).
What do we send to OpenAI? Here are some examples:
* When you select a specific part of a document and use any AI command, only the selected part is sent to OpenAI.
* With Automations, you can create your own prompts and choose which fields are sent to OpenAI, excluding everything else.
* Semantic Search indexes the Name, all Rich Text fields, and all References linked to an entity. This means that **everything** within these fields will be sent to OpenAI when you add a Database into an index. Therefore, it is the riskiest feature to use in terms of GDPR compliance.
### Which models does Fibery use?
Fibery uses different models for different use cases:
* OpenAI GPT-4o-mini for automation, but you can specify GPT-4o for templates.
* In the text assistant, Fibery uses GPT-4o.
* For audio and video transcription, Fibery utilizes the [Deepgram Nova](https://deepgram.com/learn/nova-2-speech-to-text-api) model, which is specifically developed for audio-to-text conversion.
# TABLE OF CONTENTS
___________________
Table of Content appears automatically on the left of the document, once you use Headers (at least two of them)
It's seen only on the document itself, and won't appear on Views like [Feed View](https://the.fibery.io/@public/User_Guide/Guide/Feed-View-14)
### Collapse ToC
It is possible to collapse ToC. When collapsed, it shows a line with the words "Table of Content" and an expand icon.
The collapsed state is remembered by every user.
When you click on a link in TOC it scrolls you to the header.
* H1
* H2
* H2
* H3
### FAQ
If you have any questions, please, ping us in chat or [in our community.](https://community.fibery.io/ "https://community.fibery.io/")
# SYNC MEETINGS FROM GOOGLE CALENDAR
____________________________________
After you've synced Google Calendar with Fibery, you'll have several new Databases. Let's say you've chosen to have Event Database with a list of all the meetings for a given period, and Calendar Database with a list of Google Calendars you've synced.
You might want to assign these meetings to users from User Database (in People Space) to allow teammates see all their meetings easily and receive notifications.
Here is how to do it.
## Step 1. Create an auto-linking relation from person in Google Calendar to user in Fibery
For clarity, let's rename the User Database in Google Calendar Synced Space to Person Database.
Here are the steps:
* Navigate to Person Database and click `+` on a column to create a new Relation.
* Select User Database and setup one-to-one Relation.
* Click Advanced button and `Automatically link People to Users` switcher and select "Email" in both sides.
As a result, Persons from Google Calendar will be linked to Users in Fibery automatically.

## Step 2. Add People field to event database
Go to the Event Database in Google Calendar Synced Space, add new Field by clicking `+` and select "People" to add People Field. You can give it name "Assignees" for more sake.
## Step 3. Create two rules in the event database
Navigate to Event database, click `Automations` in the upper right corner, and add two Rules.
### Rule 1. Assign organizer
When Organizer Field in Event Database is updated, then add Assignees from relevant Users in User Database.
To define Assignees in the 'Then" part of this Rule, click `…` and add a Formula `[Step 1 Event].Organizer.User`

### Rule 2. Assign event attendees
When new Attendees are added to Event in Event Database, then add Assignees from relevant Users in User Database.
To define Assignees in the 'Then" part of this Rule, click `…` and add a Formula `[Step 1 linked Person].User`

## Step 4. Delete all events and re-sync again
Now we should delete all events and re-sync them to run these Rules for all old events.
1. Navigate to a Table View with all events. If you don't have it, create this View.
2. Select "All Events".
3. Click `Actions` and select `Delete`
4. Navigate to Google Calendar Synced Space.
5. Click `synced … minutes` ago label.
6. Click `Sync now` button on the right.
As a result, all events will be added again and assigned to proper people.
> [//]: # (callout;icon-type=icon;icon=exclamation-circle;color=#673db6)
> Note that Automation takes time - it may take 10+ minutes to get all events assigned to all users.
# BURNDOWN CHART BASED ON "DONE" CARDS COUNTS
_____________________________________________
## Burn Down Chart
Let's create a [Burn Down Chart ](https://en.wikipedia.org/wiki/Burn_down_chart)for Sprint 1.0. It will be a chart that shows a number of "Done" Bugs and User Stories in Sprint:
### Step 0: Pre-requisites
1. Bug and Story databases are connected to the Sprint database (have a relation).
2. Bug and Story has a [Lookups](https://the.fibery.io/@public/User_Guide/Guide/Lookups-16) field called `Sprint Status`. Create this field for both databases via `New Field` → Lookup → Sprint → Status. This is required to filter Bugs and Stories by current sprint.
### Step 1. Create a Report View and choose Datasources
That will be a historical report and 90 days history period is ok for us. We will be analyzing Bugs & Stories, so they will be our sources

### Step 2. Filter Data by the current Sprint
💡 No need for that, if you create Context reports using [Smart Folders](https://the.fibery.io/@public/User_Guide/Guide/Smart-Folders-26)
We need this chart to be updated automatically, once we start a new Sprint. Both Bugs & User Stories have a [Lookups](https://the.fibery.io/@public/User_Guide/Guide/Lookups-16) field with the Sprint Status. It is calculated based on its duration. So, we can use that "common" field in our dynamic filter.

### Step 3. Set X-axis Timeline function
Now we should set a [TIMELINE](https://vizydrop-svc.fibery.io/svc/vizydrop/api/v1/docs/calculations/timeline) function like this (note that the two last values are cut chart by release dates):
```
AUTO(
TIMELINE(
[Modification Date],
[Modification Valid To],
TRUE,
MIN([Sprint Dates Start]),
MAX([Sprint Dates End])
)
)
```

### Step 4. Set Y-axis and chart type
In a Burn Down we calculate the remaining number of undone cards, so in Y-axis we will set a [`COUNTIF_DISTINCT `formula](https://vizydrop-svc.fibery.io/svc/vizydrop/api/v1/docs/calculations/countif_distinct "https://vizydrop-svc.fibery.io/svc/vizydrop/api/v1/docs/calculations/countif_distinct")
```
COUNTIF_DISTINCT(
[Id],
[State Final] != 'true'
)
```
Note: you can have many as many `"Final"` states as you want to. By default final state is `Done`
And we'll set Line as a chart type:


### Step 5. Make this chart a bit more friendly
You can name the title and add the report description, so it was clear for everyone how it works

### Step 6. Add an Ideal line
The ideal line should just move from the first to the last day of the Sprint and from the number of planned cards to zero. It can be created as an Annotation only, using this [IDEAL_LINE](https://vizydrop-svc.fibery.io/svc/vizydrop/api/v1/docs/annotations/ideal_line) function:
```
IDEAL_LINE(
FIRST([Bugs & Stories progress]),
0
)
```
Here is how you add a new Annotation line:


### Step 7. Add a forecast line
The forecast line shows basic predictions about the Sprint completion date based on team velocity. We'll use the [FORECAST_LINE](https://vizydrop-svc.fibery.io/svc/vizydrop/api/v1/docs/annotations/forecast_line) function:
```
FORECAST_LINE(
[Bugs & Stories progress],
0
)
```


**Noted:**
If you want to check whether everything is calculated correctly, which cards had changed and etc. - anytime you can check the data source.


# GET /LOGO
___________
The `/logo` endpoint is used to provide a SVG representation of a connected application's logo. This endpoint is entirely optional. Valid responses are a HTTP 200 response with a `image/svg+xml` content type, a HTTP 204 (No Content) response if there is no logo, or a 302 redirect to another URI containing the logo. If no logo is provided, or an error occurs, the application will be represented with our default app logo.
# POST /OAUTH1/V1/AUTHORIZE
___________________________
The `POST /oauth1/v1/authorize` endpoint performs obtaining request token and secret and generating of authorization url for OAuth version 1 accounts.
Included with the request is a single body parameter, `callback_uri`, which is the redirect URL that the user should be expected to be redirected to upon successful authentication with the third-party service. `callback_uri` includes query parameter `state` that MUST be preserved to be able to complete OAuth flow by Fibery.
Return body should include a `redirect_uri` that the user should be forwarded to in order to complete setup, `token` and `secret` are granted request token and secret by third-party service. Replies are then POST'ed to [/oauth1/v1/access_token](https://the.fibery.io/@public/User_Guide/Guide/POST-oauth1-v1-access_token-373) endpoint.
Request body sample:
```
{
"callback_uri": "https://oauth-svc.fibery.io/callback?state=xxxxxxx"
}
```
Response body sample:
```
{
"redirect_uri": "https://trello.com/1/OAuthAuthorizeToken?oauth_token=xxxxxxxxxxxxxxxxxxxxxxxxxxxxxxxx&name=TrelloIntegration",
"token": "xxxx",
"secret": "xxxx"
}
```
*Note:* The OAuth implementation requires the account identifier to be `oauth` for OAuth version 1.
*Note:* If service provider has callback url whitelisting than `https://oauth-svc.fibery.io/callback?` has to be added to the whitelist.
# POST /OAUTH1/V1/ACCESS_TOKEN
______________________________
The `POST /oauth1/v1/access_token` endpoint performs the final setup and validation of OAuth version 1 accounts. Information as received from the third party upon redirection to the previously posted `callback_uri` are sent to this endpoint, with other applicable account information, for final setup. The account is then validated and, if successful, the account is returned; if there is an error, it is to be raised appropriately.
The information that is sent to endpoint includes:
* `fields.access_token` - request token granted during [authorization step](https://the.fibery.io/@public/User_Guide/Guide/POST-oauth1-v1-authorize-372)
* `fields.access_secret` - request secret granted during [authorization step](https://the.fibery.io/@public/User_Guide/Guide/POST-oauth1-v1-authorize-372)
* `fields.callback_uri` - callback uri that is used for user redirection
* `oauth_verifier` - the verification code received upon accepting on third-party service consent screen.
Request body sample:
```
{
"fields": {
"access_token": "xxxx", // token value from authorize step
"access_secret": "xxxxx", // secret value from authorize step
"callback_uri": "https://oauth-svc.fibery.io?state=xxxxx"
},
"oauth_verifier": "xxxxx"
}
```
Response can include any data that will be used to authenticate account and fetch information.
*Tip*: You can include parameters with `refresh_token` and `expires_on` and then on [validate step](https://the.fibery.io/@public/User_Guide/Guide/POST-validate-369) proceed with access token refresh if it is expired or about to expire.
Response body sample:
```
{
"access_token": "xxxxxx",
"refresh_token": "xxxxxx",
"expires_on": "2020-01-01T09:53:41.000Z"
}
```
# POST /OAUTH2/V1/AUTHORIZE
___________________________
The `POST /oauth2/v1/authorize` endpoint performs the initial setup for OAuth version 2 accounts using `Authorization Code` grant type by generating `redirect_uri` based on received parameters.
Request body includes following parameters:
* `callback_uri` - is the redirect URL that the user should be expected to be redirected to upon successful authentication with the third-party service
* `state` - opaque value used by the client to maintain state between request and callback. This value should be included in `redirect_uri` to be able to complete OAuth flow by Fibery.
```
{
"callback_uri": "https://oauth-svc.fibery.io",
"state": "xxxxxx"
}
```
Return body should include a `redirect_uri` that the user should be forwarded to in order to complete setup.\
Replies are then POST'ed to [/oauth2/v1/access_token](https://the.fibery.io/@public/User_Guide/Guide/POST-oauth2-v1-access_token-375) endpoint.
```
{
"redirect_uri": "https://accounts.google.com/o/oauth2/token?state=xxxx&scope=openid+profile+email&client_secret=xxxx&grant_type=authorization_code&redirect_uri=something&code=xxxxx&client_id=xxxxx"
}
```
*Note:* The OAuth implementation requires the account identifier to be `oauth2` for OAuth version 2.
*Note:* If service provider has callback url whitelisting than `https://oauth-svc.fibery.io` has to be added to the whitelist.
# POST /OAUTH2/V1/ACCESS_TOKEN
______________________________
The `POST /oauth2/v1/access_token` endpoint performs the final setup and validation of OAuth version 2 accounts. Information as received from the third party upon redirection to the previously posted `callback_uri` are sent to this endpoint, with other applicable account information, for final setup. The account is then validated and, if successful, the account is returned; if there is an error, it is to be raised appropriately.
The information that is sent to endpoint includes:
* `fields.callback_uri` - callback uri that is used for user redirection
* `code` - the authorization code received from the authorization server during redirect on `callback_uri`
Request body sample:
```
{
"fields": {
"callback_uri": "https://oauth-svc.fibery.io"
},
"code": "xxxxx"
}
```
Response can include any data that will be used to authenticate account and fetch information.
*Tip*: You can include parameters with `refresh_token` and `expires_on` and then on [validate step](https://the.fibery.io/@public/User_Guide/Guide/POST-validate-369) proceed with access token refresh if it is expired or about to expire.
Response body sample:
```
{
"access_token": "xxxxxx",
"refresh_token": "xxxxxx",
"expires_on": "2020-01-01T09:53:41.000Z"
}
```
# POST /SCHEMA
______________
If you specify type = "crunch" for your custom app, it means that you know in advance your data schema. So you need to implement endpoint for getting the schema.
## Request
Request body contains account and filter:
```
{
"filter": {
"query": "select * from test"
},
"account": {
"username": "test_user",
"password": "test$user!",
/*...*/
}
}
```
## Response
Response should contain data schema with the following format:
```
{
"name": {
id: "name"
ignore: false
name: "Name"
readonly: false
type: "text"
},
"age": {
id: "age"
ignore: false
name: "Age"
readonly: false
type: "number"
},
/*...*/
}
```
Schema is JSON object where key is field and value if field description. Field description contains:
| field | description | type |
| --- | --- | --- |
| id | Field id | string |
| ignore | Is field visible in fields catalog | boolean |
| name | Field name | string |
| description | Field description | string |
| readonly | Disable modify field name and type | boolean |
| type | Type of field | "id" \| "text" \| "number" \| "date" \| "array\[text\]" \| "array\[number\]" \| "array\[date\]" |
# POST /VALIDATE/FILTER
_______________________
This endpoint performs filter validation. It can be useful when app doesn't know about what filter value looks like. For example, if your app receives sql query as filter you may want to check is that query is valid.
## Request
Request body contains source, account information and filter information:
```
{
"source": "sql",
"filter": {
"query": "select * from my_table"
},
"account": {
"username": "test_user",
"password": "!test$!_user"
}
}
```
## Response
If the filter is valid, the app should return HTTP status 200 or 204.
If the account is invalid, the app should return HTTP status 400 (Bad request) with a simple JSON object containing an error message:
```
{"error": "Your filter is incorrect!"}
```
# POST /COUNT
_____________
Fibery can display the progress of processing records in case when the special route with count of records implemented. If you know in advance how much data you return, and prefer progress be displayed then implement this endpoint. It will help to show more precise progress during report creation.
## Request
Request body contains account, source and filter:
```
{
"source": "sql",
"account": {
"username": "test_user",
"password": "test_$user!",
/*...*/
},
"filter": {
"query": "select * from db"
}
}
```
## Response
The endpoint should return count of records as simple string or number.
# FILTERS
_________
Use filters to narrow down a selection using a combination of conditions:

Filters work in a similar way across Fibery:
* on data [Views](https://the.fibery.io/@public/User_Guide/Guide/Views-8),
* in [Rules](https://the.fibery.io/@public/User_Guide/Guide/Rules-51) trigger,
* in relations as [Relation Filters and Sorts](https://the.fibery.io/@public/User_Guide/Guide/Relation-Filters-and-Sorts-177).
This is a common guide although we'll use Views as an example.
## Setting up
### Add a filter rule
To add a basic filter:
1. select `Filters`
2. click `+ Add Filter` and select `Add Filter Rule`
3. pick a Field you would like to filter by
4. pick an operator — for example, `is any of` or `is after`
5. pick a value

### Combine rules with `and` and `or`
Narrow down the selection even further by adding more rules:

Combine the rules with `and` to get items that satisfy all the rules; with `or` — that satisfy any of the rules:

### Quick filters
You can create Quick Filters in all top level views (Table, Board, Timeline, Calendar, List).
Just create a filter or a filter group and pin it.
You can also pin filters on relation and embedded Views. It may help to reduce amount of Views you create, but in relation views it will also increase visual noise, so use it carefully! You can also re-order filters (and pinned filters as a result). Just drag and drop a filter in Filters menu.
Notes:
* Only Creators can pin filters, but all users can, well, use them.
* Filters are seen globally (by everyone)
* Filters usage (aka use or not) is per User
* It is also possible to disable/enable filters via "eye" icon in filters menu.
* Emojis make pinned filters better, use them wisely!
### Nest conditions with filter groups
For a complex combination of `and` and `or`, use filter groups:

Groups can be nested up to 3 levels deep. *If you need more (we are impressed!), describe your use case in the [community](https://community.fibery.io/ "https://community.fibery.io/").*
### Set any relative value in Date Filter
When filtering by Date Field, you can choose from convenient preset options like "today," "yesterday," and "one week from now," or use the "custom date" option to select either specific dates or relative timeframes.
You have the freedom to combine absolute and relative dates at both ends of your date range, moving beyond simple preset ranges like "past week."
Here are some examples of what you can do:
* Set a range from a specific date to another specific date (e.g., from January 1st → to January 15th)
* Mix a specific date with a relative one (e.g., from January 1st → to 5 days ago)
* Use relative dates on both ends (e.g., from 10 days ago → to 2 weeks from now)
> [//]: # (callout;icon-type=icon;icon=lightbulb-alt;color=#fba32f)
> Pro tip: Need to filter for today's data? Simply use "0 days ago" or "0 days from now" as your relative value.
### Filter by related entities fields (relations)
You can filter Entities using fields from related databases. When setting up filters, you'll see an `>` arrow next to relation fields, allowing you to access and filter by fields from the related database.

For example, if your Tasks database is connected to Teams, Epics, and Departments, you can now filter tasks using fields from any of these related databases.
> [//]: # (callout;icon-type=icon;icon=exclamation-circle;color=#fba32f)
> Some limitations:
>
> * Collection fields can be selected but don't support deeper field access
> * It not possible to dig deeper into People fields
## Nuances
### Global vs. my filters on Views
On top of filters for everyone, you are free to add your own personal filters that won't affect other users looking at the same View:

Global and personal filters are combined with `and`.
### Setting filter values for newly created Entities
When possible, we try to automatically set the appropriate values for newly created Entities based on filters:

The goal is to make sure the newly added card stays on the screen.
When determining values proves to be tricky (ex. when rules are combined with `or`), we skip this step. In this case, the card will disappear soon after creation.
> [//]: # (callout;icon-type=emoji;icon=:point_up:;color=#6a849b)
> For multi-selects filtered using `is any of` operator, we set all the values.
### Filter per DB (+ columns and rows)
When cards of multiple DBs are present on the same View, you can specify custom filters for each DB independently:

In a similar way, you can configure filters for rows and columns.
### Relative date filters

**`is on or after month ago`**\
\[Nov 7,… ) – so any future date is included as well.\
**`is within the past month`**\
(Nov 7, Dec 7\]
> [//]: # (callout;icon-type=emoji;icon=:point_up:;color=#6a849b)
> If the day of the month on the original date is greater than the number of days in the final month, the day of the month will change to the last day in the final month.
#### "This month", "This week", "This year" filter
You can filter views by past/current/next week/month/quarter/year.

# WHITEBOARD RELATION TOOL
__________________________
Relation Tool simplifies the creation, modification and deletion of relations between entities. It works for all kinds of relations, including many-to-one, many-to-many, and even self-relations. In a nutshell, you have a new way to work with relations visually 🥹.
## Using the Relation Tool
To use the Relation tool, follow these steps:
* Ensure that the `Show relations` is turned ON. This mode enables the visibility of the Relation tool.
* Locate the Relation tool icon in the toolbar

* Click on the Relation tool icon or use the shortcut key `R` to activate the Relation tool.
* Use the Relation tool to create relations between entities by clicking and dragging from one entity to another.
* Alternatively, hold down the `Shift` key while creating a line from one entity to another to create a relation
> [//]: # (callout;icon-type=icon;icon=exclamation-circle;color=#fba32f)
> Note that if you attempt to create a relation between entities that have no existing relations, a visual indicator will notify you that the relation will not be created.
## Styling and Settings
The Relation tool has predefined styling rules for relations that can't changed.
* Color:
* For 1-\* relations, the color of the parent entity is used
* Line:
* Relations are represented by dashed lines to distinguish them from usual connectors.
* Arrow. The number of arrows depends on the relation type:
* For 1-1 relations, no arrows are displayed.
* For 1-\* relations, one arrow is displayed.
* For \**-\** relations, two arrows are displayed on both ends.
## Deleting Relations
To delete a relation, follow these steps:
1. Select the relation arrow between entities.
2. Press the "Delete" key or use the `Unlink` action to delete the selected relation (You can also delete a relation by dropping it onto an empty space)
3. Deleting a relation removes the corresponding relation from the database.
## Converting Connectors to Relations
You can convert connectors to relations by following these steps:
1. Select multiple connectors that you want to convert to relations.
2. Click `…` and select Convert to Relations.
3. The selected connectors will be converted to relations, maintaining their assigned properties.
# GITLAB ACTIONS
________________
When something happens in Fibery (ex. a Story is completed), update your data in GitLab.
Here is a list of possible actions:
* **Merge Requests:** create, merge, approve, close
* **Branch:** create
* **Issue:** create
* **Incident:** create
If an action is missing, please let us know.

# HOW TO CREATE A JOB APPLICATION PORTAL
________________________________________
Hiring a new employee is a complex process that requires a lot of coordination between recruiters, hiring managers, HR professionals, and the rest of the team. Wouldn't it be nice to have all your applications for that new head of business development in one place? Where you could make a View or two to compare favourites and share with your team? Of course it would, and the good news is we can do it with a form.
## Explore the Hiring Template
Before we start messing with databases, we need to think about what kind of data we want to collect and what we want to do with it. Here are some prompts to help get the wheels turning.
1. Have a clear understanding the goal of the position and evaluating if a new hire is even necessary - maybe a contractor would be a better choice, which could have implications for the hiring pipeline.
2. Create (or grab from the hiring committee) a job description. This will help you tease out what questions you want to ask of your applicant and who needs to see data you collect.
3. Think about your hiring process and what would trigger an applicant moving forward in the pipeline.
### Install the Template
1. Click `+Template` at the bottom of your Spaces panel.
2. Find the `Hiring Template` by scrolling or searching, and click install `Install`
3. Click on the `Hiring` Space and take a peek at the configured databases

> [//]: # (callout;icon-type=emoji;icon=:thinking_face:;color=#fba32f)
> **OPTIONAL:** Find the â‹…â‹…â‹… menu of the Space at the top right and `Delete all Space data` . This will get rid of all the dummy data in the Template and keep the Views and Databases. Up to you if you would like to keep this configuration or start from scratch.
### Modify the Hiring Template
Keeping in mind your hiring process and the applicants you are searching for, you may opt to rename or add databases and fields.
We adjusted the `Position` database with different positions, and added a `Rich Text Field` to the `Candidate` database so we could prompt applicants in the form for a short introduction of themselves.
Also take a moment to adjust the options in the `State` field in the `Candidate` database if they do not match the steps in your hiring process.

## Create a Hiring Page
No need to call upon your web developers to add a temporary position page while you are hiring - we can make a Fibery Document and share it publicly. The URL that is generated works like any other URL, is indexed by search engines, and can be unshared the moment you don't need it anymore. Feel free to skip this step if you already have your hiring page set up.
Find the `Our hiring process` document in the Hiring Space and edit it with a company summary, position descriptions, your hiring process and whatever other information you would like to prime your candidates with.
When we're ready to share the form, we'll add a link to it on this document.

## Create a Form
1. Click on the `+` and find Form View. Select the `Candidate` database when prompted. This will link the form to all of the fields in that database, which will serve as the base for your application questions.
2. Select which fields you want to show to your applicants and which ones are only for you.
Take a moment to customize the form: add a short intro into the `Rich Text box`, rename the field names to match your company tone, add descriptions, and maybe change the cover photo.

In the top right, you can `Preview` the form to see what it will look like when its published. It's fully functional in `Preview` mode, so plop in some dummy data and test it out if you are so inclined.
## Share to the public
That's it! When you are ready to share the form, click the **Share** button to generate a public link and put it on your hiring page. Do the same on the hiring page Document and it will be live on The Internet.

Here are some more ideas on where you could put it:
* YouTube description of a product demo
* a Tweet
* a button on your website
* in a QR code
## Try this next
* Add an Automation to alert the hiring chair of new applications, or HR of a newly accepted offer
* Create a Context View organized by open position that shows where the applicant is in the pipeline
# WORKSPACE SETTINGS
____________________
Configure how workspace for all users. See [Personal preferences](https://the.fibery.io/@public/User_Guide/Guide/Personal-preferences-288) for user-specific customizations.
## Navigate to settings

Here is how to navigate to workspace settings:
1. click on the workspace name in the top-left corner;
2. select `Settings`.
You can also type `settings` (in full) in search.
## Change logo and workspace name
To change the logo and workspace name, navigate to `Settings` in the sidebar, type the name in `Name` field and upload the logo. The logo should be square to look good.
> [//]: # (callout;icon-type=icon;icon=confused;color=#fba32f)
> Workspace name is not affecting workspace URL. For example, if you have an account [xxx.fibery.io](http://xxx.fibery.io) and rename the workspace to `Teddy's`, the url [xxx.fibery.io](http://xxx.fibery.io) will remain.

## Authentication
Check [Authentication methods](https://the.fibery.io/@public/User_Guide/Guide/Authentication-methods-48) to learn how you can enable and disable workspace authentications.
## Restrict access by IP
You can define a list of allowed IP addresses to make your account even more private.
1. Enable `List of allowed IP addresses`.
2. Type several status IP addresses and make sure to include your own IP address.
3. Click `Save`.

Note that if you set incorrect IP addresses you may lose your access to the account. In this case contact us (click on ? icon in the right bottom and click Chat with support)
## Workspace Status
This gives you real-time updates on the status of services in your workspace. It's designed to help you out when you're dealing with a lot of data and want to avoid any performance issues.


## Export workspace
See [Export your data](https://the.fibery.io/@public/User_Guide/Guide/Export-your-data-63).
## Delete workspace
See [Delete Workspace](https://the.fibery.io/@public/User_Guide/Guide/Delete-Workspace-64).
# HOW FIBERY TEAM USES AI
_________________________
AI is gaining ground in today's fast-paced business world, and our Fibery Team is a skeptic-optimistic example of its use among product teams.
We'll delve into real examples, showcasing the tangible benefits and acknowledging the limitations.
## Customer Success
> [//]: # (callout;icon-type=icon;icon=baby-carriage;color=#e72065)
> Want to mention, that although AI is on the edge of technology and productivity now, its value for the Customer Success team at the moment is pretty limited. AI doesn't answer chats (and we have tons of positive feedback for that). AI doesn't link feedback. AI can't predict churn, upsell, or down-sell. It can't replace real humans (at least now).
>
> But it saves some time and helps to accumulate context. And that's already a lot.
### Summarizing chat
#### Prompt
```
[ai temperature=0.5 maxTokens=300]
"""
{{Messages}}
"""
Summarise the text above
[/ai]
```
#### How it works
This prompt is used to summarize Intercom conversations (learn more about our [Intercom integration](https://the.fibery.io/@public/User_Guide/Guide/Intercom-integration-73) ) with customers. That is helpful for other teammates, to have a quick glance at topics, that were currently discussed.
The conversation is summarized when the chat is closed. [AI in Automations](https://the.fibery.io/@public/User_Guide/Guide/AI-in-Automations-162) helps here.

#### Recent examples
We use [Feed View](https://the.fibery.io/@public/User_Guide/Guide/Feed-View-14) for visualization

#### Limitations
The biggest challenge here is volume. Sometimes users prefer to reopen conversation with a new question, rather than create a new conversation. And if it's a preferred way of communication, reasonable summarizing stops working within time. But there is no more than 5% of such cases across all the feedback we receive.
### Calculating sentiment score
#### Prompt
```
Sentiment scores are a metric for measuring customer sentiment. Scores can range from 0-100, where 100 is the most positive possible outcome and 0 is the least. Generate a sentiment score for the text below and return result as a number in a format [sentiment score] without brackets
"""
{{Messages}}
"""
```
#### How it works
Average 😅
Ok, no more jokes!
This prompt is used to add score to our Intercom conversations (learn more about our [Intercom integration](https://the.fibery.io/@public/User_Guide/Guide/Intercom-integration-73) ) with customers. That is helpful to understand, whether our team is polite enough, what can be improved, etc.
The conversation is scored when the chat is closed. [AI in Automations](https://the.fibery.io/@public/User_Guide/Guide/AI-in-Automations-162) helps here.

#### Recent examples
We built a nice report, to understand dynamic changes.

> [//]: # (callout;icon-type=icon;icon=brightness;color=#fba32f)
> Interesting insights:
>
> * the fewer chats you have, the more polite you are.
> * after vacation sentiment level increases.
## Marketing
### ~~Twitter~~ X threads about new releases
Yep, we have a [Twitter account.](https://twitter.com/fibery_io "https://twitter.com/fibery_io")
Yep, we have [weekly releases (here you can read how do we manage that).](https://community.fibery.io/t/use-case-public-changelog/2727/7 "https://community.fibery.io/t/use-case-public-changelog/2727/7")
#### Prompt
```
You are an experienced marketing professional. Write a Twitter Thread with numeration about the new release. Release notes text provided in triple quotes below:
"""
{{input}}
"""
```
#### How it works
For this case we use [AI Text Assistant](https://the.fibery.io/@public/User_Guide/Guide/AI-Text-Assistant-156)
The pre-generated description is chosen, and AI Assistant is called.
#### Recent examples:
Here is what the suggested one looks like. And check our Twitter to check, whether we used it! 🦊

## Occasional cases
Here we will share some examples, that are not part of a process.
With [AI Text Assistant](https://the.fibery.io/@public/User_Guide/Guide/AI-Text-Assistant-156) you can save some money on Grammarly while working on a feature spec.


This is probably it!
No AI was used to write this guide ~~(because it failed).~~ We promise to regularly update this one.
Feel free to share your cool prompts, feedback, and anything else[ in our community](https://community.fibery.io/c/fibery-ai/20). We will be there for you 💖
# IMAGES AND VIDEO
__________________
## Images
You may upload an image into Fibery and use it in [Rich Text](https://the.fibery.io/@public/User_Guide/Guide/Rich-Text-28) fields.
1. Type `/im` and click `Insert Image` command.
2. Upload your image and it will be inserted into the current place.
Alternatively, you can just drag and drop an image into the Rich Text field and it will be uploaded into Fibery.
You can also post a link to an image in the web and it will be automatically presented as an image.
### Resize image
Click on an image and borders will appear. Drag them to set the desired size of the image.

Tips:
* Double-click on resize handler resizes it to max width
* Double-click again to resize element back to content width
#### Align image
Click on an image and find menu on the bottom with several alignment options.
### Open image full size
1. Click on an image and find menu on the bottom.
2. Click expand arrows icon to see it in the full size.
Alternatively, you can just double click on image to expand it.
### Annotate image
1. Click on an image and find `T` action on the bottom.
2. Click it and type annotation text, it will appear below the image.
## Videos
You may upload videos into Fibery and use them in Rich Text fields.
1. Type `/vi` and click `Insert Video` command (`*.mp4` or other web supported formats).
2. Upload your video and it will be inserted into the current place.
Alternatively, you may just drag and drop a video into the Rich Text field and it will be uploaded into Fibery.
You can also post a link to any YouTube/Loom video into the Rich Text and it will be automatically embedded.
[https://youtu.be/ddgJGoQBdtQ](https://youtu.be/ddgJGoQBdtQ)
# FILE API
__________
Working with Files is different from other scenarios. To upload or download a File, use `api/files` endpoint instead of the usual `api/commands`.
When uploading a File, Fibery does two things:
1. Saves the File to Storage and gets File's `fibery/secret`.
2. Creates an Entity of `fibery/file` Type with the `fibery/secret` from the previous step and gets `fibery/id`.
When working with Storage (ex. downloading a File) use `fibery/secret`. For actions inside Fibery (ex. attaching a File to an Entity) use `fibery/id`:
Parent Entity --- (`fibery/id`) ---> File Entity --- (`fibery/secret`) ---> File in Storage\
`fibery/file` Type
| Field name | Field type | Example |
| --- | --- | --- |
| `fibery/id` | `fibery/uuid` | c5bc1ec0-997e-11e9-bcec-8fb5f642f8a5 |
| `fibery/secret` | `fibery/uuid` | c5815fb0-997e-11e9-bcec-8fb5f642f8a5 |
| `fibery/name` | `fibery/text` | "vogon-ship.jpg" |
| `fibery/content-type` | `fibery/text` | "image/jpeg" |
## Upload File
Upload a locally stored File and get:
* `fibery/id` to attach the File to an Entity;
* `fibery/secret` to download the File.
Upload an image from a Windows PC:
JavaScript
```
const Fibery = require('fibery-unofficial');
const fibery = new Fibery({host: "YOUR_ACCOUNT.fibery.io", token: YOUR_TOKEN});
await fibery.file.upload('\\Users\\Trillian\\Pictures\\virat-kohli.jpg');
```
cURL
```
curl -X POST https://YOUR_ACCOUNT.fibery.io/api/files \
-H 'Authorization: Token YOUR_TOKEN' \
-H 'content-type: multipart/form-data' \
-F 'file=@C:\Users\Trillian\Pictures\virat-kohli.jpg'
```
Result:
```
{
"fibery/id": "c5bc1ec0-997e-11e9-bcec-8fb5f642f8a5",
"fibery/name": "virat-kohli.jpg",
"fibery/content-type": "image/jpeg",
"fibery/secret": "c5815fb0-997e-11e9-bcec-8fb5f642f8a5"
}
```
## Upload File from the web
Upload a file from url and get:
* `fibery/id` to attach the File to an Entity;
* `fibery/secret` to download the File.
| parameter | optional? | type | Example |
| --- | --- | --- | --- |
| `url` | required | `string` | "https://example.com/files/attachment.pdf" |
| `name` | optional | `string` | "my file.pdf" |
| `method` | optional | `GET\POST\...` | "POST" , defaults to "GET" |
| `headers` | optional | `{}` | { "auth header": "auth key for 3rd party system" } |
Upload an image from pixabay:
```
curl -X POST https://YOUR_ACCOUNT.fibery.io/api/files/from-url \
-H 'Authorization: Token YOUR_TOKEN' \
-H 'content-type: application/json' \
-d \
'{
"url": "https://cdn.pixabay.com/photo/2016/03/28/10/05/kitten-1285341_1280.jpg",
method: "GET",
name: "img.jpg",
headers: {
"auth header": "auth key for url specified"
}
}'
```
Result:
```
{
"fibery/id": "d5bc1ec0-997e-11e9-bcec-8fb5f642f8a5",
"fibery/name": "img.jpg",
"fibery/content-type": "image/jpeg",
"fibery/secret": "f5815fb0-997e-11e9-bcec-8fb5f642f8a5"
}
```
## **Download File**
Download a File by providing `fibery/secret`.
JavaScript
```
const Fibery = require('fibery-unofficial');
const fibery = new Fibery({host: "YOUR_ACCOUNT.fibery.io", token: YOUR_TOKEN});
await fibery.file.download('c5815fb0-997e-11e9-bcec-8fb5f642f8a5', './virat.jpg');
```
cURL
```
curl -X GET https://YOUR_ACCOUNT.fibery.io/api/files/c5815fb0-997e-11e9-bcec-8fb5f642f8a5 \
-H 'Authorization: Token YOUR_TOKEN'
```
> [//]: # (callout;icon-type=icon;icon=asterisk;color=#fba32f)
> Note: there is no place on UI where you can find any arbitrary file. You can download it by URL above (or preview by browser if file format allows it).\
> To view it file on UI one must place it in the Rich Text or Document or into Files extension for some Entity.
## **Attach File to Entity**
Before attaching a File, make sure that Files field is added for the Entity's Database:
File field creates an entity collection Field called `Files/Files`. Attach and remove Files the same way you update any other entity collection Field.
Attach a picture to a Player's profile:
JavaScript
```
const Fibery = require('fibery-unofficial');
const fibery = new Fibery({host: "YOUR_ACCOUNT.fibery.io", token: YOUR_TOKEN});
await fibery.entity.addToEntityCollectionFieldBatch([
{
'type': 'Cricket/Player',
'field': 'Files/Files',
'entity': { 'fibery/id': '20f9b920-9752-11e9-81b9-4363f716f666' },
'items': [
{ 'fibery/id': 'c5bc1ec0-997e-11e9-bcec-8fb5f642f8a5' }
]
}
]);
```
cURL
```
curl -X POST https://YOUR_ACCOUNT.fibery.io/api/commands \
-H 'Authorization: Token YOUR_TOKEN' \
-H 'Content-Type: application/json' \
-d \
'[
{
"command": "fibery.entity/add-collection-items",
"args": {
"type": "Cricket/Player",
"field": "Files/Files",
"entity": { "fibery/id": "20f9b920-9752-11e9-81b9-4363f716f666" },
"items": [
{ "fibery/id": "c5bc1ec0-997e-11e9-bcec-8fb5f642f8a5" }
]
}
}
]'
```
Result (cURL):
```
[
{
"success": true,
"result": "ok"
}
]
```
## **Download attachments**
To download Entity's attached Files:
1. Get the Files `fibery/secret`;
2. Download each File using `fibery/secret`.
Get attached Files `fibery/secret` for a particular Player Entity:
```
curl -X POST https://YOUR_ACCOUNT.fibery.io/api/commands \
-H 'Authorization: Token YOUR_TOKEN' \
-H 'Content-Type: application/json' \
-d \
'[
{
"command": "fibery.entity/query",
"args": {
"query": {
"q/from": "Cricket/Player",
"q/select": [
"fibery/id",
{ "Files/Files": {
"q/select": ["fibery/secret"],
"q/limit": "q/no-limit"
} }
],
"q/where": ["=", ["fibery/id"], "$entity-id"],
"q/limit": 1
},
"params": {"$entity-id": "20f9b920-9752-11e9-81b9-4363f716f666"}
}
}
]'
```
Grab the secrets:
```
[
{
"success": true,
"result": [
{
"fibery/id": "20f9b920-9752-11e9-81b9-4363f716f666",
"Files/Files": [
{ "fibery/secret": "a71a7f30-9991-11e9-b8d4-8aba22381101" },
{ "fibery/secret": "c5815fb0-997e-11e9-bcec-8fb5f642f8a5" }
]
}
]
}
]
```
Download Files using these secrets:
```
curl -X GET https://YOUR_ACCOUNT.fibery.io/api/files/a71a7f30-9991-11e9-b8d4-8aba22381101 \
-H 'Authorization: Token YOUR_TOKEN'
curl -X GET https://YOUR_ACCOUNT.fibery.io/api/files/c5815fb0-997e-11e9-bcec-8fb5f642f8a5 \
-H 'Authorization: Token YOUR_TOKEN'
```
## Remove all files
This is an example of removing all files. Files to be safe can be filtered out if needed.
```
const fibery = context.getService('fibery');
let files = [];
for (let entity of args.currentEntities) {
const e = await fibery.getEntityById(entity.type, entity.id, ['Files']);
for (let { Id } of e["Files"]) {
files.push(Id);
}
}
await fibery.deleteEntityBatch("fibery/file", files);
return "Deleted: [" + files.join(`,`) + "]";
```
### FAQ
#### How to Upload Images via API From External Sources
```
await fetch('/api/files/from-url', {
method: "post",
headers: {
'Content-Type': "application/json; charset=utf-8"
},
body: JSON.stringify({url: "file-url", name: "file-name", id: "optional UUID of file being created"}),
});
```
# CALCULATE SENTIMENT SCORE BY AI
_________________________________
Manually sorting through the overwhelming volume of feedback is neither efficient nor pleasant. AI changes how we handle, analyze, and respond to user feedback. In particular, it comes handy for calculating sentiment score. Such analysis helps understand how the team is performing, how happy the customers are, and what can be improved.
In this guide, we'll explain how to configure AI to complete this task in Fibery automatically.
> [//]: # (callout;icon-type=emoji;icon=:superhero:;color=#fba32f)
> In the Product Team template, the Automations that rely on AI are described but disabled by default. Once you've set your OpenAI API key, you can enable them and tweak the prompts to your liking. To see an example of calculating sentiment score, go to Feedback Space and proceed to Automations in the Interview Database.
## How it works
To automatically calculate sentiment scores for a conversation with a customer, use [AI in Automations](https://the.fibery.io/@public/User_Guide/Guide/AI-in-Automations-162).
Here is the prompt for AI:
```
Sentiment scores are a metric for measuring customer sentiment. Scores can range from 0-100, where 100 is the most positive possible outcome and 0 is the least. Generate a sentiment score for the text below and return result as a number in a format [sentiment score] without brackets
"""
{{Messages}}
"""
```
This works perfectly for live communication platforms, for example, if you have [Intercom integration](https://the.fibery.io/@public/User_Guide/Guide/Intercom-integration-73) , [Zendesk Integration](https://the.fibery.io/@public/User_Guide/Guide/Zendesk-Integration-74) or [Discourse integration](https://the.fibery.io/@public/User_Guide/Guide/Discourse-integration-75) .
### **Example**
Let's say we use Intercom for customer success, and we want to automatically calculate sentiment score when chat is closed.
So we set an Intercom Integration, and now we have a Conversation Database were all chats are stored.
Here is how Automation Rule will look for calculating sentiment score for Intercom conversations.

## How to visualize sentiment scores
Sentiment score is useful for dynamically analyzing customer success over time.
You can do it using our powerful [[#^dee06c51-f937-11ec-aafd-7332cdf16307/83b65da0-fa2a-11ec-a00c-9384c37c027a]]. For example, here is what it looks like for Fibery team:

And let's see how it changes within time for a single teammate:

## See also
* Check [How Fibery team uses AI](https://the.fibery.io/@public/User_Guide/Guide/How-Fibery-team-uses-AI-194) for more examples for various cases.
* Check blogpost [Using AI for Product Feedback](https://fibery.io/blog/product-management/ai-product-feedback/) management. It's written by our CEO and he honestly shares his experience about using AI.
* Check our [community ](https://community.fibery.io/)to discuss your ideas, and write to support chat should you have any questions!
# SLACK BOT INTEGRATION
_______________________
Our Slack Bot has no AI yet. However, it's still capable of something:
* Create Entities from messages.
* Create Entities using bot command.
* Display a list of assigned entities.
* Handle vacations and sick days.
## Setup Slack integration
> [//]: # (callout;icon-type=icon;icon=exclamation-circle;color=#199ee3)
> Slack connection has to be done by Fibery & Slack admin.
1. Navigate to `Templates` → `Integrations`.
2. Find Slack and click `Connect` button.
3. Authenticate Slack account.
After that, every teammate can turn on Slack Notification in the Notification center.
> [//]: # (callout;icon-type=icon;icon=exclamation-circle;color=#fc551f)
> You can't send messages to specific channels, only DM messages from Fibery Bot.
## Create Entities from messages
Every message can be converted to some entity. For example, Task, Feature, Bug, Document, and anything else. Just click on message actions, select Create Entity action and select a Database:
If a message contains an image, it will be attached to an entity. Thus you can create bugs from screenshots in Slack quickly. Very handy! However, to make it work you have to add Fibery App into the channel.
Click on a channel name, then on `Integrations`, find Fibery and add it.
Note: you can save large messages in rich text fields.
## Connecting several Fibery Workspaces
Sometimes companies have multiple Fibery Workspaces and a single Slack workspace. In this situation Slack user can set default Fibery Workspace in Slack using the following command:
`/fibery set-default-workspace [workspace_name].fibery.io`
If you want to see what Workspace is set to default use `/fibery me` command:
```
Workspace: the.fibery.io (default)
User: Michael Dubakov
```
## Create Entities using Bot command
Type `/fibery create bug “this is a bugâ€` and a new bug will be created. You can create other entities as well, like:
```
/fibery create task "record the video about Slack Bot" @slack-user
/fibery create feature "Notifications"
/fibery create candidate "Teddy Bear"
```
Note that you can assign people from Slack using `@` symbol. It works when:
* User email in Slack and User email in Fibery is the same.
* You have at least one People field created for a database. Note that if you have several People field you should specify the field name ot make it work, check the examples below:
```
/fibery create bug "Text" @michael dubakov
/fibery create bug "Text" @michael dubakov as QA
/fibery create bug "Text" @michael dubakov as Product Owner
```
## Vacations handling
If you use the Vacations Space, you can quickly add Vacations via Fibery Slack Bot. Here are some examples:
```
/fibery day off today
/fibery day off tomorrow
/fibery half day off Jun 13
/fibery vacation Jun 10-20
/fibery sick today
```
Slack Bot tries to guess the correct dates and shows a confirmation to you:

> [//]: # (callout;icon-type=icon;icon=exclamation-circle;color=#fba32f)
> Keep in mind that if you change the database names in the Vacations template, you'll likely receive a similar error in the Slack bot, so try to stick to the original naming (until it's fully customizable):
>
> 
## Other options
Examples are created for the workspace under the name `fiberyedge.fibery.io`
**Create Tasks, Bugs, and whatnot in Fibery**
```
/fiberyedge create database ‘entity name' @assignee
/fiberyedge create bug ‘found a typo in the text' @Alex
/fiberyedge create task “add help to slack bot†@John
```
**Show Entities assigned to you**
```
/fiberyedge my database
/fiberyedge my bug
/fiberyedge my bugs
/fiberyedge my “user storiesâ€
/fiberyedge my “Marketing/Taskâ€
```
**Post vacations and sick days to Vacations Space**
```
/fiberyedge [ cancel ][ half ][ dayon | dayoff | sick | vacation | sick leave | overtime ][ $DATE ]
/fiberyedge half dayoff Friday
/fiberyedge cancel dayoff tomorrow
/fiberyedge vacation Dec 12 - Dec 29
```
**Set the channel to receive vacation updates from everyone (for Fibery admins only)**
```
/fiberyedge set vacation channel
```
**Reset the channel to receive vacation updates from everyone (for Fibery admins only)**
```
/fiberyedge reset vacation channel
```
**Get the current channel to receive vacation updates from everyone**
```
/fiberyedge get vacation channel
```
**Show Fibery user information**
```
/fiberyedge me
```
Also, you can create Entities via the ‘more actions' menu on the right of Slack messages
## Power bonus 💪
You can improve native Slack integration using [Make (Integromat) integration](https://the.fibery.io/@public/User_Guide/Guide/Make-(Integromat)-integration-82) . For example. when each teammate opens Slack in the morning, they get a list of Fibery tasks that are due today.
[https://youtu.be/r2gI-n-w214](https://youtu.be/r2gI-n-w214)
## FAQ
#### Q: I changed my email and don't receive notifications anymore.
Please, make sure that your email in FIbery and in Slack is the same. Once it's done, notifications will work again.
#### Q: When a User who is not a Slack admin tries to view or edit the automation rule, the connected Slack app is not visible
Due to security reasons, the connected Slack account is visible only to the person who added it. The person who edits the rule should provide a valid Slack account. So you may add your own Slack account or you can add the same account as your admin added - if you have enough permissions.
# IMPORT FROM CLICKUP
_____________________
# Introduction
This guide is intended for current ClickUp users considering switching to Fibery and new Fibery users looking to transfer their data from ClickUp.Â
We'll cover everything from preparing for the migration to troubleshooting common issues so that you can make the transition as smooth as possible. By the end of this guide, you'll have all the information you need to successfully migrate your data from ClickUp to Fibery and start taking advantage of all the features and benefits that Fibery has to offer.
# Step 0: Before starting the Import
To ensure a successful migration from ClickUp to Fibery, it's essential to take some time to prepare your ClickUp data and your team for the transition. This can help streamline the migration process and minimize potential disruptions to your team's workflow.
## Supported Items
* **Task, subtask, nested subtask.** Tasks are the main (and only) database elements of ClickUp.
* **Space, Folder, List.** ClickUp organizes views in a hierarchy using Spaces, Folders, and Views. When importing ClickUp tasks, they are synced into one database within one space. To represent the ClickUp hierarchy in Fibery, we use folders.
* **Views types.** We support List, Board, Timeline and Table views and their descriptions.
* **Attachment.** Attachments that are connected to Tasks are transferred during the import.
## Unsupported Items
Although the import can transfer a lot of useful data, the ClickUp API is limited and may not include necessary information and configurations that you rely on in ClickUp.
* **View types.** We do not support Calendar and Map views.
* **View settings.** A few view settings are not supported, for example, "Show/Hide Closed", "Subtask: Separately", "Me" and complex date filters.
* **Automation and formulas.** This information is completely hidden for export, and all of them should recreate manually, so it is important to understand where you use automation and what they are doing.
* **Documents and Whiteboard**. The ClickUp API does not have the capability to transform Documents or Whiteboards. As a result, you will need to manually import or copy-paste them. Please refer to the Import Document section for instructions on how to perform manual import.
* **Checklist and Todos.** ClickUp allows adding Checklists and Todos to a Task or Subtask, but their import is not supported.
* **Comment and Assigned comments.** This information cannot be imported.
* **Archived items:** Archived objects in the ClickUp database will not be synchronized during import. If you need to include these archived items in your Fibery workspace, you should [unarchive](https://help.clickup.com/hc/en-us/articles/6329610622487-Archive-a-task#h_bffd0dd67a "https://help.clickup.com/hc/en-us/articles/6329610622487-Archive-a-task#h_bffd0dd67a") them before starting the import.
## Cleanup your data
Here are some steps you can take to prepare for the migration:
1. Review and standardize naming conventions and other metadata to ensure consistency and accuracy.
2. Convert all the rich text content in tasks to plain text since the ClickUp API cannot export formatting.
3. Consolidate duplicate or overlapping data to simplify the migration process.
4. Remove unused or outdated data or fields from your ClickUp account to reduce the data needing migration.
5. Prioritize which data types, custom fields, and metadata are most important to migrate to Fibery.
# Step 1: Start an Import from ClickUp
1. Open the Fibery menu located in the top left corner of your screen.
2. Click "Import" from the sidebar and select the "ClickUp" option.

3. ClickUp data will be imported into a Space. Choose one Space from the dropdown menu or create a new Space by typing its name. Once you have a selected Space, the import process will begin.

# Step 2: Setup the access to ClickUp workspace(s)
To import data from ClickUp to Fibery, you will need to set up access to your ClickUp account. Follow these steps to authenticate your ClickUp account:
1. Choose one of the following authentication options: OAuth v2 or Personal Token. The default option is OAuth v2.
2. Click on the "Connect" button to begin the authentication process.
## Authenticate with OAuth v2
1. Choose OAuth v2 Authentication (default) and click on the "Connect" button.

2. A new pop-up window will appear, asking you to log in to ClickUp.

3. Choose the workspace(s) you would like to connect to. You can connect as many workspaces as you have access to with the credential.

###
## Authenticate with Personal Token
1. If you have or [create a personal token](https://help.clickup.com/hc/en-us/articles/6303426241687-Getting-Started-with-the-ClickUp-API#personal-api-key "https://help.clickup.com/hc/en-us/articles/6303426241687-Getting-Started-with-the-ClickUp-API#personal-api-key"), paste it in the input field.

2. Click the "Connect" button to complete the authentication process within a few seconds.
> [//]: # (callout;icon-type=emoji;icon=:nerd_face:;color=#fba32f)
> When using a Personal Token, there is no need to select Workspace(s) as the token is associated with a Workspace directly.
# Step 3: Customize the Import Settings
On the customization screens, the following options are available.

### **Databases**
* **Task:** ClickUp stores all of the records in one Database called Task. Check the box next to "Task" if you would like to import your ClickUp records to Fibery.
* **View:** ClickUp uses a hierarchy to organize the views. It uses the following entities: Space, Folder, and List. This structure will be recreated in Fibery as folders during the import process.
* **User:** If you have user-related fields in your ClickUp database, such as Assignees, select the "Users" option. This will create a separate database in Fibery and establish a relationship.
> [//]: # (callout;icon-type=icon;icon=exclamation-circle;color=#6a849b)
> [ClickUp Guest users](https://help.clickup.com/hc/en-us/articles/6310022323991-Guests-overview) will also be created when you enable user sync.
* **Import all ClickUp users into Fibery as Observers:** This option is only available when you select "Users" above. By enabling this option, all ClickUp users will be added to Fibery as Observers. This means a separate "User" database will not be created, as the users will be stored in Fibery's People database.
> [//]: # (callout;icon-type=icon;icon=exclamation-circle;color=#6a849b)
> After importing Observer users from ClickUp to the Fibery People database, they will not be notified about the import process. If you want them to use Fibery actively, you can send them the Fibery workspace link and ask them to reset their password on the login screen. This will enable them to access and utilize Fibery using their newly created Observer account.
### Workspace
Choose the ClickUp workspace that you want to import.
> [//]: # (callout;icon-type=icon;icon=exclamation-circle;color=#6a849b)
> Keep in mind that you can only select one workspace at a time.
### Spaces
Choose the ClickUp space(s) that you would like to import.
> [//]: # (callout;icon-type=icon;icon=exclamation-circle;color=#6a849b)
> If you have multiple spaces in ClickUp and would like to import them into separate databases in Fibery, select only one database during the import process and repeat the import flow for each space separately. This will ensure that each ClickUp space is imported into its Fibery database. Keeping each space in its database allows you to manage and organize your data in Fibery easily.
### Include closed
By default, the Import process does not include tasks with a "Closed" status. However, select the "Include Closed" option in the Customized screen to import closed tasks to Fibery.
> [//]: # (callout;icon-type=icon;icon=exclamation-circle;color=#6a849b)
> In ClickUp, there is a difference between tasks with a ["Done" status](https://help.clickup.com/hc/en-us/articles/6309517280919-Use-Done-statuses) and tasks with a "Closed" status. While selecting the "Include Closed" option during the import process will import tasks with a "Closed" status, tasks with a "Done" status will be synchronized regardless of this setting.
> [//]: # (callout;icon-type=icon;icon=exclamation-circle;color=#6a849b)
> Archived objects in the ClickUp database will not be synchronized during import. If you need to include these archived items in your Fibery workspace, you should [unarchive](https://help.clickup.com/hc/en-us/articles/6329610622487-Archive-a-task#h_bffd0dd67a) them before starting the import.
# Step 4: Set up Database fields
Properly mapping database fields is essential for a successful and efficient import process. When importing data into Fibery, it's important to map fields between databases and use the correct data types to ensure it is structured correctly.
Although Fibery attempts to automatically determine the best field names and data types, reviewing these recommendations before proceeding with the import is always a good idea. By verifying the field names and data types, you can ensure that the data is accurately represented in Fibery and organized in a way that suits your needs.
The list of available fields can be lengthy, particularly when importing multiple spaces into a single database. This is because all possible fields must be added to ensure that all data is accurately imported into Fibery. ClickUp contains a broad range of independent fields in a single database.
When you select both databases (Task and User) during the Import Customization process, you will see two tabs in the mapping screen. One tab represents the Task database, and the other represents the User database. You can customize the mapping for each database independently.
### Task Database settings

#### Fibery Database Name and Color
* **Name:** By default, the Task database name is set to "Task," but you can change this to reflect better the type of data you are importing, especially when you import ClickUp spaces separately.
* **Color:** In addition to customizing the database name, you can change the color. By clicking on the colored circle next to the database name, you can choose from a range of colors to better differentiate it from other databases in your workspace.
#### Field Mapping
Fibery attempts to match ClickUp database fields to corresponding Fibery fields. You can review the automatically suggested field mappings in the Field Mapping section and adjust as needed.
The fields are listed alphabetically; each row represents a ClickUp database field we can read through the API. The columns show the ClickUp field name, the type of field in the Fibery database, and the name of the field in the Fibery database.
You can select or deselect specific ClickUp database fields to include or exclude them from the import using checkboxes. By default, all fields are included.
Some fields in the Field Mapping section are greyed out and cannot be adjusted.
* **Name:** this special field cannot be adjusted or excluded. It represents the task's name and is the most important information for each record in ClickUp and Fibery.
* **Relations:** it represents a connection between two entities in the Fibery database, allowing you to build a hierarchy or represent dependence. \
Fibery automatically identifies the fields that have a relation to each other, and these fields cannot be changed in type. These fields can be excluded, but in most cases, this information is needed and highly recommended to keep them.\
Under the field type, there is a small explanation about the relation between the specified databases: the current database (Task) or the User database.
* **Workflow:** this field type in Fibery represents the current status of a task and can only have one workflow type with the name "Status" in each database. Once the Workflow type field is automatically identified or selected manually, the name will be greyed out and set to "Status".
* **Files:** these represent external files that are not stored directly in the database but are linked to it. The field name "Files" is greyed out because it cannot be changed. Multiple fields can have this type, but they will all go to the same "Files" field in the Fibery database.
### User Database settings

The settings for the User database are very similar to those for the Task database (see above). You can rename and change the color of the database. However, by default, there are only two fields, and it is not recommended to change any settings unless there is a good reason.
> [//]: # (callout;icon-type=icon;icon=exclamation-circle;color=#6a849b)
> All field names in the same Fibery database must be unique, and the field cannot be empty. If you attempt to add the same name to two fields, you will receive an error message and cannot proceed to the next step of the import process until you have resolved the naming conflict.
# Step 5: Start the Import
After finishing all the settings, scroll down to the bottom of the screen and click the "Import now" button. Once you click the button, the import screen will close, and you will be redirected back to the space where the import was set up.\
\
When you finish all the settings, scroll down to the screen and click the "Import now" button.
The import screen will close, and you will return to the Space where the import was set.

During the import, you will see the ClickUp logo and the name of the target database, as well as a spinning arrow below, indicating that the process is running. Keeping this screen open is unnecessary, as the import process will continue running in the background.
> [//]: # (callout;icon-type=icon;icon=exclamation-circle;color=#6a849b)
> The import time can vary depending on how much data is transferred from ClickUp to Fibery. Additionally, if you have checked the "Attachment" field, it could extend the import time based on the number and size of the files.
Once the import is finished, the ClickUp logo disappears (unless there is an active ClickUp integration in this Space). The process indicator will also disappear, showing the import process is completed.

# Step 6: The result
## Tasks
All tasks will be stored in a single database, organized in the same manner as ClickUp.
## Views
If you select "View" option on the Customization screen, the View hierarchy will appear in the sidebar. We represent Spaces, Folders, and Lists as Folders and use a suffix in brackets to indicate the origin, like `[Space]`, `[Folder]`, and `[List]` under the `View [Clickup]` root folder.

In ClickUp, you can create Views at every level, including other organizational entities. For example, a Folder can have a View and contain Lists. Once the structure is created, you will find Lists listed first and Folder views listed after under the Folder.

In this example, `All Project` is a view of the `Rebel Projects` folder.
## Users
By default, the sync creates a separate database for folders and creates a relation to the Task database.
When the `Import of all ClickUp users into Fibery as Observers` option is enabled, the users will be created in the People space of Fibery as Observer.
# Step 7: After the Import
When the import is finished, all data is in the Fibery database from ClickUp, but there is still much to do to make it usable for you and your team.
## Missing pieces
In the Unsupported section above, we listed entities or functions that cannot be imported. If you rely on any of these functions in ClickUp, you must manually recreate them in Fibery to make them available for your team.
## Users
**Access.** Set the appropriate access for your users in specific Spaces.
**Invite.** Created users are not automatically notified during the import process, so you must contact them and provide instructions for logging in to Fibery, including resetting their passwords if necessary.
**Switch Observer to Member.** During the user migration to Fibery, create Observer users only. It would be best to consider switching them to Members, as Observers have limited access to Fibery features.
> [//]: # (callout;icon-type=icon;icon=exclamation-circle;color=#6a849b)
> When you switch an Observer to a Member, you will be charged for that user according to your Fibery subscription plan.
## Import Documents
While ClickUp does not provide a Document Export API, you can still export documents manually. Simply [export ClickUp documents in markdown format](https://help.clickup.com/hc/en-us/articles/6325383226391-Export-a-Doc "https://help.clickup.com/hc/en-us/articles/6325383226391-Export-a-Doc") and import them using Fibery's [Import from Markdown](https://the.fibery.io/@public/User_Guide/Guide/Import-from-Markdown-187) feature. This process also transfers images from ClickUp servers to Fibery, enabling you to close your ClickUp account after the migration safely.
> [//]: # (callout;icon-type=icon;icon=exclamation-triangle;color=#4A4A4A)
> If you export all the documents from ClickUp in one markdown file, the import process cannot separate those files because the exported file does not indicate any breaks between them. Consequently, you will receive a single large document that includes all ClickUp documents.
# Known issues
* In certain situations, the color mapping algorithm may use identical colors in multiple instances across Statuses, Single-select, and Multi-select options. It is important to ensure that these colors remain easily readable.
* The List view is the default view in ClickUp, organized by columns and sections. The list view in Fibery does not support these functionalities.
* Sorting by multi-select field isn't supported in Fibery, this group settings are skipped.
* When grouping tasks by Due date in Clickup and sorting them by the same field in Fibery, the outcomes can be completely different.
* "Show/Hide Closed" settings are not synchronized, so we cannot filter them out.
* ClickUp "Me" filter does not work.
* The View and Task descriptions can have rich text formatting, but the ClickUp API provides this text in plain format, resulting in the loss of all formatting information during the import.
* Fibery folders do not have the feature to apply colors.
# SIMPLE APP
____________
# Simple reporting app
In the tutorial we will implement the simplest app without authentication and predefined schema. We will use NodeJS and Express framework, but you can use any other programming language.
## Requirements
To create simple app you need to implement only 3 endpoints:
* getting app information: [GET /](https://the.fibery.io/@public/User_Guide/Guide/GET-%2F-367)
* validate account: [POST /validate](https://the.fibery.io/@public/User_Guide/Guide/POST-%2Fvalidate-369)
* fetching data: [POST /](https://the.fibery.io/@public/User_Guide/Guide/POST-%2F-368)
Let's implement them one by one.
### Getting app information
App information should have [the structure](https://the.fibery.io/@public/User_Guide/Guide/Domain-365). Let's implement it.
```
var getSources = function () {
return [
{id: 'flowers', name: 'Flowers'},
{id: 'salaries', name: 'Salaries'},
{
id: 'stocks', name: 'Stocks',
filter: [
{
id: 'price',
title: 'Bottom Price',
optional: true,
type: 'number'
},
{
id: 'company',
title: 'Companies',
optional: true,
placeholder: 'Select companies',
private: true,
type: 'multilist',
data: [
{title: 'Apple', value: 'AAPL'},
{title: 'Microsoft', value: 'MSFT'},
{title: 'IBM', value: 'IBM'},
{title: 'Amazon', value: 'AMZN'}
]
}
]
}
];
};
app.get('/', function (req, res) {
var app = {
'name': 'Fibery Samples',
'version': '2.0',
'description': 'The set of samples to check Fibery reports in action',
'authentication': [{
'id': 'none',
'name': 'This information is public',
'description': 'There is no any authentication required. Just press [Connect] button and proceed to charts beauty'
}],
'sources': getSources()
};
res.json(app);
});
```
We can see that the app doesn't require any authentication and have 3 sources from schema configuration. *Stocks* source has some filters to select data more precisely.
You can find more information about the endpoint [here](https://the.fibery.io/@public/User_Guide/Guide/GET-367).
### Validate account
Since authentication is not required, we always return static account name.
```
app.post('/validate', function (req, res) {
res.json({name: 'Fibery Samples'});
});
```
You can find more information about the endpoint [here](https://the.fibery.io/@public/User_Guide/Guide/POST-validate-369).
### Fetching data
The endpoint receives source and filter and should return actual data.
```
var sendCsvFileAsIs = function (req, res) {
res.sendFile(resolve('./data/' + req.body.source + '.csv'));
};
var sendFilteredJsonFile = function (req, res) {
var data = require('./data/' + req.body.source + '.json');
var companyFilter = req.body.filter['company'] || [];
var price = req.body.filter['price'] || 0;
if (!_.isEmpty(companyFilter)) {
data = _.filter(data, function(row) { return _.includes(companyFilter, row.company); });
}
data = _.filter(data, function (row) {
return row.price >= price;
});
res.json(data);
};
var dataProcessor = {
'flowers': sendCsvFileAsIs,
'salaries': sendCsvFileAsIs,
'stocks': sendFilteredJsonFile
};
app.post('/', function (req, res) {
dataProcessor[req.body.source](req, res);
});
```
Let's suppose that our data stores in simple csv and json files. *req.body.source* contains selected source. For "flowers" and "salaries" sources we don't need to do anything and just return appropriate file content. For *stocks* source, because of filters, we need to implement logic on filtering data. All filters are sent in request body so we can get it from *req.body.filter*. We make filtering by price and company and return data array. You can find more information about the endpoint [here](https://the.fibery.io/@public/User_Guide/Guide/POST-368).
And that's it! Our app is ready to use. See full example [here](https://github.com/vizydrop/node-simple-app).
# GRAPHQL MUTATIONS
___________________
# Mutations
Mutations should be used to modify database content. We implemented a set of operations based on automation's actions. These operations can be performed one by one for created or filtered database's entities. In other words multiple actions can be executed for added entities or selected by filtering arguments.
Find below the syntax of mutation. Filter argument to select entities for modification is the same as defined for find query. Every action has the result. It is a `message` about action execution, affected `entities`.
```
mutation {
database(filter) {
action1(args){message,entities{id,type}}
action2(args){message,entities{id,type}}
...
actionN(args){message,entities{id,type}}
}
}
```
The operations can not be duplicated inside mutation. Batch alternative of action can be used in case multiple arguments supposed to be performed for the same action. Batch action `data` argument is an array of actions' arguments.
```
#Single command
action(arguments){message}
#Batch command
actionBatch(data:[arguments]){message}
```
The available database actions or operations can be found in Docs → Mutation.

Example of creating entity and appending content to its rich field
```
mutation{
bugs{
create(name: "New Bug"){message}
appendContentToStepsToReproduce(value: "TBD"){message}
}
}
```
Output:
```
{
"data": {
"bugs": {
"create": {
"message": "Create: 1 Bug added"
},
"appendContentToStepsToReproduce": {
"message": "Append content to Steps To Reproduce: Steps To Reproduce updated for 1 Bug"
}
}
}
}
```
Example of closing bugs with name "New Bug" and notifying assignees using text template
```
mutation{
bugs(name:{is:"New Bug"}){
moveToFinalState{message}
notifyAssignees(subject:"{{Name}} bug was closed"){message}
}
}
```
Output
```
{
"data": {
"bugs": {
"moveToFinalState": {
"message": "Move to final state executed"
},
"notifyAssignees": {
"message": "Notify Assignees: 0 notifications sent"
}
}
}
}
```
## **Create**
New entities can be added to database using `create` or `createBatch`. The arguments of these actions native database fields. One-to-one fields and inner list items also can be linked.
Create one release and link all bugs in "To Do" state
```
mutation {
releases {
create(
name: "Urgent"
bugs: {
state:{ name: {is:"To Do"}}
}
)
{
entities {
id
type
}
}
}
}
```
Output
```
{
"data": {
"releases": {
"create": {
"entities": [
{
"id": "13114b4a-fa4b-400a-8da3-257cef0e22f5",
"type": "Software Development/Release"
}
]
}
}
}
}
```
Create several bugs in different states, assign to current user and add comment
```
mutation {
bugs{
createBatch(data:[
{name: "Login failure", state:{name:{is:"In Progress"}}}
{name: "Design is br0ken", state:{name:{is:"To Do"}}}
]){message}
assignToMe{message}
addComment(value:"I will fix this bug ASAP"){message}
}
}
```
Output
```
{
"data": {
"bugs": {
"createBatch": {
"message": "Create: 2 Bugs added"
},
"assignToMe": {
"message": "Assign to me: User(s) assigned to 2 Bugs"
},
"addComment": {
"message": "Add comment: Comments added to 2 Bugs"
}
}
}
}
```
## **Update**
Use update action if it is required to modify some fields or relations. The database mutation filter argument for selection entities should be provided for actions like `update`.
Change effort and release of bugs in "To Do" with effort equals to 15
```
mutation {
bugs(effort:{is: 15}, state:{name:{is:"To Do"}}){
update(
release:{name:{is:"1.0"}}
effort: 10
){entities{id}}
countOfEntities #count of found bugs
}
}
```
Output
```
{
"data": {
"bugs": {
"update": {
"entities": [
{
"id": "fa39df10-912b-11eb-a0bf-cb515797cdf8"
},
{
"id": "f42d7db6-6c6f-429d-bf5c-c60b0d9d072d"
},
{
"id": "fb670021-4fe6-4489-86b4-8a17e60e9227"
}
]
},
"countOfEntities": 3
}
}
}
```
## Delete
Use `delete` action to remove entities which satisfy provided criterion. Be careful with this command and verify that only required entities are going to be deleted by using find command before execute `delete`.
Verify entities to be deleted using listEntities or countOfEntities
```
mutation {
bugs(state:{name:{is:"Done"}}){
listEntities{id}
countOfEntities
}
}
```
Proceed with delete
```
mutation {
bugs(state:{name:{is:"Done"}}){
delete{message}
}
}
```
Output
```
{
"data": {
"bugs": {
"delete": {
"message": "Delete: 4 Bugs deleted"
}
}
}
}
```
## Create and link relations
Related one-to-one, one-to-many or many-to-many entities can be created using `AddRelation` or `AddRelationItem` actions.
Mind using GraphQL aliases to have convenient names in output
```
mutation {
releases{
release: create(name: "3.0.1"){entities{id,type}}
tasks: addTasksItemBatch(data:[
{name:"Do design"}
{name:"Do development"}
]){entities{id,type}}
bugs: addBugsItemBatch(data:[
{name:"Fix design"}
{name:"Fix development"}
{name:"Remove code"}
]){entities{id,type}}
}
}
```
Output
```
{
"data": {
"releases": {
"release": {
"entities": [
{
"id": "c09b246b-3e47-49fa-9a28-94438dc640c3",
"type": "Software Development/Release"
}
]
},
"tasks": {
"entities": [
{
"id": "e9ddd110-e8ac-11ec-a77e-d74e2f66036c",
"type": "Software Development/Task"
},
{
"id": "e9f095c0-e8ac-11ec-a77e-d74e2f66036c",
"type": "Software Development/Task"
}
]
},
"bugs": {
"entities": [
{
"id": "ea19a190-e8ac-11ec-a77e-d74e2f66036c",
"type": "Software Development/bug"
},
{
"id": "ea290ae0-e8ac-11ec-a77e-d74e2f66036c",
"type": "Software Development/bug"
},
{
"id": "ea3a48f0-e8ac-11ec-a77e-d74e2f66036c",
"type": "Software Development/bug"
}
]
}
}
}
}
```
## Rich Text fields
There are some additional actions which may be handy in modifying rich fields and generating PDFs.
Rich fields can be modified by actions started from `appendContent`, `overwriteContent`, `prependContent`. `attachPdfUsingTemplate` can be used for generating PDF files.
The templating capabilities can be used in the same way it is available in automations.
> [//]: # (callout;icon-type=icon;icon=exclamation-circle;color=#199ee3)
> Find more information about markdown templates in [Markdown Templates](https://the.fibery.io/@public/User_Guide/Guide/Markdown-Templates-53)
```
mutation {
bugs(assignees:{containsAny:{email:{contains:"oleg"}}}){
appendContentToStepsToReproduce(value:"Line for state: {{State.Name}}"){message}
attachPdfUsingTemplate(value:"{{CurrentUser.Email}} is an author"){message}
}
}
```
Here is the result of the mutations:

## Unlink/Link relations
Relations can be linked or unlinked using `link` or `unlink` actions.
```
mutation {
bugs(release:{id:{isNull:false}}){
unlinkRelease{message}
}
}
```
Output
```
{
"data": {
"bugs": {
"unlinkRelease": {
"message": "Unlink Release: Release unlinked from 12 Bugs"
}
}
}
}
```
Link bugs with effort greater than 5 to empty release
```
mutation {
releases(name:{is:"3.0"}){
linkBugs(effort:{greater:5}){message}
}
}
```
Unlink bugs with effort greater than 15 from release
```
mutation {
releases(bugs:{isEmpty:false}){
unlinkBugs(effort:{greaterOrEquals:15}){message}
}
}
```
## Delete relations
Relations can be removed from system by executing `delete`. Again be careful with this operation since the data will be erased.
Delete release from bugs with release
```
mutation {
bugs(release:{id:{isNull:false}}){
deleteRelease{message}
}
}
```
Delete bug items in "Done" state from selected release
```
mutation {
releases(bugs: {isEmpty:false}){
deleteBugs(state:{name:{is: "Done"}}){message}
}
}
```
## Send notifications via GraphQL
The build-in notifications can be sent using `NotifyUsers` and other actions related to notifications like it is done for automatons. Text templates are supported.
> [//]: # (callout;icon-type=icon;icon=exclamation-circle;color=#199ee3)
> Text templates have the same capabilities as Markdown Templates **excluding support of Markdown Syntax**, in other words it is just a text.
```
mutation {
bugs(release:{id:{isNull:false}}){
notifyCreatedBy(subject: "Please take a look"){message}
notifyAssignees(
subject: "Fix ASAP"
message: "Fix bug {{Name}} ASAP"
){message}
notifyUsers(
to:{email:{contains:"oleg"}}
message: "Waiting for fix..."
){message}
}
}
```
## Add file from URL
The file can be attached to entities by using `addFileFromUrl` action.
```
mutation {
bugs(release:{id:{isNull:false}}){
addFileFromUrl(
name: "Super File"
url:"https://api.fibery.io/images/logo.svg"
){message}
}
}
```
# How to avoid timeouts
Request (server) timeouts can be a problem for long-running tasks.
We propose several ways to avoid it:
1. Run mutations as background job
2. Use paging for mutations to reduce amount of data to be processed.
## **Use background jobs**
There is a possibility in our GraphQL API to execute long-running actions in background. Huge set of operations with large amount of data can be executed as background jobs.
The following steps should be used:
1. Start executing mutations as background job
2. Monitor the status of job execution via executing `job` query. There are three statuses: `EXECUTING`, `FAILED` and `COMPLETED`
3. Execute `job` query again if status still equals to `EXECUTING`
4. `actions` will be populated with data when job status equals to `COMPLETED`
> [//]: # (callout;icon-type=icon;icon=exclamation-circle;color=#199ee3)
> The job results will be available in \~30 minutes.
Start background job defining actions to be executed in background
```
mutation{
features{
executeAsBackgroundJob{
jobId
actions{
createBatch(data:[
{name: "Feature 1"}
{name: "Feature 2"}
]){message}
}
}
}
}
```
The result contains jobId to monitor job status
```
{
"data": {
"features": {
"executeAsBackgroundJob": {
"jobId": "6fc2d2b3-7b31-4511-b829-99a8cefb36b3",
"actions": null
}
}
}
}
```
Monitor job status using jobId
```
{
job(id:"6fc2d2b3-7b31-4511-b829-99a8cefb36b3"){
status
message
actions{
actionName
result{
message
entities{id}
}
}
}
}
```
The actions will be populated when status equals to "COMPLETED"
```
{
"data": {
"job": {
"status": "COMPLETED",
"message": "Completed successfully",
"actions": [
{
"actionName": "createBatch",
"result": {
"message": "Create: 2 Features added",
"entities": [
{
"id": "9d7deab7-a72d-4e09-adde-f888ca455fbe"
},
{
"id": "2c8f16ce-c9b6-4273-b74e-7e924a308a1f"
}
]
}
}
]
}
}
}
```
## Use paging for mutations
Use `limit`, `offset` and `orderBy` in case of executing huge operational sets since it is required a lot of processing time and timeouts may be a problem. Please find an example on how to set sprint to stories by execution of the mutation with limit several times to avoid facing timeout. The main idea to update limited set of database until it has records which should be updated. In our case we are updating stories until some of them don't have sprint.
Execute mutation with limit for first time:
```
mutation{
stories(limit:10, sprint:{id:{isNull:true}}){
update(sprint:{limit:1, orderBy:{dates:{start:ASC}}}){message}
countOfEntities
}
}
```
Result contains 10 entities. So we will need to execute it again.
```
{
"data": {
"stories": {
"update": {
"message": "Update: 10 Stories updated"
},
"countOfEntities": 10
}
}
}
```
Execute the same mutation again with the same limit:
```
mutation{
stories(limit:10, sprint:{id:{isNull:true}}){
update(sprint:{limit:1, orderBy:{dates:{start:ASC}}}){message}
countOfEntities
}
}
```
Looks like no need to execute again since count of processed less than limit (10)
```
{
"data": {
"stories": {
"update": {
"message": "Update: 4 Stories updated"
},
"countOfEntities": 4
}
}
}
```
# EXPORT YOUR DATA
__________________
## Export whole workspace
Any admin can export all account data in Markdown + CSV + Files format.
1. Click `Settings` in the sidebar, and then click `Export`.
2. Click `Export Workspace` button.
3. Export process will start and you will receive a link to a downloadable archive in your email. It may take several hours to complete the export for a very large account.
## Export to CSV
You can also export data to CSV files using `Table View` or `Report View` (not the Database itself). Any User with any Access level can export data this way.
> [//]: # (callout;icon-type=icon;icon=confused;color=#FC551F)
> You can export only to CSV. Export to Markdown is not available (meaning no Rich text Field & no Comments Field export is available.)


## FAQ
### Can I recover my account from this exported backup?
No, it is not possible. This export is for data migration to another tool and for your data safety.
### Do you provide database backups?
We back up the data frequently but we don't share these backups with users. Data is stored on Amazon servers. For more details, check [GDPR in Fibery](https://the.fibery.io/@public/User_Guide/Guide/GDPR-in-Fibery-65)
### My backup doesn't open
Please, try multiple tools for unpacking .zip files. Somehow some of them can't work with our files. If this doesn't help - contact us in support.
# PRODUCTBOARD INTEGRATION
__________________________
# Overview
Fibery's integration with Productboard allows for the seamless import of product hierarchy, user scores, and companies. This helps product managers improve feedback gathering and keep it closer to product development.
The Productboard integration template offers new views, additional fields, and formulas to replicate Productboard functionality in Fibery.
## Import Product Hierarchy
You can import or sync Productboard's product hierarchy (product > component > feature) with customer feedback scores.

## Import Customer Database
You can import customer information and display the user impact score.

## Import Insights
You have the option to import all your collected insights.

# Setup
Follow the instructions below to set up the integration with Productboard.
1. Create a Space or go to an existing one.
2. Navigate to Space settings and click `Integrate` button.
3. Select `Productboard`.
4. Authentication of your Productboard account can be done through OAuth (recommended), but you may prefer to use a personal [API auth token](https://developer.productboard.com/reference/authentication "https://developer.productboard.com/reference/authentication").

5. Customize the Integration settings.

**Databases**
* **Product, Component, Feature:** Product hierarchy databases
* **Note:** All the customer feedback.
* **Relevance:** Importance level of the feature and product hierarchy connection.
* **Company, User:** Customer databases.
* **Release Group, Release:** Product release management information.
* **Objective:** Strategy information.
**Created From**
All feedback notes are created on or after the selected date. The default setting is one month prior to today.
6. Set up Fields and Databases.
The fields provided by Productboard can be mapped to fields in the Fibery database.

7. Press the `Sync now` button and wait until the operation is complete.
> [//]: # (callout;icon-type=icon;icon=constructor;color=#6A849B)
> You can find more information in the [Productboard integration database structure](https://the.fibery.io/@public/User_Guide/Guide/Productboard-integration-database-structure-297)
# Views
Using the Productboard Integration template will create useful views that are familiar with the Productboard setup.
**Insight Inbox**
Display all unprocessed notes, sorted in descending order by their creation date, ensuring the most recent item appears first.
**All Insights**
It functions like the Insights Inbox, but without filtering only the unprocessed items, thus displaying all Feedback Notes in a single view.
**My Insights**
When Productboard users are also Fibery users, the systems connect them automatically, allowing individuals to view the Notes assigned to them.
**Strategic Roadmap**
All objectives with a start and end date are displayed on a timeline for a clear visual understanding of parallel initiatives.
**Development Roadmap**
This timeline showcases all the features. Those without a specified date range are in the backlog and awaiting prioritization.
**Product Hierarchy**
This product hierarchy organizes a company's offerings in a structured manner, categorizing them by Product, Component, Feature, and displaying with their priority scores calculated by feedback notes.
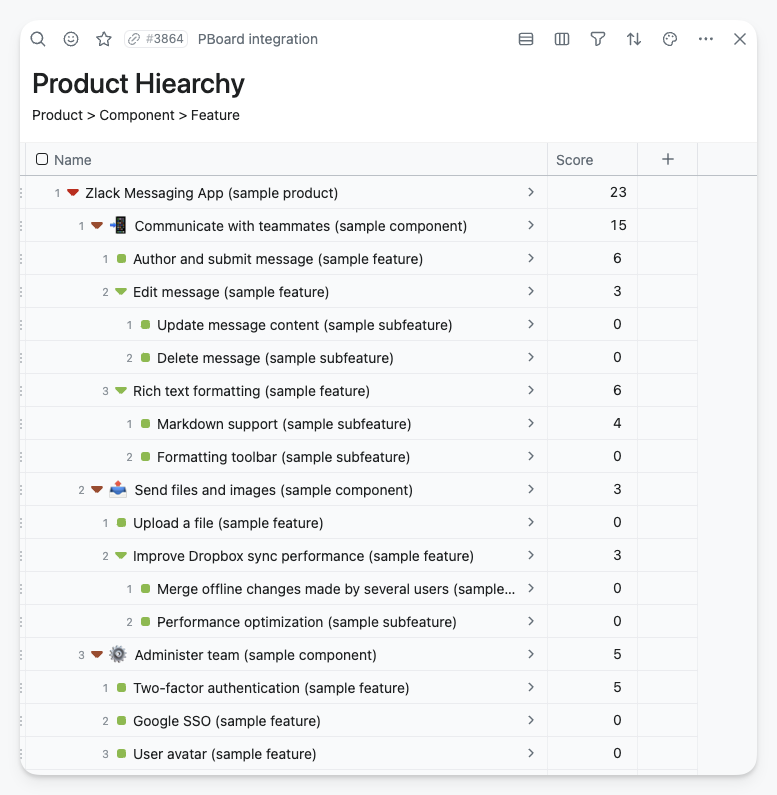
**Customers**
The customer view displays all contacts, grouped by company, with priority scores determined by feedback notes.
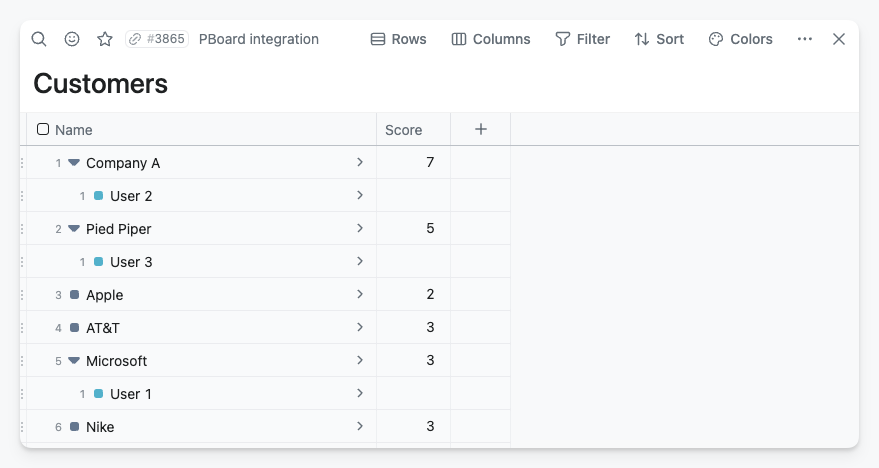
# New fields and formula
If you use the Productboard Integration template, it will create new fields and formulas to help you use it more effectively.
## Score
The score is calculated by summing the Insights noted and assigning weights based on their importance. It is calculated at every level of the product hierarchy: feature, Component, and Product, including the sum of all items within each level of the hierarchy.
The score calculation has three parts:
```
Relevances.Sum(Importance) + [Children Components].Sum(Score) + [Children Features].Sum(Score)
```
`Relevances.Sum(Importance):` all the weighted scores get the Component itself, plus
`[Children Components].Sum(Score):` all the weighted scores of the child components, plus
`[Children Features].Sum(Score):` all the weighted scores from the connected features
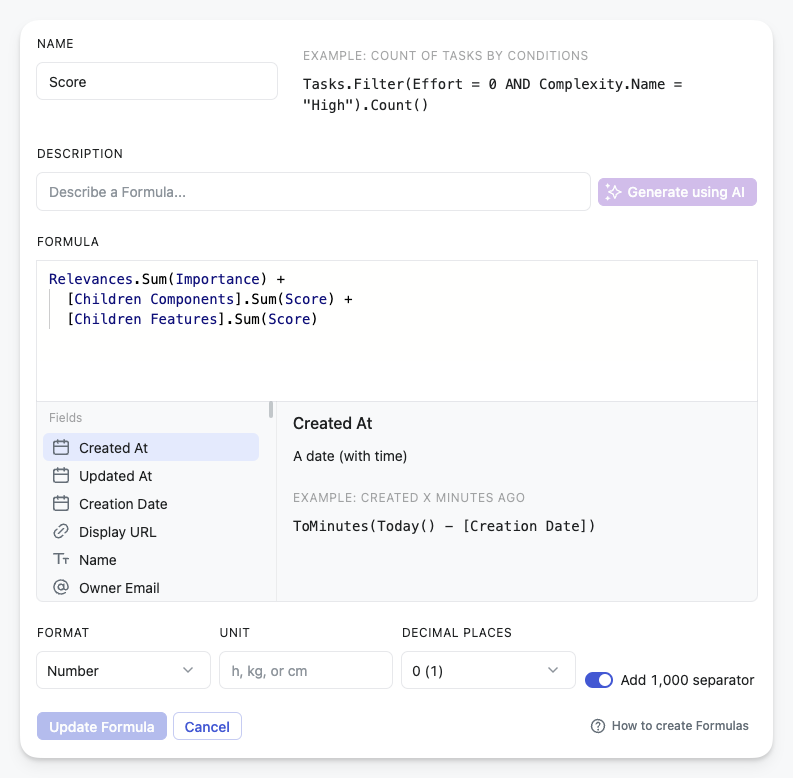
The Score field is added to Products, Components, Features, Companies, and Users (Customers) to assist in calculating priorities from various perspectives.
## Building Company and User relations
Unfortunately, the public API does not have direct access to the Customer database. However, if a customer has an entry in the Notes database, we can link them back to the Company using a certain method. For the there is a CompanyFromNotes technical field in the User database.
This information is used to automatically link Users with Companies, creating the **Customer view.**
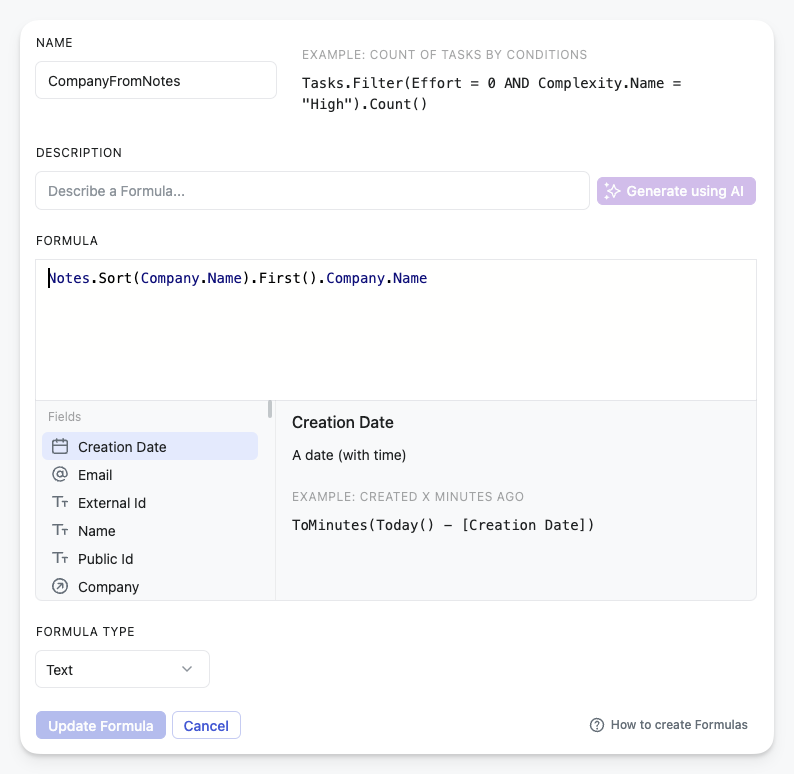
# Known Issues and Limitations
Due to the lack of API coverage and support, several items cannot be migrated or removed from Productboard.
**Notes feedback.** The notes and feedback content are accessible, but it's unclear which element of the product hierarchy they refer to. Those who need to work with this information can find it in the Note database's Raw Content field.
**Companies.** No information is available about the relationship between the company and the users. However, if there is a feedback note from a user, we can infer which company the user works for. Please note that we cannot connect users to the company if they do not have any feedback.
**Members.** The information on Productboard members is not directly available through that API, but members who follow a note in Productboard will show up in the Raw followers field for that note. No information can be retrieved if a member does not follow any notes. If this is a problem, consider solving it by having at least one Productboard note with all members as followers.
We do not support migrating/sync the following information from Productboard:
* **Feature:** attachments, comments, connected objectives, creator of the feature, dependencies, effort, drivers, followers, health status creator/owner, members and teams, portal card info, progress and setting type, scores, segments, and their importance, status settings, tags, tasks.
* **Components:** attachments, comments, followers, members & teams, portal card info, tags.
* **Product:** attachments, comments, drivers & scores, followers, members & teams, release groups, tasks, tags.
* **Company:** comments, custom company fields, followers.
* **Note:** attachment, sentiment, summary.
* **User:** comments, company, description, follower, tags, user segment.
* **Release:** comments, followers, progress, progress setting type.
* **Objective:** comments, followers, progress, progress setting type, team, theme.
# HOW TO ARCHIVE ENTITIES IN FIBERY
___________________________________
While Fibery doesn't feature an archive option, you can try some workarounds instead. So, what can you do?
## Delete cards
Cons 😥
* You won't be able to access cards anywhere, but [Activity Log](https://the.fibery.io/@public/User_Guide/Guide/Activity-Log-92)
* Deleted cards can't be analyzed with [Reports](https://the.fibery.io/@public/User_Guide/Guide/Reports-346), so if you use [Historical and Cumulative Report examples](https://the.fibery.io/@public/User_Guide/Guide/Historical-and-Cumulative-Report-examples-59) this workaround won't work for you nicely
Pros 💖
* Cards disappear everywhere — from Views, Search and etc.
* You can always find deleted cards in the [Activity Log](https://the.fibery.io/@public/User_Guide/Guide/Activity-Log-92) and restore anytime\
note: they will be preserved for 90 days on the Standard plan, and unlimited time on the Pro plan
## Add "Archived" state
Cons 😥
* There is no way to expel cards from Search (no sorting & filtering possible at the moment)
* You'll have to manually turn on specific Filters on all the Views, that may contain "archived" cards
Pros 💖
* You can easily find Archived items for retrospective actions
* All the archived cards will be preserved for your wonderful [Reports](https://the.fibery.io/@public/User_Guide/Guide/Reports-346)
### How to set up that?
#### **With the State field**
1\. Navigate to the State field configuration, and click on the `Edit` button

2\. Add a new State `Archived`

3\. Set it as a Final one. Open this option with `Option/Alt + Click` and mark it as `Final`.


4\. Turn on `Filters` anywhere you need it

#### **With the checkbox field**
Add a checkbox, and call it "Archived" (not sure how to add fields? Check [Fields](https://the.fibery.io/@public/User_Guide/Guide/Fields-15) guide 💖)

Apply necessary filters on any View

### OK, and when the real solution will be ready?
Telling the truth, we don't have any ETA for now. But if you feel, that this is something you really need — please, ping us in the Intercom chat or vote in our [Community](https://community.fibery.io/ "https://community.fibery.io/") — your request will be definitely noted.
And feel free to check our [Roadmap Board](https://the.fibery.io/@public/document/Roadmap Board-5974) to track future updates.
## Archive Space / Database
Yep, no way for that as well. But - as always - there is a workaround!
Workaround we use ourselves:
1. Create a Space, call it an `"Archive"`
2. Hide it and set "No access" permissions for all the Users
3. Move there all databases, that have to be archived

4. When databases are moved, delete empty Space
# EMOJIS
________
All you need to know about the usage of Emojis in Fibery :fibery:
## Where you can add emojis in Fibery
There is one emoji library for all building blocks and interface elements in Fibery, meaning you can use the same emojis (including custom ones) everywhere:
* in rich text (Documents, rich-text Fields, comments)
* as a Callout block icon
* as a View icon: [Emoji or Icon Instead of Default View Icon](https://the.fibery.io/@public/User_Guide/Guide/Emoji-or-Icon-Instead-of-Default-View-Icon-188)
* as an Entity icon
* as an option icon in single- or multi-select Fields
## How to add an emoji in rich text
**In Documents, rich text Fields, comments**
* Type `:` and continue with the description of an emoji to insert it into your document or rich text quickly. For example, if you want to insert 🋠, type `:lem` and find the lemon emoji in the drop-down.

* Type `/emoji` to quickly get access to the emoji panel and choose the one you want to insert into your document or rich text.
Check [Rich Text](https://the.fibery.io/@public/User_Guide/Guide/Rich-Text-28) for more actions with rich text in Fibery.
**In a Callout block**
Click the exclamation icon to access the icon panel, switch from the icon panel to the emoji panel and click the one you want. By the way, here is an example of a Callout block:
> [//]: # (callout;icon-type=emoji;icon=:point_up:;color=#fba32f)
> This is something relatively important.
Check [Callout block](https://the.fibery.io/@public/User_Guide/Guide/Callout-block-186) to get more details on ways to add and customize them.
## How to add an emoji instead of the default View icon

Check [Emoji or Icon Instead of Default View Icon](https://the.fibery.io/@public/User_Guide/Guide/Emoji-or-Icon-Instead-of-Default-View-Icon-188).
## How to add an emoji as an Entity icon
First, add the Icon Field to your Database where the related Entity is stored. Check [Fields](https://the.fibery.io/@public/User_Guide/Guide/Fields-15) for details on how to add them.
Once added, an `Add Icon` option will appear in the top left corner of the specific Entity. Simply click on it, and in the pop-up, select `Add Emoji`.

## How to add an emoji as a select option icon in Fields
You can assign emojis to options in Single Select, Multi Select, and Workflow Fields in your Database.

## How to add a custom emoji
Custom emojis play an essential role in company culture, and now you can add them in Fibery :fibery:

Check [Custom Emoji](https://the.fibery.io/@public/User_Guide/Guide/Custom-Emoji-205) for more details.
## FAQ
#### Is it possible to set/change the icons/emoji right now through the api / script automation?
Sure
You can use this:
```
const fibery = context.getService('fibery');
for (const entity of args.currentEntities) {
await fibery.updateEntity(entity.type, entity.id, { 'Icon': ':kissing_heart:'})
}
```
# CODE BLOCKS
_____________
Code blocks are useful when you want to insert a code snippet or example into your document.
## Add a code block
There are two ways to add a code block:
1. Type ```` ``` ````
2. Type `/` and find Code Block command (or use shortcut `Cmd+Option+5`)
```
(ns core.ex
(:refer-clojure :exclude [ex-cause ex-info name try])
(:require [cheshire.core :as cheshire]
[clojure.spec.alpha :as spec]
[clojure.string :as string]))
(def ex-name-default :core.error/internal)
(defn ex? [ex] (instance? Throwable ex))
(defn ex-name [ex] (:error/name (ex-data ex)))
(defn ex-cause [^Throwable ex]
(if-some [^Throwable cause (.getCause ex)]
(recur cause)
ex))
```
You can also wrap text in code block. Find `Wrap code` switcher in the top right corner of the code block.

## Syntax highlighting
Find language switcher in the right top corner of the code block. Click it and select required language:

## FAQ
### How to exit a code block?
Code block is not vim, so it is relatively easy to exit it. Push `Shift + Enter` to exit a code block.
# AUTOMATIONS
_____________
## What is a Rule and a Button
There are two types of automations in Fibery: Rules and Buttons:
* [Rules](https://the.fibery.io/@public/User_Guide/Guide/Rules-51) are Automations where the trigger is an event occurring in Fibery. For example, you can define a Rule that sets the completion date to today when a task is closed.
* [Buttons](https://the.fibery.io/@public/User_Guide/Guide/Buttons-52) are Automations that is triggered manually. For example, you can create a "Finish Sprint" Button that when clicked moves all unfinished tasks to the next sprint.
## How to add an Automation
To add an Automation:
1. Go to a Space Configuration
2. Choose a Database and expand it.
3. Find `Rules` or `Buttons` section and click `+` near it.
## Things you can do to Rules and Buttons
### Duplicate
Duplicate action is available for rules and buttons, so you can easily iterate on your existing rule configuration or create a similar button. Click `…` near a rule and select `Duplicate` action.
### Reorder
You can drag and drop automation rules and buttons to organize them better.
> [//]: # (callout;icon-type=icon;icon=exclamation-circle;color=#2978fb)
> It will also affect rules execution order.
### Add a description
You can add a description to automation Rules and Buttons. It will help to understand what the rule is about, and for buttons it will show a tooltip when a user hovers over the button.

## When to use Automations
For inspiration, please check most popular [Automations Use Cases and Examples](https://the.fibery.io/@public/User_Guide/Guide/Automations-Use-Cases-and-Examples-55).
Also, Fibery has built-in AI Assistant, so check [AI in Automations](https://the.fibery.io/@public/User_Guide/Guide/AI-in-Automations-162) to learn how to do clever things with AI.
## Who can configure Automations
Anyone with Creator access to a Space can set up no-code Rules and Buttons for Databases in the Space. [Scripts in Automations](https://the.fibery.io/@public/User_Guide/Guide/Scripts-in-Automations-54) are reserved for workspace Admins.
Check out [Automation permissions](https://the.fibery.io/@public/User_Guide/Guide/Automation-permissions-337) for a detailed breakdown.
# KEYBOARD SHORTCUTS
_____________________
Agenda:
* `Cmd` on Mac = `Ctrl` on Windows
* `Option` on Mac = `Alt` on Windows
## General & Important
* Search - `Cmd + K`
* Add new entity - `C`
## Navigation
* Expand/Collapse left sidebar - `Cmd + \`
* Close current panel - `Shift + Esc`
* Close other Panels - `Alt + Tab + O`
* Close all Panels - `Cmd + Tab + K`
* Search - `Cmd + K`
## Documents / Rich text
Fibery supports markdown formatting, so you can format your text fast using shortcuts:
* Type `**` on either side of your text to bold.
* Type `*` on either side of your text to italicize.
* Type `` ` `` on either side of your text to create inline code. (That's the symbol to the left of your 1 key.)
At the beginning of any line of text, try these shortcuts:
* Type `*`, `-`, or `+` followed by space to create a bulleted list.
* Type `[] ` to create a to-do checkbox. (There's no space in between.)
* Type `1.` followed by space to create a numbered list.
* Type `#` followed by space to create an H1 heading.
* Type `##` followed by space to create an H2 sub-heading.
* Type `###` followed by space to create an H3 sub-heading.
* Type `>` followed by space to create a quote.
* `Cmd + Shift + -` to insert a horizintal line
Special Fibery shortcuts
* Type `!` to create a [Callout block](https://the.fibery.io/@public/User_Guide/Guide/Callout-block-186).
* Type `<<` to embed an existing View or create a new embedded View.
* Type `:` followed by few letters to insert an emoji.
* Type `@` to mention a user.
* Type `#` to insert/mention an entity.
* Type `>>` to call [AI Text Assistant](https://the.fibery.io/@public/User_Guide/Guide/AI-Text-Assistant-156)
### Tables in Documents
* Add row after: `Ctrl + Option + ↓`
* Add row before: `Ctrl + Option + ↑`
* Add column after: `Ctrl + Option + →`
* Add column before: `Ctrl + Option + â†`
## Inbox
You can navigate between notifications using the up and down keys. Other shortcuts:
* `L` - move notification to Later
* `D` - move notification to Done
* `T` - move notification to Today
* `Delete` - delete notification
* `U` - mark notification as Unread.
## Whiteboard View
1. Click `…` in the bottom menu.
2. Select `Keyboard shortcuts` option to see them all → [Whiteboard keyboard shortcuts](https://the.fibery.io/@public/User_Guide/Guide/Whiteboard-keyboard-shortcuts-338)
## Timeline View
* Add new card: `Cmd + drag`
* Scroll horizontally: `Shift + scroll`
* Zoom in/out:
* slow: `Option + scroll`
* fast: `Ctrl + scroll`
# HOW TO SETUP SPRINTS
______________________
So we've already configured a setup for software development - check details in [How to Setup SoftDev Structure From Scratch](https://the.fibery.io/@public/User_Guide/Guide/How-to-Setup-SoftDev-Structure-From-Scratch-248).
Are the developers happy? Most likely, not yet. They might be concerned about having an overview of the work that needs to be done for all features. This should be grouped by Sprint and, of course, estimated.
Let's make it work.
## Adding Databases
First, we need to add another Database - Sprint, and connect it with Bugs and Stories.

The next step is to add the necessary Fields that any sprint has:
* `Dates` - to track the duration.
* `State` - a Formula that will automatically calculate whether Sprint is current, past, or future based on the dates set.
* `Capacity` - hours, story points, or whatever you prefer.
* `Capacity allocated` - a formula that relies on the linked Stories.
* `Capacity left` - a Formula that compares Capacity and Capacity Allocated.
Let's do it one by one.
1. **Dates** is a Field that has to have start and end dates.

2. **State** is a Formula. Simply copy and paste the syntax:
```
If(
Dates.End(false) < Today(),
"Past",
If(
Dates.Start() <= Today() and Dates.End(false) >= Today(),
"Current",
"Future"
)
)
```
Why is it so complicated? To avoid manual work with Filters in the future.

3. **Capacity** is just a number Field. In Units, you may set the measurement of your capacity, such as story points (as shown on the screenshot), hours, or something else.

4. To calculate **Capacity allocated**, we would rely on Stories and Bugs estimated effort. Make sure that you added such a Field in the previous step. Your Field can have a slightly different name, so here is an example of what the syntax may look like.
```
Stories.Sum(Effort) + Bugs.Sum(Effort)
or
Stories.Sum(Your field here) + Bugs.Sum(Your field here)
```
5. **Capacity left** is simply total capacity minus allocated one.
```
[Capacity] - [Capacity allocated]
```
## Adding Views
> [//]: # (callout;icon-type=icon;icon=brightness;color=#fba32f)
> Before creating any View, answer the following questions:
>
> * What needs to be included
> * Who will be using it
> * For what purposes
Having this in mind, let's check some typical scenarios.
### **Where to plan new Sprints?**
Usually, planning takes place on a Board. Everything is nice, clear and visible there. However, you can also try using Table or a List if you prefer.
Let's create a Board, choose Bug and Story as cards, and Sprint as columns. We'll name this board "Sprint planning board"

Now, it's important to display only current and future Sprints as columns, and only unfinished Bugs and Stories.
`Filters` will help here. The good news is once you set them, there will be no need to update them before every Sprint.
So, we need at least three filters:
* Bug - State is not Done
* Story - State is not Done
* Sprint - State doesn't contain "Past"

Great!
And the last thing - let's display our specific interests directly, so we don't have to open cards every time to check.
With `Fields` tab, you may choose what will be visible on the Cards, no matter what their position is - Column, Row, or Card itself.

Check how handy it is to move Cards and see recalculated Formulas:

### **Where devs can check their work for the Sprint?**
Once again, Board comes to the rescue.
Now we need to see Stories and Bugs for the current Sprint.
There are at least three ways to do this. We will explain in detail the simplest one to configure, but the least powerful. We'll also briefly describe more powerful options so you can improve the system on your own once you become more familiar with it.
#### 1st option
Let's create another Board with Stories and Bugs. However, this time we will select State as a Column, and the Card's size will be Large.

> [//]: # (callout;icon-type=icon;icon=lightbulb-alt;color=#fba32f)
> You can choose as many Databases as a source as you want.
>
> And you can always group them by Fields that they have in common, meaning of the same name and format. For example, State (both Story and Bug have States) or Feature (both Story and Bug have Features).
Let's set a Filter where we choose the Sprint.

Your teammates may also set their personal Filter that affects them only - Assignees contains Me - to see only their work for this Sprint.

This is it 🙂
#### 2nd and 3rd option
What are the other options that were mentioned before? These options will allow us to avoid the manual work of changing filters every Sprint.
1. By using [Smart Folders](https://the.fibery.io/@public/User_Guide/Guide/Smart-Folders-26). If you choose Sprints as a top level, and apply the Filter "Current", you will see dedicated work for current Sprint only.
2. By using [Lookups](https://the.fibery.io/@public/User_Guide/Guide/Lookups-16). Add LookUps to the Bug, and to the Story ("Show Sprint from State"). Then, you will be able to set the dynamic Filter "Sprint State is in Current" for the Views above.
## What's next
Once you begin your first Sprint, it will be time to create cumulative reports - such as Burndown or CFD. Check this guide - [Historical and Cumulative Report examples](https://the.fibery.io/@public/User_Guide/Guide/Historical-and-Cumulative-Report-examples-59) - for step-by-step explanation.
Or you can play with Automations and create new Sprints or mark them as Done automatically. For instructions and inspirations, check [Automations for Software Development](https://the.fibery.io/@public/User_Guide/Guide/Automations-for-Software-Development-124).
# BROWSER NOTIFICATIONS FAQ
___________________________
## Browser notifications are enabled, why am I not receiving them?
There are many reasons, in general. Browser notifications depends on your browser settings and OS settings as well.
First, try to click `Send test notification` link in notification settings and Fibery will send you test notification. If you don't see anything, it is time to investigate 🕵ï¸â€â™€ï¸.
### **Try to reset Browser notifications preferences**
Browser preferences differ based on the browser you are using. For Google Chrome, simply click on the padlock icon in the browser address bar and select `Reset permissions`.

Then go to `Settings` → `Notifications` and try to re-enable Browser notifications. Click `Allow` in a confirmation popup. Click `Send test notification` link.
If no luck, then the problem is in OS settings, enable notifications for your browser.
### Make sure Chrome can send notifications on your computer
#### For Mac
Navigate to `System Settings` → `Notifications` and enable `Allow notifications` for Chrome:

#### For Windows
To enable notifications on Windows, follow these steps:
1. Click the Start button and select Settings.
2. In the left navigation pane, choose System, then Notifications.
3. Ensure that Notifications is enabled by swiping the button to the right at the top of the page.
4. Under the "Notifications from apps and other senders" section, make sure Google Chrome is also enabled.

### **Turn off focus assist or Do Not Disturb**
Both Windows and Mac offer a 'Do Not Disturb' features. However, enabling these features will prevent you from seeing Chrome notifications. To see these notifications, ensure the 'Do Not Disturb' features are disabled.
#### For Mac
For Mac users, disable the 'Do Not Disturb' feature by clicking the **Control Center** icon located at the top right of the menu bar, and then the **Focus** icon.

#### For Windows
For Windows users, click the `Start` button followed by `Settings`. In the left-side navigation pane, select `System`, then `Focus` `Assist`. Choose `Off` to disable the feature.
If you wish to limit distractions while still receiving Chrome notifications, select `Priority only` and then `Customize priority list`. Add Chrome to the list of apps allowed to send notifications.
## I use Brave and I receive an error: Registration failed - push service error
By default, Google Services for push messaging are disabled in Brave. To enable this, open the following URL in brave:
```
brave://settings/privacy
```
After this, enable the flag "Use Google services for push messaging":

Solution details [are here](https://stackoverflow.com/questions/42385336/google-push-notifications-domexception-registration-failed-push-service-err).
## How can I re-enable notifications if I disabled them in my browser?
If you disabled them in the browser you might need to go through your browser settings and clean up the site preferences. If you're using Chrome, update settings here: `chrome://settings/content/notifications?search=notifications` and then re-enable notifications in Fibery settings.
## What happens when I disable browser notifications?
When you disable browser notifications in any browser, they are disabled in **all** browsers. Note that when you enable it in some browser, it is enabled only in this exact browser.
# SINGLE AND MULTI-SELECT FIELDS
________________________________
Single and multi-select Fields allow you to pick from one or multiple options. They are available in [Formulas](https://the.fibery.io/@public/User_Guide/Guide/Select-Fields-\(Including-Workflow-Field\)-87/anchor=Select-Workflow-Fields-in-Formulas--8e1edc34-2712-4e66-ab17-67754fa4c27f "https://the.fibery.io/@public/User_Guide/Guide/Select-Fields-(Including-Workflow-Field)-87/anchor=Select-Workflow-Fields-in-Formulas--8e1edc34-2712-4e66-ab17-67754fa4c27f") and [Automations](https://the.fibery.io/@public/User_Guide/Guide/Select-Fields-\(Including-Workflow-Field\)-87/anchor=Select-Fields-in-Automations--20ec5226-94c5-43cf-b0b3-5616ed59e10f "https://the.fibery.io/@public/User_Guide/Guide/Select-Fields-(Including-Workflow-Field)-87/anchor=Select-Fields-in-Automations--20ec5226-94c5-43cf-b0b3-5616ed59e10f").
[Workflow Field](https://the.fibery.io/@public/User_Guide/Guide/Workflow-Field-292) is a special kind of single-select Field design to track statuses.
## Emoji and color
Choose an emoji and a background color for each option for a nice visualization:

## Select & Workflow Fields in Formulas
In Formulas, these Fields are treated like Relations to mini Databases, with additional features and limitations.
Considering this:
* A Single-Select Field is a many-to-one Relation to a Database.
* A Multi-Select Field is a many-to-many Relation to a Database.
In both cases, the available choice options are the Entities of that Database.
> [//]: # (callout;icon-type=icon;icon=database;color=#673db6)
> These special Select Databases are not shown in the list of Databases for the Space, but they function in many ways like a normal Database. To access it, Alt + Click on the Select option as shown in the GIF above.
That means these Fields may have different kinds of properties, and in Formulas we have to address which one to use.
### Add a numeric values to Select Fields
To use Select Fields in [Formulas](https://the.fibery.io/@public/User_Guide/Guide/Formulas-39), you need to add numeric values to them first. Just click `…` on the Field column, scroll down to Advanced section, and enable `Specify numeric values for each option` switcher.

Now we are ready to work with Formulas.
### Case 1. Mention using name
Let's say we want to have a Formula that calculates the number of Tasks with high priority. We will create this Formula on the Project level.

Here is what the Formula looks like:
[`Tasks.Filter(Priority.Name`](http://Priority.Name)` = "High").Count()`
Similar to what we do when we use Formulas across Relations, right?

Here we go!
Let's check Case 2.
### Case 2. Calculate complexity based on a single-select value
Let's say we measure priority based on numbers, not text, just like this:

And at the Project level, you want to know the average complexity across all the Tasks. However, 0-5-10 that are visible on the screenshot are in fact text, not numbers. To use these Single-Select Fields in a Formula, you need to set numeric values to them.
To do that, click `…` on the Field column, scroll down to Advanced section, and enable `Specify numeric values for each option` switcher.

Later in the Formula, you can access these Fields as `Priority.Value`.
Here is what the full Formula looks like:
`Tasks.Avg(Priority.Value)`

Here we go!
## Select Fields in Automations
[Set Single- and Multi-Select Fields in Automations](https://the.fibery.io/@public/User_Guide/Guide/Set-Single--and-Multi-Select-Fields-in-Automations-196)
### FAQ
#### I've given a user edit access to the Task database so they can create a select field with nested properties, but they're unable to add properties to the select field. Why is that?
In this case, the issue comes from permissions on the parent Database of the select field.
* The user is trying to create a Field inside a single-select Database (which acts as a nested property in the main Database).
* To do this, they need Creator access to the parent Database (the one behind the select field).
* The “Allow others to create new values†toggle only controls whether users can add new options (i.e. Entities of the select Database) — it does not control the ability to add new Fields/properties inside that Database.
Summary:\
âœ”ï¸ *Create select options → needs the toggle enabled*\
âœ”ï¸ *Add properties to the select Database → needs Creator access to that Database*
# RELAY.APP INTEGRATION
_______________________
Fibery integrates with [Relay](https://www.relay.app/apps/fibery/integrations). Relay.app is an automation tool that people love for its deep & easy-to-use integrations, embedded AI features, human-in-the-loop functionality, and powerful workflow essentials.

To integrate with Relay, you have to:
1. Create a free Relay.app account.
2. Set up a trigger, which is what will start each workflow run.
3. Choose one or more actions to run as part of your workflow.
4. Connect and authorize Fibery
5. Turn on your workflow
Check above for some example workflows, or [visit Relay's help center](https://docs.relay.app/) for more details on how to get started.
# GITHUB INTEGRATION
____________________
How to set up GitHub integration and connect Pull Requests to real work.
GitHub integration allows to import Repositories, Branches, and Pull Requests into Fibery. The most interesting case is to import Pull Requests and attach them to real work items, like Features, User Stories, or Tasks. Thus you will see Pull Requests statuses right in Fibery.
Noted: commits from primary branch are synced only
## Setup GitHub sync
1. Navigate to `Templates` and find `GitHub` template
2. Click `Sync`.
3. Authorize the GitHub app.
4. Choose what databases you want to sync from GitHub. Specify starting date for the sync, by default it is a month ago, but you may want to fetch all the data:
5. Click `Sync now` and wait. GitHub Space will appear in the sidebar and all the data should be synced eventually.

### Link Pull Requests to User Stories (or any other Databases)
We will use [Auto-linking (Set Relations Automatically)](https://the.fibery.io/@public/User_Guide/Guide/Auto-linking-(Set-Relations-Automatically)-50) feature to link Pull Requests with User Stories in this example.
To have these connections, you have to encode `User Story Id` in your Pull Requests. In our team we include `User Story Id` into a Pull Requests name, like this:
```
fibery/us#2189 add support date box filter
```
The main idea is to extract `User Story Id` from Pull Request name and link User Story and Pull Request Databases via automatic rule. This is a two-step process.
### Step 1. Create User Story Id formula field inside Pull Request
Open any Pull Request and add a new formula field named `User Story Id`, in our case formula will look like this:

```
If(
StartsWith(Name, "fibery/us#"),
Trim(ReplaceRegex(Name, "fibery\/us#(\d+).+", "\1 ")),
""
)
```
### Step 2. Create an automatic connection between Pull Request and User Story
Inside a Pull Request create a new `Relation` field, set relation to User Story and set automatic rule to match any Pull Request with a User Story by Id:

As a result, you will see a list of Pull Requests inside User Stories, like this:

## GitHub Actions
When something happens in Fibery (ex. a Story is completed), update GitHub.
Here is a list of possible actions:
* **Pull Requests:** create, merge, approve, close
* **Branch:** create
* **Issue:** create, close
You may create either rule or automation button.

And then you have to connect your Github account.

### Why can I see my GitHub repositories in the left menu, but not when using my custom action button or rule?
The repositories you see in the left menu are part of your GitHub integration, while the repositories shown (or not shown) in your custom action popup are not automatically connected to that integration.
If a repository field appears in the action popup, it's usually just a plain text box — unless it's specifically configured to fetch or link real data. So even if you can see repos elsewhere in Fibery, they won't show up in your custom action unless you've set that up manually.


## FAQ
### How do I authenticate Fibery with GitHub securely?
Fibery uses OAuth or personal access tokens with the necessary scopes for reading branches, PRs, and commits. Permissions are managed via GitHub, and Fibery requests only the needed scopes for the integration to function.
### What permissions do I need on a GitHub side?
Here are they:


#### Make sure permissions are granted to Fibery
1. Open
2. Find Fibery and click
3. Verify `Organization access` section

### What if the User, that configured the integration is not a part of the Fibery team anymore?
When the synchronization owner becomes inactive (in Fibery), your integration will show you an error. Someone should provide his/her account on the configuration screen (take over ownership).
Synchronization should be reconfigured. Someone should press edit settings and use his/her account and only afterward press `Full sync`.
### How to reconfigure Fibery integration permission on GitHub?
To reconfigure the permissions, go to the [https://github.com/settings/applications](https://github.com/settings/applications "https://github.com/settings/applications") page and click on the Fibery integration, where you can make changes to the permission settings.
### How to sync documents from Fibery to Github?
This can be done by creating a custom script. [You can check this community topic ](https://community.fibery.io/t/4212 https://community.fibery.io/t/4212 "https://community.fibery.io/t/4212 https://community.fibery.io/t/4212")for details & examples.
### How do I handle multiple GitHub repositories or accounts syncing into Fibery?
Syncing multiple repositories/accounts is supported, but may require setup per account. You can use automation rules to link related entities across different repositories. Each GitHub account creates separate databases, but you can relate them through Fibery's flexible data model.
# DELETE WORKSPACE
__________________
If you don't need your Workspace anymore, you can delete it with all the data.
1. Navigate to `Settings` in the sidebar.
2. Find `Delete workspace` section.
3. Click `Delete entire workspace` button.
4. Type your account name into the field. For example, for `xxx.fibery.io` type `xxx`.
5. Click `Yes, delete this workspace` button.
> [//]: # (callout;icon-type=icon;icon=surprise;color=#fc551f)
> Workspace deletion is an unrecoverable operation. All your data will be deleted, so please make sure you are don't have any valuable information in the Workspace left.
# GOOGLE CALENDAR INTEGRATION
_____________________________
You can sync Google Calendar to keep track of meetings, public holidays and vacations without leaving Fibery.
> [//]: # (callout;icon-type=emoji;icon=:moneybag:;color=#FBA32F)
> You can sync several Google Calendars accounts into the same database in Pro or Enterprise plan.
Most likely this is not what you want for a team. You need to have an account that has access to all required calendars. For example, this account has access to several calendars and all of them can be synced into Fibery from a single account.
As a result, you will have `Calendar` → `Events` → `Attendees` structure. All Events from all Calendars will be visible to all people in a Space with Google Calendar Sync. If you want to hide some Events, it is not currently possible.
## Configure Google Calendar Sync
1. Navigate to a Space where you want to add a Google Calendar sync, click Integrate and click Google Calendar
2. Connect Google Account.
3. Select required Databases to sync (maybe you need all of them) and select Calendars to sync
4. (optional) Review and change fields that will be synced. For example, you don't want to sync Meet Link, so just uncheck it. You can change database name, color and field names as well.

Note: it is possible to specify future cut-off date for events. Set value in `Do not sync events that start more than [X] month(s) from today` field.

5. Click `Sync Now` button when you are happy with the fields and databases setup.
6. The sync process will start and you should see Calendar, Events and other databases filled with data.

### Event vs. All Day Event
You may notice that that there are two database for events in Fibery synced from Google Calendar: Event and All Day Event. It was technically challenging to put everything into a single Database, so here we have two.
* `Event` contains events with start and end times, like meetings.
* `All Day Event` contains Vacations, Birthdays, Public Holidays, with no specific time of day.
You can visualize them both on a single Calendar View if you need.
### Sync several accounts
You can sync several Google calendars accounts into the **same** **database**.
Setup Google Calendar Sync and enable `Allow users to add personal integrations` option.

## Use Cases
* [Sync meetings from Google Calendar](https://the.fibery.io/@public/User_Guide/Guide/Sync-meetings-from-Google-Calendar-137)
* [Sync public holidays from Google Calendar](https://the.fibery.io/@public/User_Guide/Guide/Sync-public-holidays-from-Google-Calendar-138)
* [Sync birthdays from Google Calendar](https://the.fibery.io/@public/User_Guide/Guide/Sync-birthdays-from-Google-Calendar-139)
# HOW TO MANAGE HUMAN RESOURCES WITH FIBERY
___________________________________________
This is a guide on a custom Workspace Template for managing Human Resources in Fibery. It covers all the main processes: hiring, onboarding, employee management, and vacations.
## What's included in the HR workspace template?
If you prefer video over text, we recommend to check this 11-min piece:
[https://youtu.be/e9N5ef_5OQ4?feature=shared](https://youtu.be/e9N5ef_5OQ4?feature=shared)
If you prefer text over video, here is what we will cover in detail:
* [🎣 Hiring](https://the.fibery.io/@public/User_Guide/Guide/%F0%9F%8E%A3-Hiring-223)
* creating Job portal
* looking for Candidates
* accumulating communication
* scheduling interviews, storing notes
* some other fancy things (like analytics!)
* [🙈 Employee Management](https://the.fibery.io/@public/User_Guide/Guide/%F0%9F%99%88-Employee-Management-224)
* company wiki
* planning tasks for HR managers across all employees
* managing employee's personal data
* meetings planning (salary reviews, 1:1's, etc.)
* [🣠Onboarding](https://the.fibery.io/@public/User_Guide/Guide/%F0%9F%90%A3-Onboarding-225)
* 30-60-90 Framework
* repeatable process for every new employee
* progress tracking
* unique tasks planning based on position & background
* [🌴 Vacation Tracking](https://the.fibery.io/@public/User_Guide/Guide/%F0%9F%8C%B4-Vacation-Tracking-226)
* shared company policies
* track sick days, overtime, and vacations across all teams and employees
* allocate vacations every year
* collect public holidays from all the countries, your teammates are from
* dynamic views, that show who is off today (for any reason)
* slack integration for quick and easy notification, and slack bot for simple adding requests
> [//]: # (callout;icon-type=icon;icon=heart;color=#fba32f)
> If you need help with customization, please don't hesitate to contact us with Intercom chat or simply [book a call.](https://cal.com/team/fibery/fibery-demo)
## How to install HR template?
The HR Workspace Template is not available during registration in Fibery. It was created as a custom solution for teams that already tried Fibery and are craving for more.
> [//]: # (callout;icon-type=icon;icon=download-alt;color=#4faf54)
> To install the HR Workspace template, click [this link](https://shared.fibery.io/t/27a4288e-1364-4edc-8ad6-a15b7727047f) and choose a Workspace you want to install it to.
Any Workspace Template is basically a set of connected Spaces, so here is the map of Spaces you'll get after the installation: Hiring, Boarding, Employee Management, Vacations, Business Calendar.

Now, let's dive deeper into each of the processes.
> [//]: # (callout;icon-type=icon;icon=brain;color=#fba32f)
> Remember that you can find all video instructions, useful links and flow description in the Housekeeping Space.
# TABLE VIEW
____________
On a Table View each Entity is represented as a row.
Tables are handy for quick editing and are very familiar view to work with Databases.

## How to Add table view to a space?
1. Put mouse cursor on a Space and click `+` icon.
2. Select `Table` from the menu.
> [//]: # (callout;icon-type=icon;icon=exclamation-circle;color=#9c2baf)
> When naming Table Views, we're removing the additional words in column names, and using only the original Field name. So, “Avatars of Assignees†will be “Assigneesâ€, “Progress (progress bar)†becomes “Progressâ€, etc.
## Configure rows and columns view
1. Click `Rows` in the top menu to select a database to be visualized as rows on Table View.
2. Click `Columns` to add several columns into Table View.
> [//]: # (callout;icon-type=icon;icon=exclamation-circle;color=#6a849b)
> You can enable existing fields as columns, or you can add new fields as well.
You may created hierarchical Table as well. For example, you have Product Area database that has Features and Insights collections. Select Product Area in Rows first, then click `+ Add level` button below Product Area and add nested Databases: Features and Insights. It will look like this:

It's possible to visualize recursive relationships at any level in List, Table and Smart Folder. For example, if you have Product Areas (nested) and Features (nested), you can see them like this
```
Product Area 1
- Product Area 1-1
- Feature 1
- Feature 1-1
- Feature 1-2
- Feature 2
Product Area 2
- ...
```
> [//]: # (callout;icon-type=icon;icon=exclamation-circle;color=#fba32f)
> Columns width is stored per user & per device. You may configure it also separately for web version and for desktop application.
### Group by fields
Also, you can group entities at any level in Table View by relation, state, single- and multi-select fields. You can add groups to all levels, but only one group per-level is supported.

## Add new entities
There are several ways to add a new Entities.
1. Click `+ New` button in the top menu and new row will be added in the bottom of the Table.
2. Scroll down to the bottom of the Table and click on empty row.
3. Put a mouse cursor in any row and push `Shift + Enter`.
4. Right click on any row and click `New option`.
## Open entities
Just click on a `>` icon in the first column and an Entity will be opened on the right. You can also use â†•ï¸ arrows to navigate between Entities in a table. Make sure that a row has focus and use arrows to navigate.

## Filter entities
You may filter Entities.
1. Click `Filter` in the top menu.
2. Select required properties and build filter conditions.

You can choose whether an Entity should be shown only if it matches all filters or if it matches any of the filters. It's not currently possible to use more complex logic in filters (e.g. if A and B or C).
> [//]: # (callout;icon-type=icon;icon=exclamation-circle;color=#9c2baf)
> Each Table has Global Filters and My Filters. Global Filters will be applied for **all** users, while My Filter is visible to you only.
You can also quickly find something on Table View, just use `Cmd + F` shortcut and type some keyword. This quick search works for Name, ID, numbers and other visible basic text fields.
## Totals row for numeric fields
At the bottom of every **numeric** column in Table View, you can run calculations that will show you some aggregated information: Sum, Avg, Min, Max, Count.
[https://global.discourse-cdn.com/business7/uploads/fibery/original/2X/b/bc0911b8bc91b5797fb71a389acd5e7ef1226c24.gif](https://global.discourse-cdn.com/business7/uploads/fibery/original/2X/b/bc0911b8bc91b5797fb71a389acd5e7ef1226c24.gif)
Limitations:
* Totals are calculated only for expanded (visible) rows so far. So if you have groups, totals are not good yet.
## Re-order columns
You may change the order of the columns. There are two ways do to it:
1. Just drag column to the left or right.
2. Open `Columns` menu item and re-order columns there.
## Re-order rows
You may re-order (prioritize) Entities in Table View via drag and drop.

> [//]: # (callout;icon-type=icon;icon=exclamation-circle;color=#fba32f)
> Make sure that Sorting is not set in a table, otherwise manual prioritization will not work.
## Change columns width
Drag the right side of the column title to change its width.
You can also automatically fit a single columns or all columns to content or screen. Click on any column title and select one of the option:
* Fit column to content
* Fit all columns to content
* Fit all columns to screen

Finally, you can double-click on a column separator to make it fit content:

## Change row height
To change row height, go to Rows setting and choose between:
* Short
* Medium
* Tall
* Extra tall

## Pin columns
You can pin one or several columns to the left and horizontal scroll will respect the pin. Click on a column title and select `Pin column` option.

## Hide columns
Just click on a column title and select `Hide column` option.
## Right click context menu
Right click on any row to see all possible actions for the Entity.

## Batch copy/paste
You may update Fields (Columns) in Table View via copy/paste.
1. Copy a value you need from a field.
2. Select column value for several rows.
3. Paste value from your clipboard, thus updating all rows.

## Batch actions
You may execute pre-defined actions or custom [Buttons](https://the.fibery.io/@public/User_Guide/Guide/Buttons-52) in Table View.
1. Select several rows using checkboxes on the left.
2. Click `Actions` in the top menu.

## Select one, several or all rows
You can use checkboxes to select rows. Just click some to select them.
You can select several rows with a single movement by holding mouse button and moving it down:

You can also use `Shift + click` to select all rows in between:

You can also select or unselect all rows in a table view.

## Sort rows
You may sort rows by fields.
1. Click `Sort` on the top menu
2. Add one or more sorting rules
You can also click on a column name and select `Sort ascending` or `Sort descending` option.
## Color rows
You may color code rows to highlight some important things. For example, mark features with bugs red.
1. Click on `Colors` in the top menu
2. Set one or many color rules.
## Duplicate table view
You may duplicate current list view into the same Space.
1. Click `•••` on the top right
2. Click `Duplicate Tblea` option
## Link to your table
You can copy an anchor link to this specific view so you can share it elsewhere. There are two ways to do it:
1. Click `•••` on the top right and click Copy Link
2. Click on table `Id` in top left corner and the link will be copied to your clipboard
## Export into CSV
You may export the data in the table into CSV file:
1. Click `•••` on the top right and click `Export data to CSV` option
2. Save CSV file on your hard drive.
## FAQ
### Can I group rows?
Yes, you can group rows by relation, state, single- and multi-select fields.
### Is it possible to wrap cell content?
Yes, it is wrapped if you set Row Height to Medium, Tall, or Extra Tall.
# LINEAR INTEGRATION
____________________
# Use cases
## Link Product Area or User Stories to Linear Issues
One of the main benefits of integrating Fibery with Linear is the ability to create detailed product specifications in Fibery and directly link them to development tasks in Linear. This enables product managers and development teams to clearly connect high-level product planning with specific implementation tasks. Since the synchronization is one-way from Linear to Fibery, you will have a complete picture in Fibery. It allows to
* Maintain traceability between product requirements and development work
* Ensure alignment between product vision and technical implementation
* Easily reference detailed specifications from Linear issues
## Track Development Progress
By integrating Fibery with Linear, teams can view status updates on Linear issues directly within their Fibery workspace. This provides a holistic view of product development progress without constantly switching between tools. It allows to
* Real-time visibility into development status
* Simplified progress reporting and stakeholder updates
* Identify bottlenecks or delays more quickly
## Initial Data Import
For teams finding Linear too opinionated for their workflows, Fibery offers an easy way to import existing Linear data into its more flexible environment. This allows teams to leverage Linear's strengths while gaining the customization capabilities of Fibery. It allows to
* Customize workflows beyond Linear's predefined options
* Create more complex relationships between different types of work items
* Leverage Fibery's powerful reporting and visualization tools
# Overview
Using Linear Integration, you can import Linear data into Fibery.
This is done through a time-based synchronization process. This means that all the information synced periodically from Linear to Fibery.
# Setup
1. Create a Space.
2. Navigate to Space settings and click on the `Integrate` button.
3. Select the `Linear` box.
4. Authentication of your Linear account can be done through OAuth.

5. Allow the permission request.
6. Customize the Integration settings.

**Databases**
It is possible to decide which databases need to be synced to Fibery. However, these databases are tightly connected, so only deselect any of them if you understand the consequences.

**Include archived entities**
To sync archived projects, issues, and more, you can enable this setting in Linear.
**Initiatives**
It's possible to sync only selected initiatives, leaving it empty means syncing all Linear initiatives into Fibery.
7. Set up Fields and Databases.
The provided Slack fields by the integration can be mapped and configured to the Fibery integration database.
Click on the `Sync now` button on the bottom of the screen to start the sync process.

# Supported objects, fields, and the default mapping
Fibery supports syncing the following type of information/object from Linear.
## Project Database
| | |
| --- | --- |
| **Project Database** | |
| **Linear Field** | **Type** | **Fibery Field** | **Description** |
| Archived At | Date & Time | Archived At | The time at which the entity was archived. Null if the entity has not been archived. |
| Auto Archived At | Date & Time | Auto Archived At | The time at which the project was automatically archived by the auto pruning process. |
| Canceled At | Date & Time | Cancelled At | The time at which the project was moved into canceled state. |
| Color | Text | Color | The project's color. |
| Completed Issue Count History | Text | Completed Issue Count History | The number of completed issues in the project after each week. |
| Completed Scope History | Text | Completed Scope History | The number of completed estimation points after each week. |
| Completed At | Date & Time | Completed At | The time at which the project was moved into completed state. |
| Content (Description on UI) | Rich Text MD | Description | The project's content in markdown format. |
| Created At | Date & Time | Created At | The time at which the entity was created. |
| Description (Summary on UI) | Rich Texd MD | Summary | The project's description. |
| Icon | Text | Icon | The icon of the project. |
| In Progress Scope History | Text | In Progress Scope History | The number of in progress estimation points after each week. |
| Issue Count History | Text | Issue Count History | The total number of issues in the project after each week. |
| **Name** | **Text Name** | **Name** | **The project's name.** |
| Priority | Single-Select | Priority | The priority of the project. Values: \[No priority, Urgent, High, Normal, Low.\] |
| Progress | Number (Decimal) | Progress | The overall progress of the project. This is the (completed estimate points + 0.25 \* in progress estimate points) / total estimate points. |
| Project Update Reminders Paused Until At | Date & Time | Update Reminders Paused Until | The time until which project update reminders are paused. |
| Scope | Number (Integer) | Scope | The overall scope (total estimate points) of the project. |
| Scope History | Text | Scope History | The total number of estimation points after each week. |
| Slack Issue Comments | Checkbox | Slack Issue Comments | Whether to send new issue comment notifications to Slack. |
| Slack Issue Statuses | Checkbox | Slack Issue Statuses | Whether to send new issue status updates to Slack. |
| Slack New Issue | Checkbox | Slack New Issue | Whether to send new issue notifications to Slack. |
| Slug Id | Text | Slug Id | The project's unique URL slug. |
| Sort Order | Number (Decimal) | Sort Order | The sort order for the project within the organization (ASC). |
| Start Date | Date | Start Date | The estimated start date of the project. |
| Target Date | Date | Target Date | The estimated completion date of the project. |
| Started At | Date & Time | Started At | The time at which the project was moved into started state. |
| Trashed | Checkbox | Trashed | A flag that indicates whether the project is in the trash bin. |
| Updated At | Date & Time | Updated At | The last time at which the entity was meaningfully updated. |
| URL | Url | Original URL | Project URL. |
| Status | Workflow | Status | The status that the project is associated with. **Values: Dynamic** |
| Health | Single-Select | Health | The health of the project based on the last project update. Values: \[At Risk, Off Track, On Track\] |
| Creator | Relation | User | The user who created the project. |
| Lead | Relation | User | The project lead. |
| Members | Relation | Users | Users that are members of the project. |
| | Relation | Initiatives | Initiatives which include this Project. |
| | Relation | Issues | Connected Issues to this Project. |
| | Relation | Milestones | Connected Milestones to this Project. |
| | Relation | Teams | Connected Teams to this Project. |
| | Relation | Documents | Attached document to this Project. |
## Team Database
| | |
| --- | --- |
| **Team Database** | |
| **Linear Field** | **Type** | **Fibery Field** | **Description** |
| Archived At | Date & Time | Archived At | The time at which the entity was archived. Null if the entity has not been archived. |
| Auto Archive Period | Number (Integer) | Auto Archive Period | Period after which automatically closed and completed issues are automatically archived in months. |
| Auto Close Period | Number (Integer) | Auto Close Period | Period after which issues are automatically closed in months. Null means disabled. |
| Color | Text | Color | Color of the team. |
| Created At | Date & Time | Created At | The time at which the entity was created. |
| Cycle Calender Url | URL | Cycle Calender Url | Calendar feed URL (iCal) for cycles. |
| Cycle Cooldown Time | Number (Integer) | Cycle Cooldown Time | The cooldown time after each cycle in weeks. |
| Cycle Duration | Number (Integer) | Cycle Duration | The duration of a cycle in weeks. |
| Cycle Issue Auto Assign Completed | Checkbox | Cycle Issue Auto Assign Completed | Auto assign completed issues to current cycle. |
| Cycle Issue Auto Assign Started | Checkbox | Cycle Issue Auto Assign Started | Auto assign started issues to current cycle. |
| Cycle Lock To Active | Checkbox | Active Issues Are Assigned To Cycle | Auto assign issues to current cycle if in active status. |
| Cycle Start Day | Single-Select | Cycle Start Day | The day of the week that a new cycle starts. |
| Cycles Enabled | Checkbox | Cycles Enabled | Whether the team uses cycles. |
| Default Issue Estimate | Number (Integer) | Default Issue Estimate | What to use as an default estimate for unestimated issues. |
| Description | Rich Text MD | Description | The team's description. |
| Group Issue History | Boolean | Group Issue History | Whether to group recent issue history entries. |
| Icon | Text | Icon | The icon of the team. |
| Issue Estimation Allow Zero | Checkbox | Issue Estimation Allow Zero | Whether to allow zeros in issues estimates. |
| Issue Estimation Extended | Checkbox | Issue Estimation Extended | Whether to add additional points to the estimate scale. |
| Issue Estimation Type | Single-Select | Issue Estimation Type | The issue estimation type to use. Values: \["Not Used", "Exponential", "Fibonacci", "Linear", "TShirt"\] |
| Issue Ordering No Priority First | Checkbox | Issue Ordering No Priority First | Whether issues without priority should be sorted first. |
| Key | Text | Key | The team's unique key. The key is used in URLs. |
| **Name** | **Name** | **Name** | **Team's name.** |
| Private | Checkbox | Private | Whether the team is private or not. |
| Require Priority To Leave Triage | Checkbox | Require Priority To Leave Triage | Whether an issue needs to have a priority set before leaving triage. |
| SCIM Group Name | Text | SCIM Group Name | The SCIM group name for the team. |
| SCIM Managed | Checkbox | SCIM Managed | Whether the team is managed by SCIM integration. |
| Set Issue Sort Order On State Change | Text | Set Issue Sort Order On State Change | Where to move issues when changing state. |
| Slack Issue Comments | Checkbox | Slack Issue Comments | Whether to send new issue comment notifications to Slack. |
| Slack Issue Statuses | Checkbox | Slack Issue Statuses | Whether to send new issue status updates to Slack. |
| Slack New Issue | Checkbox | Slack New Issue | Whether to send new issue notifications to Slack. |
| Timezone | Text | Timezone | The timezone of the team. Defaults to "America/Los_Angeles" |
| Triage Enabled | Checkbox | Triage Enabled | Whether triage mode is enabled for the team or not. |
| Upcoming Cycle Count | Number (Integer) | Upcoming Cycle Count | How many upcoming cycles to create. |
| Updated At | Date & Time | Updated At | The last time at which the entity was meaningfully updated. |
| Cycles | Relation | Cycles | Cycles associated with the team. |
| Issues | Relation | Issues | Issues associated with the team. |
| Members | Relation | Users | Users who are members of this team. |
| Projects | Relation | Projects | Projects associated with the team. |
## Milestone Database
| | |
| --- | --- |
| **Milestone Database** | |
| **Linear Field** | **Type** | **Fibery Field** | **Description** |
| Archived At | Date & Time | Archived At | The time at which the entity was archived. Null if the entity has not been archived. |
| Created At | Date & Time | Created At | The time at which the entity was created. |
| Description | Rich Text MD | Description | The milestone's description in MD format. |
| **Name** | **Name** | **Name** | **Milestone's name.** |
| Sort Order | Number (Decimal) | Sort Order | The order of the milestone in relation to other milestones within a project. |
| Target Date | Date | Target Date | The estimated completion date of the milestone. |
| Updated At | Date & Time | Updated At | The last time at which the entity was meaningfully updated. |
| | Relation | Project | The project of the milestone. |
| | Relation | Issues | Issues associated with the project milestone. |
## Cycle Database
| | |
| --- | --- |
| **Cycle Database** | |
| **Linear Field** | **Type** | **Fibery Field** | **Description** |
| Archived At | Date & Time | Archived At | The time at which the entity was archived. Null if the entity has not been archived. |
| Auto Archived At | Date & Time | Auto Archived At | The time at which the cycle was automatically archived by the auto pruning process. |
| Completed At | Date & Time | Completed At | The completion time of the cycle. If null, the cycle hasn't been completed. |
| Completed Issue Count History | Text | Completed Issue Count History | The number of completed issues in the cycle after each day (as list of numbers). |
| Completed Scope History | Text | Completed Scope History | The number of completed estimation points after each day (as list of numbers). |
| Created At | Date & Time | Created At | The time at which the entity was created. |
| Description | Rich Text MD | Description | The cycle's description in MD format. |
| Starts At + Ends At | Date & Time Range | Cycle Date Range | The range of start and end time of the cycle. |
| **Name + Number** | **Name** | **Name** | **Cycle's name and its number combined** **(to replicate Linear's UI).** |
| In Progress Scope History | Text | In Progress Scope History | The number of in progress estimation points after each day (as list of numbers). |
| Issue Count History | Text | Issue Count History | The total number of issues in the cycle after each day (as list of numbers). |
| Progress | Number (Decimal) | Progress | The overall progress of the cycle. This is the (completed estimate points + 0.25 \* in progress estimate points) / total estimate points. |
| Scope History | Text | Scope History | The total number of estimation points after each day (as list of numbers). |
| Updated At | Date & Time | Updated At | The last time at which the entity was meaningfully updated. |
| | Relation | Team | The team that the cycle is associated with. |
| | Relation | Issues | Issues associated with the cycle. |
| | Relation | Uncompleted Issues Upon Close | Issues that weren't completed when the cycle was closed. |
## Initiative Database
| | |
| --- | --- |
| **Initiative Database** | |
| **Linear Field** | **Type** | **Fibery Field** | **Description** |
| Archived At | Date & Time | Archived At | The time at which the entity was archived. Null if the entity has not been archived. |
| Color | Text | Color | The initiative's color in HEX. |
| Created At | Date & Time | Created At | The time at which the entity was created. |
| Summary + External Links | Rich Text MD | Summary | The initiative's description in MD format AND external links. |
| Icon | Text | Icon | The text of icon of the initiative. |
| **Name** | **Name** | **Name** | **Initiative's name.** |
| Slug Id | Text | Slug Id | The initiative's unique URL slug. |
| Sort Order | Number (Decimal) | Sort Order | The sort order of the initiative within the organization. |
| Target Date | Date | Target Date | The estimated completion date of the initiative. |
| Target Date Resolution | Single-Select | Target Date Resolution | The resolution of the initiative's estimated completion date. Values: \[Half Year, Month, Quarter, Year\] |
| Trashed | Checkbox | Trashed | A flag that indicates whether the initiative is in the trash bin. |
| Updated At | Date & Time | Updated At | The last time at which the entity was meaningfully updated. |
| Status | Single-Select | Status | Initiative's status. Values: \[Planned, Active, Completed\]. |
| Creator | Relation | User | The user who created the Initiative. |
| | Relation | Owner | The owner of the Initiative. |
| | Relation | Projects | Projects associated with the Initiative. |
| | Relation | Document | Documents associated with the Initiative. |
## **User Database**
| | |
| --- | --- |
| **User Database** | |
| **Linear Field** | **Type** | **Fibery Field** | **Description** |
| Archived At | Date & Time | Archived At | The time at which the entity was archived. Null if the entity has not been archived. |
| Active | Checkbox | Active | Whether the user account is active or disabled (suspended). |
| Admin | Checkbox | Admin | Whether the user is an organization administrator. |
| Avatar | Avatar | Avatar | User's avatar image. |
| Created At | Date & Time | Created At | The time at which the entity was created. |
| Created Issues Count | Number (Integer) | Created Issues Count | Number of issues created. |
| Description | Rich Text MD | Description | The user's description in MD format. |
| Disable Reason | Text | Disable Reason | Reason why is the account disabled. |
| Display Name | Text | Display Name | The user's display (nick) name. Unique within each organization. |
| Email | Email | Email | The user's email address. |
| Guest | Checkbox | Guest | Whether the user is a guest in the workspace and limited to accessing a subset of teams. |
| Initials | Text | Initials | The initials of the user. |
| invite hash | Text | Invite Hash | Unique hash for the user to be used in invite URLs. |
| Last Seen | Date & Time | Last Seen | The last time the user was seen online. If null, the user is currently online. |
| **Name** | **Name** | **Name** | **The user's full name.** |
| Status Emoji | Text | Status Emoji | Emoji of a status (as text). |
| Status Label | Text | Status Label | The label of the user current status. |
| Timezone | Text | Timezone | The local timezone of the user. |
| Updated At | Date & Time | Updated At | The last time at which the entity was meaningfully updated. |
| URL | URL | Original URL | User's profile URL. |
| | Relation | Assigned Issues | Issues assigned to the user. |
| | Relation | Created Issues | Issues created by the user. |
| | Relation | Teams | Teams the user is part of. |
| | | | |
## **Issue Database**
| | |
| --- | --- |
| **Issue Database** | |
| **Linear Field** | **Type** | **Fibery Field** | **Description** |
| Archived At | Date & Time | Archived At | The time at which the entity was archived. Null if the entity has not been archived. |
| Auto Archived At | Date & Time | Auto Archived At | The time at which the issue was automatically archived by the auto pruning process. |
| Auto Closed At | Date & Time | Auto Closed At | The time at which the issue was automatically closed by the auto pruning process. |
| Board Order | Number (Decimal) | Board Order | The order of the item in its column on the board. |
| Branch Name | Text | Suggested Branch Name | Suggested branch name for the issue. |
| Cancelled At | Date & Time | Cancelled At | The time at which the issue was moved into canceled state. |
| Completed At | Date & Time | Completed At | The time at which the issue was moved into completed state. |
| Created At | Date & Time | Created At | The time at which the entity was created. |
| Customer Ticket Count | Number (Integer) | Customer Ticket Count | Returns the number of Attachment resources which are created by customer support ticketing systems (e.g. Zendesk). |
| State | Workflow | State | The workflow state that the issue is associated with. In Fibery, it will be **all states created by all teams combined (including Triage)**. |
| Description + Attachments | Rich Text MD | Description | The issue's description in MD format (includes any attachments for the issue as they are just files in the document). |
| Due Date | Date | Due Date | The date at which the issue is due. |
| Estimate | Number (Integer) | Estimate | The estimate of the complexity of the issue.. |
| Identifier | Text | Identifier | Issue's human readable identifier (e.g. ENG-123). |
| Number | Number (Integer) | Number | The issue's unique number. |
| Pevious Identifiers | Text | Previous Identifiers | Previous identifiers of the issue if it has been moved between teams. |
| Priority | Single-Select | Priority | The priority of the issue. Values: \[No priority, Urgent, High, Normal, Low\] |
| SLA Breaches At | Date & Time | SLA Breaches | The time at which the issue's SLA will breach. |
| SLA Started At | Date & Time | SLA Started | The time at which the issue's SLA began. |
| Snoozed Until At | Date & Time | Snoozed Until | The time until an issue will be snoozed in Triage view. |
| Sort Order | Number (Decimal) | Sort Order | The order of the item in relation to other items in the organization (sort asc). |
| Sub Issue Sort Order | Number (Decimal) | Sub Issue Sort Order | The order of the item in the sub-issue list. Only set if the issue has a parent. |
| Started At | Date & Time | Started At | The time at which the issue was moved into started state. |
| Started Triage At | Date & Time | Started Triage At | The time at which the issue entered triage. |
| **title** | **Name** | **Name** | **The issue's name.** |
| Trashed | Checkbox | Trashed | A flag that indicates whether the issue is in the trash bin. |
| Triaged At | Date & Time | Left Triage At | The time at which the issue left triage. |
| Updated At | Date & Time | Updated At | The last time at which the entity was meaningfully updated. |
| URL | URL | Original URL | Issue's URL. |
| Labels | Multi-select | Labels | Labels associated with this issue. |
| Reactions | Text | Reactions | Reactions associated with the issue (as list of their names). |
| Assignee | Relation | User | The user to whom the issue is assigned to. |
| Creator | Relation | User | The user who created the issue. |
| Bot Actor | Text | Bot Creator | A bot actor is an actor that is not a user, but an application or integration. |
| | Relation | Cycle | The cycle that the issue is associated with. |
| | Relation | Issue | Parent issue |
| | Relation | Project | The project that the issue is associated with. |
| | Relation | Milestone | The Milestone that the issue is associated with. |
| Snoozed By | Relation | User | The user who snoozed the issue. |
| | Relation | Team | The team that the issue is associated with. |
| Subscribers | Relation | Users | Users who are subscribed to the issue. |
## **Document Database**
| | |
| --- | --- |
| **Document Database** | Attachments for Projects and Initiatives |
| **Linear Field** | **Type** | **Fibery Field** | **Description** |
| Archived At | Date & Time | Archived At | The time at which the entity was archived. Null if the entity has not been archived. |
| Color | Text | Color | The color of the icon. |
| Content | Rich Text MD | Description | The documents content in markdown format. |
| Created At | Date & Time | Created At | The time at which the entity was created. |
| Hidden At | Date & Time | Hidden At | The time at which the document was hidden. Null if the entity has not been hidden. |
| Icon | Text | Icon | The icon of the document. |
| Slug Id | Text | Slug Id | The document's unique URL slug. |
| Sort Order | Number (Decimal) | Sort Order | The order of the item in the resources list (ASC). |
| **title** | **Name** | **Name** | **The document title.** |
| Trashed | Checkbox | Trashed | A flag that indicates whether the document is in the trash bin. |
| Updated At | Date & Time | | The last time at which the entity was meaningfully updated. |
| URL | URL | Original URL | The canonical url for the document. |
| | Relation | Created By | The user who created the document. |
| | Relation | Updated By | The user who last updated the document. |
| | Relation | Project | The project that the document is associated with. |
| | Relation | Initiative | The initiative that the document is associated with. |
## **Unsupported fields**
* **Team database: Active cycle —** We add the active cycle field to the cycle database in the linear template. The active cycle is calculated using the cycle timerange and the current date.
* **Initiative database: Description** **—** this field is inaccessible through Linear API.
* **Comments** **—** we have decided not to support this field to streamline our solution. Please let us know if it is important to you.
## FAQ
### Why are some Linear Projects not syncing with Fibery?
If you're noticing that some Projects from Linear aren't showing up in Fibery, but others are syncing just fine, here are a few things to check:
* **Check for Initiative Filters**
If you've applied a filter to Linear Initiatives in your integration settings or synced databases, only Projects linked to visible Initiatives will be synced. Projects associated with filtered-out Initiatives will not appear in Fibery.
* **Reconnecting the Integration**
Reconnecting the Linear integration (e.g., deleting and re-adding it) won't resolve this issue if filters are still applied. Make sure to review and adjust filters on Initiatives, Projects, or related databases.
* **Still not syncing?**
If filtering doesn't seem to be the cause and the issue persists, reach out to our support team with:
* Links to specific missing Projects
* A description of your current sync/filter setup
# FIBERY AS A CMS: HOW WE AUTOMATICALLY PUBLISH POSTS FROM FIBERY TO OUR GATSBY BLOG
____________________________________________________________________________________
Fibery as a CMS is an interesting idea to explore. We run [our Fibery blog](https://fibery.io/blog/) in [Gatsby](https://www.gatsbyjs.com/) with static .md files, but Fibery can produce content in Markdown format. We decided to automate blog posts publishing and integrated Fibery with Gatsby.
## Blog space structure
We created Blog Space in our Fibery account (you can [install it into your workspace using this template link](https://shared.fibery.io/t/28f4ec2d-a51b-4ed8-bd79-03e5cdd77497-blog)). Blog space has three databases:
* Author
* Article
* Question (used for [structured data](https://developers.google.com/search/docs/appearance/structured-data/intro-structured-data))
From the user perspective everything is easy: you just create new Article entity, and write a text. Here is the list of Articles in Blog Space with one article opened on the right:

## Tech details
The article database has "Publish" Action Button. This button triggers the blog CI pipeline. The CI pipeline fetches data content using a [JavaScript script](https://gist.github.com/Mavrin/2e70b7e98846f20fa53b41039f6201af) from Fibery and writes the markdown file to the file system. Then, it triggers the Gatsby build and pushes the new blog to the production cluster.
Here is [the article in our real blog](https://fibery.io/blog/ai-product-feedback/), and here is the article in Blog Space (pay attention to some fields on the right that we use to add tags, date and other meta to the blog post):

The main idea behind the script is to traverse a Fibery document, fetch images from Fibery, save them to the file system, replace the Fibery link with the local file link, and transform the document into a specific format that a blogging system can use as a source for an article.
> [//]: # (callout;icon-type=icon;icon=exclamation-circle;color=#fba32f)
> This script implemented naive approach for fetching data and doesn't handle rate limit api error. This script needs improvements such adding cache for already fetched images and adding API request limit to fibery.
Quote from Michael, who writes a lot:
> Now I can write and update articles really fast without any special knowledge. While I enjoyed VSCode and Markdown, Fibery text editor is much more pleasant experience. You can add images faster, don't think how to format this and that, use AI right here to make proofreading and corrections. It really saves time and removes a barrier for blog posting.
# HOW TO LINK ENTITIES OR CREATE A NEW ENTITY AUTOMATICALLY
___________________________________________________________
Here are some cases when it can be helpful:
* With [Forms](https://the.fibery.io/@public/User_Guide/Guide/Forms-134) we collect requests. Requests have to be linked to Contacts from our CRM (based on the Phone number provided), and if no matches - create a new record
* With [Email integration (Gmail, Outlook & IMAP)](https://the.fibery.io/@public/User_Guide/Guide/Email-integration-(Gmail,-Outlook-&-IMAP)-66) we collect contacts and emails and also need to link them to our current CRM. If this is a new contact - update the CRM.
* Anything else you can think of
If you need just to link everything automatically, and don't need to create smth if no matches are found - [Auto-linking (Set Relations Automatically)](https://the.fibery.io/@public/User_Guide/Guide/Auto-linking-(Set-Relations-Automatically)-50) will work.
Otherwise, there are two options.
## Option 1: Automations
#### 1. Add a "technical" field on
This field can be hidden later but will use that in automations.
It has to be created on the Database, where we collect requests/emails/any dynamic information.
In our case, it will live on the `Request` database.
I added a `Checkbox` field and named it in the ugliest way possible,

This field will be filled in automatically.
#### 2. Add a rule that links rows from different Databases
This rule is also created on the `Request` database.
**Noted:** we have to have a field, we will link based on. For ex., in my case Users provided their Phone numbers in the Request. And Contact in my CRM also has a Phone number. I want to link two rows if the Phone numbers are identical.
Here is what the Rule looks like.

Here is the formula syntax used:
```
Contacts.Filter(Phone = [Step 1 Request].Phone).Sort().First()
```
#### 3. Add a rule, that creates new Contact, if no matches are found
The second rule is also created on the `Request` database level

## Option 2: Deduplication
This option is close to the previous one, but you're the one to decide, what works best for you.
#### Step 1. Always create a `Contact` out of `Request`.
Here is what the rule, created on the `Request` database looks like.

#### Step 2. Detect duplicates and delete them.
We have [Deduplication template](https://fibery.io/templates/deduplication), check it out. This template is designed to provide an example of a way to implement de-deduplication of entities within a database. In this case, if a new entity has the same Email and Number as an existing entity, the Options of the new entity will be added to the original entity, and then the new one deleted.
# SLACK ACTIONS AND NOTIFICATIONS
_________________________________
You can send messages to Slack channels and create new Channels from Fibery. Here are new Actions:
* `Send Message to Channel` Sends message to configured Slack channel if it exists.
* `Create Channel` Creates Slack channel, invites users and sends welcome message.
* `Invite Users` Invites users to specified Slack channel if it exists.
* `Send Message to Users` Sends a direct Slack message to a selected users (by email).
Note that [Markdown Templates](https://the.fibery.io/@public/User_Guide/Guide/Markdown-Templates-53) can be used for all these actions.
### Send a notification about new workspace registration
We send a notification about every created lead into `#leads-new` channel. Here is how the action looks.

Note how you can use fields in a template. Here we have `Country` database linked to a `Workspace`, and we use `{{Country.Name}}` to insert a name of the country into the message:
```
{{Country.Name}} {{Email}} from {{Company Name}} created ** via template {{Contact Job.Name}}
```
Check Slack messaging formatting guide
| | |
| --- | --- |
| **Text** | |
| Bold text: wrap your text with asterisks (\*). | `*bold*` |
| Italic text: wrap your text with underscores (\_). | `_italic_` |
| Strikethrough text: wrap your text with tildes (\~). | `~strikethrough~` |
| **Inline code and blockquotes** | |
| Inline code blocks that are a single word or line: wrap your text with a single backtick (\`). | `` `inline code block` `` |
| For inline code blocks that are a block of text: wrap your text with three backticks. | ```` ```inline code block text block``` ```` |
| For blockquotes: start the blockquote with a closing angle bracket (>). | `>blockquote` |
| **Lists** | |
| Ordered lists: type the **number**, a **period (.)**, and a **space** before your text. | `1. ordered list` |
| Bulleted lists: it's not possible to format bulleted lists in the same way it's done directly on Slack (using asterisks). However, you can mimic the formatting using the bullet point symbol (**•**) and a **space** before your text. | `• bulleted list` |
| **Links** | |
| URL links are automatically hyperlinked in Slack without additional formatting. | |
| To display link text instead of the URL: Type an **open angle bracket (<)**, your **URL link**, a **pipe character (\|)**, your **link text**, and a **closing angle bracket**. | `` |
| **New lines** | |
| No special formatting is required. To add a new line, use the **return (enter) key** on your keyboard. | |
| **Emoji** | |
| Wrap the name of the emoji in colons (:). | `:heart_eyes:` |
| **Mentions and notifications** | |
| User mentions: type an **open angle bracket**, the **at symbol (@)**, the user's **Slack member ID**, and a **closing angle bracket**. To get the member id: Click on a user name within Slack Click on "View full profile" in the menu that appears Click the ellipses (three dots) Click on "Copy Member ID" | `<@UG1234567>` |
| “Everyone†notification (notifies everyone in your workspace in the #general channel) | `` |
| “Here†notification (notifies active members in a specific channel) | `` |
| “User group†notification (notifies all members of a user group): type an **open angle bracket**, an **exclamation point (!)**, type in “**subteam**†, a **caret symbol (^)**, the **user group ID**, and a **closing angle bracket**. | `` |
### Send a reply to a Slack Message
Using [Slack integration](https://the.fibery.io/@public/User_Guide/Guide/Slack-integration-284) it is possible to collect all Slack Messages from a configured Slack channel.
With database automation, you can set conditions to trigger automatic replies. For example, an automatic reply can be sent in Slack when a 🎈 emoji is added to a message.
1. In the When section, use `Entitiy linked to a Message` action with `Reactions` field.
2. Add a filter for Reaction where the `Name comtains :balloon:`
3. Select `Send Message to Channel` option in the When section
4. Select the Slack account for the Slack Workspace
5. Add the channel name from the original message: `[Step 1 Message].Channel.Name`
6. Type any message using clear text or other fields
7. Add the Message Id to the `Thread` field to be sure that the message will be a reply: \
`[Step 1 Message].[Message Id]`
### Create a channel for a Feature
We create channels for the Features we are going to start. Now it is possible to do it via the Action Button in Feature entity.
1. You click a button, provide a name of the channel.
2. Fibery creates the channel and invite all assigned users and a feature owner into the channel.

This is a template we use to invite owner and assignees to created channel:
```
{{Owner.Email}},{= Assignees:Email =}
```
> [//]: # (callout;icon-type=icon;icon=exclamation-circle;color=#fba32f)
> Private channels are not supported at the moment. If you need this functionality, ping us via chat 🤗
You can also send a notification if you want to track who added the comment. This syntax will help to define the author of the comment: `CurrentUser.Email`.
### FAQ
#### Restricted action

Looks like you don't have permission to send messages to a specific channel.
[Here you may check more non-fibery details.](https://stackoverflow.com/questions/67603707/what-does-restricted-action-error-code-in-conversation-create-mean "https://stackoverflow.com/questions/67603707/what-does-restricted-action-error-code-in-conversation-create-mean")
# CUSTOM APP: DATE RANGE GRAMMAR
________________________________
In order to make filtering by dates and date ranges easier on the end-user, Fibery integration app uses a custom domain specific language to represent dates and date ranges. The syntax allows a user to specify either a static date or a dynamic date range using plain English statements.
## **Arbitrary Dates**
Dates can be easily and quickly specified without any knowledge of the DSL by simply inserting a date in either *DD-MMMM-YYYY*, *DD MMMM YYYY*, *DD-MM-YYYY* or *DD MM YYYY* format.
The Date Spec DSL also includes various keyword elements that can be used to quickly insert dynamic values. In your date specification you may specify *today* and *yesterday* to get the appropriate date value. These date values will always parse in relation to the current day, allowing you to specify a date or date range of, or relative to, these dates.
## **Periods**
Periods in the date spec DSL is where the majority of the magic happens. The DSL understands various time periods, as outlined in the chart below. These time periods can be referenced either aligned to their appropriate boundaries (calendar months, full weeks, quarters, etc.) or arbitrarily aligned to a particular day (the past month, past week, etc.).
| Period | Aligned value | Arbitrary value |
| --- | --- | --- |
| day | a day | a day |
| week | iso week (Mon - Sun) | 7 days |
| month | calendar month (1st day start) | 30 days |
| quarter | calendar quarter (Q1, Q2, etc.) | 90 days |
| year | calendar year (Jan 1 - Dec 31) | 365 days |
## **Grammar usage**
Periods can be referenced, as mentioned earlier, either aligned to an appropriate date boundary or arbitrarily aligned. When using an aligned period, the period fits to the calendar representation of that period. For example, an aligned month starts on the 1st day and ends on the last, whereas an arbitrary month would represent 30 days starting or ending on a particular day.
### **LAST and THIS statements**
The *last* keyword creates a period aligned to the last period represented. Consider the following examples:
| DSL statement | value |
| --- | --- |
| last week | the last full calendar week starting from Monday |
| last month\` | the last full month, starting from the 1st |
| last quarter | the last full quarter |
| last year | the last full year |
User can specify period interval exactly. For example, `last 3 weeks`, `last 8 months` and etc. *this* keyword is an alias for *last* and can be used instead of it.
### **PREVIOUS statement**
The *previous* keyword creates a range whose starts with first day of the period before the current period and continues for period length. Consider the following examples:
| DSL statement | value |
| --- | --- |
| previous week | starts at 12:00:00 AM on the first day of the week before the current week and continues for seven days |
| previous month | starts at 12:00:00 AM on the first day of the month before the current month and continues for all the days of that month |
| previous quarter | starts at 12:00:00 AM on the first day of the calendar quarter before the current calendar quarter and continues to the end of that quarter |
| previous year | starts at 12:00:00 AM on January 1 of the year before the current year and continues through the end of December 31 of that year |
User can specify period interval exactly. For example, `previous 3 weeks`, `previous 8 months` and etc.
### **BETWEEN statements**
The *between* keyword allows you to specify a date range or minimum and maximum values to filter on with more power and precision. The full format for this statement is `BETWEEN date AND date` where both dates are some representation of a date (this can be an arbitrary date, keyword or period). *ago* keyword can be used inside between to specify date more precisely.
Consider the following examples:
| DSL statement | value |
| --- | --- |
| between 6 quarters ago and 2 months ago | starts at 12:00:00 AM on the first day of the calendar quarter 6 quarters before the current calendar quarter and continues until to the first day of the calendar month 2 months before the current calendar month |
| between 1 January 2016 and today | between Jan 1, 2013 and today |
### **FROM and TO statements**
*from* and *to* allow user to specify ranges without minimum or maximum values.
Consider the following examples:
| DSL statement | value |
| --- | --- |
| from 1 Jan 2010 | starts at 1 Jan 2010 till now |
| to 1 Jan 2012 | ends with 1 Jan 2012 |
## **Receiving Parsed Dates**
The date range grammar parses an input date with each use of a filter that utilizes a date-type field. These dates are provided to application connectors as a dictionary object representing a date range. User-input dates and date ranges are timezone-naive.
Date always is parsed as date range. Even if user enters a single date in a field, this date will be parsed and further represented as a dictionary object with `_min` equal to start of the date and `_max` equal to end of the date. If a user enters a date range with no defined minimum or maximum, such as would be the case when using the `FROM` or `TO` keywords, `_min` and `_max` keys will not be present and the dictionary will have only `_min` or `_max` as its single key-value pair.
`_min` and `_max` represented as a string in [ISO-8601](http://www.iso.org/iso/catalogue_detail?csnumber=40874) format.
# APP WITH SCHEMA
_________________
# Custom reporting app with authentication and predefined schema
In the tutorial we will implement more complex app with authentication and predefined schema. We will use NodeJS and Express framework but you can use any other programming language.
## App requirements
Let's suppose that we have a company that works on products sailing. We want to give an ability to visualize products and employees. For example, manager may want to see salary distribution across employees. But we want to show salaries of employees only if the user is manager. Otherwise we want to hide the info.
To create the app you need to implement 4 endpoints:
* getting app information: [GET /](https://the.fibery.io/@public/User_Guide/Guide/GET-%2F-367)
* validate account: [POST /validate](https://the.fibery.io/@public/User_Guide/Guide/POST-%2Fvalidate-369)
* getting schema: [POST /schema](https://the.fibery.io/@public/User_Guide/Guide/POST-%2Fschema-376)
* fetching data: [POST /](https://the.fibery.io/@public/User_Guide/Guide/POST-%2F-368)
### Getting app information
App information should have [the structure](https://the.fibery.io/@public/User_Guide/Guide/Domain-365). Let's implement it.
```
const getSources = () => ([{id: 'employee', name: 'Employee'}, {id: 'products', name: 'Products'}]);
const getAuthentications = () => ([
{
name: 'Login & token',
id: 'login-token',
description: 'Provide login and token to our system',
fields: [
{
'optional': false,
'id': 'login',
'name': 'Login',
'type': 'text',
'description': 'Login',
'datalist': false
},
{
'optional': false,
'id': 'token',
'name': 'Token',
'type': 'text',
'description': 'Token',
'datalist': false
},
]
}
]);
app.get('/', (req, res) => {
const app = {
'name': 'Custom app with schema',
'version': version,
'type': 'crunch',
'description': 'Custom app with predefined data schema',
'authentication': getAuthentications(),
'sources': getSources()
};
res.json(app);
});
```
In case you know schema of your data in advance, you can specify type = "crunch" in app schema and control the schema depending on account. From the schema we can see that the app requires authentication and have 2 sources: employees and products. Authentication schema shows that user should input login and token. Sources don't have any filters. You can find more information about the endpoint [here](https://the.fibery.io/@public/User_Guide/Guide/GET-367).
### Validate account
Login and token should be validate using our internal rules (login should be not empty, token should have at least 6 chars). The account name should be return if the provided account is valid (in our case login is returned as account name).
```
app.post('/validate', (req, res) => {
const {login, token} = req.body.fields;
// login should be not empty
if (login && login.trim().length === 0) {
return res.status(401).json({message: `Invalid login or token`});
}
// token should have at least 6 chars
if (token && token.trim().length < 6) {
return res.status(401).json({message: `Invalid login or token`});
}
const userInDb = Boolean(users.find((user) => user.login === login && user.token === token));
if (!userInDb) {
return res.status(401).json({message: `Invalid login or token`});
}
res.status(200).json({name: login});
});
```
You can find more information about the endpoint [here](https://the.fibery.io/@public/User_Guide/Guide/POST-validate-369).
### Getting schema
Different schemas are returned depending on source and account. Full schema is returned for *products* source in all cases. Full schema is returned for *employee* source in case when account belongs to manager, otherwise returned schema is without salary field.
```
app.post('/schema', (req, res) => {
const source = req.body.source;
const account = req.body.account;
const accountInDb = users.find(({login}) => login === account.login);
if (source === 'employee') {
if (accountInDb.type === `manager`) {
return res.json({
name: {
id: "name",
ignore: false,
name: "Name",
readonly: false,
type: "text"
},
age: {
id: "age",
ignore: false,
name: "Age",
readonly: false,
type: "number"
},
salary: {
id: "salary",
ignore: false,
name: "Salary",
readonly: false,
type: "number"
}
});
}
return res.json({
name: {
id: "name",
ignore: false,
name: "Name",
readonly: false,
type: "text"
},
age: {
id: "age",
ignore: false,
name: "Age",
readonly: false,
type: "number"
},
});
} else {
return res.json({
name: {
id: "name",
ignore: false,
name: "Name",
readonly: false,
type: "text"
},
price: {
id: "price",
ignore: false,
name: "Price",
readonly: false,
type: "number"
},
quantity: {
id: "quantity",
ignore: false,
name: "Quantity",
readonly: false,
type: "number"
}
});
}
});
```
You can find more information about the endpoint [here](https://the.fibery.io/@public/User_Guide/Guide/POST-validate-369).
### Fetching data
Source and filter should be passed to endpoint and the actual data should be returned in response.
```
const employees = require('./data/employees.json');
const products = require('./data/products.json');
const getSourceDb = (source) => {
if (source === 'employee') {
return employees;
} else {
return products;
}
};
app.post('/', (req, res) => {
const source = req.body.source;
const db = getSourceDb(source);
const account = req.body.account;
const accountInDb = users.find(({login}) => login === account.login);
if (source === `employee` && accountInDb.type !== `manager`) {
return res.json(db.map(({name, age}) => ({name, age})));
}
res.json(db);
});
```
Let's suppose that employees and products are stored in simple json files. *req.body.source* contains selected source. If source is *employee* and account is not manager, we do not return salary. In other cases we return all info as is. You can find more information about the endpoint [here](https://the.fibery.io/@public/User_Guide/Guide/POST-368).
That was the final step! See full example [here](https://github.com/vizydrop/node-simple-app-with-schema).
# CUSTOM ACCESS TEMPLATES
_________________________
> [//]: # (callout;icon-type=emoji;icon=:unicorn_face:;color=#9c2baf)
> This feature is a part of the [Pro and Enterprise plans](https://fibery.io/pricing) but there is a [free trial](https://the.fibery.io/@public/User_Guide/Guide/Custom-Access-Templates-240/anchor=Using-outside-of-the-Pro-plan--6b7958d6-5740-4069-ba89-e6b6936bc422).
**Access templates** are a reusable way to provide access to a set of linked Entities: for example, to a Product, its Epics, their Features, and so on.

## When to use custom access templates
When sharing, for example, a Feature, you could always extend access to its Stories and Bugs: [Share Entity](https://the.fibery.io/@public/User_Guide/Guide/Share-Entity-233). However, extending the default access (e.g. `Editor`) is often either too much (includes a sensitive relation) or not enough (doesn't go deep enough or ignores many-to-many). For example:
* when sharing a Task, share Subtasks but not Time Logs;
* when sharing a Product, share not only Features and Marketing Campaigns, but also Stories and Tasks one level deeper;
* when sharing a Story, include `Depends On` and `Blocks` many-to-many relations.
Custom access templates make all of these use cases possible.
## How access templates work

When sharing an Entity, you are choosing not only an access level (e.g. `Viewer` or `Editor`) but also how this access extends to linked Entities.
The options in the sharing dropdown are **access templates**: they are defined per Database and include which capabilities a user receiving access should get and how this capabilities should be propagated down (or up) the hierarchy.
Out of the box, there are four default access templates: `Owner`, `Editor`, `Commenter`, and `Viewer` with an option to extend access via all one-to-many relations. Check out [Share Entity](https://the.fibery.io/@public/User_Guide/Guide/Share-Entity-233) for details about the capabilities included.
When default access templates are not enough, Creators can create custom ones. The new templates appear in the dropdown next to the default ones.
## Creating custom access template

1. Navigate to access template screen either from the sharing popover or from the Database configuration screen.
2. Click `+ New Template` to create a custom access template.
3. Pick a name.
4. Provide a description to help those who share Entities to decide on the right access.
## Selecting path & capabilities
1. Toggle capabilities by clicking on their icons\
(hover to read the capability's name)
2. Click the special `+` icon to extend access via some relation.
3. Click `x` on the right to remove a relation.
Currently, extending access is limited to 5 levels deep with 25 paths wide. Please reach out if you need more.
> [//]: # (callout;icon-type=emoji;icon=:heavy_plus_sign:;color=#fc551f)
> To grant someone permission to create entities of a certain Database (e.g. Tasks or Features), [Share Database](https://the.fibery.io/@public/User_Guide/Guide/Share-Database-342) using `Submitter` access level *in addition* to using an access template.
> [//]: # (callout;icon-type=emoji;icon=:point_up:;color=#1fbed3)
> Relations to and from [User Groups](https://the.fibery.io/@public/User_Guide/Guide/User-Groups-47) are excluded here. We recommend sharing entities *with* the Groups, not *via* the Groups.
## Sharing Entity using custom access template

Once you've added a custom access template, it appears in the sharing dropdown to be selected. Using it does not differ from the usual [Share Entity](https://the.fibery.io/@public/User_Guide/Guide/Share-Entity-233) procedure.
> [//]: # (callout;icon-type=emoji;icon=:point_up:;color=#fba32f)
> To share an Entity using a custom access template, the sharer should have at least the same access themselves.
## Reorder access templates

Reorder templates via drag'n'drop in the configuration screen to rearrange the list in the sharing dropdown.
## Disabling & deleting access template

You can disable or delete the access template.
**Disable** an access template to hide it from the sharing dropdown. Users who received access using this access template will retain it, but it won't be possible to select the disabled template when sharing with new people.
**Delete** a custom access template to remove it completely and revoke access for all users who have received access using this template. There is **no trash bin** for access templates, so please be extra careful when deleting an access template that is being used.
## Updating access template already in use

See which Entities are shared and with whom using a particular template in the `Share` section. It also includes Fields providing automatic access.
If you update a custom access template that is already in use, users' access will be updated. For example:
1. Admin creates a `Product Manager` custom access template for Feature DB with ability to see but not edit Features.
2. Someone shares Feature #32 with Sarah using this `Product Manager` template.
3. Sarah can now view but not update the Feature #32.
4. Admin updates `Product Manager` template to include edit capability.
5. Sarah can now both view and update the Feature #32.
## Using outside of the Pro plan

Custom access templates are exclusive to [Pro and Enterprise plans](https://fibery.io/pricing)…
…however, it's a unique functionality that might be challenging to assess without laying hands on it. That's why we provide a free trial: you can create as many custom access templates as you want and try sharing Entities using them. At any moment, there can be up to 5 shares: e.g. one Entity shared with 5 people or 5 Entities shared with a single user.
If you use custom access templates for more than 5 shares while on Pro and then downgrade, the existing shares will continue to work so no one will lose access. However, you won't be able to share more Entities with more users using custom access templates.
# USE STRATEGIC DRIVERS FOR FEATURE PRIORITIZATION
__________________________________________________
Drivers refer to specific criteria that influence the prioritization of features or ideas within a product roadmap. Teams can define and assign drivers to each product initiative, allowing them to evaluate proposals based on how well they address the specific factors that matter most to the product's success.
The Product Team template includes two Drivers: Adaptation and Engagement. Depending on what you want to highlight in building your product, you might want to include other Drivers or modify the existing ones.
## How to change the Drivers name?
The Driver is simply a Single Select Field that you can modify as any other Field. As an Admin, you need to go to the Feature Database and find the Driver you need to change.
Click on `…` icon → `Edit`, and change the name of the Driver.

## How to set up more Drivers?
Adding a new Field can be done either from a Database or from the View.
To add a new Driver from a Feature Database:
a) click on the `+ New Field` button in the top right corner;
b) navigate to the last Field of the Database and add a new Single Select Field by clicking `+` in the column header.

To add a new Driver from the View:
a) navigate to the last Field of the Table, click on `+` sign in the column header and select `+ New Field`;
b) select `Feature` (you need to specify which DB this field will belong to) → add Single-Select Field, give it a name (e.g. Driver - Performance), and configure it similarly to the existing Drivers.
> [//]: # (callout;icon-type=emoji;icon=:broken_heart:;color=#d40915)
> Unfortunately, the Field can't be duplicated, so you'll need to set it up manually.
## How to change the Driver values?
The steps for changing the Driver's value are similar to the ones for changing the name. in the Edit Menu. The values can be changed in the Edit Menu at any time.

> [//]: # (callout;icon-type=emoji;icon=:slot_machine:;color=#6a849b)
> By changing the value, all related Formulas will be automatically recalculated.
## How to change the calculation Formula or Driver's weight?
1. Go to `VE Score` Field in the Feature Database
2. Click on `…` icon → `Edit`
3. Make changes in the syntax. You may want to add another driver or remove the existing one from the calculation, as well as change the numbers that take part in the calculation.

> [//]: # (callout;icon-type=emoji;icon=:sparkles:;color=#fba32f)
> You can ask AI to help you with the syntax. To do that, insert a prompt in the Description Field and click on `Generate using AI`.
## How to change AutoEffort in bulk?
If you want to use AutoEffort on many Features at once, you don't need to manually open every Feature. Instead, follow the next steps.
1. Select as many Features as you need using the checkbox or simply by drag-selecting them in the list (if there are too many of them for manual selection)
2. Click on `Actions` button
3. Select `AutoEffort ON` button

As a result, all Features' Effort will be recalculated based on their Subfeatures' Effort.
# TRACK СHANGES MADE BY AUTHOR
______________________________
With this report, we will be able to track changes, done by our teammates. A bit similar to the Audit log, but more structured and flexible.
It may look like this, but we will also check other visualizations

### Step 1. Select Report type
Create a new Report and select `Table`. Select required entities (Features in our case):

`Data source` - `Historical data (burndown chart, cumulative flow diagram, etc.)`
`Databases` - `Features` (or anything else you want to analyze)
`Date Range` - `90 days`
### Step 2. Set Filters

These are filters, applied in my example.
`Changed fields` \*- trigger, we are interested in. So, if you want to track who changed the `State` - we need to select that in Filters.
`Assignees (current value) exists` / `Assignees (current value) is not empty` - optional filter. To get only those Features, that have Assignees.
`WEEK(Modification Date)rangeBetween month ago and today` - probably we don't need changes, that were done more than a month ago. This filter would affect the performance - how many cards will be analyzed via our report each time when it is looking for the updates.
### Step 3. Put the data
Move the fields you are interested in from the left panel to the right one, and set them as columns.

We also need Dates here.
We can put Date as one more column.
But we can also use it as a grouping source.
Move the `Modification date` \*\* field to the `Group By` section and choose Day/Week/Month as a grouping method.

You're done.
### What can be changed?
* Fields, we need to track changes of (instead of State - any field you need)
* Data granularity (Yearly grouping for Objectives, Daily for routine Tasks)
* Visualization - play around with other kinds of reports, ways of grouping and etc.
Here is an example of how to show % of Done Tasks per week per User


### To know ðŸ§
(that info is not required to create the report, but probably will make smth more clear in terms of cumulative reports logic)
1. `Changed fields contains State` vs `Changed fields contains only State`
Changed Fields is an array. When you use contains only means that it passes an array consisting of 1 element with the value State.
You can have 3 cards that have changes in those fields
1. State, Assignees
2. State
3. Assignees
`Changed fields contains State `would grab #1 and #2
`Changed fields contains only State `would grab only #2
2. `Modification date `vs` Modification date valid to`
Here you have `date range` changes
* Modification date - when it was done
* Modification valid to - essentially the date when the next change is made
If you have any questions - please, contact us via chat. Would be glad to help you! 💖
# ENTITY
________
Entity represents a database record. For example, you may have Interviews database, and every record in this database is an entity.
Here is an Entity View that represents a single Interview record.

# NESTED DOCUMENTS
__________________
## What are nested documents?
Nested Documents are a powerful feature in Fibery that allows users to create a hierarchy of documents to organize information more effectively. Here are some use cases:
* **Knowledge base**: Use nested documents to create a knowledge base for your team or company. You can have a top-level document for each category, with sub-documents for specific topics. This makes it easy to find and share information.
* **Customer support**: Use nested documents to create a customer support system and user guides. You can write a user guide for your product as a set of nested documents and make it public via [Share Space to web](https://the.fibery.io/@public/User_Guide/Guide/Share-Space-to-web-36).
* **Notes**: Capture notes and other unstructured information in documents. You can transform these notes into real entities such as tasks, projects, bugs, etc. later.
* **Research**: Use nested documents to organize research and information for a project or paper. Create a top-level document for the project, with sub-documents for specific topics or sources. This makes it easy to keep track of information and sources.
* **Personal to-do**: Manage your personal to-do list in [Private Space](https://the.fibery.io/@public/User_Guide/Guide/Private-Space-25). Create a top-level document named "My To-Do" and create large tasks as nested documents. This way, you can write articles, posts, ideas, and more:

## How to create a nested document?
There are three ways to create a nested document.
### 1. From the sidebar
Click the `+` button in the sidebar next to the document, and it will be created immediately.

### 2. Using the /document command
Type `/` anywhere in a document and find the `Document` command.
Type the name of a document and click the `Create` option below:

### 3. Using the /insert entity command
Type `/` anywhere in a document and find the `Insert Entity` command (or just type `#` in a document).
Select `Document` from the drop-down menu and create a new document.

## How to move and re-nest nested documents?
Simply drag any document and drop it where needed. You may nest documents by dropping a document onto the name of the parent document. Check out this GIF for a visual example:

## How to delete a nested document?
There are two ways to delete a document:
1. Click on `...` in the sidebar near the document and select the `Delete Document` option.
2. Click on `...` in the top right corner of the document and select the `Delete Document` option.
🚨 When you delete a document, all nested documents will also be deleted. If you recover a deleted document using the [Trash](https://the.fibery.io/@public/User_Guide/Guide/Trash-90) feature, all nested documents will also be recovered.
> [//]: # (callout;icon-type=icon;icon=surprise;color=#FC551F)
> When you delete a reference to a nested document from a parent document, you are only deleting the reference, not the nested document itself.
## FAQ
### I want to see the full hierarchy of nested documents.
Currently, you can only view it in the sidebar. However, we plan to make it more explicit in the future.
[You may also use a script workaround, suggested by Yuri_BC.](https://community.fibery.io/t/aggregated-toc-of-sub-pages/6058)
This script automates the creation and updating of a hierarchical Table of Contents (TOC) for a Fibery entity (in this case of database ‘Page') and its sub entities (sub Pages), facilitating easier navigation and organization of content.
```
const fibery = context.getService('fibery');
const pageType = 'YourSpaceName/Page'; // Replace YourSpaceName
const tocType = 'YourSpaceName/TOC'; // Replace YourSpaceName
const baseUrl = 'https://YourAccountName.fibery.io/YourSpaceName/Page/'; // Replace YourAccountName and YourSpaceName
const databaseId = '8ff09230-0883-11ee-a2e3-dd72e97a05a2'; // Replace with the UUID of your Page database
async function generateTOCAndAppendForSubPages() {
const currentPageEntity = args.currentEntities[0];
let pageEntity = await fibery.getEntityById(pageType, currentPageEntity.id, ['Sub Pages', 'TOC', 'Name']);
if (!pageEntity) return;
let parentTocEntity;
if (pageEntity.TOC && pageEntity.TOC.id) {
parentTocEntity = await fibery.getEntityById(tocType, pageEntity.TOC.id, ['Description', 'Level']);
} else {
parentTocEntity = await fibery.createEntity(tocType, { 'Name': `Aggregated Table Of Contents of Subpages`, 'Page': pageEntity.id });
}
if (!parentTocEntity.Level) {
await fibery.updateEntity(tocType, parentTocEntity.id, { 'Level': 'bbed5bd0-f38c-11ee-8ba1-7bd35f7e50e0' });
parentTocEntity = await fibery.getEntityById(tocType, parentTocEntity.id, ['Description', 'Level']);
}
const maxDepth = getMaxDepthFromLevelEntity(parentTocEntity.Level ? parentTocEntity.Level.Name : '3');
let tocContent = [];
for (const subPage of pageEntity['Sub Pages']) {
const subPageEntity = await fibery.getEntityById(pageType, subPage.id, ['Description', 'Public Id', 'Name']);
if (subPageEntity && subPageEntity.Description && subPageEntity.Description.Secret) {
let descriptionContentJson = await fibery.getDocumentContent(subPageEntity.Description.Secret, 'json');
tocContent = tocContent.concat(createHierarchicalTOCJson(descriptionContentJson, subPageEntity['Public Id'], subPageEntity.Name, subPage.id, maxDepth));
}
}
if (parentTocEntity.Description && parentTocEntity.Description.Secret && tocContent.length > 0) {
await fibery.setDocumentContent(parentTocEntity.Description.Secret, JSON.stringify({ doc: { type: "doc", content: tocContent } }), 'json');
}
}
function createHierarchicalTOCJson(descriptionContentJson, publicId, pageTitle, pageId, maxDepth) {
const tocEntry = { type: "paragraph", content: [{ type: "entity", attrs: { id: pageId, text: pageTitle, typeId: databaseId, }, marks: [{ type: "strong" }] }] };
const baseIndent = " ";
const additionalIndent = " ";
let isFirstHeading = true;
descriptionContentJson.doc.content.forEach(block => {
if (block.type === 'heading' && block.attrs.level <= maxDepth) {
if (isFirstHeading) {
tocEntry.content.push({ type: "hard_break" });
isFirstHeading = false;
} else {
tocEntry.content.push({ type: "hard_break" });
}
const indent = baseIndent + additionalIndent.repeat(block.attrs.level - 1);
const bulletPoint = "• ";
const textContent = block.content.map(element => element.text || '').join('');
tocEntry.content.push({ type: "text", text: indent + bulletPoint }, { type: "text", text: textContent, marks: [{ type: "link", attrs: { href: `${baseUrl}${publicId}/anchor=${block.attrs.guid}` } }] });
}
});
return [tocEntry];
}
function getMaxDepthFromLevelEntity(levelText) {
if (!levelText) return 3;
const match = levelText.match(/\d+/);
return match ? parseInt(match[0], 10) : 3;
}
await generateTOCAndAppendForSubPages();
```
### Can I share the nested documents?
Yes! you can share nested documents with the public and all nested documents are shared automatically. Note that nested views will not be shared though.
###
# DESKTOP CLIENT
________________
Fibery has a desktop client for macOS and Windows — try it for faster experience and improved notifications.
Go to [Desktop App — Fibery](https://fibery.io/desktop-app) to get the macOS app that supports Intel and Apple silicon.
With the desktop client:
* You can receive Fibery notifications in a more appealing and seamless way.
* Fibery stays active in the background, so the dock promptly notifies you of any unread messages.
* Keyboard shortcuts are less likely to conflict with browser-based defaults or custom settings.

You can also configure each new tab to open a search window, inbox, the first item from the sidebar, or the last tab you opened. Additionally, you have a setting for managing spell check.

#### Find text in desktop app
The Find feature helps you to quickly locate and make content updates as you go. Open the find bar using `CMD+F` on mac or `Ctrl+F` on Windows.

#### Icons and Panels in tabs
Tabs display Entity or View icons. Plus, when you have multiple panels open, tabs automatically split to show them side by side.
## Troubleshooting:
#### I don't receive notifications in my macOS app
Please, check the following:
1. Make sure, your Mac doesn't have “Do not disturb†enabled
2. Check if notifications for the Fibery app are enabled in the Mac settings

If nothing helps, please contact us via support chat - and we will do our best to help 💖
## FAQ
#### Is it possible to set up the Fibery desktop app to open all Fibery links I click on?
Unfortunately, not yet. Please, let us know if you are missing this functionality.
#### I sometimes use the Fibery desktop app, but it hasn't been working for a while. I've tried reinstalling multiple times?
1. The app window is missing (not visible on screen):
* This can happen on Windows when you leave the app open on an external display and later disconnect it.
* Windows might still “place†the window outside your current display area.
* To fix this:
* Click the Fibery tray icon to focus the app.
* Then press Win + Shift + Left Arrow or Win + Shift + Right Arrow to move the window back to your current display.
2. The app window is completely empty (even the tabs area is blank):
* This means something is very broken inside the app.
* A simple reinstall might not be enough — you'll likely need to manually clear the app data.
* On Windows, you can safely delete the following folder:
`C:\Users\[YourUserName]\AppData\Fibery`
*(*âš ï¸ *Be careful — don't remove the entire `AppData` folder, just the `Fibery` folder inside it.)*
* After that, reinstall the app and log in again.
If none of these steps help — feel free to reach out and we'll look into it further with you!
# ENTITY MENTIONS AND BI-DIRECTIONAL LINKS
__________________________________________
Bi-directional links are ad-hoc connections and work for all database entities in Fibery. When you mention an entity via `#` or `[[` , you will see the mention in the entity itself.
> [//]: # (callout;icon-type=icon;icon=exclamation-circle;color=#199ee3)
> For some use cases, like feedback management, it is better to use [Highlights](https://the.fibery.io/@public/User_Guide/Guide/Highlights-310).
## Creating an entity mention
Use `#` or `[[` to link to entities or views in rich text. For example, here is the link to a release [May 26, 2022 / Customize pinned Fields, rename Workspace, 16 fixed bugs](https://the.fibery.io/@public/Changelog/Release/May-26,-2022-%2F-Customize-pinned-Fields,-rename-Workspace,-16-fixed-bugs-12)
## Back-links section in an entity view
Every entity has a References section in the main area where all links to this entity are displayed. For example, here are the references for the releases above:

It shows when the link was created, link context, who created it and enables fast navigation to the exact place in a document or entity.
### Navigate to the exact place in a document or entity
1. Put a mouse cursor over reference section and find `Open` arrow.
2. Click Open arrow and a document or entity will open in the left panel.

### Customize Entity Mention fields to show
You can customize which fields to show for mentioned entities. Put the cursor on database icon and click …, then select fields you want to be displayed for this database.

This setting is per-database and for all users. It means if you set it up for Feature database, all users will see these fields on mentioned entities.
## Use Cases
Here are some use cases for bi-directional links that may inspire you.
### Competitors
We use them to link feedback and opinion about Fibery competitors. Thus when you want to see what our leads or customer told us about ClickUp, you can navigate to ClickUp entity and read them here.

### Cross-referenced user guide
This user guide uses mentions extensively to glue information together. It works better than usual links, since you can change names of guides and it will be reflected in all places automatically.
## FAQ
### What is the difference between References and Relations?
[Relations](https://the.fibery.io/@public/User_Guide/Guide/Relations-17) are much more powerful and make sense when you need to build [Views](https://the.fibery.io/@public/User_Guide/Guide/Views-8) (ex: group Tasks by Project), or powerful [Formulas](https://the.fibery.io/@public/User_Guide/Guide/Formulas-39) (show me avg progress on Tasks on this Project), etc.
References can work as ad-hoc light relations, but you can't use them to create views.
Exemple: I wanted to discuss his interview in this meeting ≠meetings and interviews are formally connected

Here is an insight, that is connected to Interviews, Conversations, Docs and etc. via `References`
### Can References be used in Formulas?
Yes, but capabilities are a bit limited. Here are some examples:
#### Count number of References
`References.Count()`
It can be used to count, how many times Feature was requested, Bug was reported, or Insight was collected. Formulas results can be used for prioritization
#### Count the number of References from specific channels/databases
`References.Filter((FromEntityType.Name = "Customer Success/Conversation")).Count()`
In this case, we will see how many references do we have from Customer Conversations only.
This may help to better filter reference sources.
#### Count unique requests
`References.Filter(FromEntityType.Name != "Customer Success/Conversation").CountUnique(FromEntityId)`
In this case, we will see how many references we have from Customer Conversations only, and also ignore requests, that were done by a single customer. So if one customer asked for a feature 15 times, only one request was counted.
> [//]: # (callout;icon-type=icon;icon=confused;color=#FC551F)
> Can't do…
>
> At the moment we can't operate with the source database attributes. For example, we can't create a formula that will calculate all references from conversations where we talked to product teams.
>
> Also, at the moment we can't calculate a weighted score for the request. For example, we can't calculate whether this request for the customer is crucial or just a wish.
### How can I batch re-link references?
Unfortunately, the script is the only way to do that.
You need to go through the content of all `Rich text` fields where there was a linked highlight. It is necessary to use the “JSON†format as below
```
const content = await fibery.getDocumentContent(documentSecret, "json");
```
The goal is to find all linked highlight nodes inside the markup like
```
{ type: 'linkedhighlight', attrs: { id: '6459d4e1-fb9f-49ae-8d1d-7a3a29f0e5fb', meta: { links: [ { typeId: 'e822e844-2424-40f4-a309-9c32b4f27119', id: 'b5d87a90-f35f-11ee-b9f7-11aaf793c597' } ], type: 'linkedhighlight' } } }
```
Here it is important to modify only those whose TypeId and Id, correspond to the original type ID and the original entity ID with new ones that were obtained after
Most importantly, you also need to change `attrs.id` to a new random UUID
```
const newId = utils.uuid()
```
Here is what can be used as an inspiration :)
```
function walk(content, matcher, transform) {
if (content === null) {
return null;
}
if (matcher(content)) {
return transform(content);
}
if (Array.isArray(content)) {
return content.map((item) => walk(item, matcher, transform));
}
if (typeof content === "object") {
return Object.fromEntries(Object.entries(content).map(([key, value]) => [key, walk(value, matcher, transform)]))
}
return content;
}
function relinkHighlights() {
const originalEntityTypeId = "e822e844-2424-40f4-a309-9c32b4f27119";
const originalEntityId = "b5d87a90-f35f-11ee-b9f7-11aaf793c597";
const targetEntityTypeId = "target-type-id";
const targetEntityId = "target-id";
const transformed = walk(content, (value) => {
if (typeof value === "object" && value.type === "linkedhighlight") {
return value.attrs.meta.links.some(({typeId, id}) => {
return typeId === originalEntityTypeId && id === originalEntityId;
});
}
return false;
}, (linkedHighlight) => {
return walk({linkedHighlight, id: utils.uuid()}, (value) => {
return typeof value === "object" && value.typeId === originalEntityTypeId && value.id ===originalEntityId;
}, (link) => {
return {
...link,
id: targetEntityId,
typeId: targetEntityTypeId
};
});
});
console.log(transformed);
}
relinkHighlights();
```
Please, note that this `linkedhighlight` node is not a public API.
So, if we consider this one as an example:
```
{
type: 'linkedhighlight',
attrs: {
id: '6459d4e1-fb9f-49ae-8d1d-7a3a29f0e5fb',
meta: {
links: [
{
typeId: 'e822e844-2424-40f4-a309-9c32b4f27119',
id: 'b5d87a90-f35f-11ee-b9f7-11aaf793c597'
}
],
type: 'linkedhighlight'
}
}
}
```
Here
**type** and **attr** - describes a node type and its attributes
**`id`** is a node unique identifier, if you change the content of `linkedhighlight` node you must also update its id (it might not be necessary for other node types).
**`links`** holds information about to which Entity in the system this highlighted text is linked to. It was made as an array as we at some point decided that there maybe more than one target, but never did it.
So, link consists of **`typeId`** and **`id`** it which are Entity Type Id and Entity Id to which your highlighted Text is mapped.
To get `typeId` you can use Schema
```
const schema = await fibery.getSchema();
const typeId = schema.typeObjectsByName[`SPACE_NAME/DATABASE_NAME`].id;
```
If you want to script a button that will be on the Converted Database then the following steps will be like:
```
iterate on args.currentEntities
e.g. for (const convertedEntity of args.currentEntities) { ...
for each convertedEntity find respective source Entity e.g. by matching their Names using graphql, there you could include entity id in the select clause
request every Rich Text field content in json format for source Entity
call relinkHighlights to get updated json representation of the rich text content
const newContent = relinkHighlights({content, sourceId, sourceTypeId, convertedEntity.id, convertedEntity.type});
update rich text document with new content
```
# HOW TO TRACK TIME WITH FIBERY
_______________________________
So where have all these hours gone?

In this article, we'll share ways to:
* â± Track time manually and with a timer.
* 👆 Roll up the time spent on Tasks to Projects, Customers, and even Goals.
* 🧮 Generate a timesheet for a person or a whole team.
* 🤹†Report on any custom attribute, juggle data till we're bored.
Here are a couple of solutions we suggest:
* a lightweight — with manual or automated time logging
* a more powerful one — with a dedicated Database for time logs
* a bonus one suggested by our Solution Architect — similar to the previous one, but with different rules
## Lightweight Time Tracker
> [//]: # (callout;icon-type=emoji;icon=:gift:;color=#159789)
> [Copy Space](https://shared.fibery.io/t/9825287f-2518-4ad8-9977-082074570e86-time-tracker "https://shared.fibery.io/t/9825287f-2518-4ad8-9977-082074570e86-time-tracker")
### Log time
To capture the time spent, we add a Field to the smallest thing we do. So it's Task, not Project; Story, not Epic:
Teammates log the time spent manually:
Or with a timer (involves creating an extra Date field, Previous Value field, and some [Action buttons](https://the.fibery.io/@public/User_Guide/Guide/Action-Buttons-52) [Buttons](https://the.fibery.io/@public/User_Guide/Guide/Buttons-52).
Here are the rules that can be used for the Action Buttons:
1) Start Timer

2) Stop Timer

```
2. ToHours(Now() - [Step 1 Task].[Timer Started])
3. [Step 1 Task].[Time Spent] + [Step 1 Task].[Previous Value]
```
3) Reset Timer

To quickly spot the longest tasks, we display the time spent on each card on the Kanban board and turn on the sorting:
### Roll up
To get a sense of how big a Project is, we roll up the time spent with a [Formulas](https://the.fibery.io/@public/User_Guide/Guide/Formulas-39)
```
Tasks.Sum([Time Spent])
```
### Generate timesheets
Once we've collected the time entries, we are ready to report time spent by project and person:
Once the timesheets are ready, we generate a link for the HR department and stakeholders that avoid Fibery at any cost:
That's it for the quick-and-easy solution.
> [//]: # (callout;icon-type=emoji;icon=:gift:;color=#159789)
> [Copy Lightweight Time Tracker to your workspace](https://shared.fibery.io/t/9825287f-2518-4ad8-9977-082074570e86-time-tracker "https://shared.fibery.io/t/9825287f-2518-4ad8-9977-082074570e86-time-tracker")
## Time Tracker Pro
> [//]: # (callout;icon-type=emoji;icon=:gift:;color=#2978fb)
> [Copy Space](https://shared.fibery.io/t/3298e795-2ada-45eb-a648-6f5ff06400c9-time-tracker-pro "https://shared.fibery.io/t/3298e795-2ada-45eb-a648-6f5ff06400c9-time-tracker-pro")
A more advanced solution comes in handy when you'd like to:
* keep detailed logs,
* tag time spent — ex. whether it's billable,
* separately track time for each person working on a task.
### Log time (like a pro)
Instead of adding a Field, this time we add a whole new Database — Time Log. We also connect it to the lowest level of work hierarchy — Task in our example.
To simplify time entry, we configure a personal timesheet for everyone:
Timer is also an option here: those buttons from above could be re-programmed to add time logs. We are just too lazy to do it for this article — please ping us via Intercom if timer is what you need.
### Tag logged time
Since Time Log is its own thing now, we are free to add attributes:
* billable or not,
* kind: email, meeting, or actual work,
* description.
Let's add the Billable checkbox as an example:
We link the Time Entry to a specific Task, and the Task belongs to a certain Project. This means we can show the parent Project on a Time Entry too:
### Roll up time (like a pro)
Since a Task has multiple Time Entries, the roll-up for a pro starts one level lower:
* `Task.[Time Spent]`
=
`[Time Logs].Sum(Hours)`
* `Project.[Time Spent]`
=
`Tasks.Sum([Time Spent])`
* …(till the very top)
### Generate timesheets (like a pro)
Now that we've collected quality data, it's time to do some analysis. Where have we put most of our efforts in?
```
SUM(IF([Billable] == 'true', [Hours], 0))
```
The same data from a different angle (just showing off):
So that's the more advanced solution.
> [//]: # (callout;icon-type=emoji;icon=:gift:;color=#2978fb)
> [Copy Time Tracker Pro to your workspace](https://shared.fibery.io/t/3298e795-2ada-45eb-a648-6f5ff06400c9-time-tracker-pro "https://shared.fibery.io/t/3298e795-2ada-45eb-a648-6f5ff06400c9-time-tracker-pro")
## Bonus Solution
Here, to track time, we use another principle: instead of personal tables with time logs and automation buttons, we set rules on a User level (which will require being an Admin 👑) to track which tasks a User is working on.
### Make the setup
The Time Tracker Space will consist of the following Databases: Project, Task, and Time Log.

Project has many Tasks, and Tasks have Time Logs associated with them.
🔗 Additional relations:
* Task has a relation to User. We can call this relation field 'Currently working on' to give us an idea of what task the user will be working on;
* Time Log has a relation to User — a standard one.
You can also add a couple of formulas to calculate how much time you spent on Tasks and on the Project in general. Don't forget about other fields as Start and End Time for the Time Log. Here's what it will look like:
Time Log Duration Formula
```
ToMinutes([End Time] - [Start Time])
```
Task Time Worked Formula
```
[Time Logs].Sum(Duration)
```
Project Total Worked Formula
```
Tasks.Sum([Time Worked])
```
### Add Rules for a User
To build the tracker, we need two rules in Users Space. To do that you'll need Admin privileges 👑 These two rules make the tracker start and stop counting time on a particular Task. Here's how it's done.
#### ðŸƒâ€â™€ï¸ Start Tracker
The purpose of this rule is to recognize when a user is currently working on something. This rule will also stop any other Time Log started before:
#### ðŸ Stop Tracker
This rule applies to the case when a user is no longer working on a Task, so it will just stop the Tracker set for a Task:
#### 🤷â€â™€ï¸ How all of this is supposed to work?
We created a special relation field to a User that is related to every Task, which is called 'Currently working on'. When we connect any User to a Task, it will automatically start the Tracker. To stop the Tracker, you'll need to unlink a User (or a Task).
### Track your time
Let's see the Tracker in practice 💪
There are some examples of adding a Time Log:
#### Option 1
Open a Task → Link a User to 'Currently working on' → To stop the Tracker, unlink the User
#### Option 2
Go to Users → Link a Task to 'Currently working on' → To stop the Tracker, unlink the Task. It will also get to the Time Log Database
Now you've got the proof you needed!

> [//]: # (callout;icon-type=emoji;icon=:gift:;color=#4faf54)
> You can use this shortcut and [copy the template](https://shared.fibery.io/t/555b6b3d-8ed5-4167-900f-8a726b082ef0-time-tracking) to save some time for your projects.
### How to show “Time Spent Last Month†and “Time Spent Total†in the same table report
You can create a report in Fibery that displays both total time spent and time spent last month per project and user.

#### 1. Add the “Time Spent Total†field
If your database already tracks time logs with a “Time Spent†(number) field, you can simply use `SUM()` in a report to calculate totals per Project/User.
Example for total:
```
SUM([Time Spent])
```
#### 2. Add the “Time Spent Last Month†field
To calculate the total for the previous month only, use `SUMIF()` with a condition based on the date field.\
We'll compare the year and month parts of the date with the previous month from today.
Example formula:
```
SUMIF( [Time Spent], DATEPART([DateField], "year") == DATEPART(ADD_MONTH(NOW(), -1), "year")
AND DATEPART([DateField],
"month") == DATEPART(ADD_MONTH(NOW(), -1), "month") )
```
Where:
* `[Time Spent]` — your number field with logged hours.
* `[DateField]` — the date when the time was logged.
* `ADD_MONTH(NOW(), -1)` — moves the date to the previous month.
* `DATEPART(..., "year"/"month")` — extracts the year or month from a date for comparison.
#### 3. Display both in one table
* Add both formulas as separate columns in a Table View of Report.

# RSS INTEGRATION
__________________
🚨 This integration is in the alpha stage
🚨 It wasn't tested on large amounts of data
👀 If you have faced any issues, or have any questions - please, ping us in the chat
## How to set up the RSS integration
1. Go to the Space configuration screen and click on `Integrate` tab
2. Choose `“Add custom appâ€`

3. Paste this URL - [`https://fibery-rss-importer.vercel.app/`](https://fibery-rss-importer.vercel.app/)

4. Click `Connect your awesome integration` and the `Connect` on the auth screen \
Noted: we don't currently support any authorization

5. Select `“Postâ€` table, and add all the feed URLs that you want to import \
Noted: URLs must be publically accessible

💖 Customize your database schema if you want
💪 After the sync you should see a new Post database, with all the posts imported from the feed
# COMMENTS ON WHITEBOARD
________________________

Collaborate on Whiteboard views via comments: provide feedback, ask questions, leave notes, mention people and receive notifications.
### Who can add comments
* Anyone with **"can view"** or **"can edit"** access can add and reply to comments
* Only the original creator of a comment or admin can delete it
### How to add comments
1. Click the **Comment** icon in the Tools Toolbar on the bottom, or press the **`Shift+C`** hotkey  to enter commenting mode.Â
2. To add a comment, click anywhere on the board or on an object attach your comment to that object. After clicking, start typing to draft your comment.Â
3. Use @mention to tag someone.
4. To publish your comment, click the **`Send`** button or press **`Cmd/Ctrl + Enter`**.Â
Comments are always visible on the canvas by default, even outside of comment mode. However, you can choose to hide them, so they only appear when you are in comment mode.Â
To hide comments, use the keyboard shortcut **`Ctrl+Shift+C`** to toggle them on or off.
# REST API AUTHENTICATION
_________________________
Fibery API uses token-based authentication. That means you need to pass your API token with every request. This token should be the same for all requests, there is no need to generate a new one each time. Your API token carries the same privileges as your user, so be sure to keep it secret.
```
# To authenticate set the Authorization header in this way:
curl -X POST "https://YOUR_ACCOUNT.fibery.io/api/commands" \
-H "Authorization: Token YOUR_TOKEN" \
-H "Content-Type: application/json" \
...
# JavaScript
const Fibery = require('fibery-unofficial');
const fibery = new Fibery({host: "YOUR_ACCOUNT.fibery.io", token: YOUR_TOKEN});
```
Make sure to replace your account name and token with the actual values
## Managing tokens
The number of tokens is limited to **3 per user**.
You can generate, list and delete tokens on the "API Tokens" page available from the workspace menu.

You can also manage the tokens directly using the API. The following endpoints are available to manage access tokens:
* `GET /api/tokens` — lists all access tokens that were given to current user
* `POST /api/tokens` — creates new token for current user
* `DELETE /api/tokens/:token_id` — deletes token by id
> [//]: # (callout;icon-type=emoji;icon=:woman-shrugging:;color=#fc551f)
> You need to be authenticated with a browser cookie or with an already existing token when accessing these endpoints.
## Request limits
To ensure system stability and consistent user experience, our API is rate-limited.
Rate-limited requests will return a "Too Many Requests" error (HTTP response status `429`). The rate limit for incoming requests is **3 requests per second per token**.
> [//]: # (callout;icon-type=icon;icon=exclamation-circle;color=#fba32f)
> Rate limits may change. In the future we may adjust rate limits to balance for demand and reliability.
# EXTEND OR REDUCE THE PRODUCT HIERARCHY
________________________________________
**Product hierarchy** refers to the organizational structure and process through which a company manages the creation and improvement of its products.
## What are the four levels of hierarchy
In the Product Team template, there is a four-level hierarchy:
```
Opportunity → Component → Feature → Subfeature
```
* The top level is **"Opportunity"** which signifies the identification of potential areas or problems in the market. This level involves strategic decision-making to understand customer needs, market trends, and competitive landscapes.
* The next level is the **"Component"** level, where the identified opportunities are broken down into components or modules. Components serve as the building blocks of the product and represent the key functional elements required to address the identified opportunity.
* Then there is the **"Feature"** level, which involves the granular details of product development. This level includes the design, development, and implementation.
* At the bottom level, there is **"Subfeature"** which refers to a specific aspect of a feature that offers additional functionality or detail.
## How to extend product hierarchy
There are two ways of extension - upward in the hierarchy and downward.
### To the top
Opportunities can be grouped according to high-level goals that your company is focused on. For example, the opportunity "Performance issues" could be part of the goal to "Create the fastest tool on the market."
Alternatively, opportunities could be grouped based on the specific market that the research was conducted for. For instance, the opportunity "Users don't like how drag and drop works" may be more relevant for RTL (right-to-left writing) markets.
Let's proceed with the first option.
It all begins with creating a Database. We can create it in the same Space as the rest of the hierarchy to avoid initial confusion. We will name it Goal.

Now let's connect it with the Opportunity Database. You can set [Relations](https://the.fibery.io/@public/User_Guide/Guide/Relations-17) right from the Database setup screen, just click on `Relations` in the upper right corner.

Relations are many-to-one because of the initial requirement to add a higher level to the hierarchy. In this case, a Goal can contain multiple Opportunities, as Opportunities need to be grouped with a single Goal.
At the Goal level, you have access to all the discovered Opportunities and can visualize them in your preferred way.
For example, here is a [List View](https://the.fibery.io/@public/User_Guide/Guide/List-View-10):

> [//]: # (callout;icon-type=emoji;icon=:bulb:;color=#fba32f)
> Check ​[How to design a database in Fibery](https://the.fibery.io/@public/User_Guide/Guide/Databases-7 "https://the.fibery.io/@public/User_Guide/Guide/Databases-7") and relevant guides on [Databases](https://the.fibery.io/@public/User_Guide/Guide/Databases-7), ​and [Views](https://the.fibery.io/@public/User_Guide/Guide/Views-8) to know more about relevant topics.
### To the bottom
This the case when you need an additional level of hierarchy for better decomposition.
Now we have Subfeatures at the bottom of the hierarchy. We can add an extra level and include Stories, small tasks to deliver.
How? Once again, it all begins with creating a Database. Let's create a Story database in the Product space.

> [//]: # (callout;icon-type=emoji;icon=:bulb:;color=#673db6)
> You might want to add Fields such as Assignees or Workflow. Everything is up to you - nothing is hardcoded.
We need to connect the Story with the Subfeature Database. You can set [Relations](https://the.fibery.io/@public/User_Guide/Guide/Relations-17) right from the Database setup screen, just click on `Relations` in the upper right corner.

Relations are many-to-one because of the initial requirement to add a bottom level to the hierarchy. So, now we will have to deliver many Stories to finish a single Subfeature. A single Subfeature can be decomposed into multiple Stories.
For visualization, we will use the Board ​[Context Views](https://the.fibery.io/@public/User_Guide/Guide/Context-Views-20). By opening any Subfeature, we can quickly access all the Stories and check the progress.

> [//]: # (callout;icon-type=emoji;icon=:male-technologist:;color=#2978fb)
> You can say that Story sounds more like a software development definition rather than product development one. Yes, Fibery can be used as a tool for software development as well. You may check [this webinar](https://www.youtube.com/watch?si=L3HhtgMWCBgi0kzh&v=pUsLloLzmSk&feature=youtu.be&ab_channel=Fibery "https://www.youtube.com/watch?si=L3HhtgMWCBgi0kzh&v=pUsLloLzmSk&feature=youtu.be&ab_channel=Fibery") if you are interested.
## How to reduce the product hierarchy
As you remember, in the Product Team template, we use a four-level hierarchy.
```
Opportunity → Component → Feature → Subfeature
```
### At the top or the bottom
If you want to get rid of Opportunities or Subfeatures, that's easy. You can just delete them with one click, and the hierarchy still remain stable. Just click on `…` next to the name of Database and choose `Delete`.

### In the middle
But if we reduce something from the middle, the connection will be broken. Here is how Component, Feature, Subfeature and Opportunity are connected currently.

What if we get rid of the Feature?

The Relations between Databases will be lost.
What we need to do is to create new Relations that reflect the way we work. But how to understand the proper way of connecting Databases?
We recommend to map out your thoughts somewhere, for example, on the ​[Whiteboards](https://the.fibery.io/@public/User_Guide/Guide/Whiteboards-38). Here is how we expect the final result to look:

> [//]: # (callout;icon-type=emoji;icon=:exclamation:;color=#d40915)
> Note that Database deletion may affect Formulas, Automations, and Views. Admins will be notified automatically about any broken Formulas or Automation rules.
Let's create new Relations right from the Workspace map. To access it, click on the Workspace name in the top left and then click `Workspace Map` (Admins only).
We want the Component to consist of multiple Subfeatures and Subfeature to be a part of a single Component (one-to-many relation). And we plan that Subfeature may affect multiple Opportunities, as well as a single Opportunity may be affected by multiple Subfeatures (many-to-many relation).

Here is how the final setup looks like.
# GITLAB INTEGRATION
____________________
GitLab integration allows to import Projects, Branches, Labels, Issues and Merge Requests into Fibery. Don't worry, **you can skip archived projects if needed**. It is also possible to sync Reviewers & other user-oriented fields.
The most interesting use case is to import Merge Requests and attach them to real work items, like Features, User Stories, or Tasks so Merge Requests statuses are visible right in Fibery.
🚨 Note that only main(master) branches can be synced. If this is not enough for you, please let us know in the Intercom
🚨 Every User has to be a part of the Git organization in order to be properly synced. At the moment there is no way to sync Users who are not a part of the member list, even if they were previously a part of the project.
## Setup GitLab sync
***Note**: to set up this integration, you have to have enough access to your GitLab sources. Ex., Group is included in the list only if your account has at least "GUEST" access.*
1. Navigate to `Templates` and find `GitLab` template
2. Click `Sync`.
3. Authorize the GitLab app.
4. Choose what databases you want to sync from GitLab.
5. Specify starting date for the sync. The default is set to sync the last 30 days, but go ahead and fetch all the data if you need it.
6. Click `Sync now` and wait for the magic to happen. Once the GitLab Space appears in the sidebar, all the data should be synced.
You can also synchronize Subgroup members in this integration.

## Link Merge Requests to Features (or any other Database)
To have these connections, you have to encode `Feature Id` in your Merge Requests. In our team, we include Feature Id into a Merge Requests name, like this:
```
[feature/2013] Documents ant Whiteboards collections on entity as extensions
```
The main idea is to extract `Feature Id` from Merge Request name and link Feature and Merge Request Databases via automatic rule ([Auto-linking (Set Relations Automatically)](https://the.fibery.io/@public/User_Guide/Guide/Auto-linking-(Set-Relations-Automatically)-50)). This is a two-step process.
### Step 1. Create Feature Id formula field inside Merge Request
Open any Merge Request and add a new formula. In Fibery's case, the formula looks like this:

Here is the formula for your convenience:
```
If(StartsWith(Name,"\[feature/"),Trim(ReplaceRegex(Name,"\[feature\/(\d+).+"," \1 ")),"")
```
### Step 2. Create an automatic connection between Merge Request and Feature
Inside a Merge Request, create a new Relation field. Set relation to Feature, and **set automatic rule to match any Merge Request with a Feature by Id**:

As a result, you will have the following info:

Inside a Feature you will see a list of Merge Requests:

## FAQ
#### I have error: Unable to fetch commits pipelines for :403 forbidden
This is a GitLab http error: \[GET 403\] https://gitlab.com/api/v4/projects/33016488/pipelines?sha=db30a2c5d59b0ade745514f6a4adb7ba30f739d8&sort=desc&order_by=updated_at&per_page=1 403 Forbidden
Most likely user, that is responsible for Fibery integration doesn't have enough access to Gitlab.
If that's not the case - please, contact us in the chat. ðŸ™
#### GitLab users who are flagged as "guests" in GitLab aren't being synced to the "Members" database in Fibery
Inheritance works in another direction in GitLab API (for members).
Let's say
Parent group - User A; User B\
Child group - User A; User C;
If you select parent group then you will receive: A, B\
If you select child group then you will receive: A B, C
#### Do you have a VPN solution for on-premise GitLab setup?
We do not provide a VPN solution for on-premise GitLab setups. However, one potential workaround would be to allow Fibery IP addresses ranges ad open them for communication so that the integration can function properly. This can be done by configuring a firewall rule that allows specific traffic to and from the Fibery IP addresses.
These addresses are:
```
18.198.169.41
18.196.77.165
3.124.79.168
```
Please contact us if you need more detailed information about Fibery IP addresses.
#### Can I fetch data from multiple Gitlab project groups?
Currently, the case with multiple project groups is not one we can support in a nice way.
If you need multiple sources at the same time - as a workaround we can suggest schema 1 integration = 1 organization/project
#### User emails are not synced
That's a tricky limitation for the Gitlab side.
You can only sync emails, that are marked as `public`.
And making email public in Gitlab is a User's preference at the moment. So every Gitlab user [has to change that setting](https://docs.gitlab.com/ee/user/profile/#set-your-public-email "https://docs.gitlab.com/ee/user/profile/#set-your-public-email"), so Fibery could sync it.

[Here is a Gitlab's community post on that with more details](https://forum.gitlab.com/t/retrieve-user-emails-via-api/33448/7 "https://forum.gitlab.com/t/retrieve-user-emails-via-api/33448/7").
#### I want to link several entities to another entity
[This community discussion](https://community.fibery.io/t/link-several-entities-to-another-entity/6015) is a nice way to learn about options.
# GDPR IN FIBERY
________________
We're committed to complying with GDPR.
## Data processing agreement
You can find Fibery data processing terms [here](https://fibery.io/terms-of-service "https://fibery.io/terms-of-service") (section 15).
Please also check [Fibery privacy policy](https://fibery.io/privacy-policy "https://fibery.io/privacy-policy"), [cookies policy](https://fibery.io/cookies-policy "https://fibery.io/cookies-policy") and [cloud security](https://fibery.io/cloud-security "https://fibery.io/cloud-security").
## Data portability & management tools
**Import**: We provide tools to import from CSV, Trello, Airtable, Notion and Jira.
**Export**: You can [Export your data](https://the.fibery.io/@public/User_Guide/Guide/Export-your-data-63) from an entire workspace. Documents, entities and databases can be exported individually.
**Workspace deletion**: You can [Delete Workspace](https://the.fibery.io/@public/User_Guide/Guide/Delete-Workspace-64) from the workspace settings menu. Upon requesting to delete a workspace, all content will immediately become deleted and can no longer be recovered.
**Workspace settings**: You can manage other [Workspace settings](https://the.fibery.io/@public/User_Guide/Guide/Workspace-settings-62) such as name, users, and allowed IP addresses.
## International data transfers and model clauses
Fibery may transfer your Personal Data to countries other than the one in which you live. We deploy the following safeguards if Fibery transfers Personal Data originating from the European Union or Switzerland to other countries not deemed adequate under applicable data protection law:
* Strict security measures mentioned in documents above.
* European Union Model Clauses and Data Processing Addendum. Fibery offers Data Processing Addendum as well as European Union Model Contractual Clauses, also known as Standard Contractual Clauses, to meet the adequacy and security requirements for our Customers that operate in the European Union, and other international transfers of Customer Data. While protection is provided by default in accordance with GDPR applicability to your Personal Data - you may want to directly sign our standard Data Processing Addendum and Model Clauses as part of Service Purchase process, and we welcome you to request your copy via email at [new@fibery.io](mailto:new@fibery.io)
## Sub-processors
We work with the following companies and tool systems to store, analyze, and transmit data for our users. They've been carefully vetted for best-in-class security practices.
* [Amazon Web Services](https://aws.amazon.com/)
* [Intercom](https://www.intercom.io/)
* [Elasticsearch](https://www.elastic.co/)
* [Braintree](https://www.braintreepayments.com/)
* [Chargebee](https://www.chargebee.com)
# SHARE DATABASE
________________
Sometimes [Share Entity](https://the.fibery.io/@public/User_Guide/Guide/Share-Entity-233) is not enough and [Share Space](https://the.fibery.io/@public/User_Guide/Guide/Share-Space-232) is too much — that's when sharing a Database comes in handy.
## When to share a Database
### Create without seeing everything
You'd like people to create stuff and have access to it without seeing the stuff of other people:
* **IT support tickets:** employees should be able to create and see their Tickets (e.g. "Configure a printer") without seeing the Tickets of others.
* **Leads:** a sales rep should be able to collect new Leads into a Database (e.g. for future outreach) without seeing all of the Leads.
* **Vacations:** employees should be able to add Vacations, Sick Leaves, and Overtimes without necessarily seeing everyone else's.
In this case, share the relevant Database using `Submitter` access template and [Automatically Share Entities via People Field](https://the.fibery.io/@public/User_Guide/Guide/Automatically-Share-Entities-via-People-Field-327) via `Created By` Field.
### Create inside a particular parent

The same mechanism applies when you share a hierarchy via [Custom Access Templates](https://the.fibery.io/@public/User_Guide/Guide/Custom-Access-Templates-240):
* Product and its Epics, Features, and Stories;
* Project and its Tasks;
* Client and their Contacts.
If you'd like people not just to edit linked Epics but also to create new ones, add them as `Submitters` of the Database. They will be able to create Epics in the Products they have access to as well as "orphan" Epics.
> [//]: # (callout;icon-type=emoji;icon=:ear:;color=#1fbed3)
> If parentless entities become an issue for you, please let us know.
### Edit only some Databases in a Space
There are some Databases in a Space that require a more careful approach to permissions:
* **Software Development:** developers should be able to create and edit Stories and Bugs, but not Sprints and Releases — those are reserved for managers.
* **Vacations:** everyone should be able to create Vacations, Sick Leaves, and Overtimes, but not Public Holidays.
In this case, share the Space with everyone using a less powerful access template (e.g. `Viewer`) — and then share the selected DBs with the privileged people using `Editor` template.
## How to share a Database
Navigate to the Database you'd like to share (e.g., by typing its name in search) and select `Share` option in the context menu:

Add users and groups that should receive access, select the appropriate access template, and click `Add`:

> [//]: # (callout;icon-type=emoji;icon=:lock:;color=#1fbed3)
> You have to be `Creator` in either the Database or its Space to manage access of others.
## How to manage automatic access for assigned users and groups

In addition to sharing all records of a Database, you can automatically share certain records with assigned users and groups.
Check out the relevant guides for details:
* [Automatically Share Entities via People Field](https://the.fibery.io/@public/User_Guide/Guide/Automatically-Share-Entities-via-People-Field-327)
* [Automatically Share Entities with linked Groups](https://the.fibery.io/@public/User_Guide/Guide/Automatically-Share-Entities-with-linked-Groups-395)
## FAQ
### **Can I override Space access on the Database level?**
Only if you want to grant *more* access: if someone is `Editor` in a Space, they will always have at least `Editor` access to all the Databases in this Space.
If you'd like them to have `Editor` access to most DBs and `Viewer` access to some, make them `Viewer` in the Space and `Editor` in the select DBs.
# SEMANTIC SEARCH (AI SEARCH)
_____________________________
When you want to link text from a conversation or Intercom chat to an existing feature, insight, or product area, you often struggle to remember the exact Entity and have to search for it, which can be time-consuming. Additionally, there are instances where you are not even aware that such a feature or insight exists, making it difficult to verify.
This is when AI Search comes in handy.
**AI Search uses the meaning of the search query.** It may find relevant results even if they don't exactly match the query.
## How to setup AI search
Add several Databases into AI Search index. Navigate to `Settings → AI` and find AI Search section. Here you can add some Databases into the AI search index.

It takes time to index large databases, so give it at least 30 minutes.
> [//]: # (callout;icon-type=emoji;icon=:f017819a-810e-4380-8605-cb94fe047a65:;color=#1fbed3)
> Only databases you added into AI Search will be available in AI Search results.
### What Databases to add?
In general, we recommend to use Database you create links to often from text and mention a lot. In our case it is everything related to product: Insight, Feature, Product Area, etc. In your case it may be something different.
## How to use AI Search?
AI Search is available wherever you see the Search dialog and type **three or more words**. It works automatically for all databases that are in the index.
What are typical use cases?
1. Find some Entity you want to link feedback to. For example, select a text in intercom conversation and create a highlight.
2. Find some Entity you want to mention, type `#` and start typing Entity name.
3. Type or paste some text into search and use `AI Search` to find an Entity relevant for this text.
## How AI search index works?
AI Search indexes the following information of an entity:
* Name
* All rich text fields
* All references (only quotes from the referenced Entities will be indexed)
When you add a new Database to the index, it usually takes 30 minutes to add everything into the index.
If you want to remove a Database from the index, click `…` near a database name in AI Search settings and select `Remove Index for..` command.

Index updates are daily. It means if some entity changed, the changes will appear in search index in the morning.
> [//]: # (callout;icon-type=emoji;icon=:f017819a-810e-4380-8605-cb94fe047a65:;color=#1fbed3)
> You may force reindex immediately if you want for some reason. Click `…` near database name in AI Search settings and select `Reindex` option.
## FAQ
### What technologies you are using?
We use [OpenAI vectorization](https://platform.openai.com/docs/guides/embeddings) and [Pinecone](https://www.pinecone.io/).
# WATCH ENTITY AND DOCUMENTS AND GET NOTIFICATIONS
__________________________________________________
You can receive updates about an entity or a document into your Inbox using `Watch` action.

## How to Watch an entity or a document?
There are several rules that make you a watcher:
* When you created an entity.
* When you are assigned to an entity.
* When you add a comment to an entity.
* When you add an entity to Favorites.
Navigate to `Settings → Notifications` to turn on/off these rules.

You can also manually subscribe to all changes via the Watch action. It is available in:
* Entity Activity popup
* Top right menu `⋯` in entity view or document view
* Context menu (right-click the sidebar item)
## Add watchers via automated rule
There is also Watch action in automatic rules, so you can make some users as Watchers.
For example, you have Task database and want to add Watchers to some tasks. In this scenario you can create a relation to a User database and call it Watchers, then you can create a rule: when an item is linked to Task in Watchers collection, trigger Watch action for this item.

Another example, you want entity creator to watch the entity automatically. In this case you can create a rule like that:

## Unwatch done entities
You can automatically unwatch entities moved to final state with a rule. Enable it in Settings → Notifications.

## What notifications you will receive
Overall, you will get notifications about all changes, like some field changed, item added into collection, item removed from a collection, comment added, file added, reference added or removed.
> [//]: # (callout;icon-type=emoji;icon=:point_up:;color=#fba32f)
> Changes in rich text field do not trigger notification.
Notifications about entity events are merged into a single notification usually, in this case click `Show more updates` link to see all changes.

## Watchlist: see a list of all entities you watch
You can see all entities you're watching → find Watchlist in your Inbox.
In a watchlist you can filter entities by database, unwatch some entities, or even unwatch all entities or all completed entities with a single click.

## FAQ
### Can I receive notifications via Email as a Watcher?
Not yet.
### Can I receive notifications about rich text updates and documents updates?
No, only about inline comments.
# SEND EMAILS AND REPLY TO EMAILS
_________________________________
Fibery can send emails via Action Button or Automation Rule. You have to connect your Gmail or SMTP account to do that.
## Send email via buttons
For example, here we set up an action button to send emails to selected Accounts (every account has `Email` field, note how we map it in `To` field using `{{Email}}` syntax):

Then you can go to the Accounts table and you will see this popup before you send the email:

## Send email via automation rule
You can send emails automatically and even build various flows (for example: send emails after Lead registration on the 1st, 2nd, and 3rd days).
Here is an example where we send an email with some questions to activated Leads. We set the Activated checkbox automatically based on usage patterns, and here is the rule that triggers the email:

Connect Gmail or SMTP account and specify `To` field (in this case the field in a lead is called `Email`).

## Markdown support
Fibery can format email messages using markdown (and the result is HTML).
Mark `Use markdown to format message` the checkbox below a Message field and use [Markdown Templates](https://the.fibery.io/@public/User_Guide/Guide/Markdown-Templates-53) to format the message.

### Automatic Markdown Parsing
Content entered without HTML tags is automatically parsed and rendered using **Markdown** formatting. This ensures that lists, headings, and emphasis are displayed correctly, even if the **“Use MD to Format Messageâ€** option is not enabled.
You can write plain text with Markdown syntax (e.g., `**bold**`, `# headings`, `- lists`), and the system will handle the formatting for you.
## File Attachments
You can attach files in `Send Email` action. File can be attached by using Fibery formula.

Limitations: Only 10 files can be attached to one email and the file size of each attachment should be less than 5Mb.
## Reply Headers in Send Email action
You can set `In-Reply-To:` and `References:` headers in Send Email action, and it means you can actually [create a button to reply to emails in Fibery](https://www.loom.com/share/1bf61de02ece45bca8f7c6847ff271af?sid=193b541e-b5a4-48f8-a693-18250e36488f).
* Make sure that Subject is set as a formula: `"RE: " + [Step 1 Message].Name`
* Make sure that `In Reply To` (and `References`) fields is set as a formula: `[Step 1 Message].[Original Message Id]`
This is how Reply action button can look:

## How to send email from the corporate account
Let's say you use a common email box - [new@fibery.io](mailto:new@fibery.io)
Every user, that will use the button `send email` from this corporate email address, has to connect the email address here.
So, even if Admin already connected this email, every user has to connect it as well.

Why so?
Many (but not all!) of your teammates have access to this email account. And your email provider is aware of the permissions set - you already configured, who can send the email from this address ([like here for Microsoft mailbox](https://learn.microsoft.com/en-us/microsoft-365/admin/add-users/give-mailbox-permissions-to-another-user?view=o365-worldwide "https://learn.microsoft.com/en-us/microsoft-365/admin/add-users/give-mailbox-permissions-to-another-user?view=o365-worldwide"))
But Fibery is not aware.
So Fibery also needs to check, whether the User that clicks the button has access to this email address and has the necessary permissions.
And this additional step for everyone - "connect email address" - is exactly for this purpose. It checks permissions on the provider side. Without permissions, the User won't be able to connect the corporate email address to Fibery.
## FAQ
### Do you support HTML templates?
Yes, but via Markdown only (see above)
### Can Fibery send 20K emails?
It depends on your Gmail or SMTP account. If you can do it via this account, then Fibery will do it as well.
### Some of the emails I sent through FIbery are in the spam folder for the recipient
You send emails using your own connected email address. Unfortunately, we control nothing there. We are only making API calls to email providers on users' behalf. So, it is the same as if you wrote it in Gmail and sent it manually.
### Why some text from the email automation (Gmail) is in purple?
Unfortunately, that problem is not on the Fibery side
The purple font is a default Gmail behavior- Gmail turns the font purple if that text has already been received in a previous email in the thread.
## Troubleshooting
### "Send Email" is invalid: Valid account for external action "Send Email"
You haven't connected your email account. Please follow these instructions (enable IMAP, generate password) and try again. You get this error because this account is not connected to Fibery yet.
If you connected your account, then it should appear in the drop-down menu. Otherwise, it means that:
* you didn't do the integration properly
* the credentials you are using are incorrect
You need to click on 'Connect Email account' in the drop-down (just like in the screenshot above), add your email and go to your Google account, follow this instruction [https://support.google.com/mail/answer/185833?hl=en](https://support.google.com/mail/answer/185833?hl=en), and insert the password that you generated in the 'Password' field.

### Failed to execute Action "Send Email": Query with permissions does not support collection field expression ended with the secured field. Use subquery expression, please
Unfortunately, currently, our templates support only one level of references.
So if the result is many emails - like in the screenshot - you will see this relatively ugly error.

We recommend using the "Join" syntax instead for small batches.
Or for a bigger batch, create the button on the "lowest" level - in our case Contact - and then click the button to apply batch action on all required Entities. Better to do that on a Table view with pre-setup filters.
# READWISE INTEGRATION
______________________
## Setup Readwise sync
1. Navigate to `Templates` and find the `Readwise` template
2. Click `Sync`.
3. Provide your Readwise API access token.
4. Choose whether to sync Highlights, Books or both (Book is the Readwise term for the place where a Highlight was found, but may actually be an e-book, PDF, twitter account, etc.).
5. Click `Sync now` and wait. A Readwise Space will appear in the sidebar and all your Readwise library data should be synced eventually.
> [//]: # (callout;icon-type=icon;icon=exclamation-circle;color=#fba32f)
> The Name of the Highlight is the first 100 characters of the Highlight text. If the text is over 100 characters, this will be indicated with an ellipsis at the end of the name (…)
The template includes an automation to automatically download the cover image of each Book entity and include it in the Files field. This allows you to show the book covers in a board view.
See [Show Images as Covers on Cards](https://the.fibery.io/@public/User_Guide/Guide/Show-Images-as-Covers-on-Cards-184) for more details.
# COMMENTS ON THE WHITEBOARD
____________________________
## Comments on the whiteboard
Adding comments improves teamwork by enabling users to provide feedback, ask questions, and leave notes across the board.

### Who can add comments
* Anyone with **"can view"** or **"can edit"** access can add and reply to comments
* Only the original creator of a comment or admin can delete it
### How to add comments
1. Click the **Comment** icon in the Tools Toolbar on the bottom, or press the **`SHIFT+C`** hotkey  to enter commenting mode.Â
2. To add a comment, click anywhere on the board or on an object attach your comment to that object. After clicking, start typing to draft your comment.Â
3. Use @mention to tag someone.
4. To publish your comment, click the **`Send`** button or press **`CMD/CTRL + Enter`**.Â
Comments are always visible on the canvas by default, even outside of comment mode. However, you can choose to hide them, so they only appear when you are in comment mode.Â
To hide comments, use the keyboard shortcut **`CTRL+Shift+C`** to toggle them on or off.
#### Reactions
To add a reaction to a specific comment, you must click the reaction icon in the comment's floating menu and select a reaction.

To remove your reaction, click the button of the added reaction

### Comments sidebar
you can access and manage comments from the right sidebar by clicking the comments button in the toolbar. Selecting a comment or thread will instantly takes you to its location on the board and expand the comment panel.

##
# HOW TO DISTINGUISH BETWEEN BUSINESS DAYS AND HOLIDAYS/WEEKENDS
________________________________________________________________
We recommend choosing one of the two workarounds: using API or Formulas.
## Using API
We recommend using [Working Days API](https://api.workingdays.org/1.3/api-documentation "https://api.workingdays.org/1.3/api-documentation").
This would allow you to create formula functions for calculating working hours or days between two dates. It would be also helpful for resource and capacity planning by calculating an end date based on a required number of hours or days.
It includes information on public holidays (by country and region), which is very helpful for remote teams.
Also, it supports customization options, so you can choose to deviate from the standard for your country or region. At the moment, it seems like customization is best done via the web interface (e.g. [working days in Greece](https://greece.workingdays.org/ "https://greece.workingdays.org/ ")).
## Using Formulas
There is also a way to distinguish between business days and holidays using Formulas.
> [//]: # (callout;icon-type=icon;icon=exclamation-circle;color=#fc551f)
> Note that it won't help to distinguish public holidays in your country.
Here is how a Working Days Formula might look:
```
((ToDays(Dates.End() - Dates.Start()) + IsoWeekDay(Dates.Start()) - IsoWeekDay(Dates.End())) * 5) / 7 +
Least(IsoWeekDay(Dates.End()), 5) - Least(IsoWeekDay(Dates.Start()), 6) + 1
```
Note: it assume that you have a date range field called `Dates`, but you might need to change the formula to match your specific case.
## Example
This was implemented in our Vacation Pro template which Fibery team uses on a daily basis.
Check this video from 16:51 - here starts the part that explains how to exclude weekends using Formula.
[https://youtu.be/UC0hZZVxbJI?feature=shared](https://youtu.be/UC0hZZVxbJI?feature=shared)
For a full understanding, we recommend checking the whole video.
# SYNC PUBLIC HOLIDAYS FROM GOOGLE CALENDAR
___________________________________________
Google handles public holidays from all countries nicely, so you can use it as a source of Public Holidays in Fibery (for any reason).
For example, you can build an automation that sends messages to Slack about a vacation.

In a Google Account you can subscribe to many calendars, click `+`, then `Subscribe to Calendars` and then `Browse Calendars of Interest`. For example, in this account we have holidays from three countries.

👉 We recommend to setup a different set of Databases for public holidays to not mix them with usual Events.
1. Create new Google Calendar Sync just for Holidays. Rename `All Day Event` to `Holiday`.

2. Create a new Calendar View, select Holiday as an item.

#### Advanced. Connect Holidays to Countries
It can be handy to connect holidays to countries database to visualize them better. Here is how you do it.
1. Sync Countries into Fibery - Go to some Space, click `Integrate` and select `World`. Configure the sync and you will have a list of Countries.
2. Now we need to connect Holiday and Country automatically - First we will extract country name from Calendar Name. Go to Calendar database and create a new Formula `Country Name` with a formula text `Replace(Name,"Holidays in ","")`

3. Create a new Relation between Calendar and Country - `Set Automatically link Calendars to Countries` checkbox and select `Country Name` for Calendar and `Common name` for Country Database.

4. Create a new Lookup field in Calendar from Country to extract flag.

5. Go to the Holiday Database and create a new Lookup field to see the Country Flag on a Holiday entity.

As a result, you will be able to display Country Flag on all Holiday entities, like this:

#### Advanced. Create an automation rule to send holiday notification to Slack
You can send holidays to Slack via scheduled automation rule that runs every day.
1. Go to Holidays database, click Automations and create a new On Schedule rule, like this

2. Connect Slack account and send a message to some public channel, like this

###
# CUSTOM INTEGRATION APPS
_________________________
Let's assume you created an integration app, made it's url available and are ready to try it in Fibery.
## Adding custom app
Navigate to space you would like to integrate and click integrate button, find add custom app option and click. Follow the flow.

## Editing custom app
You can change the link to a custom app or force an update to the configuration of the app after deploying it to production by finding your app in catalog and clicking on settings icon in right upper corner.
> [//]: # (callout;icon-type=icon;icon=exclamation-circle;color=#199ee3)
> It is recommended to update custom app every time when changes to config or schema of app are happened. Just click update button in described case.

## Deleting custom app
You can delete a custom app by finding your app in the catalog and clicking on settings icon in right upper corner.
> [//]: # (callout;icon-type=icon;icon=exclamation-circle;color=#fba32f)
> In case of app deletion, the databases will not be removed and relations to the databases will not be affected.

> [//]: # (callout;icon-type=icon;icon=exclamation-circle;color=#d40915)
> Note, that integration entity deletion is prevented if it has any custom schema
Integration sync can cleanup entities like Source for Highlights, and it is quite dangerous, since restoration is not super easy. Integration entities with ANY schema modifications will not be deleted during sync.
This applies if:
* At least one custom field has been added by an admin.
* The entity has any rich text field.
To manage source-deleted entities, there will be a Simple Text field `deleted in source` with values `yes` and `no`. If an entity with a modified schema is deleted in the source, the value will be set to `yes`. Admins can then manually delete these entities if needed (by first setting Sync to Manual).
# HOW TO USE GRAPHQL API AND IDE
_________________________________
GraphQL is a query language for APIs and a runtime for fulfilling those queries with your existing data.
The good news is that Fibery GraphQL IDE can be used by non-tech users to retrieve and modify the database records in a quick and simple way since it has autocomplete and easy to understand language.

## How to start
Every space has separate GraphQL API endpoint. The list of available space API endpoints can be found by following the link: `{your fibery host}/api/graphql`

By opening space's end-point in your browser you will find a graphical interactive in-browser GraphQL IDE. Here you can explorer space's GraphQL documentation and execute your GraphQL queries.

Now you are ready to find records in your database.
## How to find database records
The records can be queried using query which starts from `find`
For example:
```
{
findBugs(name: {contains: "first"}) {
id
name
state{
name
}
assignees{
name
}
}
}
```

Read more about queries including sorting and paging [GraphQL queries](https://the.fibery.io/@public/User_Guide/Guide/GraphQL-queries-255).
## How to modify or create database records
There are multiple operations available for modifying database records. These operations can be performed for found entities by provided filter or for created records in corresponding database.

Find below an example of operations which can be performed for created record. In this example new bug created, assigned to author of API call, description with a template content is set to bug description.
```
mutation {
stories {
create(name: "Super Bug") {
message
}
assignToMe {
message
}
appendContentToDescription(
value: "This is a description of *{{Name}}*"
){message}
}
}
```

For creating multiple records batch operation command **createBatch** can be used.
```
mutation {
stories {
createBatch(data: [
{name: "Bug 1"}
{name: "Bug 2"}
]) {
entities {
id
}
}
assignToMe {
message
}
appendContentToDescription(value: "TBD") {
message
}
}
}
```
Find below the example of operations which can be performed for found records by provided filter as params to root node of mutation. Bugs with word “first†in name are moved into “In Progress†state, sprint is unlinked, found bugs are assigned to author of API call and the owner of found stories is notified.
```
mutation {
bugs(name:{contains: "first"}){
update(state: {name: {is: "In Progress"}}) {
message
entities {
id
}
}
unlinkSprint {
message
}
assignToMe {
message
}
notifyCreatedBy(subject: "Assigned to Aleh") {
message
}
}
}
```

> [//]: # (callout;icon-type=emoji;icon=:test_tube:;color=#673db6)
> Read more about [GraphQL mutations](https://the.fibery.io/@public/User_Guide/Guide/GraphQL-mutations-256).
## Samples
### Retrieve tasks assigned to current user
```
{
findTasks(assignees:{contains:{id:{is:"$my-id"}}}){
name,
description{
md
}
}
}
```
### Retrieve content of rich fields and documents
You can download content of rich fields or comments in four formats: `jsonString`, `text`, `md`, `html`.
```
{
findFeatures{
name,
description{
text
}
}
}
```
### Batch update of multi select field
Set values "One" and "Two" to multi select field.
```
mutation {
tasks(multiSelect:{isEmpty:true}){
update(
multiSelect: {name: {in: ["One", "Two"]}}
)
{
message
}
}
}
```
### Assign tasks to current user
```
mutation {
tasks(assignees:{notContains:{id:{is:"$my-id"}}}){
assignToMe{message}
}
}
```
### Change value of rich field
Let's assume `Feature` database has rich field `Description`. Rich field can be updated using methods below.
> [//]: # (callout;icon-type=emoji;icon=:handshake:;color=#fc551f)
> [Markdown Templates](https://the.fibery.io/@public/User_Guide/Guide/Markdown-Templates-53) are supported as well.
```
mutation{
features(id:{is:"ABC"}) {
overwriteDescription(value:"rewrite {{NAME}} desc"){message}
appendContentToDescription(value: "text to append"){message}
prependContentToDescription(value: "text to prepend"){message}
}
}
```
### Clear values with GraphQL
```
mutation {
stories(id:{isNull:false}){
update(myDate:null){message}
}
}
```
# TEXT HISTORY
______________
Fibery tracks all changes in all [Rich Text](https://the.fibery.io/@public/User_Guide/Guide/Rich-Text-28) fields and [Documents](https://the.fibery.io/@public/User_Guide/Guide/Documents-85).
## View text changes history
You can access text history by clicking `View History` icon in the top right corner for a Document (or top right corner of a Rich Text field).

You will see a list of revisions on the right that showing the time of the change and the user who made the change.

> [//]: # (callout;icon-type=icon;icon=exclamation-circle;color=#d40915)
> Please, note that on `Standard` plan history is limited for 90 days.
>
> Use `Pro` version for the unlimited history.
## Restore an older text version
If you have edit access to a Document or an Entity, you can restore an older version.
1. Open `Version History` panel.
2. Click on required revision.
3. Click the `Restore Version` button.
## FAQ
### Can I force create my own version at any time?
Not yet, Fibery handles this automatically so far, by detecting gaps in text editing activity.
### How can I track changes (diffs) in a Rich Text field over time?
Currently, there is no built-in way to retrieve the change history (diffs) for a Rich Text field. While it is possible to track which entities have had their Rich Text fields updated in the last seven days, accessing specific content changes (e.g., added or removed text) is not directly supported.
Additionally, version history for Rich Text fields is not well integrated with the standard activity history, making it difficult to generate a report that consolidates changes over a specific period.
If tracking text changes is essential, consider implementing a workaround, such as manually logging updates in a separate field or using external tools to capture snapshots of text at different times.
# JIRA TWO-WAY SYNC
___________________
> [//]: # (callout;icon-type=icon;icon=exclamation-circle;color=#199EE3)
> First, you should setup Jira sync. Check this guide → [Jira integration: Cloud & Server ](https://the.fibery.io/@public/User_Guide/Guide/Jira-integration:-Cloud-&-Server--69)
You can sync some issue fields from Fibery to Jira. The following fields are synced from Fibery to Jira:
1. Build-in issue fields: Name, Priority, Status, Assignee
2. Custom fields with following types: Single Text, Date, Number
Open integration settings and click `Enable sync of some issue fields from Fibery to Jira` setting.

When you change some field manually in Fibery, it will be synced back to Jira. Note that only supported fields are editable, other fields are read-only.

## Create Jira Issues and Comments
There are two actions that you can use in Automations: `Add Issue` and `Add Comment to Issue.`
### Add Jira Issue
Add Jira Issue from Fibery using a [Buttons](https://the.fibery.io/@public/User_Guide/Guide/Buttons-52) or [Rules](https://the.fibery.io/@public/User_Guide/Guide/Rules-51).
Make sure to set Project Key. For example, Project A has PA key here.

Here is how a rule can look like. For example, when we create new Feature, we want to create Jira Epic as well:

Here is the flow for a button:

### Add Comment to Jira
Add Comment to Jira Issue from Fibery using a [Buttons](https://the.fibery.io/@public/User_Guide/Guide/Buttons-52) or [Rules](https://the.fibery.io/@public/User_Guide/Guide/Rules-51).

# VIEW API
__________
Views API is provided at `https://{YOUR_ACCOUNT}.fibery.io/api/views/json-rpc`.
It follows the [JSON-RPC specification](https://www.jsonrpc.org/specification).
## Getting views
To get a list of Views, use the `query-views` method.
All filters and params are optional. If omitted, all Views will be returned.
```
curl -X POST https://YOUR_ACCOUNT.fibery.io/api/views/json-rpc \
-H 'Authorization: Token YOUR_TOKEN' \
-H 'Content-Type: application/json' \
-d \
'{
"jsonrpc": "2.0",
"method": "query-views",
"params": {
"filter": {
"ids": ["b190008d-3fef-4df5-b8b9-1b432a0e0f05", "dd62b0df-537e-4c12-89f2-d937da128c7b"],
"publicIds": ["1001", "1002"]
}
}
}'
```
Possible filters are:
| | | |
| --- | --- | --- |
| `ids` | array of UUID strings | Matches views by the `fibery/id` field. |
| `publicIds` | array of numeric strings | Matches views by the `fibery/public-id` field. |
| `isPrivate` | `true` or `false` | If true, return only matching views from "My space". If false, return only matching views outside of "My space". If omitted, matching views both from and outside of "My space" are returned. |
| `container` | {type: "entity";
typeId: "6ded97e6-b4ca-4a8c-a740-6c34c3651cd1";
publicIds: \["1", "2"\]} | If provided, the query will return only views attached to entities with the given public ids in the database (type) with the given typeId. |
## **Creating views**
To create one or more Views, use the `create-views` method:
"Container app" in this example contains a `fibery/id` reference to the space where the new View is to be created.
```
curl -X POST https://YOUR_ACCOUNT.fibery.io/api/views/json-rpc \
-H 'Authorization: Token YOUR_TOKEN' \
-H 'Content-Type: application/json' \
-d \
'{
"jsonrpc": "2.0",
"method": "create-views",
"params": {
"views": [
{
"fibery/id": "3541bdf6-ab15-4d5e-b17b-eb124b8fe2f7",
"fibery/name": "My Board",
"fibery/type": "board",
"fibery/meta": {},
"fibery/container-app": {
"fibery/id": "760ee2e2-e8ca-4f92-aaf2-4cde7f9dad0e"
}
}
]
}
}'
```
## Updating views
To update one or more Views, use the `update-views` method:
```
curl -X POST https://YOUR_ACCOUNT.fibery.io/api/views/json-rpc \
-H 'Authorization: Token YOUR_TOKEN' \
-H 'Content-Type: application/json' \
-d \
'{
"jsonrpc": "2.0",
"method": "update-views",
"params": {
"updates": [
{
id: "3541bdf6-ab15-4d5e-b17b-eb124b8fe2f7",
values: {
"fibery/name": "My Updated Board",
"fibery/meta": {},
}
}
]
}
}'
```
## Deleting views
To delete one or more Views, use the `delete-views` method:
```
curl -X POST https://YOUR_ACCOUNT.fibery.io/api/views/json-rpc \
-H 'Authorization: Token YOUR_TOKEN' \
-H 'Content-Type: application/json' \
-d \
'{
"jsonrpc": "2.0",
"method": "delete-views",
"params": {
"ids": ["3541bdf6-ab15-4d5e-b17b-eb124b8fe2f7"]
}
}'
```
# ACCOUNT BALANCE TREND REPORT
______________________________
### Why might you need this report?
Its main purpose is to track financial health over time by showing both the current balance of each account and how these balances change month by month. It combines a snapshot (Amount) with a historical view (Cumulative Amount), letting you see not just where you are financially but how you got there.
### When it's helpful:
* Budget monitoring: quickly see if spending or income trends are moving in the right direction.
* Cash flow tracking: identify months with unusually high inflows or outflows.
* Investment performance: track gains or losses in investment accounts over time.
* Decision-making: spot accounts that need attention (e.g., large negative balances) before they become problematic.

More technically speaking, the report displays financial balances and their monthly changes by account:
* Amount column: Shows the current total balance for each account (e.g., Bank Account = 1530, Cash = -148).
* Cumulative Amount by Month(Date): Tracks how each account's balance has changed month by month (June, July, August 2025). Positive numbers indicate an increase, and negative numbers indicate a decrease.
* SUM row: Provides the total balance across all accounts
### Structure
You will need two databases to work with
They are connected with a one-to-many relationship:
* One Account can have many Transactions.
* Each Transaction is linked to exactly one Account via the “Account†field.
#### Accounts database
* Represents the places where your money lives (e.g., bank accounts, cash, credit cards, investments).
* Key features:
* Name & State: Track workflow (To Do → In Progress → Done).
* Hierarchy: Organize accounts in a tree structure (parent/child accounts).
* Description field: Add context or notes.
#### Transactions
* Represents every money movement (income or expense) tied to an account.
* Example transactions:
* Income: Paycheck deposit (+$2,000), Dividend (+$25)
* Expenses: Grocery shopping (-$75), Coffee (-$8), Stock purchase (-$300)
* Key features:
* Amount: Positive = income, Negative = expense.
* Date: When the transaction happened.
* Account: Links each transaction to its account.
* URL: Optionally store receipts or statement links.
### Report structure
You will need as a source one database only, Transaction.
> [//]: # (callout;icon-type=icon;icon=heart;color=#199EE3)
> Please, note that here we will use SPLIT trick a lot. [Check this video for better understanding](https://youtu.be/sK2RTuQZdmI?si=VuPPG8AvzadbPz4y)
#### Account column
```
SPLIT([Account Hierarchy],'>')
```
This formula takes the Account Hierarchy field (a text string like `Parent > Child > Subchild`) and splits it into separate parts wherever there is a `>` symbol. It allows the report to display just the individual account name or parts of the hierarchy rather than the full string.

It's useful when you have nested accounts (like parent-child) but want cleaner reporting. It also helps group or filter data more simply in the report without long hierarchy strings.
### Amount column
```
SUMIF(
[Amount],
SPLIT(
[Account Hierarchy],
'>'
) == [Account]
)
```
This formula adds up (SUM) all the amounts for transactions that match a specific account, but only when the split part of the hierarchy equals the account name in the current row.

It lets you summarize balances per account (or per level of the hierarchy) even if your transactions are stored with the full hierarchy path. It also helps avoid duplicate calculations when multiple accounts share the same parent.
### Cumulative amount column
```
SUM([Amount])
```
It doesn't check for conditions or hierarchy — just takes every `Amount` value that's currently in view (or grouped context) and sums them together. It gives you the overall total balance or net sum of all amounts without any extra logic.

> [//]: # (callout;icon-type=icon;icon=heart;color=#d40915)
> We hope, you find that helpful.
# WHITEBOARD SECTIONS
_____________________
### Sections
> [//]: # (callout;icon-type=icon;icon=rocket;color=#199EE3)
> *Sections* are a way to visually organize your thoughts, ideas, or plans within a canvas-like space. Think of it like digital sticky notes or grouped content blocks. Each section can contain text, images, or even sketches, and you can freely move them around, resize them, and connect them.

#### Adding objects to a Section
* Drag and Drop: Move or resize a section over any object to automatically include it in the section.
* This allows you to organize related objects efficiently.
#### Nested Sections
* Create Layers of Organization: Sections can contain other sections.
* Simply drag one section into another to create a nested structure.
* Use this feature to group content hierarchically.
#### Duplicating a Section
* Duplicate with Content: Easily duplicate a section along with everything inside it.
* Right-click the section and choose Duplicate.
* Great for templates or repeating layouts.
#### Renaming a Section
Option 1: Double-click the section's name to rename it.
Option 2: Right-click and select Rename from the context menu.
#### Locking Sections
* Prevent Accidental Edits: Lock sections to stop any movement or changes.
* Right-click the section and select Lock.
* Locked sections also prevent edits to their contents.
#### Hiding Sections
* Temporarily Hide Content: Hide sections without deleting them.
* Useful for managing complex layouts, step-by-step reveals, or interactive presentations.
* Simply right-click and select Hide.
#### Exporting and Copying Sections
* Export as Image: Right-click and select Export as Image to save a section and its contents.
* Copy to Clipboard: Use the copy option for quick pasting into other documents or apps.
#### Default Sizes and Resize Behavior
* Improved Defaults: Section sizes and resizing behavior have been refined for better layout control.
* New sections now follow standardized sizing for consistency.
#### Object Guides
* Context-Aware Guides: Guides now appear only when you are actively interacting with a section.
* This reduces clutter and improves the editing experience.
#### Link Sections to each other
You can also link entire sections to each other — not just individual objects within them.

### Lock/Unlock section
You now have two flexible locking options to keep your designs safe and organized:
* Lock All – Locks both the section and all its content.\
Prevent any changes to the section or its elements. Nothing can be moved, edited, or selected.
* Lock Background Only – Locks just the section itself.\
Keep the section in place while still allowing edits, additions, or removals of the elements inside.

#### Tips for Better Workflow
* Use nested sections for structured content.
* Lock frequently used layouts to avoid unintentional edits.
* Hide content not currently in use to keep the workspace clean.
* Duplicate sections to quickly recreate designs with consistent formatting.
###
# HIGHLIGHTS
____________
## What are Highlights?
A Highlight usually represents a fact, a piece of useful data.
Highlight is a special connection that captures some information from rich text field in a `source` entity and links it to a `target` entity. For example, here we capture some interesting fact from a user Interview and connect it to a product Component.

You can capture and augment some text with additional information, like highlighting severity or urgency. Highlight above can be visualised on Whiteboard View like this:

Highlights linked to a target entity are visible inside this entity. For example, the Reporting Component has all linked Highlights, so you can read them and update them (like change the Severity field, or even re-connect to some other target entity):

## Why you may need Highlights?
Highlights help to capture and accumulate information/facts about something, and later it will be easier to make decisions and answer specific questions. For example, if we take product feedback management, here are the questions you will be able to answer:
* What are the top problems in the product?
* What to focus on next in specific product area?
* What some specific customer wants?
* What our target customers asked for recently?
* What we should build for some specific market?
For example, here we accumulate leads and customers feedback about open problems and features, and calculates priority score based on feedback volume, customer size and segment, feedback pain level:

The most common use cases for Highlights are:
* Product feedback management. Here you capture facts from Intercom chats, customer calls, and connect them to product features or areas.
* User research. Here you capture observations from user interviews, and connect them to insights or problems.
* Market research. Here you capture information about market from web posts, newsletters, and connect it to niches, opportunities, etc.
## How to setup Highlights
Navigate to Settings → Highlights, here you should already see Highlight database created. If not, you can add Highlight database.
> [//]: # (callout;icon-type=icon;icon=exclamation-circle;color=#fba32f)
> If you already used References to link information between text and databases, you might need to migrate from references to highlights. Check [References to Highlights](https://the.fibery.io/@public/User_Guide/Guide/References-to-Highlights-316) guide then.
In the left there are all Sources databases (you will review them and capture information here), on the right there are all Target databases (where you want to accumulate facts).

Highlight database is connected via [Relations](https://the.fibery.io/@public/User_Guide/Guide/Relations-17) to **several** sources and **several** targets. It means, essentially, that Highlight database uses multi-relations. Single Highlight entity always has exact source entity and exact target entity.
[https://youtu.be/eqBfy8dnK7E](https://youtu.be/eqBfy8dnK7E)
## Multiple Highlight databases
You can create and manage multiple Highlight databases and change their names and colors, just like any other database in Fibery. The only restriction is that you cannot set the same source in different Highlight databases. However, there are no restrictions for Highlight targets.
This can be helpful if you want to utilize the Highlight functionality in various scenarios.
## How to capture Highlights
There are several ways to capture Highlights:
* Manually, in Source entity (like open an Interview and create Highlights from text)
* Using AI in Source entity
* Using AI in Target entity (like open some Feature and find new Highlights related to this Feature)
Check [Find Highlights (manually and with AI help)](https://the.fibery.io/@public/User_Guide/Guide/Find-Highlights-(manually-and-with-AI-help)-308) guide.
## How to visualize Highlights
Highlights is a database, so you can create Views and work with Highlights as with usual databases.
[Using Highlight database views](https://the.fibery.io/@public/User_Guide/Guide/Using-Highlight-database-views-311)
## How to setup formulas for Highlights and Targets
You can use Highlights to calculate Features or Insights prioritization score.
[Highlights and Targets formulas](https://the.fibery.io/@public/User_Guide/Guide/Highlights-and-Targets-formulas-312)
## Empty Highlight Suggestion
It can happen that the Highlight Suggestion does not find relevant matching content. Instead of giving a "No matching found" error message, we try to provide some clues on how you can increase the chance of getting matching suggestions.
For example, during the X-wing user test interviews, someone interviewed Indiana Jones. Thus, it is unsurprising that our incredible AI was unable to find any correlation between the X-wing user interview questions and the Indiana Jones story. But now you know why…

# DATE FUNCTIONS
________________
#### ADD_DAY
Adding days to a date
`ADD_DAY([Created On], 1)`
#### ADD_HOUR
Adding hours to a date
`ADD_HOUR([Created On], 1)`
#### ADD_MINUTE
Adding minutes to a date
`ADD_MINUTE([Created On], 1)`
#### ADD_MONTH
Adding months to a date
`ADD_MONTH([Created On], 1)`
#### ADD_WEEK
Adding weeks to a date
`ADD_WEEK([Created On], 1)`
#### ADD_YEAR
Adding years to a date
`ADD_YEAR([Created On], 1)`
#### AUTO
Returns the auto detected date grouping period
`AUTO([Date])`
#### DATE
Converts a provided date string in a known format to a date value
`DATE('3 Sep 2018')`
#### DAY
Returns the date of the expression (DD MMM YYYY)
`DAY([Date])`
#### HOUR
Returns the date, truncating seconds of the expression
`HOUR([Date])`
#### MINUTE
Returns the date, truncating seconds of the expression
`MINUTE([Date])`
#### MONTH
Returns the month of the expression
`MONTH([Date])`
#### NOW
Returns the current date as date value
`DAY(NOW())`
#### QUARTER
Returns the quarter of the expression
`QUARTER([Date])`
#### TIMELINE
Special date function used for grouping data by date period
`TIMELINE([Start Date, End Date])`
#### WEEK
Returns the week of the expression
`WEEK([Date])`
#### YEAR
Returns the year of the expression
`YEAR([Date])`
# VIEWS INSIDE RICH TEXT (EMBED VIEWS)
______________________________________
You can insert [Views](https://the.fibery.io/@public/User_Guide/Guide/Views-8) inside Documents and Rich Text fields to make them more dynamic. There are many use cases, like Dashboard for some Space/Project/Product/Customer or an interactive report about Release state.
> [//]: # (callout;icon-type=icon;icon=exclamation-circle;color=#fba32f)
> You can insert all kind of views with some exceptions. Here are Views you **can't insert**:
>
> * Form View
> * Feed View
> * Any Context View
## Insert Views
Type `<<` to insert or create a new View inside a document or entity's rich text field. For example, here we insert the MRR report into a document.

Alternatively, type `/` and find `/Insert View` command.
## Resize Views
You can resize views horizontally and vertically, or even make views larger than the width of text.
To resize a view, select it and draggers will appear on the left/right sides and on the bottom of the view. Drag them to resize the view.

## Delete Views
To delete a view in a document, simply click on the dots in the top right corner of the inserted view and press the `Delete` button on your keyboard.

## FAQ
### What happens, if I share the Document, that has embedded View?
Unfortunately, those views won't be shared. We hope to improve that behavior in the future.
### What about permissions?
Permissions are required to insert or delete a view block, as well as to edit the original view configuration. To embed a particular view, a user needs at least read access to it in their space.
# FIELDS
________
A Field is a way to store information of a certain kind for all Database Entities, such as text, number, relation, etc.
You can add as many Fields as you want for every Database.

You can also search Database fields in Space Setup and navigate to the fields quickly via keyboard.
## What are the Field types?
### Basic Fields
* **Text** — a simple text field, typically not more than a single line of text, without formatting
* [Number Field](https://the.fibery.io/@public/User_Guide/Guide/Number-Field-289) — a number with formatting options.
* [Single and Multi-Select fields](https://the.fibery.io/@public/User_Guide/Guide/Single-and-Multi-Select-fields-87)
* Single-select — select a value from a list of options.
* Multi-select — select several values from a list of options.
* [Workflow Field](https://the.fibery.io/@public/User_Guide/Guide/Workflow-Field-292) — track the status of an Entity.
* **People field** — assign people to an Entity.\
*(this is a special kind of [Relations](https://the.fibery.io/@public/User_Guide/Guide/Relations-17) field, with [Inbox and notifications](https://the.fibery.io/@public/User_Guide/Guide/Inbox-and-notifications-35) automatically added)*
* [Date field](https://the.fibery.io/@public/User_Guide/Guide/Date-field-93) — a date or date range with an option to include time.
* **Checkbox** — a single checkbox (= true or false).
* **URL** — a link to some resource.
* **Email** — an email address.
* **Phone** — a phone number.
* [Location field](https://the.fibery.io/@public/User_Guide/Guide/Location-field-163) — stores location as an address or coordinates.
* [Icon field](https://the.fibery.io/@public/User_Guide/Guide/Icon-field-193) — an emoji for a particular Entity.
* **Avatar** — a custom avatar for every Entity (useful for Teams, Departments, and Customers).
* **Files** — upload and attach files to Entity (PDFs, slides, and videos).
* **Comments** — discuss Entity in a comments thread.
### Complex fields
* [Rich Text](https://the.fibery.io/@public/User_Guide/Guide/Rich-Text-28) — more sophisticated than a simple text field. Great for a Feature description or Article content.
* [Relations](https://the.fibery.io/@public/User_Guide/Guide/Relations-17) — connect Databases. For example, a Feature may have many Tasks, or many Teams can be assigned to a Feature.
* [Lookups](https://the.fibery.io/@public/User_Guide/Guide/Lookups-16) — show a field from a related Database.
* [Formulas](https://the.fibery.io/@public/User_Guide/Guide/Formulas-39) — calculate things. For example, a total effort of all Tasks related to the Feature.
* [Documents](https://the.fibery.io/@public/User_Guide/Guide/Documents-85) — allows rich text documents to be associated with an Entity.
* [Whiteboards](https://the.fibery.io/@public/User_Guide/Guide/Whiteboards-38) — allows whiteboards to be associated with an Entity.
## How to add a Field?
There are several ways to do that.
1. Add Fields from any Entity of the Database.
For example, open any Entity and find `+ New field or Relation` action in the bottom right corner.

2. Add Fields from the Database setup screen.
Open the Database setup screen and add new Fields there.

## How to delete and rename Field?
There are two ways to do it.
1. Delete or rename the Field from a Database setup screen.
Navigate to a relevant Database, and click `…` near the required Field:

2. Delete or rename the Field from any View.
Find `…` near the Field and click it to invoke the actions.

## How to duplicate field?
It's possible to duplicate field. You can quickly duplicate basic fields (including single- and multi-selects) into another database.
## Change Field Visualization
There is an option to select how a field is presented on the Entity View through the "Display as" feature. If a field offers multiple display options, you'll find the "Display as" feature accessible in the field's context menu.
Some fields already support multiple visualizations: for example, this is useful when you need to present a number as a progress bar when using %(percent) units.

You also have another way of customizing Fields' appearance — via `Manage Fields & Layout` menu in the top-right corner. If a Field has customization options, it'll have an `>` arrow next to it.

This can be applied to:
* URL fields
* Email fields
* Phone fields
* Button field
## How to Hide and Unhide Fields from the Entity View?
You can hide or unhide all Fields on the Entity View or selected Fields only.
> [//]: # (callout;icon-type=emoji;icon=:exclamation:;color=#d40915)
> This action is not user-specific but universal. If you hide all Fields or an individual Field, it will become invisible to all users.
### **To hide or unhide all Fields**
Navigate to the top right corner and choose `Collapse Fields Column`. To unhide, choose `Expand Fields Column`.

### To hide or show individual Fields
Navigate to the top right corner and choose `Show/Hide Fields`. You can also hide an individual Field by clicking `…` and choosing the needed option.

## Fields search
Scrolling through a long and somewhat arbitrary sorted list of Fields when picking what to display on a View is annoying, so we have a search option for convenience.

## How to Move Fields between Entity View sections?
With drag and drop, you can move fields between sections.
> [//]: # (callout;icon-type=emoji;icon=:tea:;color=#4faf54)
> Note: if you don't use any filters, fields, or sorting for a to-many relation (e.g. Tags), consider transforming it into a simple list — it will declutter the UI and speed up loading.
## FAQ
### What is a Rank Field in Reports?
Rank is a property that every Entity in the Workspace has. Its value is a relative number indicating a global ordering. Rank is not an editable Field, it can't be used in Formulas and Automations. It is commonly used for the sorting Field in a Report View.
For more details, check the great discussion in[ Fibery Community.](https://community.fibery.io/t/reports-my-state-ranks-changed/5211/3 "https://community.fibery.io/t/reports-my-state-ranks-changed/5211/3")
### When Created By Field can be empty?
It may happen in two cases:
1. If the data was imported
2. If you add data via API
If you faced this issue, and none of the cases above work for you — please, contact us in chat.
### Why are some fields on the right, and some are at the bottom in Entity View?
In the Entity View, Collections are displayed at the bottom. Collections are sets of Entities that appear as a result of building many-to-many or one-to-many relations. You can also find Files, Documents, Comments, and Whiteboard Fields, as they are all Collections. There is also a Description (or Rich text Field) that may contain a lot of text therefore requiring some space.
You can move fields between sections to change that
### What's the character limit for the text field?
Now any text field (formula or not) can have up to 5000 of characters.
Please, note that this is a limit for the `Text` field, **not** for `Rich text` fields.
### Can I remove or rename the "Name" field that comes with every new database?
No, the `"Name"` field is a required system field in Fibery and cannot be deleted or renamed. Every entity must have a Name field to uniquely identify it across views and relations.
However, you can customize its behavior:
* ✅ Make it a formula: You can generate its value automatically based on other fields (e.g., `Title + Date`).
* ðŸ‘ï¸ Hide it in views: You can choose not to display the Name field in tables, cards, or other views where it's not needed.
# LOCALIZATION
_______________
We currently have almost no localization, neither in terms of languages nor date or time. However, due to the no-code nature of Fibery, this limitation is not so painful (except maybe for [Timezones](https://the.fibery.io/@public/User_Guide/Guide/Timezones-41)).
## 📆 Pick what day the week starts (per user)
We came up with a [set of principles](https://community.fibery.io/t/twitter-post-about-potentially-new-fibery-settings/5728/4?u=antoniokov) for date and time localization. Choose when a week starts for you — and we will adapt date pickers as well as [Calendar View](https://the.fibery.io/@public/User_Guide/Guide/Calendar-View-13) and [Timeline View](https://the.fibery.io/@public/User_Guide/Guide/Timeline-View-12) accordingly. The default comes from your browser locale.

## 🕜 Choose date and time format (per user)
A user is now free to choose their preferred date and time format in preferences. Instead of `Feb 1, 2024 15:09` it can be `2/1/2024 3:09 pm`.
The default for time comes from your browser locale, dates are `Feb 28, 1992` by default.
## 🌎 Name Spaces, Databases, Views, and Fields in your language

While the hero customizing Fibery for their team has to deal with English quite a bit, for most users most of the labels (Databases, Fields, Entities, etc.) will be in their native language.
In our experience, this can't replace localization, for sure, but it works for fully non-eng-speaking teams.
## FAQ
### Is there a way to translate the UI?..
We recommend adding a browser extension that translates the UI. It should be installed by each user and can vary for different browsers.
# OVERVIEW
__________
# Overview
All communication between Fibery and connected applications occurs over a REST API. All third party applications are expected to adhere to a particular API format as outlined in this documentation. The underlying technologies used to develop these third party applications are up to the individual developer.
## REST Endpoints
Below are a list of the HTTP endpoints expected in a Fibery custom app connector.
Required:
* [GET /](https://the.fibery.io/@public/User_Guide/Guide/GET-%2F-367) - returns app information
* [POST /](https://the.fibery.io/@public/User_Guide/Guide/POST-%2F-368) - returns the data
* [POST /validate](https://the.fibery.io/@public/User_Guide/Guide/POST-%2Fvalidate-369) - performs validation of the account
Optional:
* [POST /datalist](https://the.fibery.io/@public/User_Guide/Guide/POST-%2Fdatalist-370) - returns possible options for filter fields
* [GET /logo](https://the.fibery.io/@public/User_Guide/Guide/GET-%2Flogo-371) - returns an image/svg+xml representation of the application's logo
* [POST /oauth1/v1/authorize](https://the.fibery.io/@public/User_Guide/Guide/POST-%2Foauth1%2Fv1%2Fauthorize-372) - begins OAuth (v1) authentication by retrieving redirect URI
* [POST /oauth1/v1/access_token](https://the.fibery.io/@public/User_Guide/Guide/POST-%2Foauth1%2Fv1%2Faccess_token-373) - finalizes OAuth (v1) authentication by processing token request
* [POST /oauth2/v1/authorize](https://the.fibery.io/@public/User_Guide/Guide/POST-%2Foauth2%2Fv1%2Fauthorize-374) - begins OAuth (v2) authentication by retrieving redirect URI
* [POST /oauth2/v1/access_token](https://the.fibery.io/@public/User_Guide/Guide/POST-%2Foauth2%2Fv1%2Faccess_token-375) - finalizes OAuth (v2) authentication by processing token request
* [POST /schema](https://the.fibery.io/@public/User_Guide/Guide/POST-%2Fschema-376) - returns predefined data schema for specified account and filter
* [POST /validate/filter](https://the.fibery.io/@public/User_Guide/Guide/POST-%2Fvalidate%2Ffilter-377) - performs filter fields validation
* [POST /count](https://the.fibery.io/@public/User_Guide/Guide/POST-%2Fcount-378) - returns dataset size
# DEPENDENCIES
______________
Adding a dependency lets you connect entities to each other and indicate that one entity depends on another entity. For example, some feature can't start till another feature is implemented, or some task blocks several other tasks.
> [//]: # (callout;icon-type=icon;icon=channel;color=#199EE3)
> Timeline View is the best place to [see and manage dependencies](https://the.fibery.io/@public/User_Guide/Guide/Timeline-View-12/anchor=Manage-Dependencies--52a07f2e-1b37-4dee-9ecc-e700fdc7c319).
## How to add dependency relation?
Only [Self-relations](https://the.fibery.io/@public/User_Guide/Guide/Self-relations-328) can be marked as dependency. To add a dependency for some Database (for example, Features):
1. Navigate to Features database and add a new Relation field
2. Select Feature database for relation as well
3. Set desired cardinality (in most cases you need many-to-many)
4. Click Advanced and Mark `Use relation as dependency` switcher
5. Save the field

Note that two fields will be created as a result: `Blocking` and `Blocked By`. They are needed to set features that blocks current feature, or set features that current feature is blocking.

Here is a good illustration how dependencies work. Selected feature `Admin sets spaces…` is Blocked by one feature `Automations to add things…`, but itself it is Blocking yet another feature `Default space…`:

## Adding dependencies
Dependencies are just relations, so you can add them anywhere. However, there is one special place to [add dependencies in a visual manner: Timeline View](https://the.fibery.io/@public/User_Guide/Guide/Timeline-View-12/anchor=Manage-Dependencies--52a07f2e-1b37-4dee-9ecc-e700fdc7c319).
Create a new Timeline View for your database (in our case it is Features Database), and select Enable dependencies in Items section. Here you will be able to create dependencies visually and select a strategy to shift dependent entities if needed.

## FAQ
### Do you avoid weekends?
"Avoid Weekends" toggle ensures that tasks spanning weekends maintain the correct number of working days, effectively bypassing non-working days.
This is **enabled by default** for all users and does not require any manual activation.
**How It Works?**
* If a task extends over a weekend, the duration is automatically adjusted to maintain the correct number of working days. \
For example, a task that lasts three working days (Monday, Tuesday, and Wednesday), if rescheduled forward by three calendar days, will be moved to Thursday, Friday, and Monday, skipping the weekend (Saturday and Sunday).
* This works only for shifted cards
* Right now business days are Monday → Friday, but this setting is configurable in Personal settings
* Shifted cards keep the same duration in business days
* When **Keep time between entities** is enabled, duration in business days between shifted cards is kept the same
### Is it possible to shift dates automatically?
Only on [Timeline View](https://the.fibery.io/@public/User_Guide/Guide/Timeline-View-12). If you configured Timeline View and see dependencies, then you can select a strategy to move dependent entities dates.
### Is it possible to create dependency between different databases?
No, it is not possible.
### Can I convert any existing self-relation to a dependency?
Yes, edit this relation field, click Advanced and turn on `Use relation as dependency` switcher. Make sure that dependency direction is set correctly.
# INTERCOM INTEGRATION
______________________
How to Integrate Fibery with Intercom and connect feedback with Insights, Features and Tasks.
## Setup Intercom sync
1. Navigate to `Templates` and find Intercom template
2. Click `Sync`.
3. Authorize Intercom app.
4. Choose what databases you want to sync from Intercom. In most cases you want to have all the data. Specify starting date for the sync, by default it is a month ago, but you may want to fetch all the data:

5. Click `Sync now` and sync process will be started. Note that it may take time to complete.
Intercom Space will appear in sidebar.
## Link feedback to ideas, features, bugs, etc
1. Open any Conversation
2. Select the text, push `Cmd + L`, select some entity and text will be linked to the selected entity:

### Change sync interval
You can change data sync intervals in integration settings. Click on Intercom Space, then click on a database name and change the sync interval:

Fibery also syncs data near real-time when:
* a reply added
* status changed
* something is tagged
## FAQ
### Can I stop integration, but keep data in Fibery?
Indeed you may just want to import the data from Intercom one time. In this case, you can disable integration. Navigate to integration Database and click ... near Intercom.

After that, all Conversations will remain in Fibery and this Database will be transformed into the usual Database (like all fields will be editable, etc).
### I added a new field to my Intercom, how can I update data in Fibery?
You have to push the full sync in the Intercom Integration. Then this data will be updated for all the previous conversations.

### I want to train Fin (Intercom AI Assistant) on my Fibery knowledge base
If you would like to use Fin to help your users with the information created in Fibery, we suggest doing the following:
* Create documentation in Fibery and make it available on a Public URL ([Share Space to web](https://the.fibery.io/@public/User_Guide/Guide/Share-Space-to-web-36) )
* Fin can consume information from [public URL](https://www.intercom.com/help/en/articles/7837514-add-your-support-content-for-fin)
* There are also [best practices](https://www.intercom.com/help/en/articles/7860255-support-content-best-practices-for-fin) on how to structure that page
## Useful info
This video shows how we handle Intercom feedback in Fibery.
[https://youtu.be/KgH0UEtmzJM](https://youtu.be/KgH0UEtmzJM)
# MULTIPLE ENTITY VIEWS
_______________________
Multiple Entity Views allow users to create and manage multiple layouts for any database entity.
### What problems it solves?
Sometimes a database can be large with dozens or even hundreds of fields, and different users in different contexts might want to work with only a subset of these fields. Here are a few examples:
* A Feature can look different from the QA perspective than from the PdM perspective.
* As a project manager, sometimes I want to work on project finances, but later switch to project scheduling.
Multiple Entity Views allow to switch context with two clicks:

## How to setup Multiple Entities Views?
Enable `Multiple Views` through the "Manage Fields & Layout" control.

The switcher appears once Multiple Views are enabled. Click on `Add view` and add more views here:

What else you can do:
* You can add, rename, duplicate, and delete entity views
* Views are listed in the switcher and can be reordered as well
* Fields can be added or removed from any number of views
* Different entity views can have different layouts
* Multiple Entity Views will be preserved in [Share Space as a Template](https://the.fibery.io/@public/User_Guide/Guide/Share-Space-as-a-Template-56)
### Pin Entity Views
You can pin several Entity Views and enjoy quick navigation between these Views. For example, you can customize them for specific use cases and switch focus fast.
Open Entity Views drop down, click `…` for any Entity View and select `Pin` action. This is how several pinned Entity Views look:

## How to use Multiple Entity Views?
The first view will be the default for all users.
When a user selects another Entity View, this selection is remembered for this user and all entities from the database will be opened with the preferred Entity View for this user.
## Q&A
#### Can I define what entity view is selected by default based on user role, from another view (like Table) or by some entity field value?
Not yet, but we are collecting use cases and thinking about the solution. Ping us in Intercom (Help & Support section in the bottom of the left menu) and provide your use case to speed up this process.
#### What happens if I add new field?
When a field is created from some Entity View, it is visible in this Entity View only by default and it is hidden from other views. Note that if you add a new field from Database, it is still added to all Entity Views.