How to Design a Database in Fibery: a Guide for Non-nerds
So you have decided to change your life and give Fibery, a no-code app for knowledge and task management, a chance. “Where should I start?” you may wonder. If you haven’t had an experience with no-code tools before, this might be a crucial question.
Learning a new tool is similar to learning a new language. Nobody starts learning English with Shakespeare’s sonnets; you start with the alphabet. This post explains the alphabet of database design and the way it works in Fibery. It provides a simple algorithm for your first steps - and explains how to develop further.
First, let’s sync on what a no-code tool means and what type of thinking it requires.
What is a no-code tool?
Previously, the world was divided into people who create apps (programmers) and people who use apps (the rest of the world). Now, even if you’re not a programmer, you can create your own app with the help of special no-code (or low-code) tools. Fibery is one of them. All the features you’ve seen in other work tools are available in Fibery, and you are free to use them in the way that best suits your work needs. Think of it as creating your own Trello or Product Board. Pretty cool, right?
However, before you become comfortable, you’ll need to get used to a few new things.
- The interface is different because no-code software relies on the concept of database design, and you’ll need to understand it.
- You’ll need to understand the work process you want to build before you start building it. Otherwise, you’ll be lost with endless possibilities of a new tool.
To adopt something new, you need to start simple and small. As the saying goes, “you need to eat the elephant one bite at a time”.
Actually, that’s a process. And Fibery is a tool for replicating any process you want.
So let’s design the “Eat the Elephant” process in Fibery.
🐘Disclaimer: Never have I eaten a real elephant, nor do I want to do so.
Step 1: Formulate what you want to do
Where do I start? From formulating what I need to do.
What do I want to do? I want to eat the elephant one bite at a time.
- Who? I.
- What? Eat.
- Whom? The elephant.
- How? Bite by bite.
- When? At a specific time.
Each answer is an essential part, or building block, of the process. I’m not sure this is a conventional way to approach the matter, to say the least, but it is good enough to be a starting point.
❓I could’ve also asked the following questions:
- Where? Home, office, Jamaica, etc.
- Which? Blue, pink, hairy, etc.
- Whose? Lenny’s, Michael’s, Anna’s etc.
- Why? Birthday, funeral, team building, etc.
And all of these could be considered as characteristics of a process. However, let’s keep it simple for now.
Understanding this, I’m ready to start replicating the process in Fibery.
Step 2: Organize information into databases
When you open Fibery, the first thing you see is an empty “table” — please meet your first database, ready to be filled in with data.
What is a database?
A database is a collection of data records that share the same characteristics.
In my case, I need databases that store data records relevant to answers to each “How” and “W”-question. The only exception is the “What?”, because “Eat” is the process itself. So I’ll have Diner (“Who?”), Elephant Part (“Whom?”), Bite (“How?”), Time (“When?”) databases.
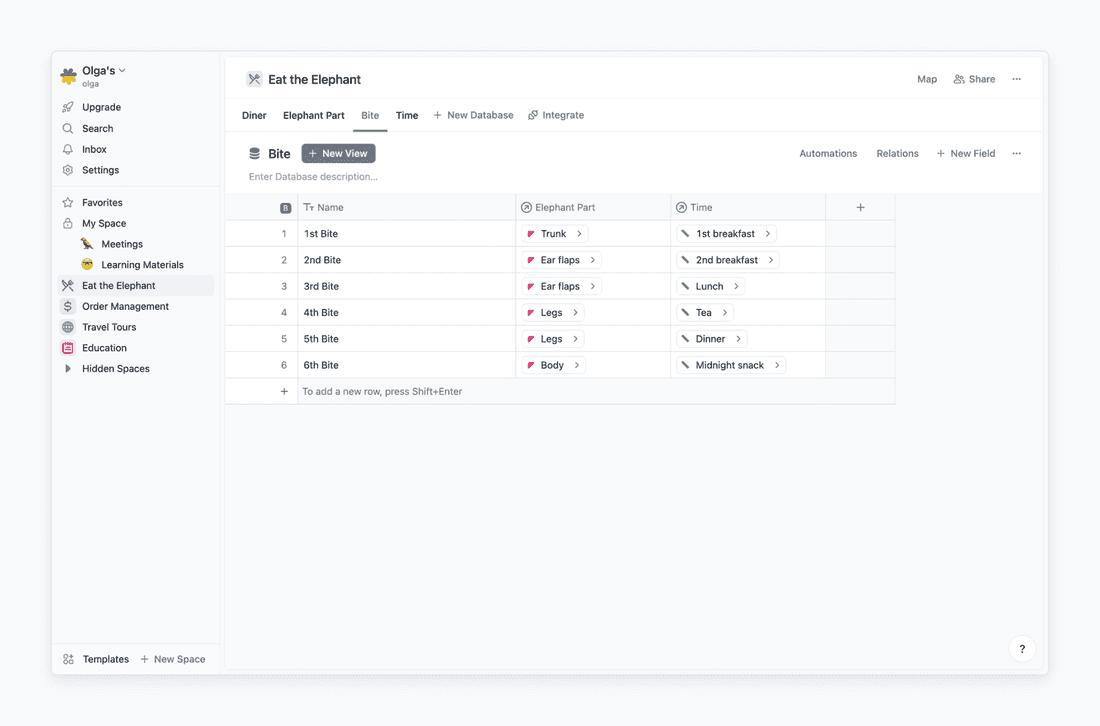
Then I need to fill my databases with data. As I aim to start simple, here is what I have:
Here is how initial databases setup for the “Eat the Elephant” process looks in Fibery
🍿Understanding how to break the process into parts is a crucial step. The better the foundation, the easier all the next steps become. Often, you realize that the database division is not optimal when you start filling them with data. There are certain rules to approach this matter. That’s called database normalization. For curious minds, I recommend watching this video.
Now let’s bring this process to life. To start “eating”, I need to set the connections between different databases. That’s called relations.
What is a relation?
A relation is a connection between two different databases. There are different types of them, but no matter the type, a relation is visible from both ends.
First, I want to connect bites and elephant parts. We’re eating the animal bite by bite, remember?
To set a relation, or connection, between databases, I click on the plus sign + on the column in the table. I also need to choose how they will be connected.
Do I eat each part of the elephant in one or many bites? Actually, several bites might be needed for such large pieces, so I’d go for many bites for each part. When I bite, do I bite one part of the elephant or many at once? I can’t imagine how I can bite ear flaps and trunk simultaneously, so I choose that each bite relates to a single part that I am biting.
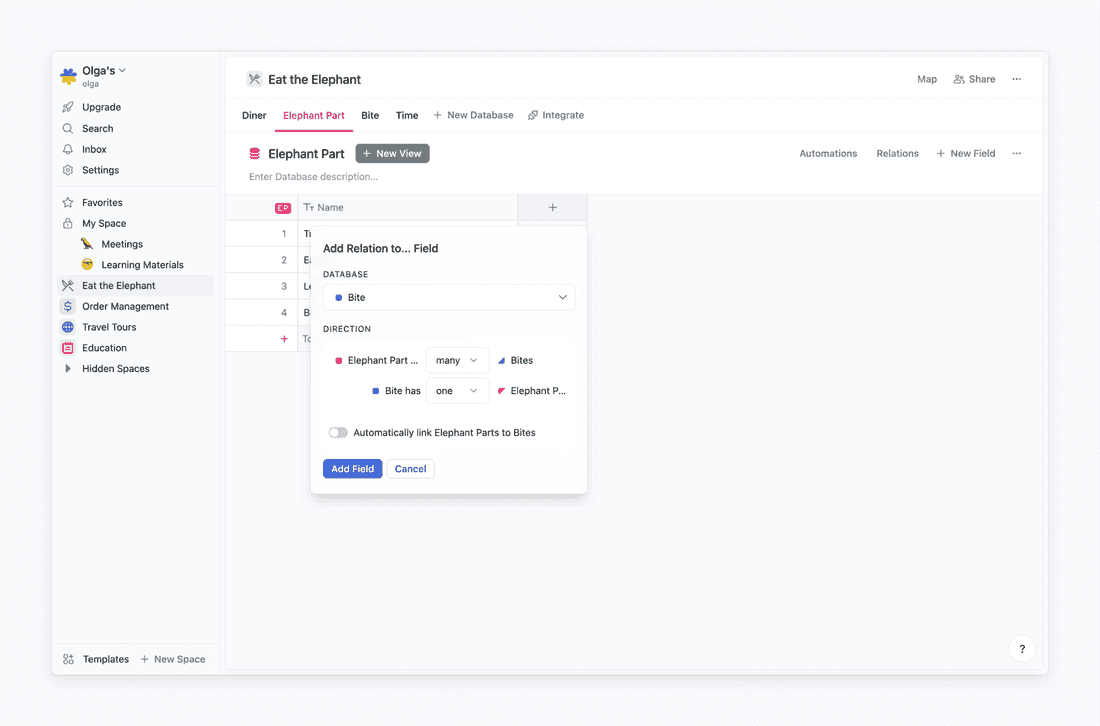
This is called setting the relation cardinality. It can be one-to-many (my case), one-to-one (if I could eat one part in one bite only), or many-to-many (If I could eat multiple parts in the same bite).
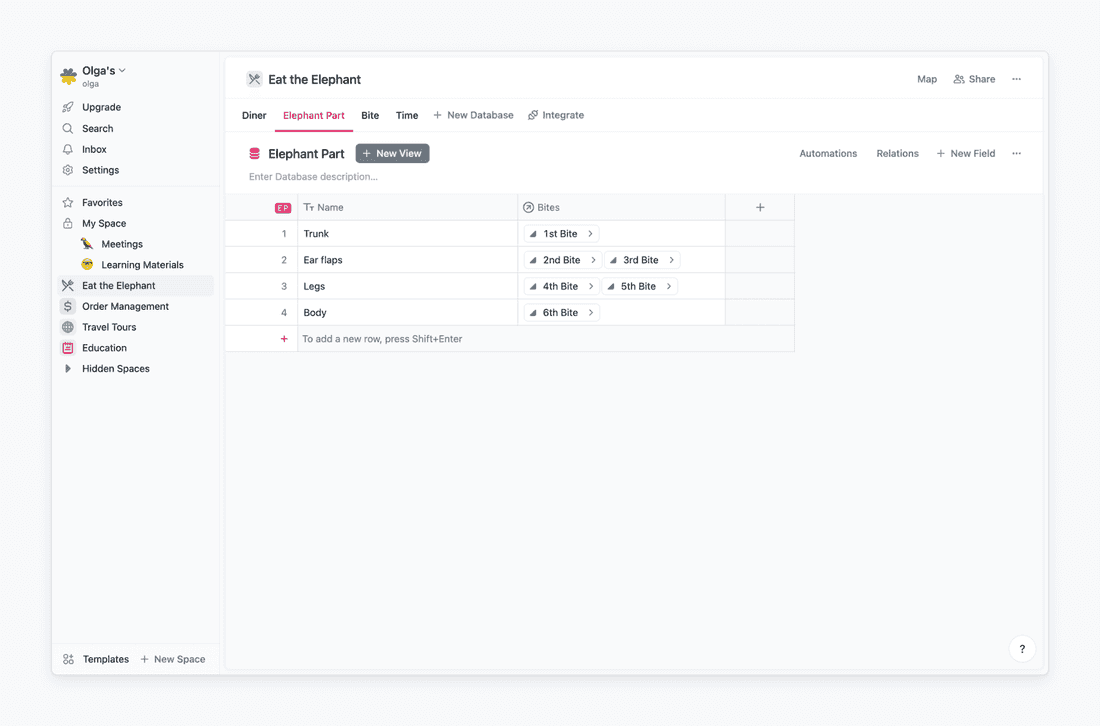
This is how my Elephant Part and Bite databases look after I set a relation between them and connect each elephant part with a bite. Relation is visible from both ends, remember? It also means that if I delete a relation between Trunk and the 1st bite in the Elephant Part database, it will be deleted in the Bite database too.
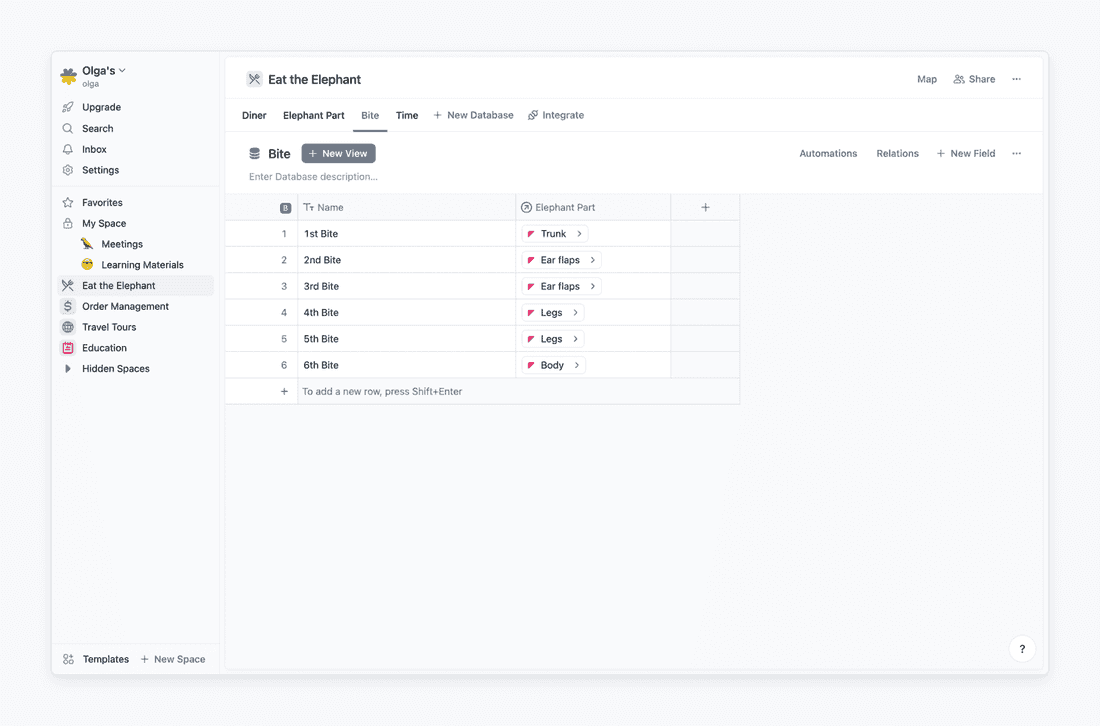
Second, I want to connect Bite and Time databases. We’re eating the animal one bite at a time, remember? For that, I’m setting a one-to-one relation from Bite to Time database. Here is how my Bite database looks after that:
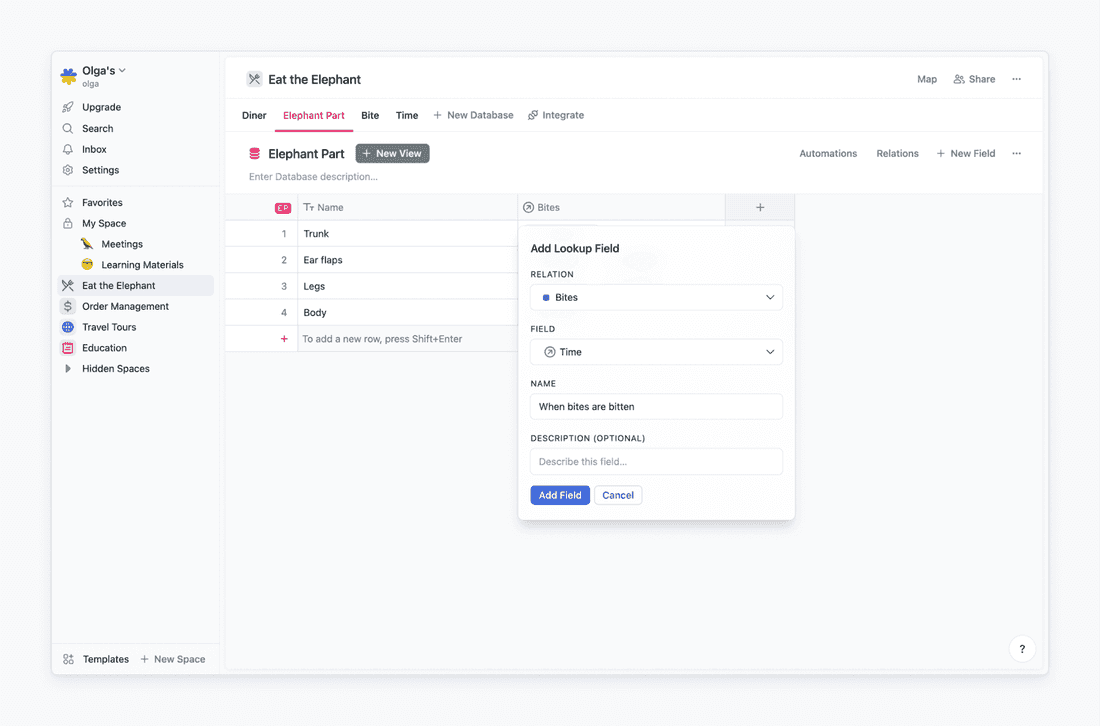
So I know what part of the elephant is designated for each bite, and I know when each bite is happening. How can I know when an elephant part is eaten? I will use lookup field for that.
You can think of lookup field as a sneak peak. Elephant Part database and Time database are not connected directly but through a Bite database. So when in Elephant Part database, I don’t want to set an honest and open relation with the Time database, I just want to know what’s up between Bite and Time.
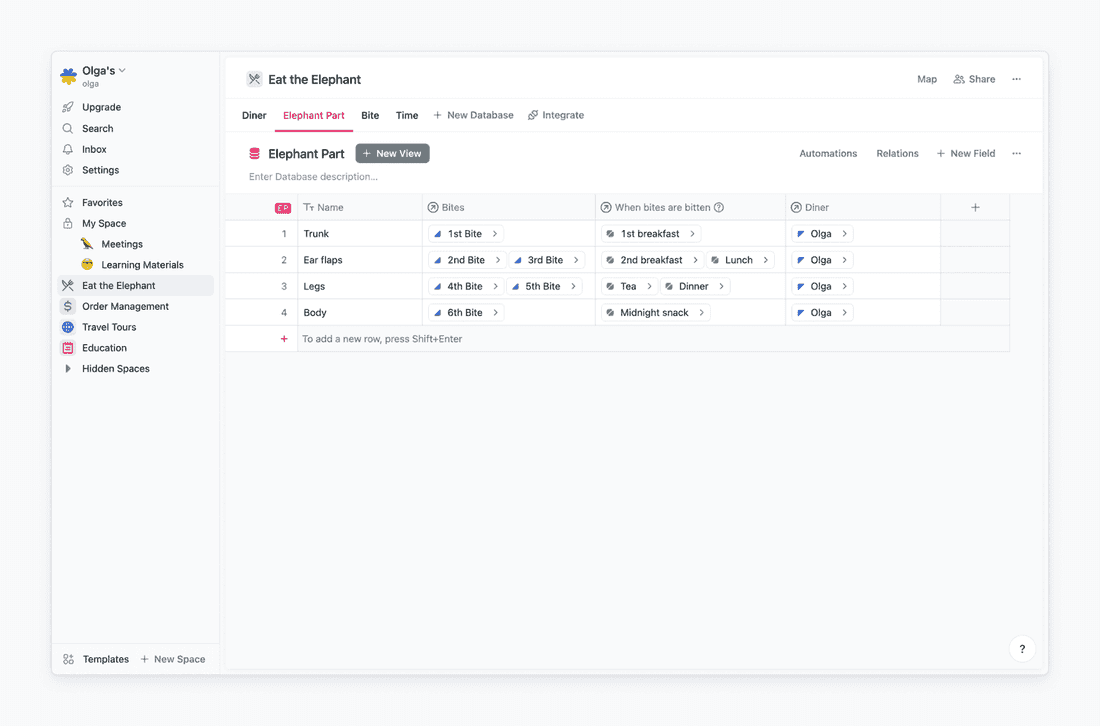
Here we go! I’ve also created a many-to-one relation to the Diner database to assign myself to all the elephant parts.
Step 3: Organize work and make decisions using views
Congrats! Now you have databases, data, and connections between them. What to do next? Organize work and make decisions.
For that, you need to use views. “Don’t mix data storage and data visualization” is one of the fundamental principles of Fibery. A database is where data is stored, and a view is how you look at data. Think of a house and a window metaphor: opening or closing a window will not damage the house. In the same way, creating, deleting, and changing data views won’t affect the database itself.
For example, I decided that eating the elephant is a team sport, and I invited my colleagues to join me. This means that now one elephant part can be eaten by several diners, and one diner can have many elephant parts, so I change relation between Diner database and Elephant Part database from one-to-many (when I was the only diner) to many-to-many. As a next step, to assign parts of the elephant to different team members, I create a classic Kanban board, and I rearrange “meals”.
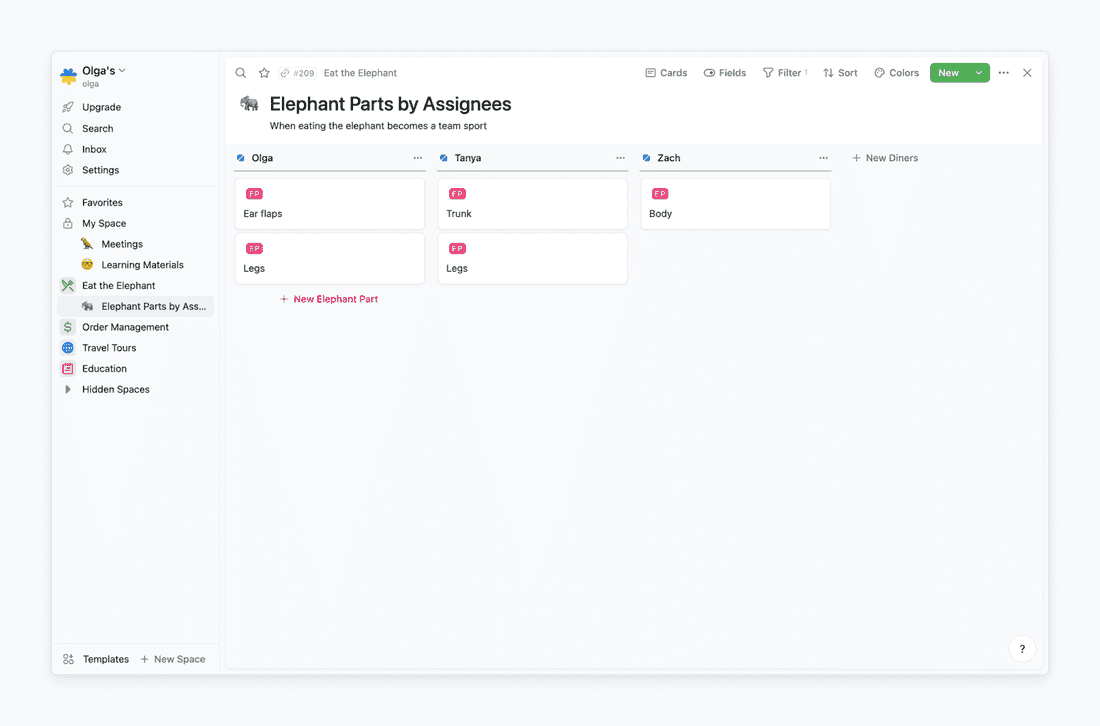
All the changes are mirrored in the relevant databases. If I delete this board, the data from databases won’t be deleted. Remember, a view is just a window.
Step 4: Automate everything
Low-code tools allow you to reduce the amount of manual work. There are two main ways to do that: using formulas and automations.
What is a formula?
A formula is a field where the value is automatically calculated. For example, I can create a formula that generates a name for a field based on certain criteria. Say, I’m tired of distinguishing bites by numbers (1st, 2nd, 3rd, 4th, 5th). I want clarity. For that, I create a formula that adds the time when a bite is bitten to its name.
You know what the best part is? I don’t need to understand how to write formulas. I can simply type the prompt for AI, and it will spit out a formula for me.
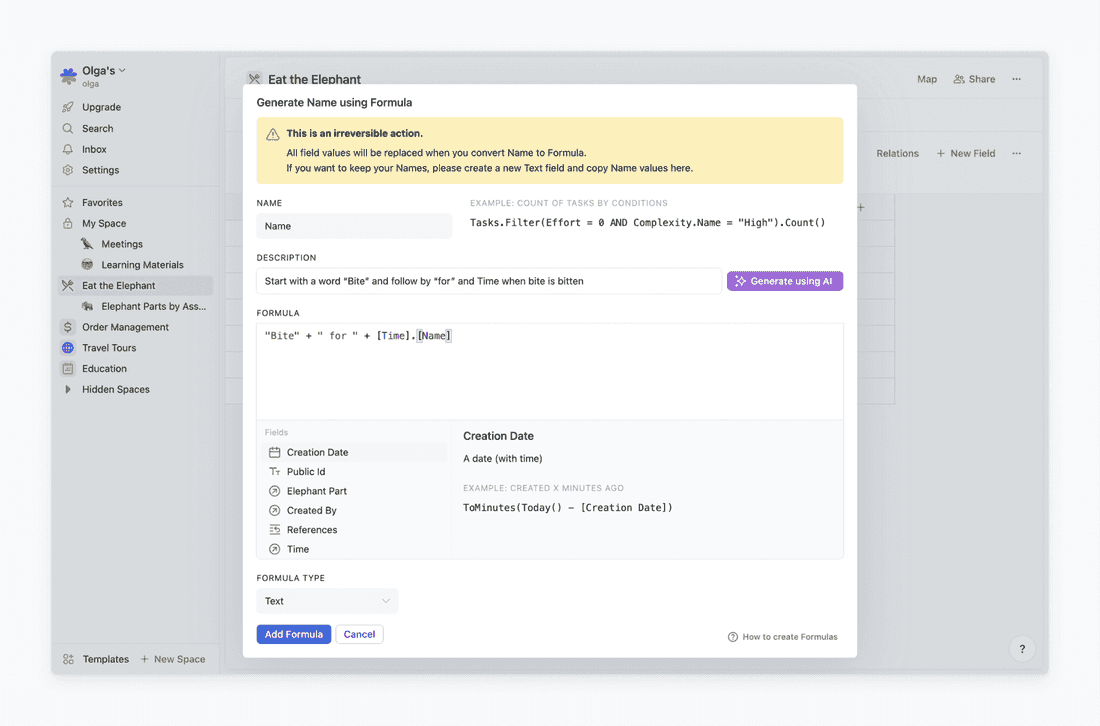
Here we go. And If I add a new time, the name will be generated automatically.
An example of how to use a formula for generating names
What is an automation?
An automation allows you to define a set of actions that should always happen when a trigger condition is met. In other words, if you have a repetitive action or a set of actions, you can ask Fibery to complete them instead of completing them manually.
For example, I’ve decided to cut the elephant into smaller pieces, and I want each new piece to be assigned to me automatically. For that, I go to Automations in the Elephant Part database, and I formulate what I want to do using “When” and “Then”.
When a new elephant part is created, then update the Diner to be Olga. Here is how this Rule looks in the interface:

And here is how it works: even before I finish typing the name of a new elephant part, it is assigned to me.
An example of how to use rule to assign team members to tasks
Automations are great for any repetitive process. I can assign “meals” to team members based on what they’ve eaten before. If somebody has stomach issues, I can exclude them from the next “meal”. I can sync with a food shop: each time there is a delivery, I’ll be notified, and and Elephant Part database will be updated. And so on.
I think it’s enough of this carnivorous examples. Let us move on.
Step 5: Onboard team members
After setting up a basic workflow, invite colleagues and explain what is going on. Add a description to the Kanban view, or write a document about the process and embed the Kanban board in it (or any other view) for better navigation.
Have teammates try the process and take notes of what does work, and what doesn’t. Make the necessary changes and try again. Repeat.
This applies to any process or tool. Start humbly, design for a small group of people, and then spread to everyone in the company.
How do I create more complex set ups?
Either by practice or, if you don’t have much time and need a quick solution, with the help of a human.
Fibery has a concierge service that helps you set up the workspace of your dreams. We can also review your workspace and give recommendations, just ping us in the support chat. And of course, if you have any questions, feel free to contact us.
We want you to climb the steep learning curve as much as you do 🤝
Psst... Wanna try Fibery? 👀
Infinitely flexible product discovery & development platform.